Blog Hop

stamp review crew: painted poppies

Hello crafty friends! I’m so happy to be hopping with the super creative Stamp Review Crew Design Team! Today we are shining a spotlight on Painted Poppies. This beautiful set is in the current Stampin’ Up! mini catalog and is part of a beautiful suite of products, including coordinating dies and some gorgeous designer series paper.

For stamp sets that are part of a product suite like this, I try to create a project or two not using any of the coordinating products. It helps me find more versatility in the stamp set. That’s what I did for today’s projects.

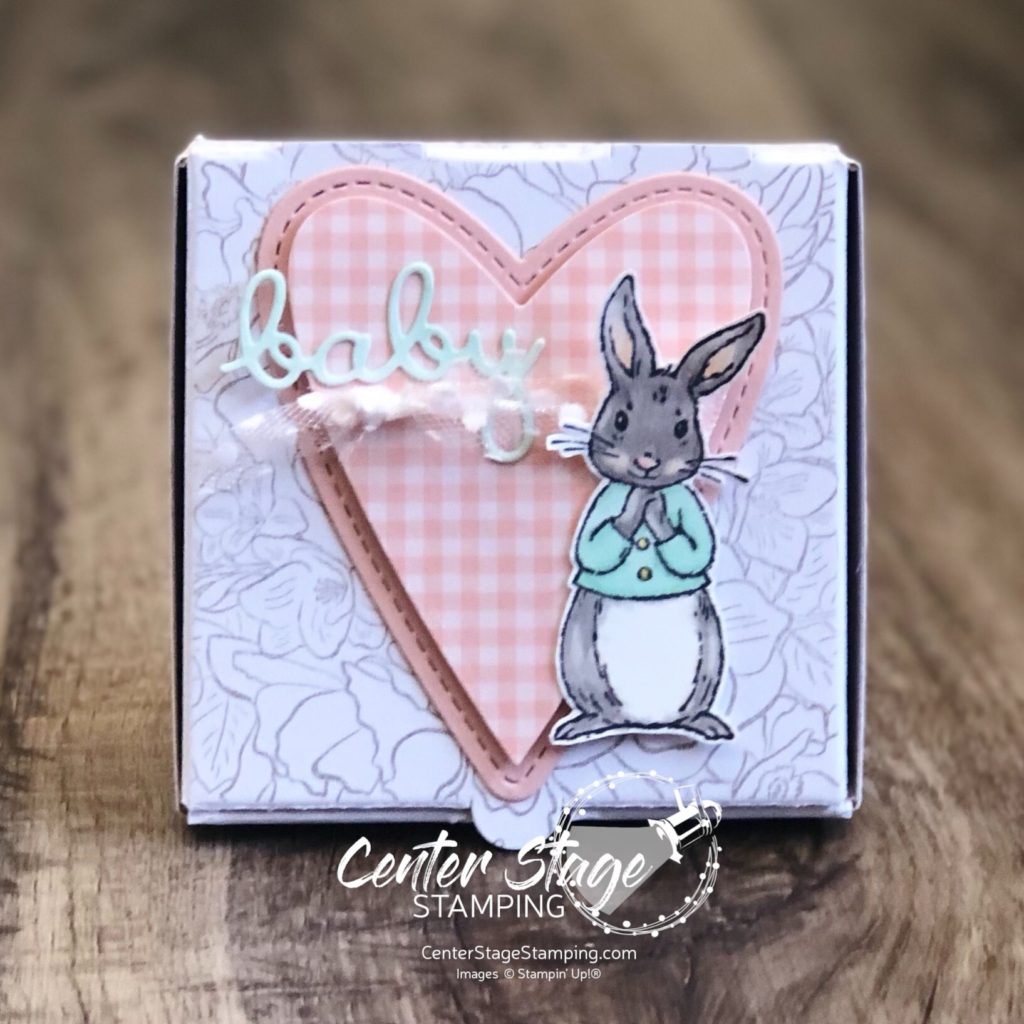
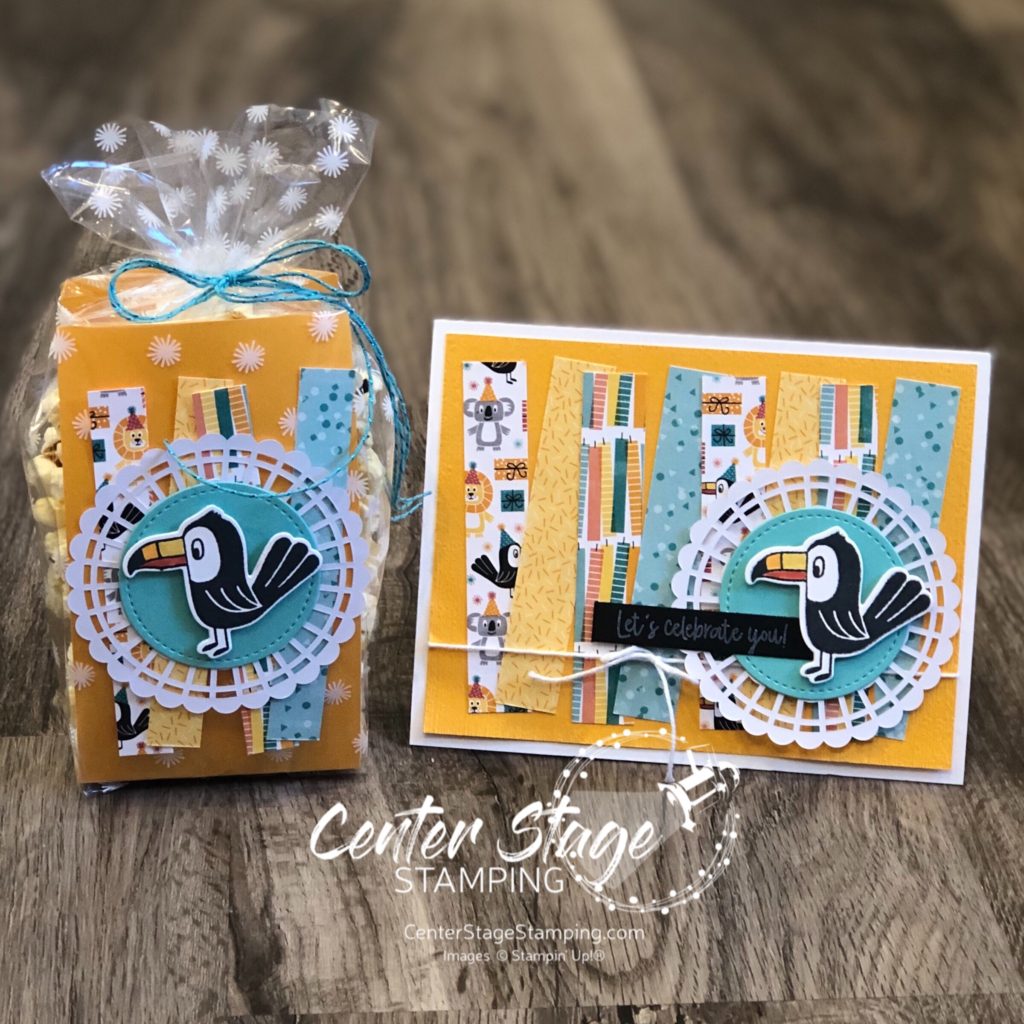
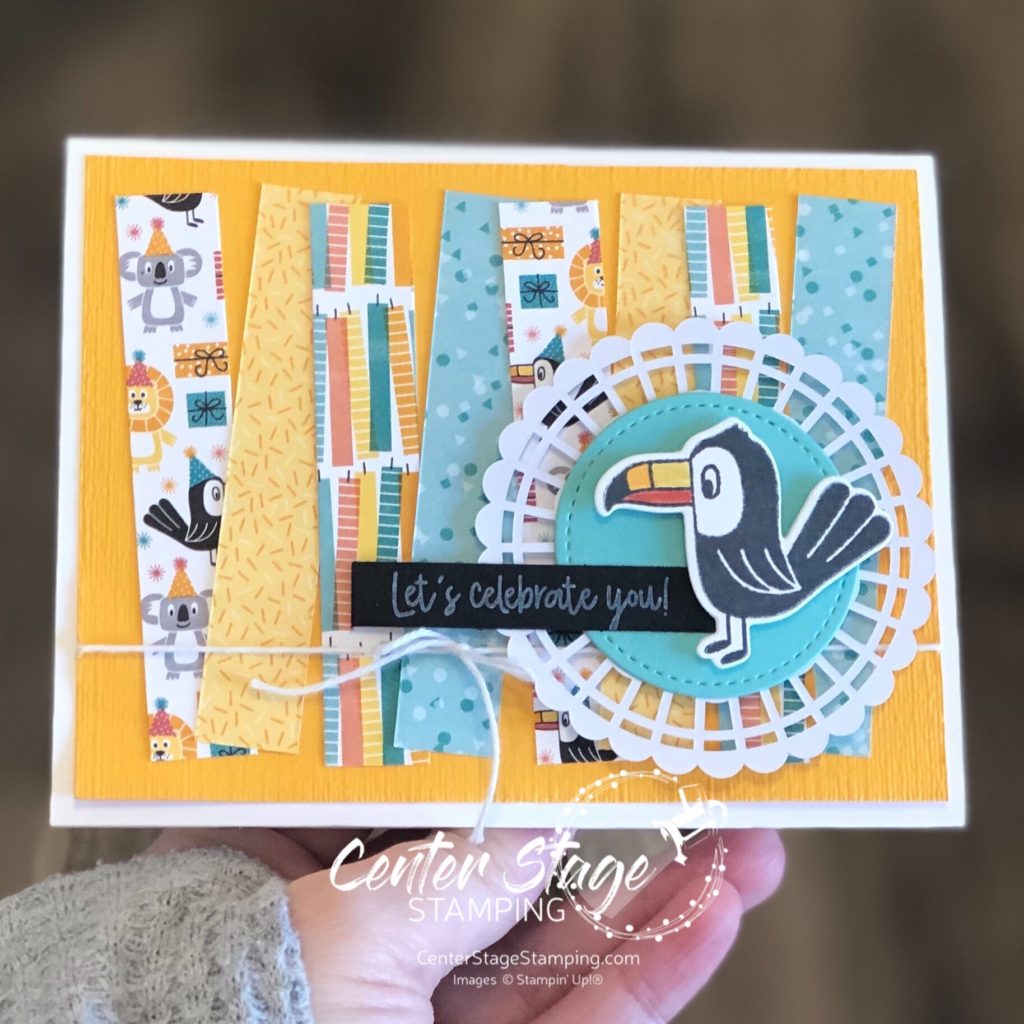
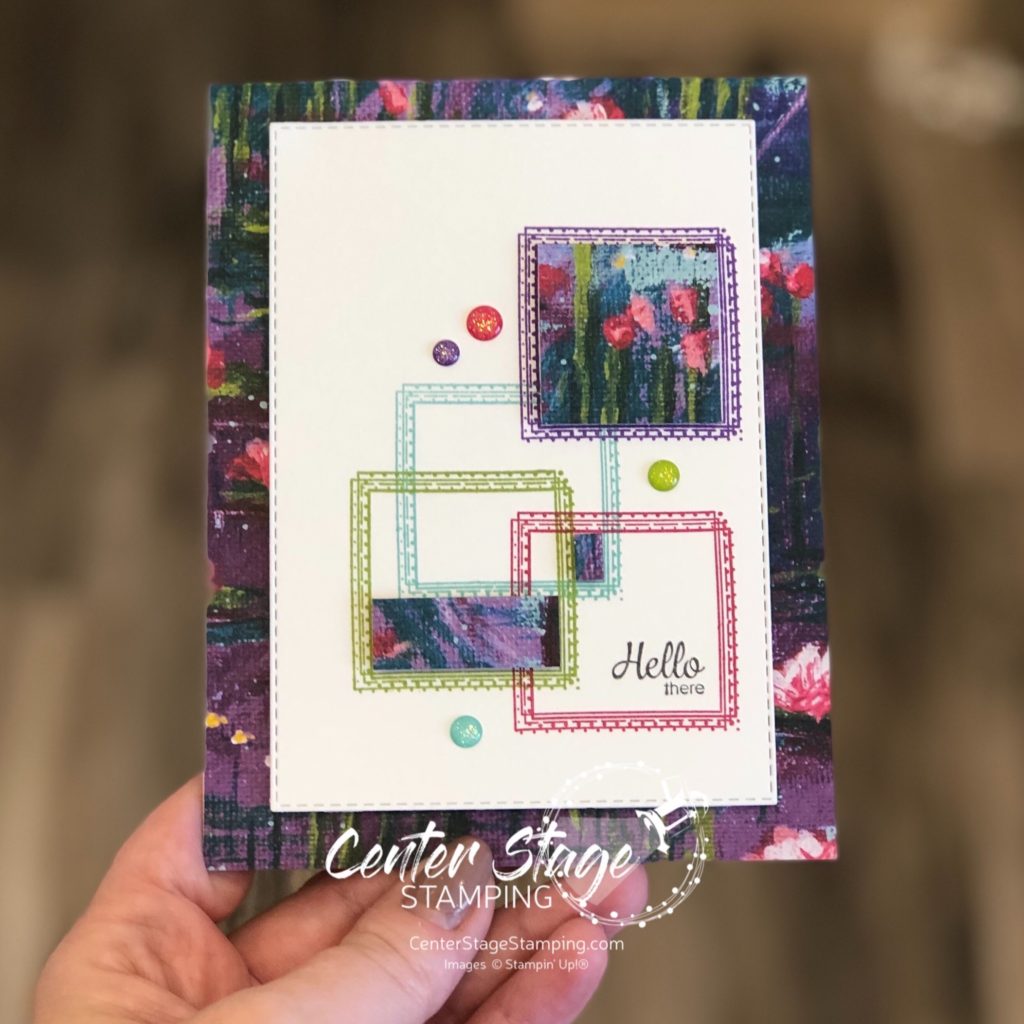
For this first card, I did a simple watercolor smooshing to create a background to stand out against images stamped in black.

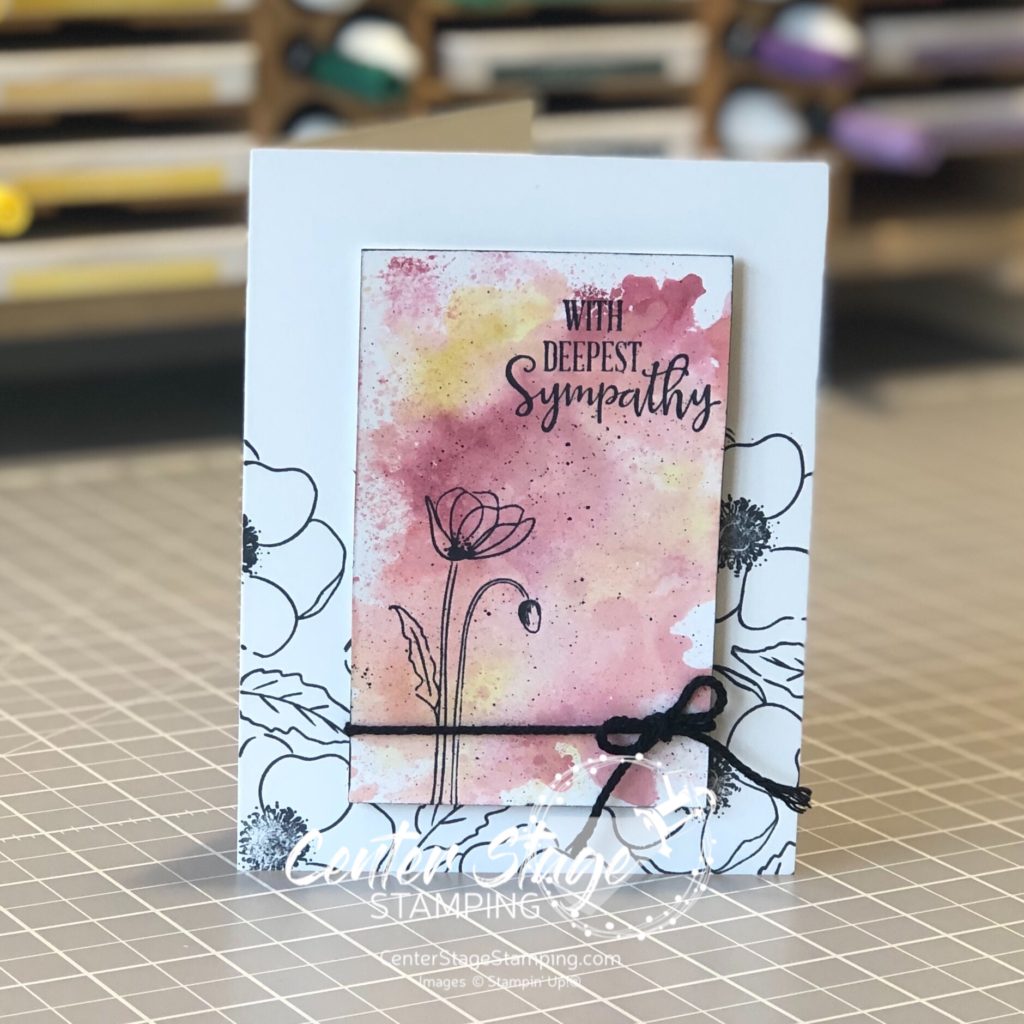
I used Cherry Cobbler, Terracotta Tile and Crushed Curry Stampin’ Write markers and scribbled them on my silicon mat. Next I spritzed the mat with water and laid my Whisper White (thick) panel on to pick up the color. This technique works better with watercolor paper, but I wanted a smooth surface. You do have to be careful not to over saturate the Whisper White card stock or it will pill. Let the panel completely dry before stamping the image in Memento Black ink.

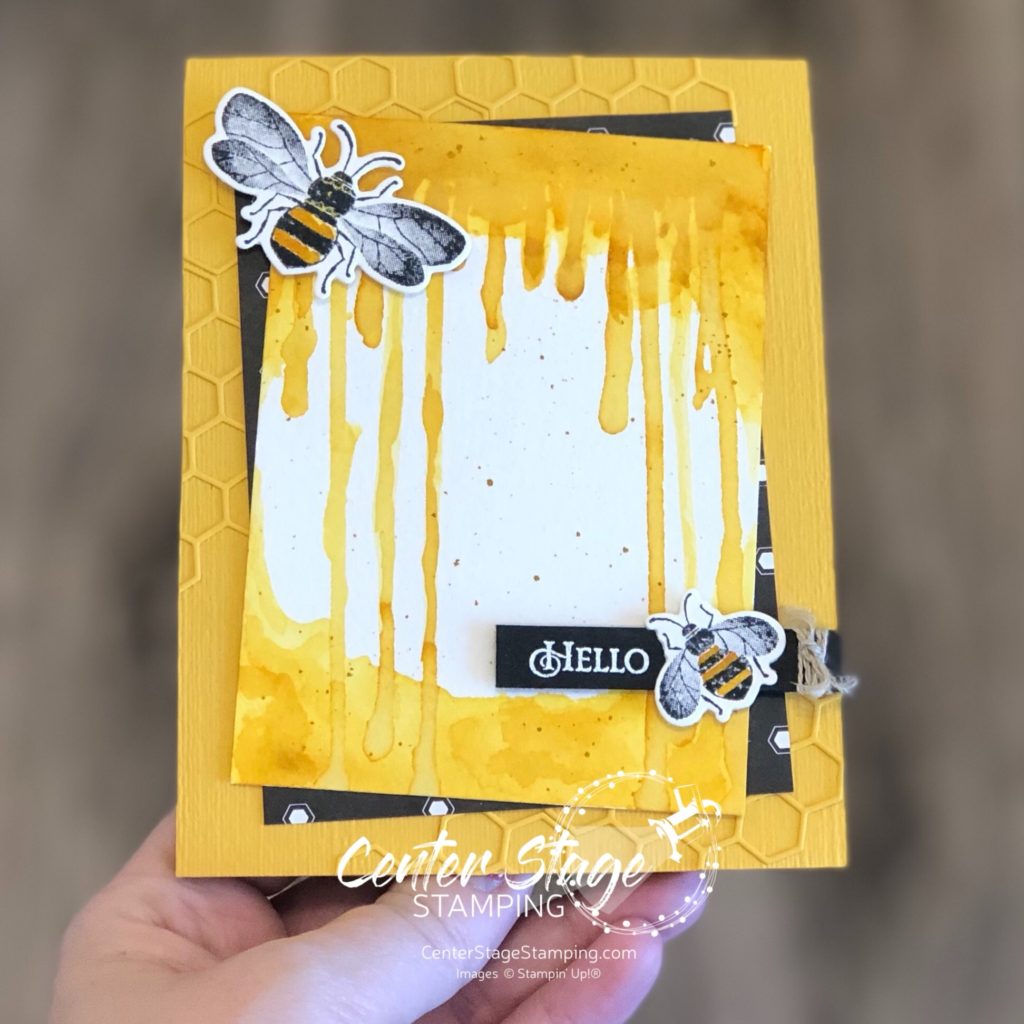
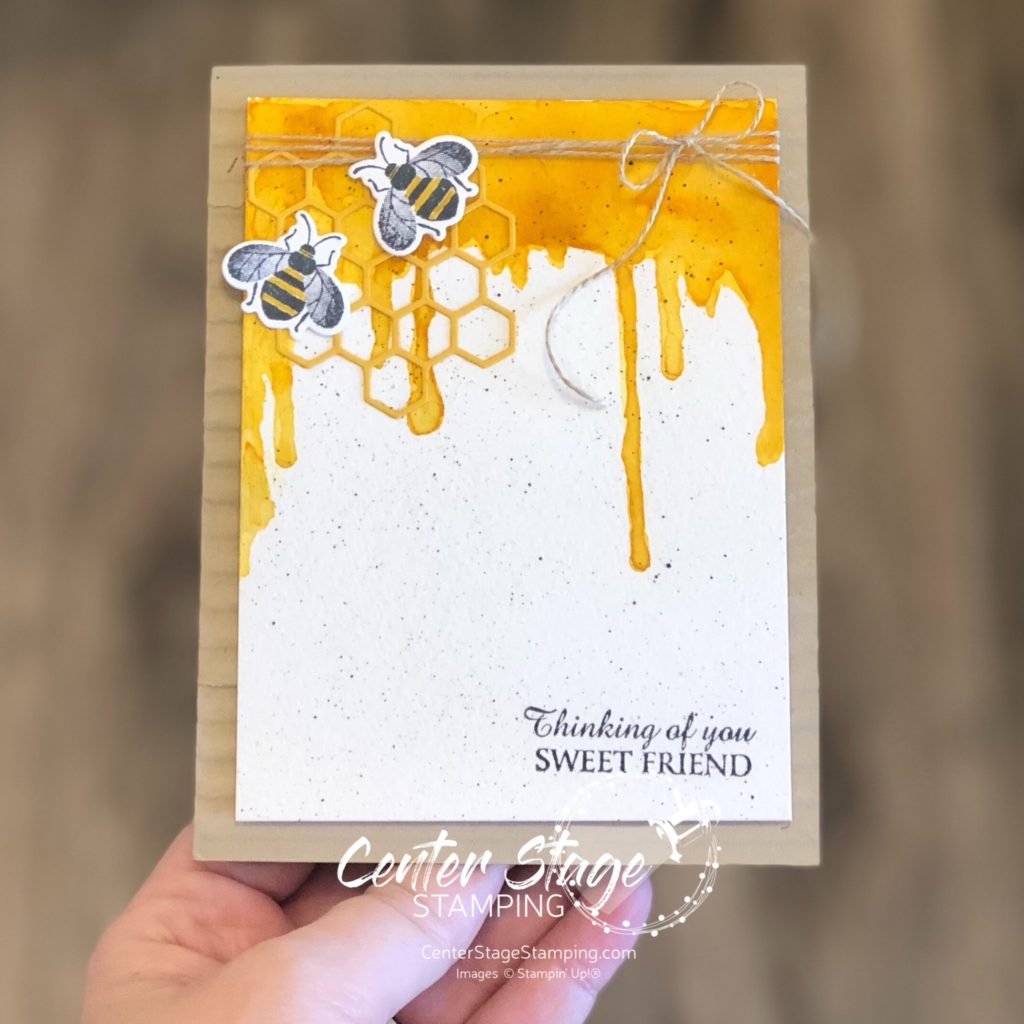
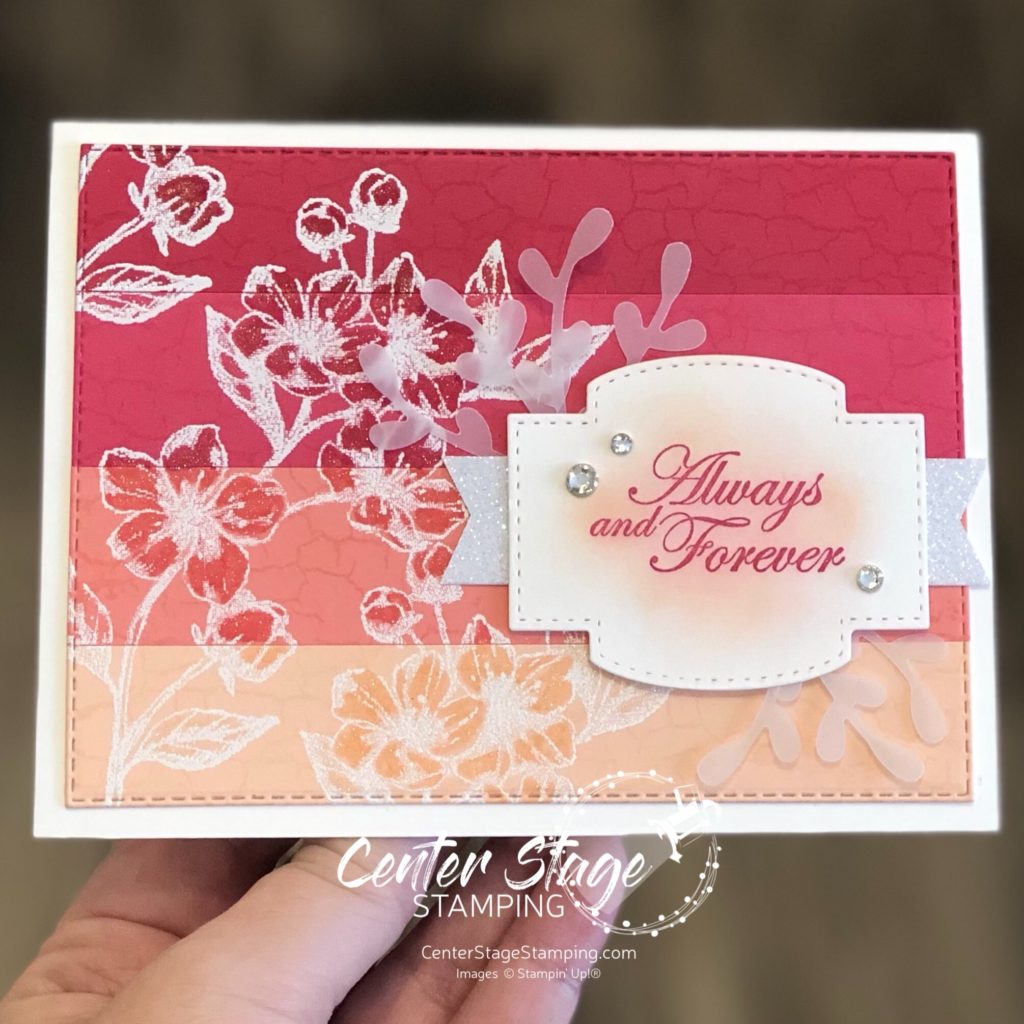
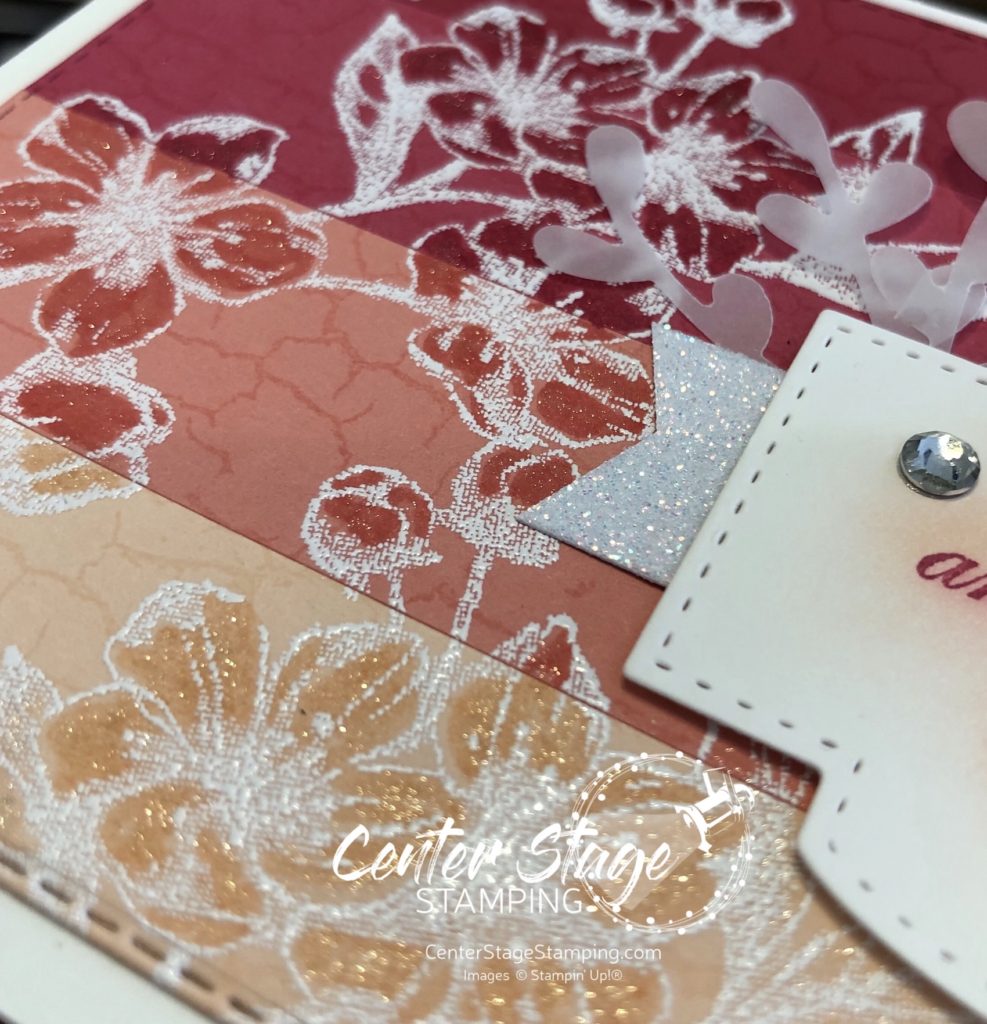
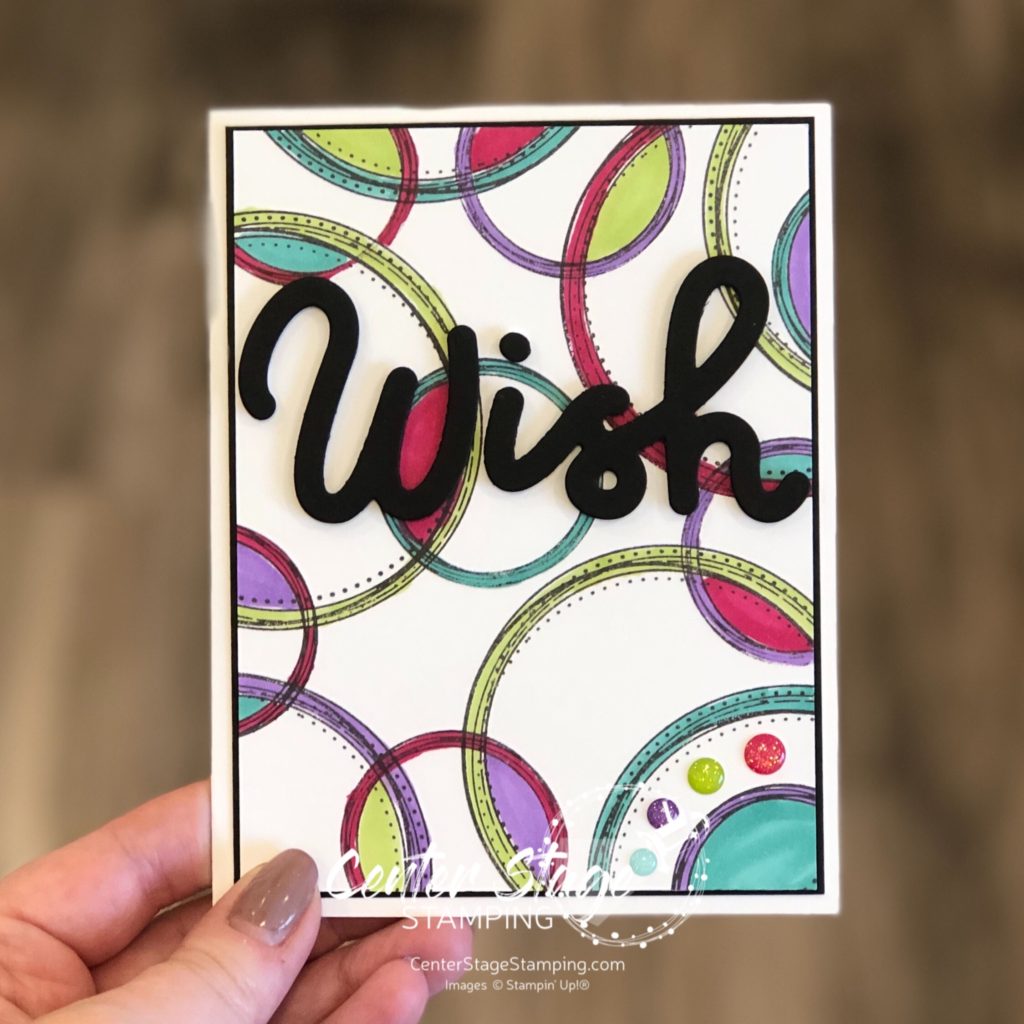
My second card uses a much bolder color scheme. I started by stamping the flower images in VersaMark ink and embossing them with white embossing powder on watercolor paper.

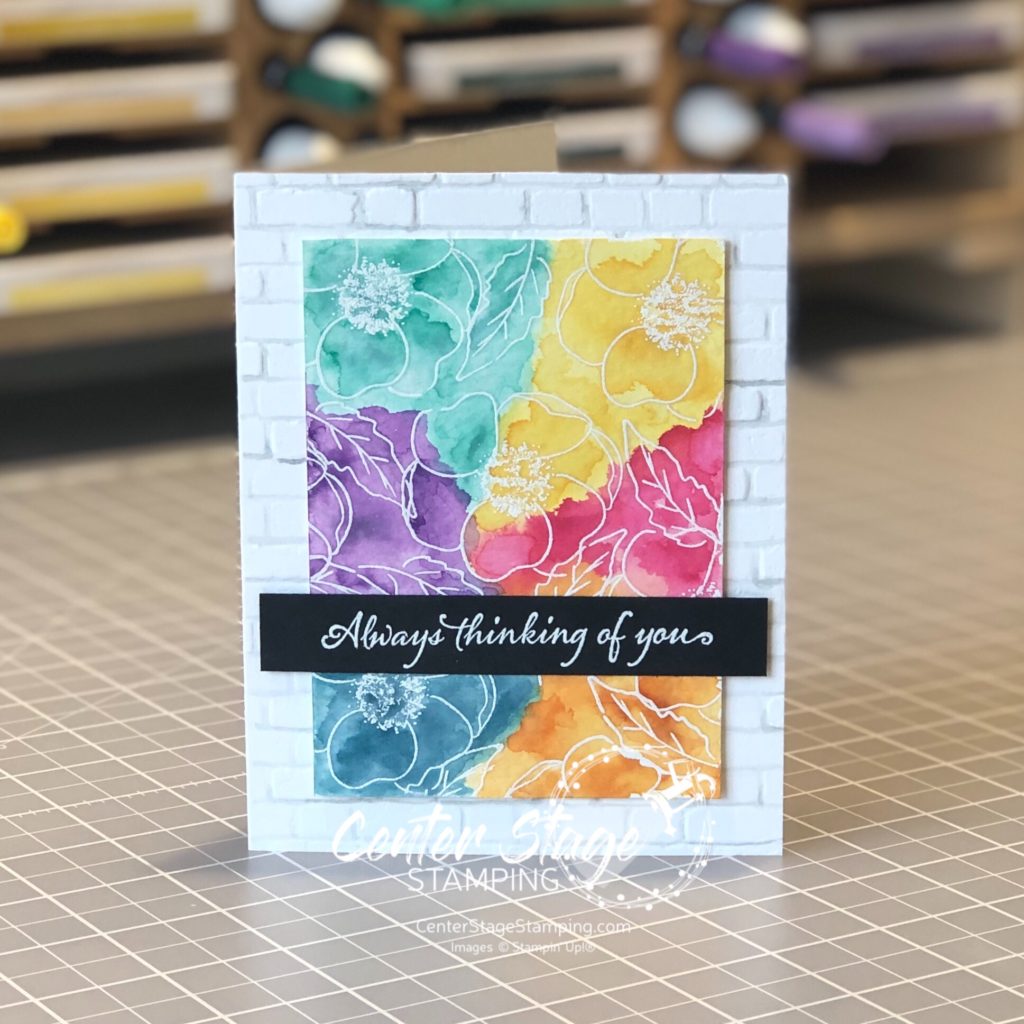
I did a watercolor wash across the panel, doing one color section at a time. Be sure to let dry between colors to control color bleeding. I used Daffodil Delight, Lovely Lipstick, Pumpkin Pie, Pretty Peacock, Gorgeous Grape, and Coastal Cabana. The card base was embossed with the Brick&Mortar 3D embossing folder. I painted the grout lines with a light wash of Smokey Slate to help create additional depth. The sentiment is from Very Versailles stamp set.

Thanks for stopping by! Be sure to check out the full blog hop for more inspirational projects featuring this beautiful stamp set! You can head on over to the talented Cindy by clicking on the NEXT button below or you can go back to the creative Nikki by clicking on the PREVIOUS button.

Thanks for stopping by! Join me again to shine a spotlight on creativity!

Share with your friends:

stamp review crew: bonanza buddies

Hello friends! The Stamp Review Crew is together again for another blog hop! I love hoping with these talented artists. It is so much fun to see how everyone works with a certain stamp set. Loads of inspiration! Today we shine a spotlight on the super fun Bonanza Buddies stamp set.

This set has some adorable critters in it and they are tons of fun to work with. But, for my card for today’s blog hop I decided to focus on other images in the set and use them in a different way. These shapes are meant to be gifts, balloons, and party hats. But, I think they also make a great geometric background.

Color scheme is Coastal Cabana, Bermuda Bay, Granny Apple Green, Grapefruit Grove, and Basic Black.

Look beyond the basic use of an image and let your creativity soar!

Now, go check out what the rest of the Crew has to inspire you. You can head over to Lou by clicking the NEXT button below or you can go back to Holly by clicking on the PREVIOUS button.

Thanks for stopping by! Join me again to shine a spotlight on creativity!

Share with your friends:

osat blog hop: chick ewe out

Hello friends! It is time for the monthly One Stamp At A Time Blog Hop. This month’s hop is an animal theme and the OSAT Design Team has some fun projects in store. Be sure to make your way through the complete blog hop roster. You don’t want to miss anything!

Last month I received the BEST Valentine gift ever. My first Grandchild was born!!! She has completely stolen my heart.

So naturally with baby on my mind, I create a couple of fun projects to welcome a sweet little girl.

I just adore this sweet little bunny from the Fable Friends stamp set. Reminds me so much of Peter Rabbit. Paired with the Beautiful Bouquet background stamp and some sweet Blushing Bride gingham DSP, you end up with a perfect gift pair.

I colored the little bunny with my Stampin’ Blends. I love the shading you can get. The Beautiful Bouquet is stamped with white ink on a Gray Granite card base. I sponged Pool Party ink on the oval with the sentiment to achieve a lighter shade of Pool Party. Isn’t he adorable peeking out from the heart opening?

I made a little gift box using one of the Mini Pizza Boxes. I stamped the Beautiful Bouquet in Gray Granite ink. I also used the heart cut out from the card. The “baby” is cut out of Whisper White card stock and sponged with Pool Party ink for a soft shade to match the oval on the card.

Thanks for stopping by. I am going back to staring at photos of my sweet little Granddaughter!

Be sure to check out what the rest of the Design Team has created! You can find a pop up full blog hop roster by clicking on the BLUE RECTANGLE below.

Thanks for stopping by. Join me again to shine a spotlight on creativity!

Share with your friends:

stamp review crew: honey bee

Hello friends! I am excited to be hopping once again with the Stamp Review Crew. If you are not familiar with The Stamp Review Crew, we are a group of international Stampin’ Up! Demonstrators who hop together on the first and third Monday of the month to bring you some great inspiration. Each blog hop features a different stamp set. You can find all of the blog hops archived on the Stamp Review Crew blog. Today we are shining a spotlight on the Honey Bee stamp set.

This stamp set is so much fun to work with. For my first card, I was inspired by one of my favorite Disney characters with a love for Hunny – Winnie the Pooh! I was thinking about the scene where he gets stuck in the honey tree and honey is dripping all around him.

I created a Crushed Curry watercolor wash to try to create a similar look.

I added a couple of bees, some Golden Honey DSP and some die cut honey comb for added texture.

My second project continues the dripping honey theme.

This time I added the panel to a card base embossed with the Corrugated 3D emboss folder.

I think that Silly Ol’ Bear would approve, don’t you? Time for you to continue your way to more creative inspiration through the blog hop. From here you can head over to Linda by clicking the NEXT button below or you can go back to Holly by clicking the PREVIOUS button

Thanks for stopping by! Join me again to shine a spotlight on creativity!

Share with your friends:

OSAT blog hop: sixteen candles

Welcome to another fantastic blog hop with the talented One Stamp At A Time Design Team! Our theme this month, “Sixteen Candles”, has us creating fun birthday projects. I can’t wait to see what everyone on the team came up with!

As for me, I had some fun playing with the Birthday Bonanza Suite. I love this suite as it works for kids of all ages: 1 to 101! Who wouldn’t love this card and treat bag duo!

This card layout came from the talented Mercedes Weber. I cased a swap card I got from her a couple of years ago. It is a great way to 1. show off multiple patterns in a DSP pack. 2. use up those paper scraps.

I adapted the layout for the treat bag.

The Mango Melody piece is inside the cello bag. The DSP strips, Doily and Toucan are on the outside. Lots of possibilities for this adorable little bag!

Be sure to check out the great Birthday creations from the rest of the OSAT design team. You can find the full blog roll call by clicking on the BLUE rectangle below. Be sure to make your way through the full blog hop. You don’t want to miss any of the amazing talent that awaits you.

Thanks for stopping by! Join me again to shine a spotlight on creativity!

Share with your friends:

stamp review crew: forever blossoms

Hello crafty friends and welcome to another Stamp Review Crew blog hop! Taking the stage today is the beautiful Forever Blossoms form the Mini Catalog. I believe the large sprig is a cherry blossom. (I’m guessing based on the fact that Cherry Blossoms is the coordinating die set.)

I started with a color scheme of various shades of pink. I used Petal Pink, Flirty Flamingo, Melon Mambo, and Lovely Lipstick. For the first card, I started with a water color wash for the back ground. I added a little Daffodil Delight and Calypso Coral for more color depth.

Once the water color was completely dry, I stamped the flower sprig in black ink and added some white accents with a white color pencil. Then I colored the petal with some Wink of Stella for a delicate shimmer. The card base is stamped with All Wired Up in Flirty Flamingo.

For the second card, I glued down strips of card stock for an ombre look. I heat embossed the flowers in white and colored them in with the same color Stampin’ Write markers to make them stand out. This panel was then stamped with the Crackle background using VersaMark ink for a subtle background. I added Wink of Stella to the flowers for sparkle and cut the panel with a stitched rectangle die. The sentiment is on one of the Stitched So Sweetly dies with a little glimmer paper for more sparkle. Finished off with some vellum sprigs and a few rhinestones.

I love the delicate sparkle on these cards. It’s really giving me some springtime vibes. Sigh. That’s a long way off. Let’s go see what the rest of the design team has in store for this beautiful set! You can head over to Ann by clicking on the NEXT button below or go back to Lauren by clicking the PREVIOUS button.

Thanks for stopping by! Join me again to shine a spotlight on creativity!

Share with your friends:

stamp review crew: broadway birthday

Hello, my crafty friends! It is time for another exciting Stamp Review Crew Blog Hop! In the spotlight today: Broadway Birthday. I must say, I was particularly drawn to this set when it was first released. Hmmmm, I wonder why?

I have two projects to share today. I used the same color scheme for both: Terracotta Tile, Mango Melody, Daffodil Delight, Basic Black, Whisper White.

I am really pleased with how these turned out. I love how the color pops against the black and white. Let’s take a closer look.

The sentiment is embossed in white on Basic Black card stock. I colored the word “never” with Dark Mango Melody Stampin’ Blends. I created an ombre look by stamping “WISH” once, then stamping again in each color without re-inking the stamp. For the top Daffodil Delight I stamped a third time without re-inking. It is faint and didn’t show up in the photo, but it is there.

For my second card, I started with the awesome black and white striped pattern from the Golden Honey Specialty DSP. I LOVE black and white stripes.

The Mango Melody Starburst circle is embossed with the Subtle 3D embossing folder for some added texture.

Are you ready for some more Broadway Birthday inspiration? Head on over to the incredibly talented Charlet by clicking on the NEXT button below, or you can go back to the amazingly creative Linda by clicking on the PREVIOUS button.

Thanks for stopping by! Join me again to shine a spotlight on creativity!

Share with your friends:

OSAT Blog Hop: purses, poppies and Paris

Welcome to the first One Stamp At A Time design team blog hop of 2020! For this blog hop we are featuring products int he new Stampin’ Up! Mini Catalog. I am putting the Tropical Oasis Suite center stage today. I created a fun tropical card and an adorable little 3D pineapple!

The card uses the beautiful Tropical Oasis designer series paper, Timeless Tropical stamp set and In the Tropics dies. I also used the fun circle stamp from the Swirly Frames set.

For the adorable 3D pineapple, I followed a pattern from Martha Inchley. you can find her pattern and a video tutorial HERE. I followed her pattern, but used the pineapple top from the In the Tropics dies. I cut three of them, folded them in half and glued them together. It didn’t matter that they didn’t match up exactly, it added to the rough look a pineapple has.

I added some linen thread through the leaves so it could be hung if you wanted.

Thanks for stopping by. Be sure to check out the rest OSAT blog hop. Head on over to Charlet to see her fun projects by clicking on the NEXT button.

You can find a pop up list of participating design team by clicking on the BLUE rectangle below.

Thanks for stopping by! Join me again to shine a spotlight on creativity!

Share with your friends:

stamp review crew: swirly frames

Hello crafty friends! We are going to send out 2019 with one last Stamp Review Crew blog hop for the year! What a year of inspiration it has been. Join the SRC design team as we shine a spotlight on Swirly Frames.

Swirly Frames is generally a set to use as a back ground or subtle detail. It was a fun challenge to take a set that is usually in a supporting role and put it center stage. For my first card, I drew inspiration from the upcoming Stampin’ Up! Sale-a-bration catalog and the stunning Lily Impressions Designer Series Paper. This paper looks like it came from an art gallery. So I thought why not make a card simulating an art display.

I overlapped some squares and added bits of the dsp to look like they were framed. A few Glitter Enamel Dots add some fun detail. Colors used are Gorgeous Grape, Lovely Lipstick, Granny Apple Green, and Coastal Cabana.

My next card was inspired by art projects we did in elementary school. we would draw a bunch of random shapes and color in sections that overlapped. I decided to do the same with the two circle stamps in the Swirly Frames set.

I colored the circles with Stampin’ Blends: dark highland Heather, Light Bermuda Bay, dark Lovely Lipstick, dark Granny Apple Green. The WISH is from the Broadway Lights die set.

I think Swirly Frames is great in a leading role, don’t you?

Now it is time for you to continue on with the SRC blog hop. Head on over to Cindy and her fantastic creations by clicking on the NEXT button below. Or you can go back to Holly and her inspiring projects by clicking on the PREVIOUS button.

Thanks for stopping by! Join me again to shine a spotlight on creativity!

Share with your friends:

stamp review crew: happy tails

Welcome back for another Stamp Review Crew blog hop! Today’s feature is actually two different sets: Happy Tails and Nine Lives. The SRC design team has some great inspiration for both dog and cat lovers.

I am definitely a dog lover, so my creations use the Happy Tails set. I also added the coordinating Dog Builder punch. I love this pups silhouette. It gave some of the smaller images in the stamp set a chance to shine.

I stamped the tiny bone in Crumb Cake, some images second generation, and Whisper White. I added some sponging around the edges and some white ink spatters. I punched out the dog, cut out the negative image with a stitched circle die and mounted some Calypso Coral gingham dsp behind.

I had to make a fun little treat for the four legged family members as well.

I filled a little cello bag with mini dog treats, tied it shut with some linen thread and polka dot ribbon. The tag is a stitched circle die cut of Calypso Coral gingham dsp.

Our whole family is a bit dog crazy. My husband and I have two dogs: a 15 year old Shih Tzu named Pippin and a 3 year old Yorkie named Elphie. Our daughter and son-in-law have three dogs: Ruffy, Belle, and Mose. And our son has a beagle mix named Jemma. Our middle daughter has to be different. She has a bunny named Winnie. Animals outnumbered people for last year’s Christmas photo!

Now, continue on the SRC blog hop for more inspiration featuring our four legged friends! From here you can go on to the talented Chalet by clicking on the NEXT button below. Or you can go back to the creative Heidi by clicking the PREVIOUS button. Either way, be sure to travel through the entire blog roll. You don’t want to miss anything!

Thanks for stopping by! Join me again to shine a light on creativity!

Share with your friends: