Annual Catalog

thank you elephant

Just a quick post today to share this adorable guy!

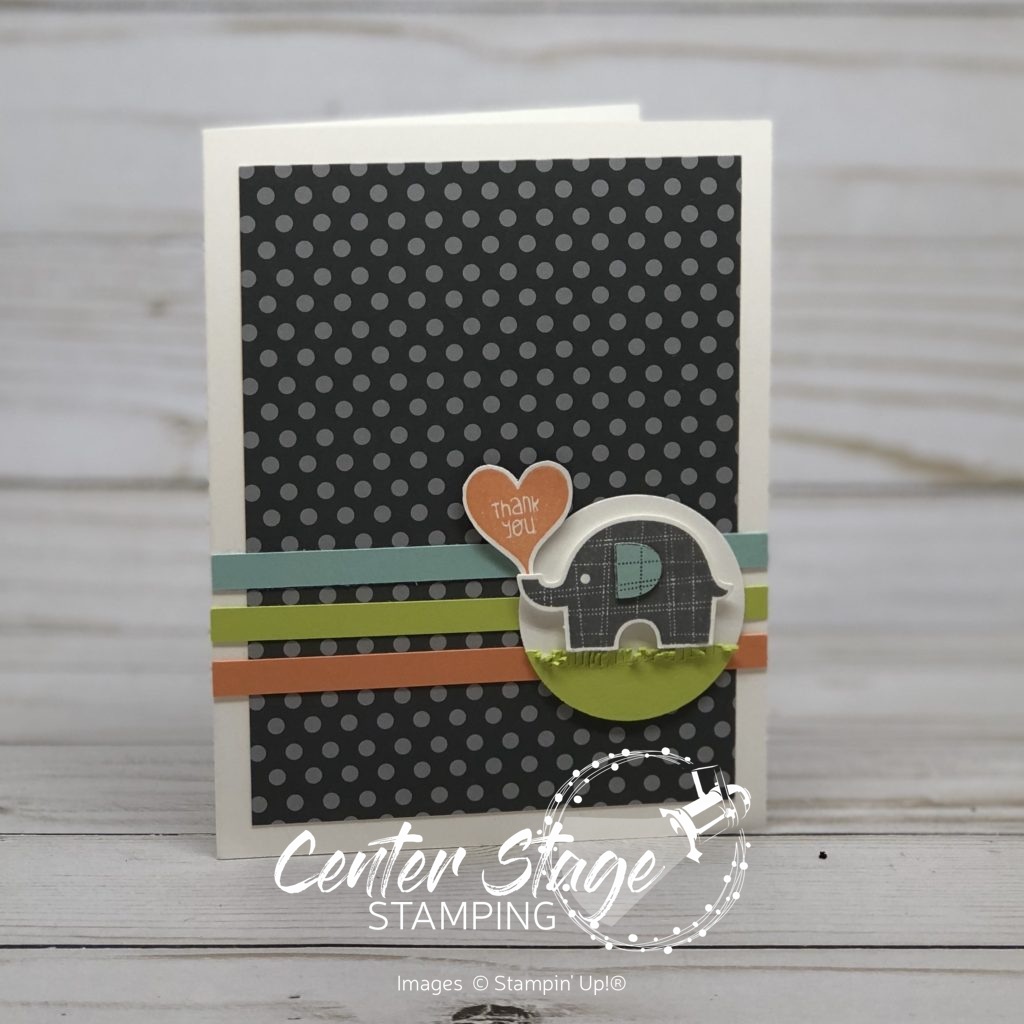
Little elephant: thank you - Center Stage Stamping

With Basic Gray as a backdrop and pops of pool Party, Lemon Lime Twist and Grapefruit grove, this cute little elephant steals the show.  I decided to keep the card pretty simple with a few fun details to spotlight my little pachyderm friend. I punched out a Whisper White 1-3/4″ circle and a Lemon Lime Twist 1-3/4″ circle, then trimmed down the Lemon Lime Twist one and fringed the top edge for the grass. The little Basic Gray elephant is punched out with the coordinating Elephant Builder punch and made it a breeze to give him a Pool Party ear.  I fussy cut the Grapefruit grove heart sentiment.  This little guy is definitely deserves to be center stage!

That’s a wrap for today.  Join me again to put a spotlight on creativity!

Share with your friends:

inky friends: dc 10

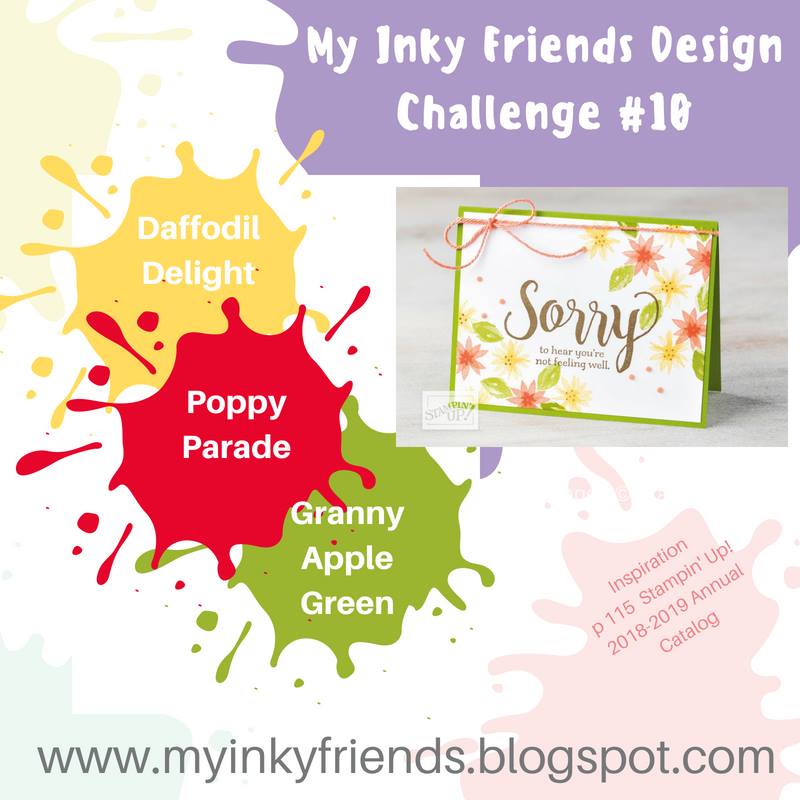
My Inly Friends are back with their 10th design challenge!  This is a color challenge based on a sample on page 115 of the Stampin’ Up! 2018-19 Annual catalog.  A very bright combination of colors! You can head over to the My Inky Friends page to see what all of the Design Team created with this color inspiration.  Here is my creation:

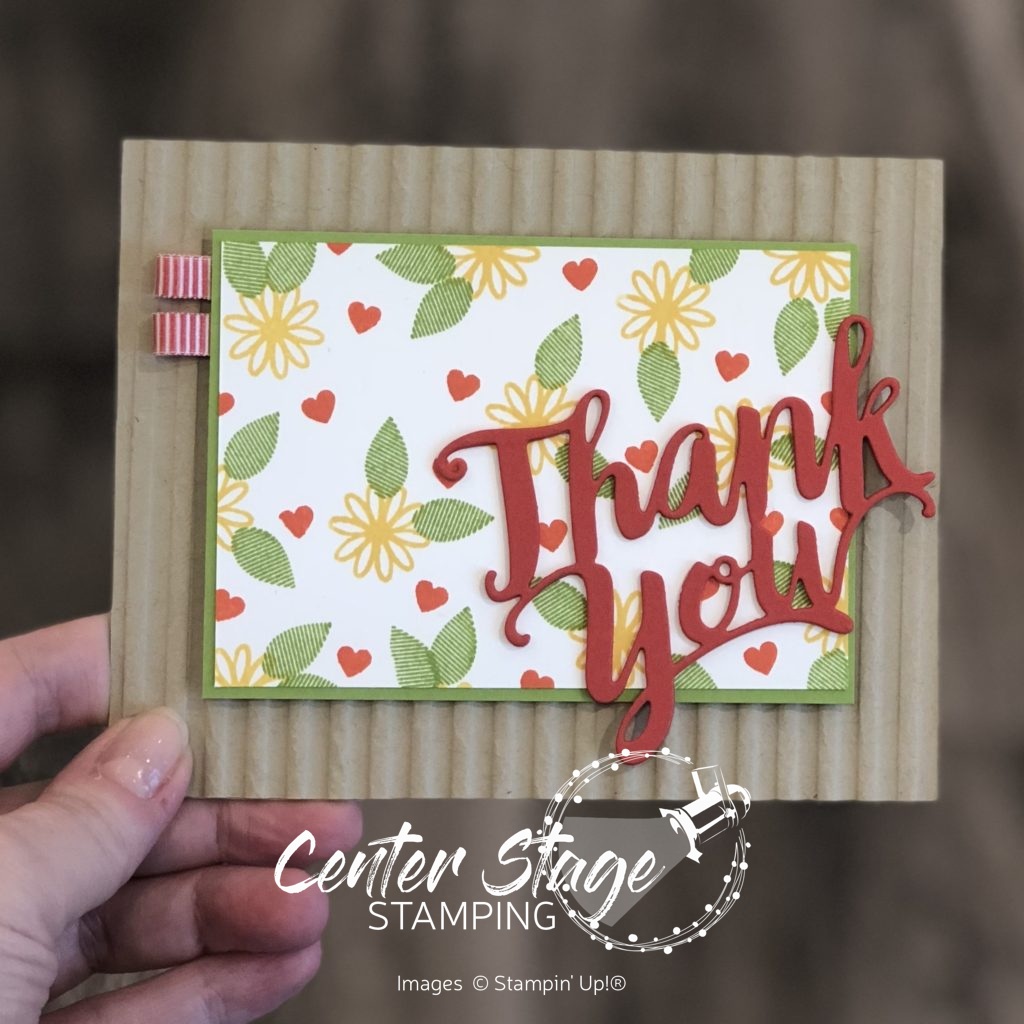
Inky Friends DC 10: Thank You - Center Stage Stamping

I used the A Big Thank You stamp set and coordinating Thank You Thinlit.  The small images work great to create your own background paper. The Crumb Cake card base is embossed with the Corrugated Dynamic Textured Impressions Embossing Folder.  I just love the texture and dimension it gives.  I added two little ribbon loops on the top left corner of the image panel to finish it off.  I let the die cut thank you hang off the image panel a bit to pull it into the card base some.  I think it helps it stand out more.

Head over to the My Inky Friends page and check out the other design team creations, then have a go at this color combo yourself!  Be sure to upload your creation to the My Inky Friends page so we can share in your creativity!

That’s a wrap for today.  Join me again to put a spotlight on creativity!

Share with your friends:

tropical chic

Only in Minnesota:  Two weeks ago, it was in the 80’s – 90’s, last week was mostly rainy, and this week we are in the 50’s. I am so not ready for the winter gloom to set in.  I am desperately trying to hang on to summer.  Give me warmth and sunshine!  I decide to play around with the Tropical Chic stamp set to help keep that summertime feelin’ going.

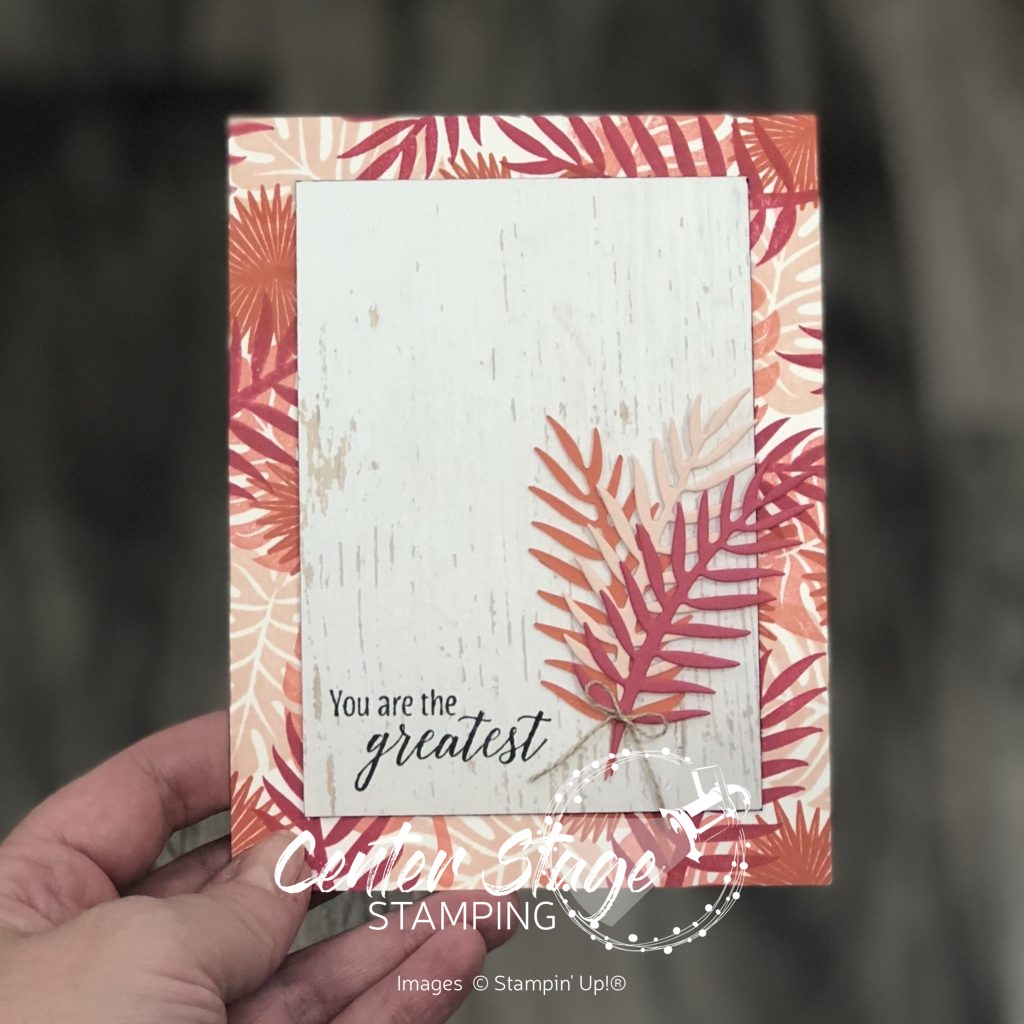
Tropical Chic: you're the greatest - Center Stage Stamping

I started by stamping the various leaves all over a Whisper White card base.  I used Petal Pink, Flirty Flamingo, Melon Mambo and Calypso Coral inks.  Next I added a panel of the Wood Textures designer series paper (have I mentioned it is my FAVE!!) with the sentiment stamped in Black Memento Ink. I cut the leaves from the coordinating Tropical Thinlits in Petal Pink, Melon Mambo and Calypso Coral card stock and added a Linen Thread bow.  A quick and simple card, but it really pops.  Think I have to try this in some other color combinations…endless possibilities!

That’s a wrap for today!  Join me again to put a spotlight on creativity!

Share with your friends:

stamp review crew: waterfront

Welcome back to another Stamp Review Crew blog hop!  I’m so glad you have joined us as we put the Waterfront stamp set in the spotlight.  This set is a lot of fun to play with and creates wonderful watercolor style landscapes and more when you let your creativity cut loose.  I have to admit, I have had the set for several months, but this is the first time I have created anything with it.  I assure you, it won’t be the last!
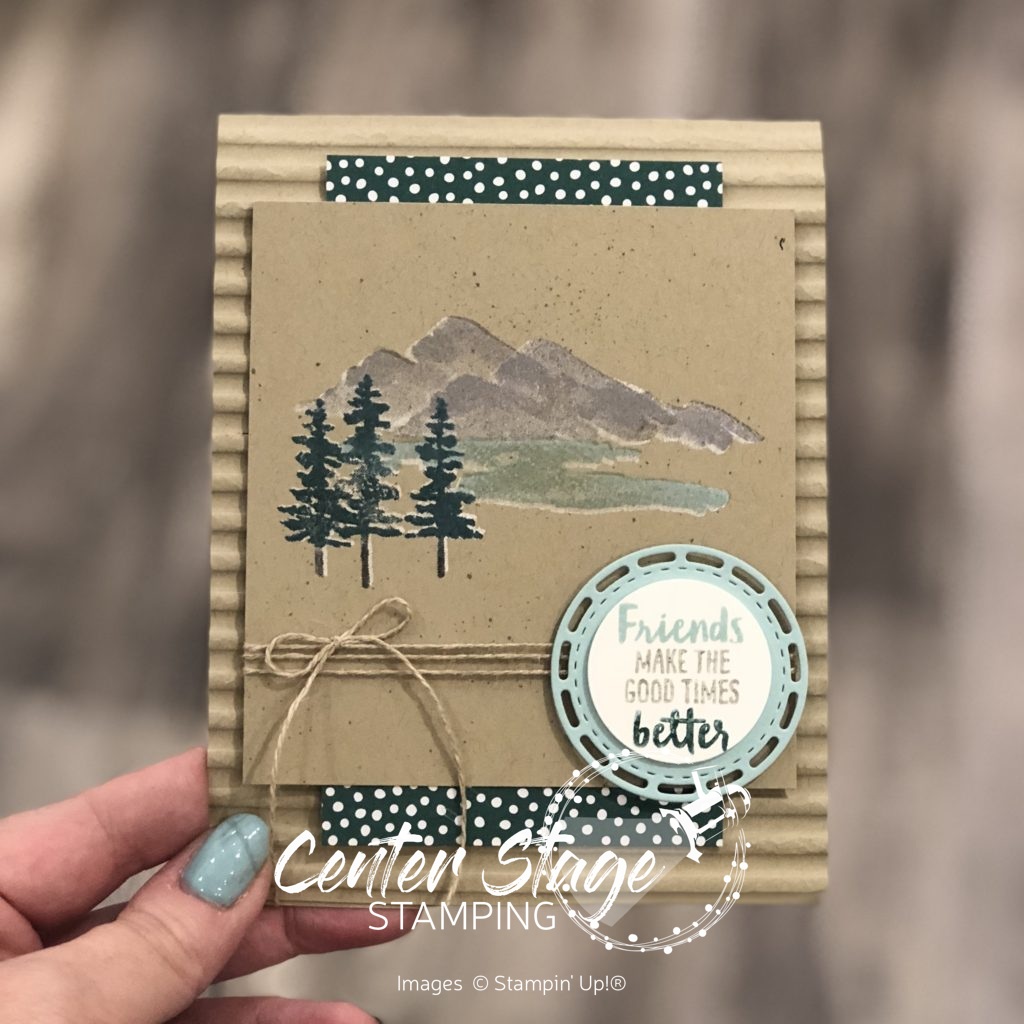
Waterfront: Friends make the good times better - Center Stage Stamping

For this card, I stamped the mountains, lake and trees first in Whisper White craft ink on Crumb Cake card stock and let it completely dry.  Once dry, I stamped over the images with the colors Gray Granite, Pool Party and Tranquil Tide (with a little Early Espresso for the tree trunks).  Since the stamps are photopolymer, it made lining up the images a breeze.  I didn’t try to line them up perfectly.  The bits of white peeking out give some nice highlights. I layered the image panel on a piece of Tranquil Tide dots from the ’17-’19 In Colors Designer Series Paper stack.  The front of the card base was run through the NEW Corrugated Dynamic Textured Impressions Embossing Folder.  Isn’t it just AMAZING!  I can tell it will be used A LOT!

I used Stampin’ Write markers to ink the sentiment stamp and layered it on a Pool Party circle cut from the Stitched Labels Framelits.  Then adhered it over a bit of Linen Thread wrapped around the image panel.

I had been watching an episode of Murder She Wrote when I came up with the idea for this next card.  I hand an image in my mind of a quaint painting hanging on a weathered cottage wall,  Here’s what I came up with:
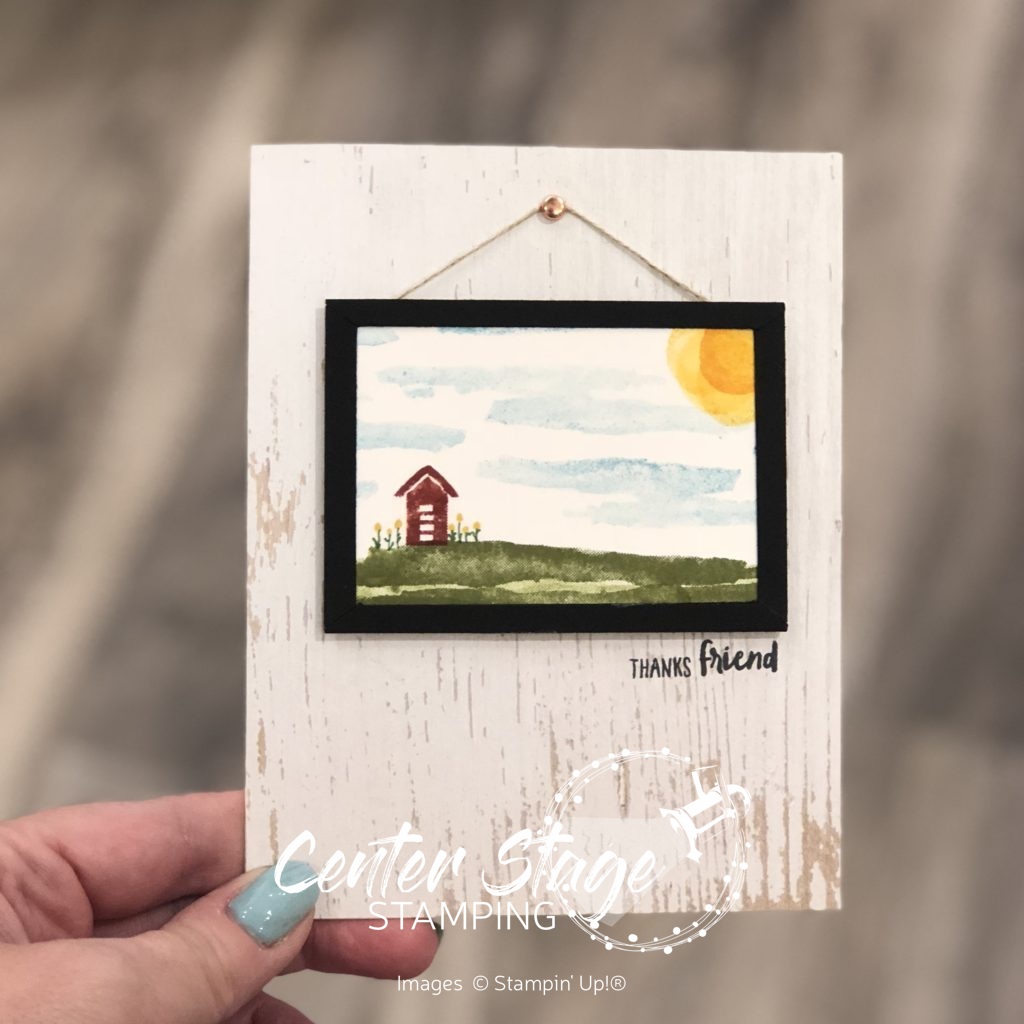
Waterfront: thanks friend - Center Stage Stamping

I covered the card base with a piece of the Wood Textures designer series paper – seriously, my FAVE!  I stamped the scene on a piece of thick Whisper White card stock.  I hand drew the flowers with Stampin’ Write markers.  Then I framed the painting.  First I cut a pice of Basic Black card stock the same dimension as my “painting”.  Next, I cut diagonally corner to corner both directions.  Finally, I trimmed about 1/4″ off the outer most edge of each triangle.  Here is a picture to help you see what I did.
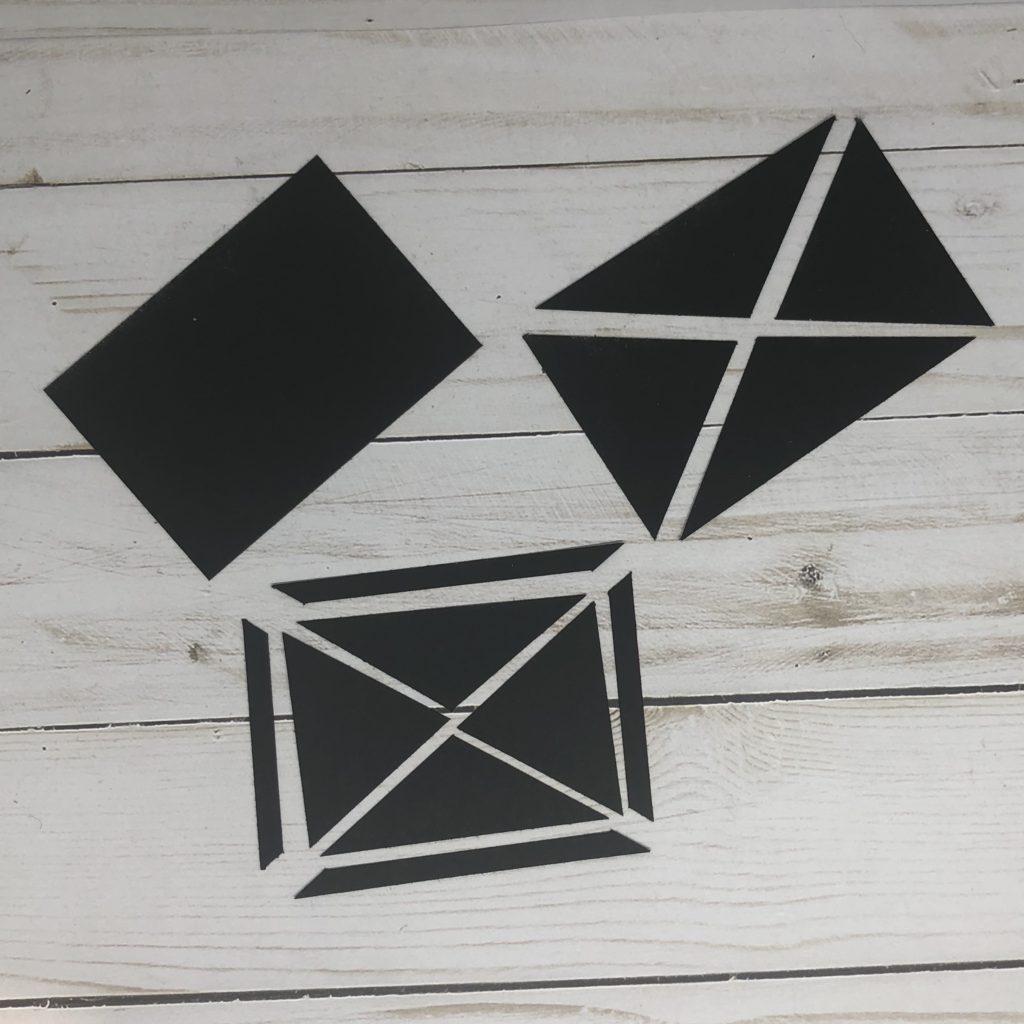
I could have just mounted the “painting” on a piece of Basic Black and called it good.  But this way, I get the mitered corners like a real frame.
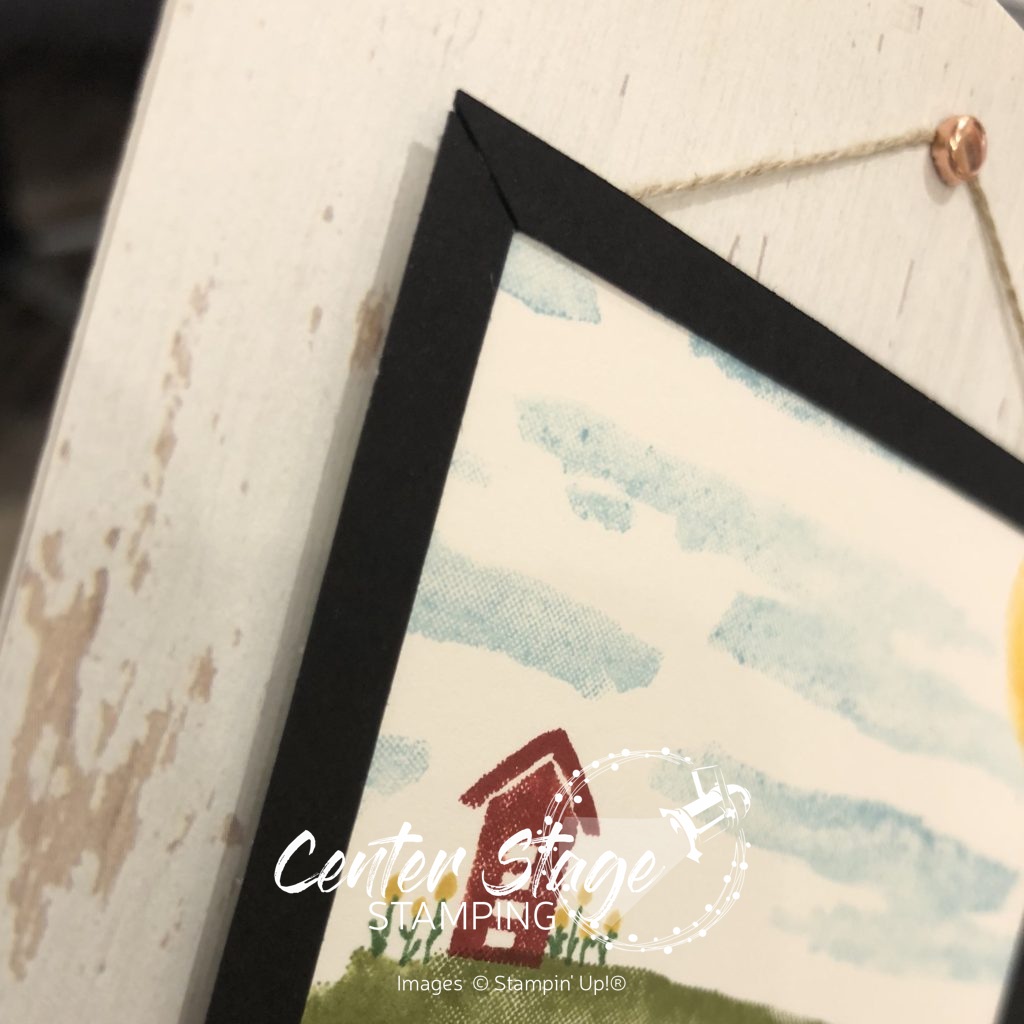
Waterfront: thanks friend close up - Center Stage Stamping

It’s a really small detail and most probably won’t notice it, but I thought it was neat.

If you started this blog hop from the beginning, I am the final stop.  If you picked it up somewhere in the middle, make sure you go around and check out all the great inspiration with the Waterfront stamp set!  From here you can go back to Heidi or on to Debra

*The Stamp Review Crew is a group of International Stampin’ Up! demonstrators who want to show you how much you can do with ONE stamp set. Each edition the SR Crew will showcase a new featured stamp set. Each stop along the hop will show you a different idea, or ideas using that set!**


That’s a wrap for now.  I hope you will come back and join me in putting a spotlight on creativity!


Share with your friends:

stamp review crew: varied vases

The Stamp Review Crew is hopping again and this time we are putting Varied Vases in the spotlight!  This is such a fantastic set.  I love the little vases and flowers.  The coordinating Vases Builder punch makes it even better.  I had played with set quite a bit when it first came out.  Check out this post or this one for even more Varied Vases inspiration.  This time, I wanted to try a different approach with this set.

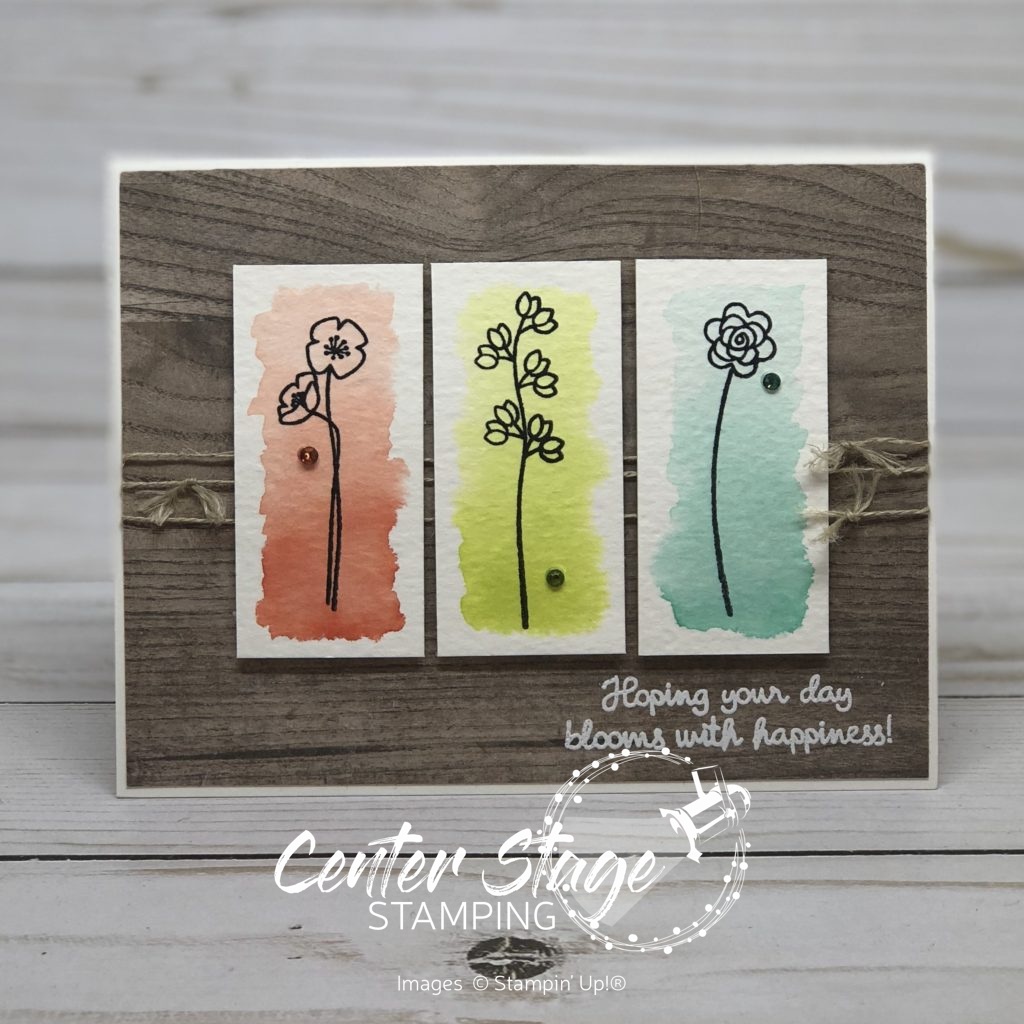
Hoping your day blooms with happiness - Center Stage Stamping

For my first card, I chose to let the sweet flowers take center stage.  I started with a gradient watercolor wash on three small panels of watercolor paper.  i used Calypso Coral, Lemon Lime Twist and Coastal Cabana.  Once completely dry, I stamped the flowers on each panel with Memento Black ink. I adhered a panel of Wood Textures DSP on a Whisper White card base which I had wrapped three rows of Linen Thread. The sentiment is stamped and embossed in white on the bottom of the Wood Textures DSP.  I adhered the three flower panels with dimensionals for some added depth.  I finished off with a little rhinestone one each panel.  I colored these with Stampin’ Blends markers – Calypso Coral, Granny Apple Green, Bermuda Bay.

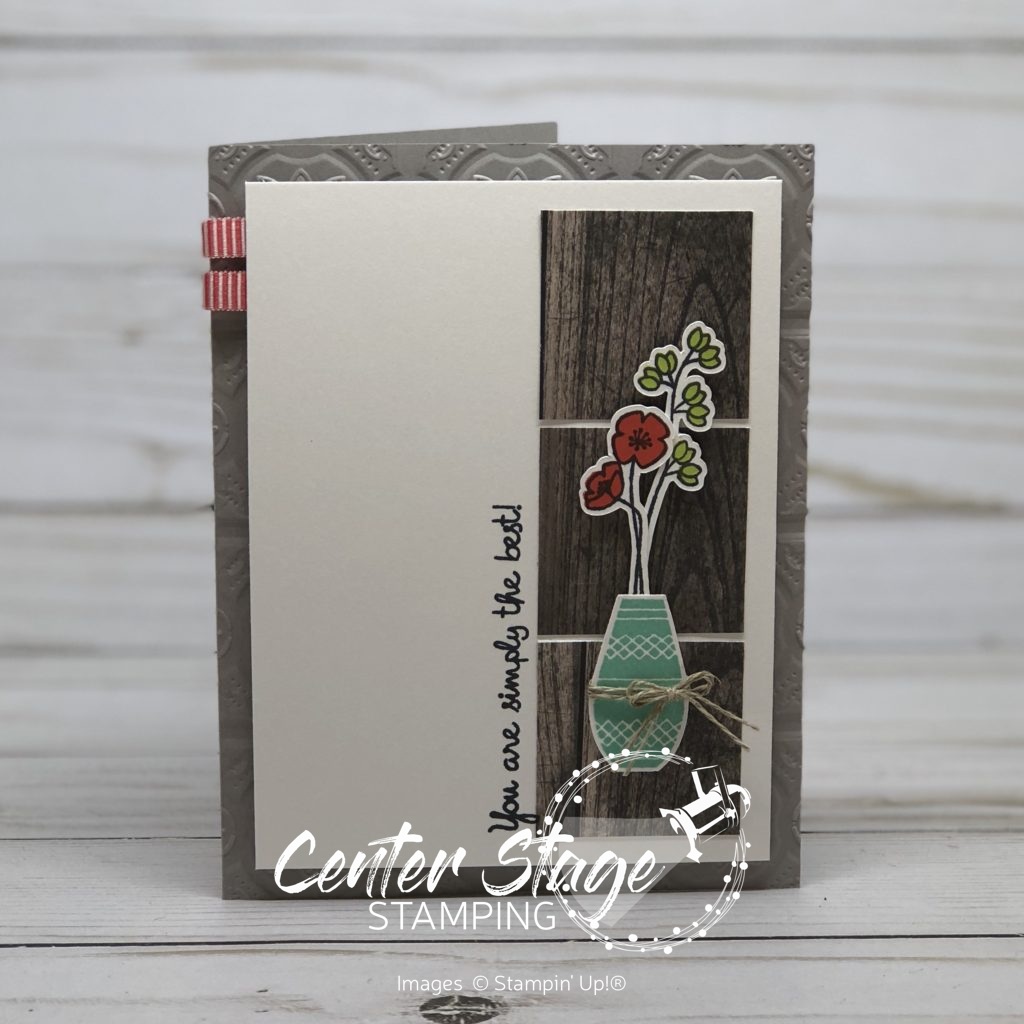
You are simply the best - Center Stage Stamping

My next card brings back the Wood Textures DSP.  I think it is a great pairing with Varied Vases.  I stamped the Vase in Coastal Cabana, punched it out with the Vase Builder punch and wrapped a bit of Linen Thread around it.  I stamped the flowers in Memento Black, Poppy Parade and Lemon Lime twist and cut them out.  (Full disclosure, I cut them out with my Scan-n-Cut.) I layered all of this on a Whisper White panel and stamped the sentiment along the edge of the Wood Texture DSP squares.  I added two little Poppy Parade Ribbon loops before gluing the Whisper White layer to the Gray Granite card base.  Notice the texture on the card base?  I ran it through the NEW Tin Tile Dynamic Textured Impressions Embossing Folder.  This folder is in the Stampin’ Up! 2018 Holiday catalog!  It is really awesome!

That’s a wrap for me.  I am the final stop on the blog hop, so if you started at the beginning, you have seen all of the amazing Varied Vases projects.   You can go forward to Charlet, the first stop of the blog hop. Or you can go back to Mickey and work your way back around.  If you started the hop somewhere in the middle make sure you continue on so you don’t miss any of the fantastic inspiration!  And as always, you can find the blog hop archives over on the Stamp Review Crew blog.

**The Stamp Review Crew is a group of International Stampin’ Up! demonstrators who want to show you how much you can do with ONE stamp set. Each edition the SR Crew will showcase a new featured stamp set. Each stop along the hop will show you a different idea, or ideas using that set!**

Thanks for stopping by! Happy Stamping!
Share with your friends:

inky friends: suite designs blog hop

Welcome back!  I excited to be part of My Inky Friends Suite Designs Blog Hop!  This time we are putting a spotlight on various product suites in the 2018-19 Stampin’ Up! catalog.  I am thrilled to put the broadway Bound suite center stage! (I know, you are all so surprised that i would pick that suite.  What can I say?  Somethings are just meant to be!)  This dramatic suite can be found on page 69.

Let’s start with this fun project pairing.

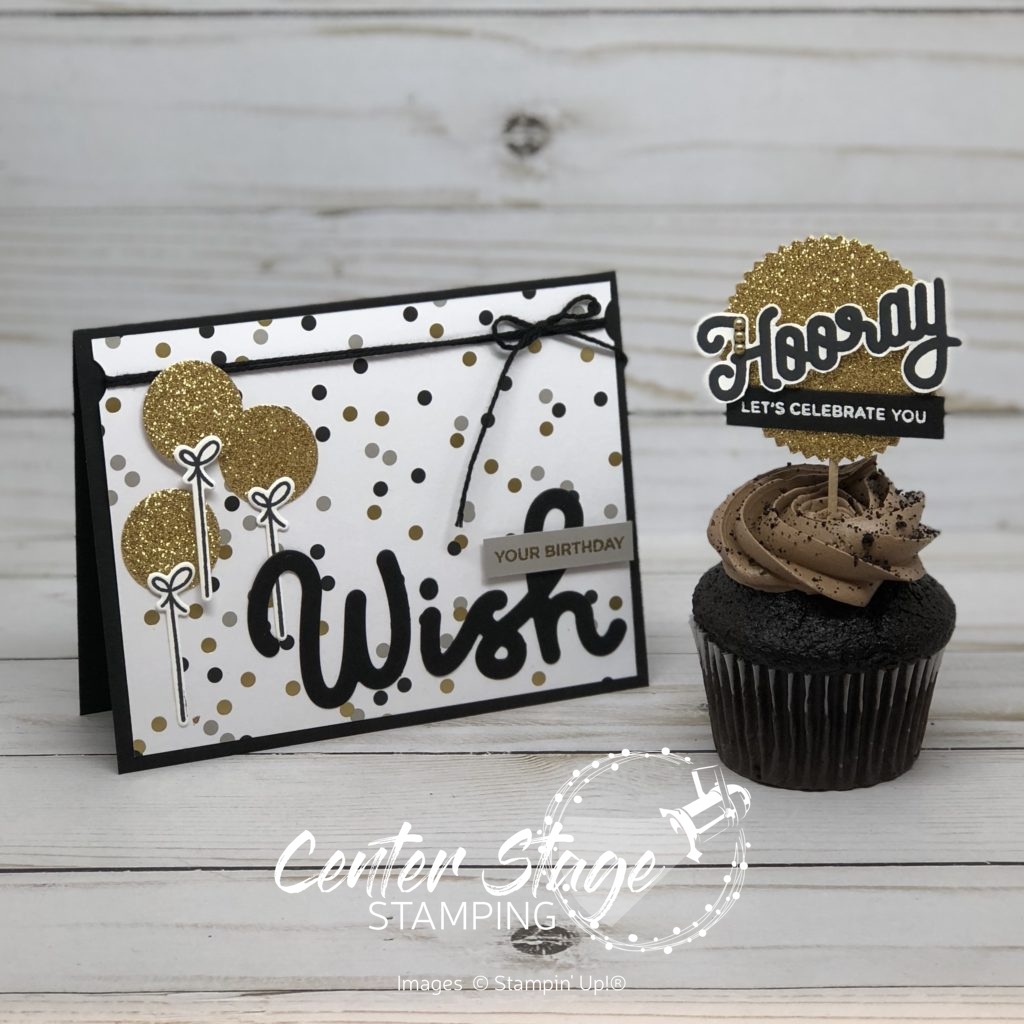
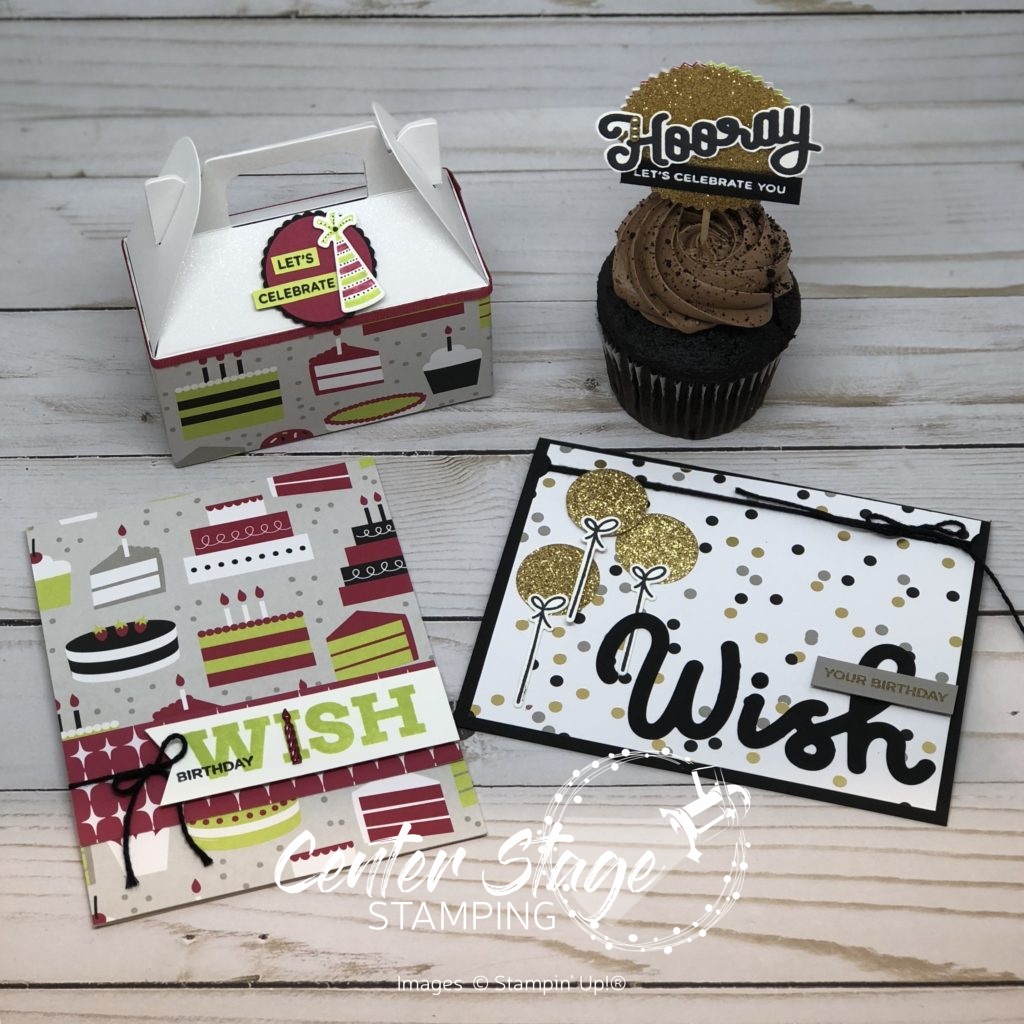
Golden Broadway Birthday - Center Stage Stamping


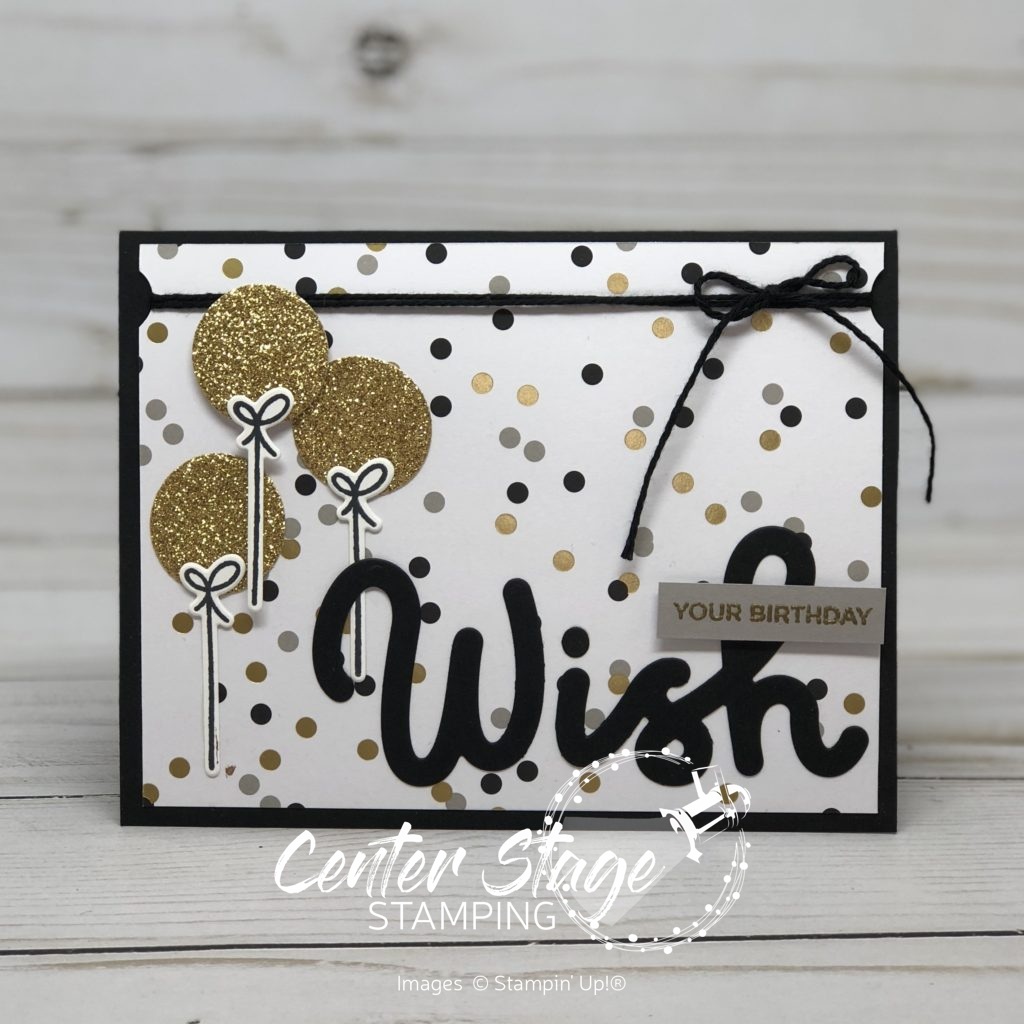
Who wouldn’t love to get a birthday treat like this.  The gold foil in the Broadway Bound designer series paper brings out that Broadway sparkle!

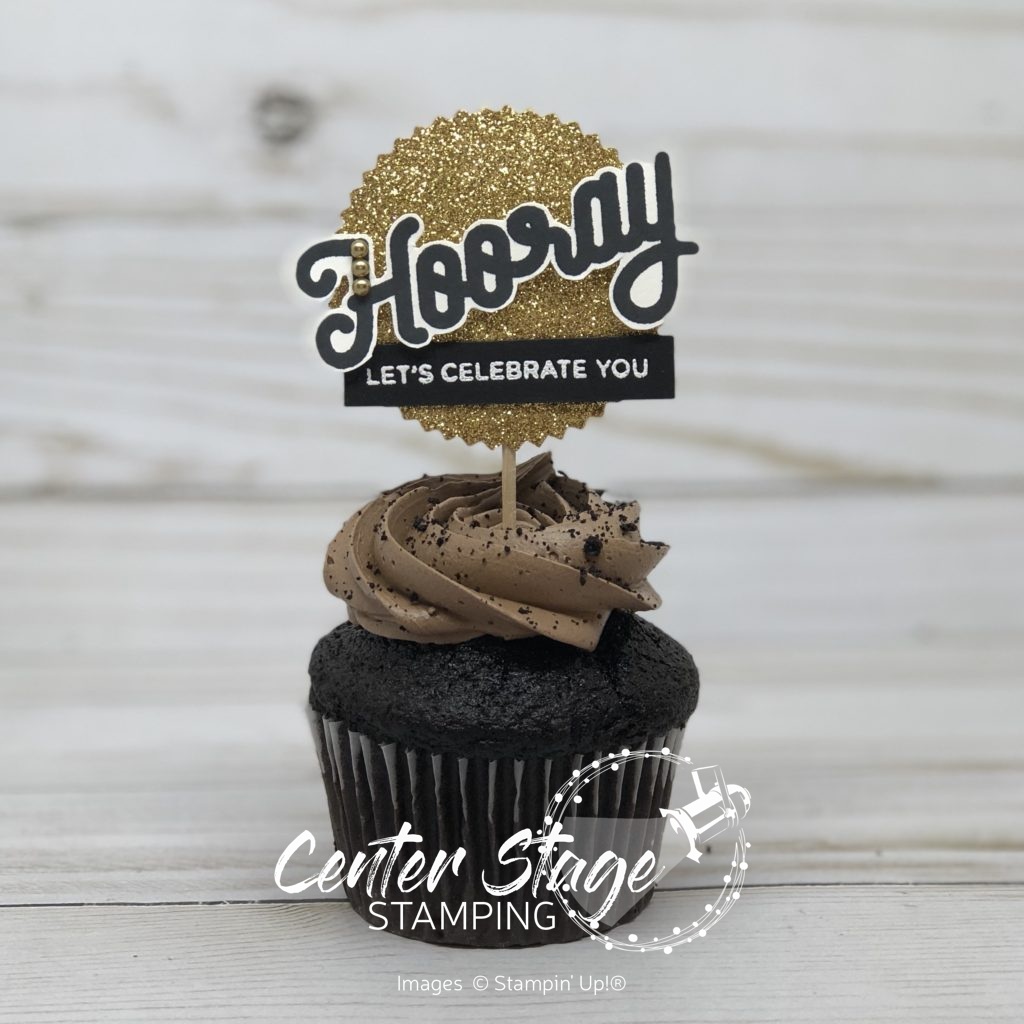
Hooray cupcake - Center Stage Stamping

First off how awesome is this cupcake topper?  A bit of gold glimmer paper punched with the Starburst punch makes a great base for the fun greeting. A few gold Metallic Pearls are a great finishing touch.

Broadway Wish card - Center Stage Stamping


The gold shimmer cut from the Broadway Lights Framelits balloons make this a great coordinating card for the cupcake treat.

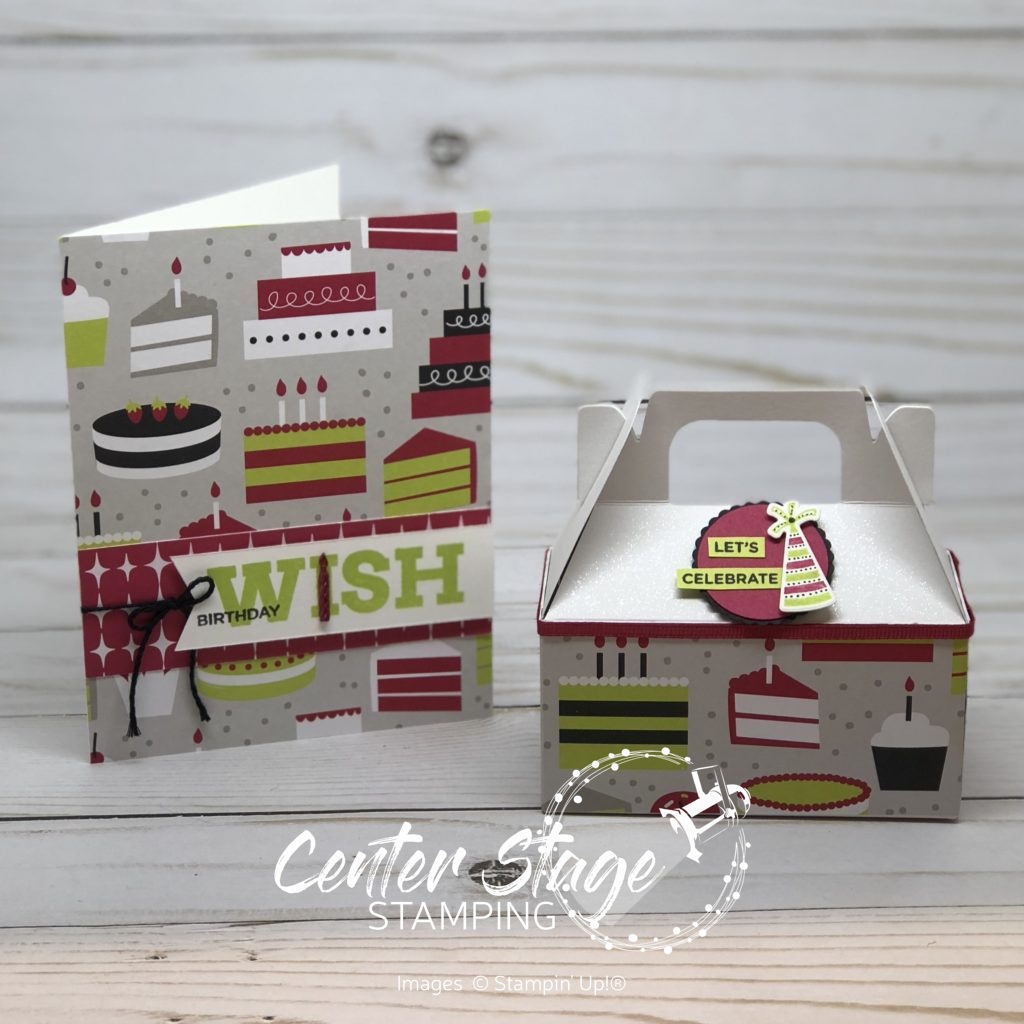
This next pair of projects Brings out the Bold colors of Lovely Lipstick and my favorite, Lemon Lime Twist,

Broadway Wish set - Center Stage Stamping

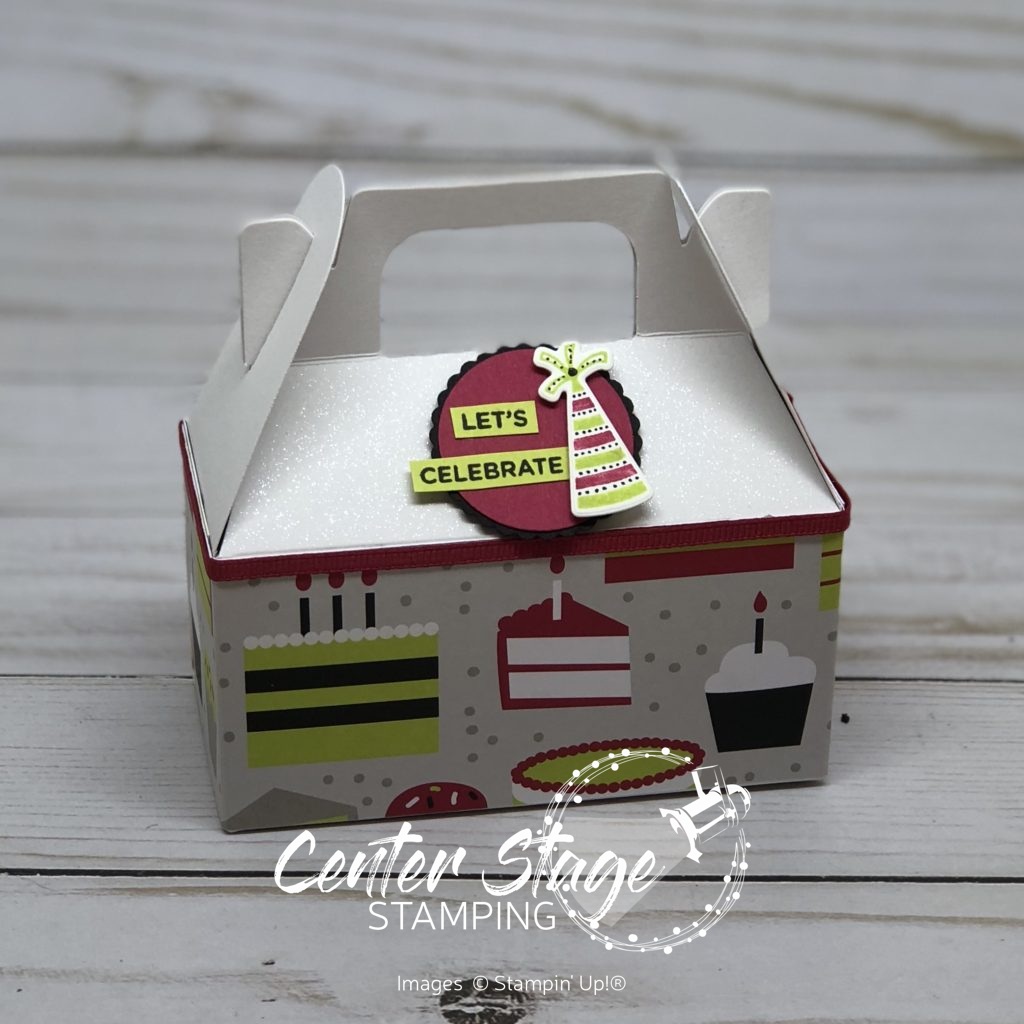
Here is a closer look at the gift box.

let's celebrate gift box - Center Stage Stamping

I started with one of the Lustrous White Mini Gable Boxes.  I wrapped the bottom with the cake pattern from the Broadway Bound dsp.  I glued some Lovely Lipstick 1/8″ Grosgrain Ribbon around the top.  The greeting on the box is layered as follows: 1-3/8″ scallop circle in Basic Black, 1-1/4″ circle in Lovely Lipstick, the hat die cut from the Broadway Lights Framelits (I added the black dots with a Basic Black Stampin’ Write Marker).  I stamped the sentiment on Lemon Lime Twist card stock and cut it apart and adhered to the circle.  This element is added to the box with dimensionals.

Broadway Birthday Wish card- Center Stage Stamping

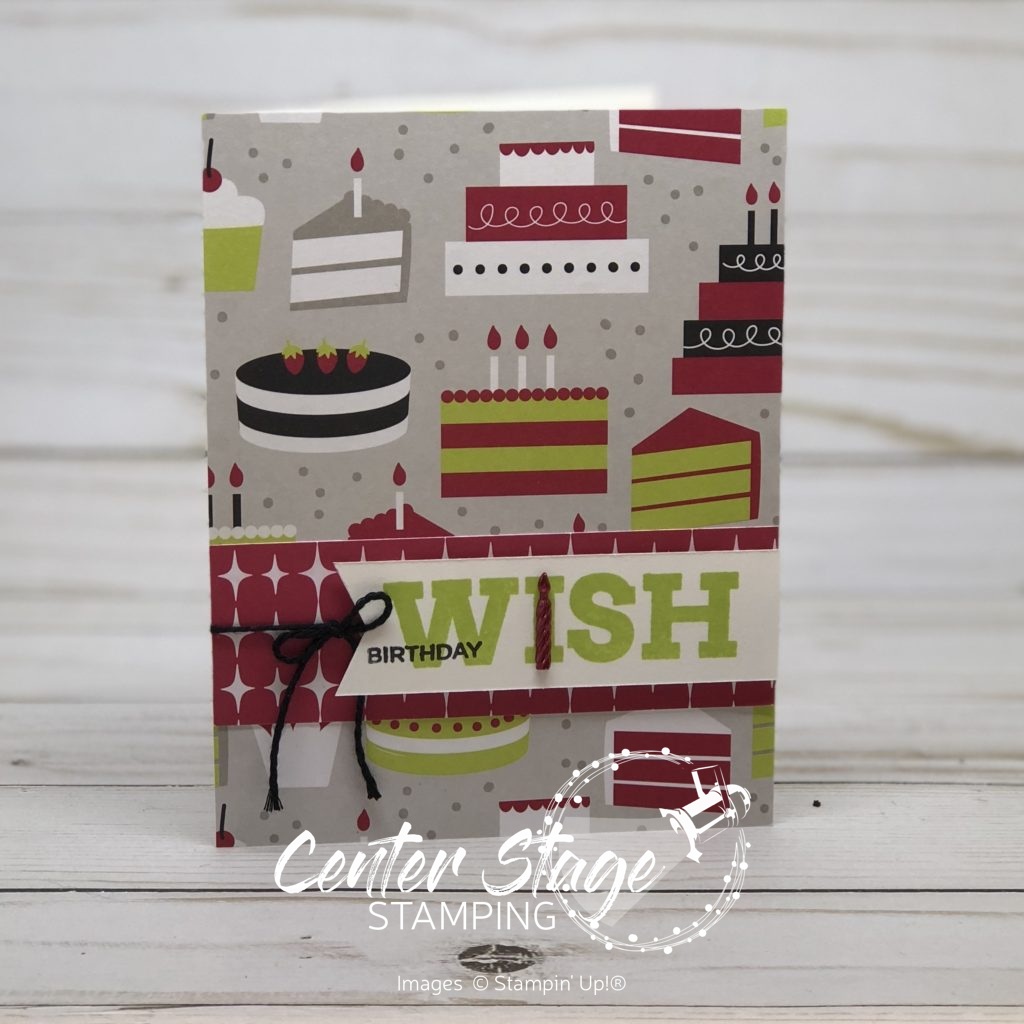
I let the Broadway Bound dsp take center stage for this card.  The little candle embellishment on the “I” is one of the silver Candle Embellishments.  But wait, it’s pink, not silver.  Ah ha!  I colored it with the dark Lovely Lipstick Stampin’ Blend!  How cool is that?

Broadway Birthday treats - Center Stage Stamping

Broadway Bound is a fantastic suite of products that give your birthday projects great dramatic flair!   I’m sending you over to Twila and her wonderful projects featuring the Under the Mistletoe Suite.  Or, if you are traveling backwards through the hop, you can go back to Rhonda and her delightful projects with the Delightfully Detailed Suite.

That’s a wrap for now. Happy Stamping!

Share with your friends:

let’s celebrate you

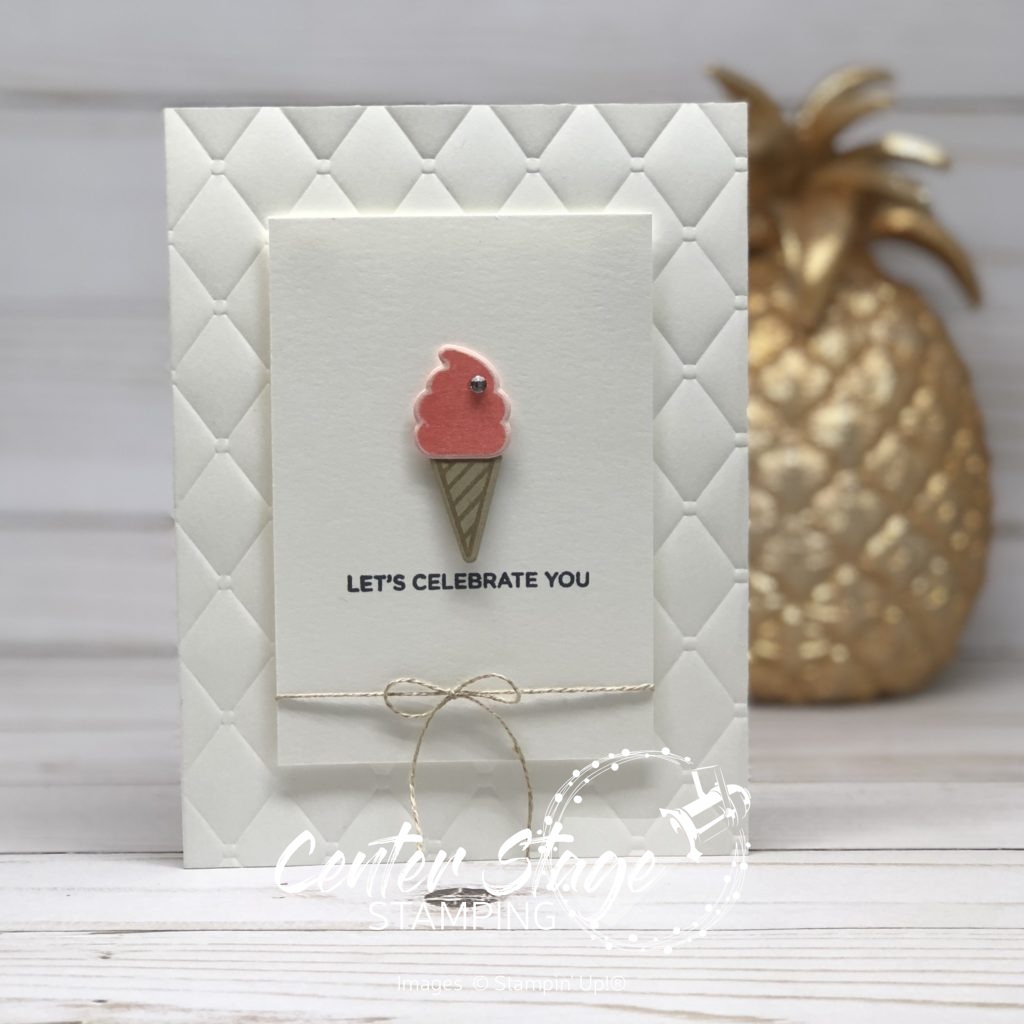
I’m back with another card using the Broadway Birthday stamp set.  This set is really quite versatile. You can go big and bold like this card, or you can go for a more subtle look like today’s card.

Let's Celebrate You - Center Stage Stamping

Hard to believe that is from the same set isn’t it?  How fun is that little ice cream cone!  I decided to let the ice cream be a simple focal point and the only color on the card.  But that doesn’t mean the card has to be boring.  Texture can help with that.  The Thick Whisper White card base is embossed with the Tufted 3D Dynamic Textured Impressions Embossing Folder.  I just love the quilted look it gives  The Ice cream cone is stamped in Crumb Cake ink on Crumb Cake card stock and the ice cream is Flirty Flamingo ink stamped on Powder Pink card stock.  I cut it out with the coordinating Broadway Lights Framelits. Some Linen thread and a little rhinestone are the finishing touches.

Thanks for stopping by! Happy Stamping!

-Mary

Share with your friends:

carnival of colors blog hop

It’s good to be back blog hopping with My Inky Friends.  This time we are spotlighting some of the fabulous NEW Stampin’ Up! colors.  Stampin’ Up! has done a color revamp and it is fabulous!  They have introduced ten BRAND NEW colors and brought back six former In Colors to the core color families.  Plus there are five BRAND NEW In Colors!  So. Much. Color!!!  I LOVE IT!!  You may have arrived here from Yapha if you are following the hop in order. (or from Sharleen if you are being wild and crazy and doing the hop backwards).

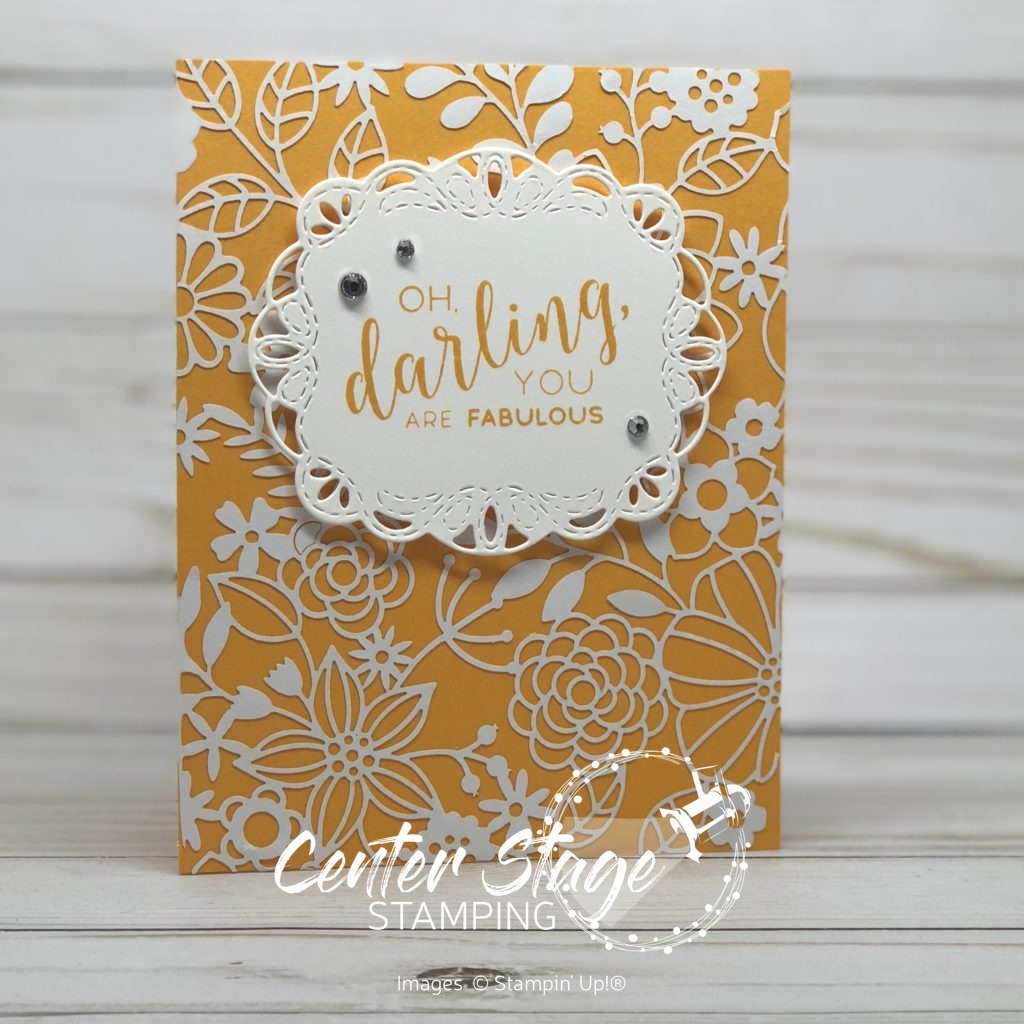
Today, I get to put the NEW Mango Melody center stage.  This is such a fantastic cheerful color.  This first card let’s this color introduce itself with the help of the Delightfully Detailed Laser-cut Specialty Paper.

Darling you are fabulous - Center Stage Stamping

The sentiment is from the Stitched All Around stamp set.  I cut out the label from the coordinating framelit set, Stitched Labels.  between the framelits and the Laser cut paper, the work is done for you!  Just throw on a few rhinestones for some added bling and voila!

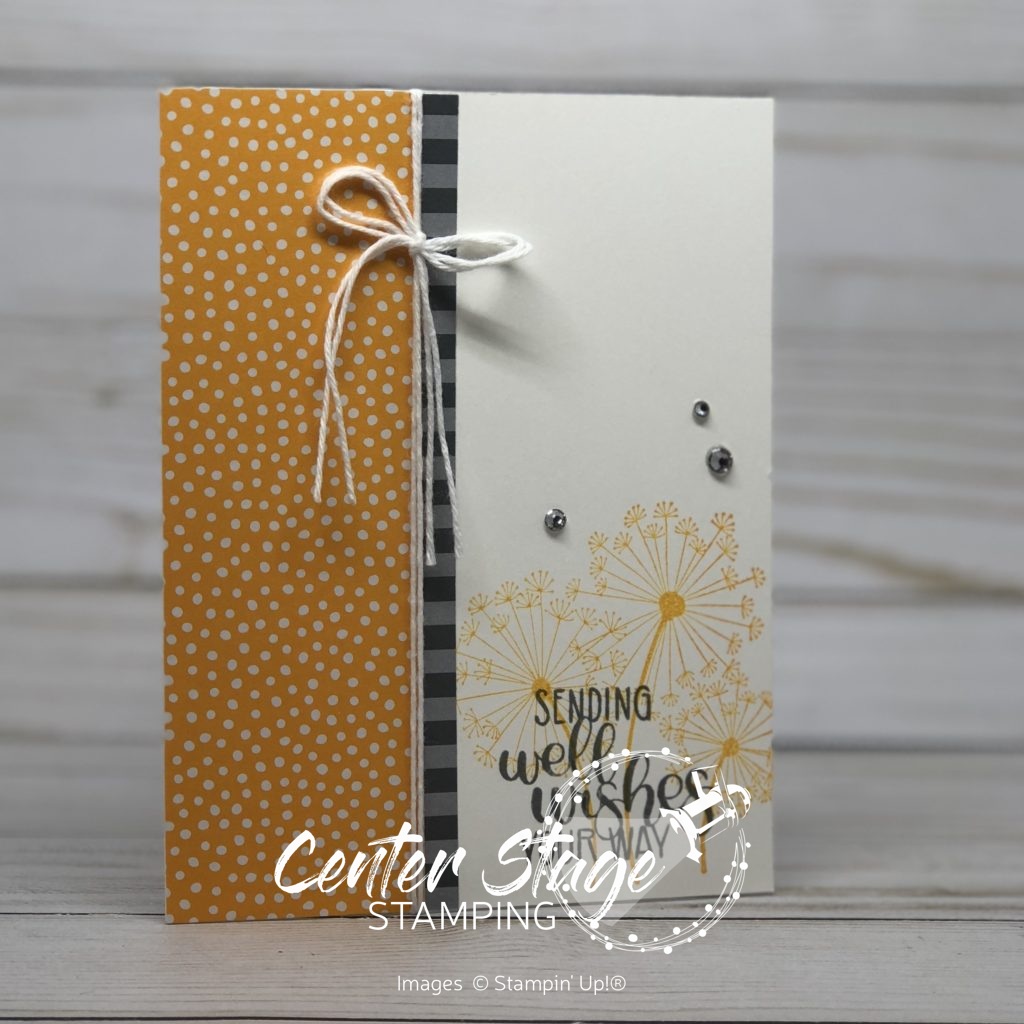
For the next card, I added in a bit of Basic Gray and the Dandelion Wishes stamp set.

Sending Dandelion Wishes your way - Center Stage Stamping

The patterned paper strips are from the new 6″x6″ Designer Series Paper, Brights and Neutrals.

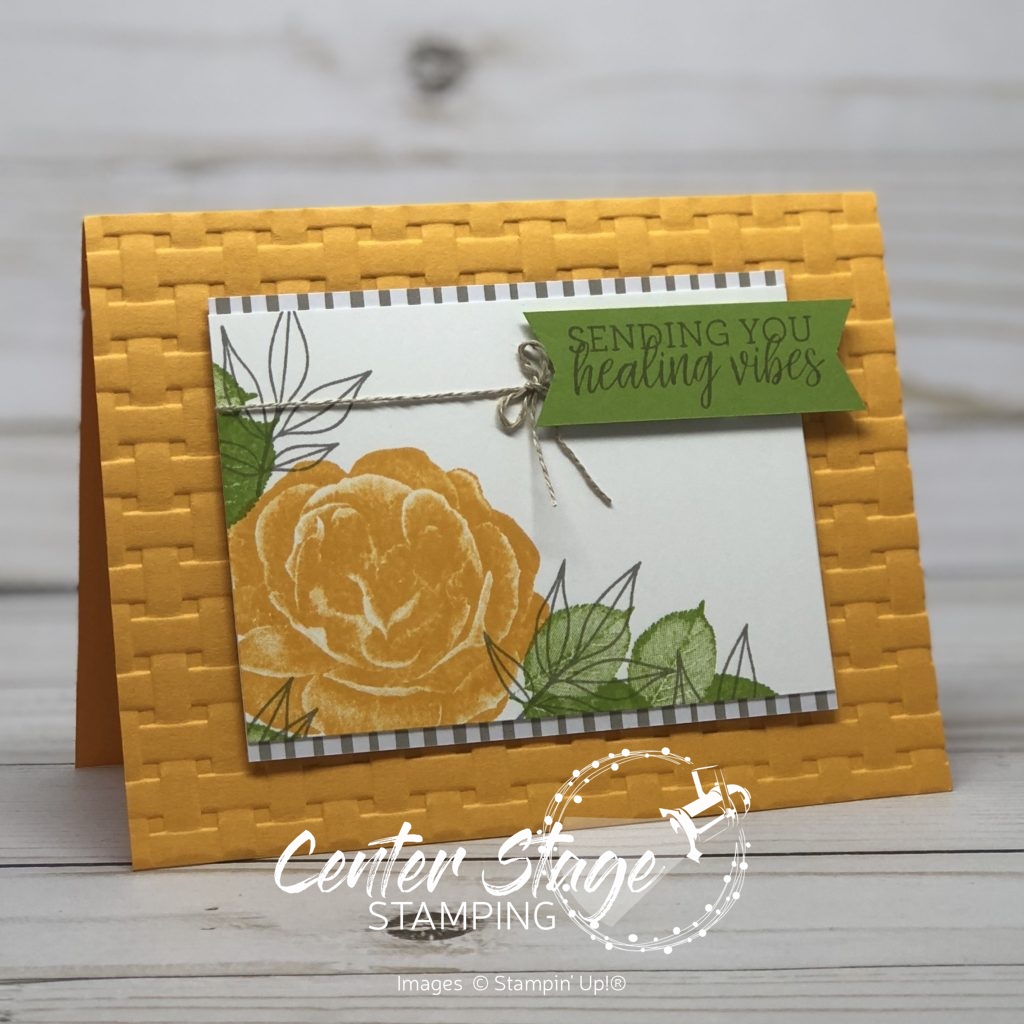
For the last card, I cast Mango Melody with fellow NEW colors Gray Granite and Granny Apple Green.  They take the stage with the Healing Hugs stamp set.

Healing Vibes - Center Stage Stamping

The card base is embossed with the Basket Weave 3D Dynamic Textured Impressions Embossing Folder. This cheerful color combo should brighten anyones day!

Now, head on over to Sharleen.  She has some great projects featuring the new In Color, Pineapple Punch.  Be sure to follow the full blog hop circle for great color inspiration!

Thanks for stopping by! Happy Stamping!

-Mary


Share with your friends:

thank you big time

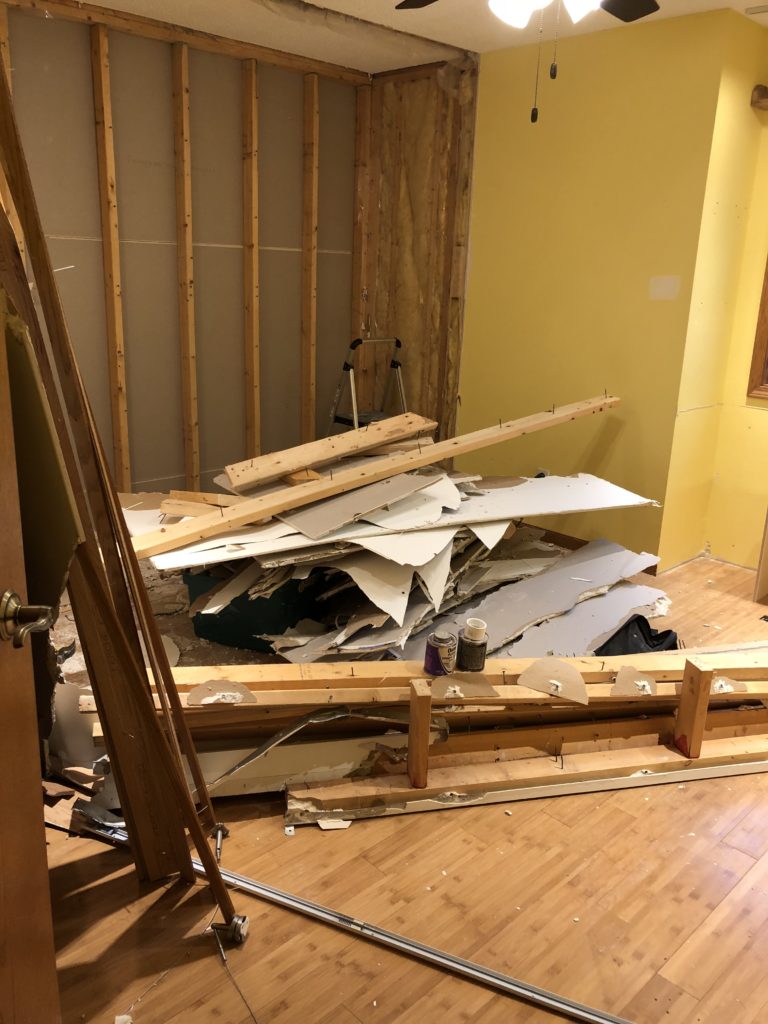
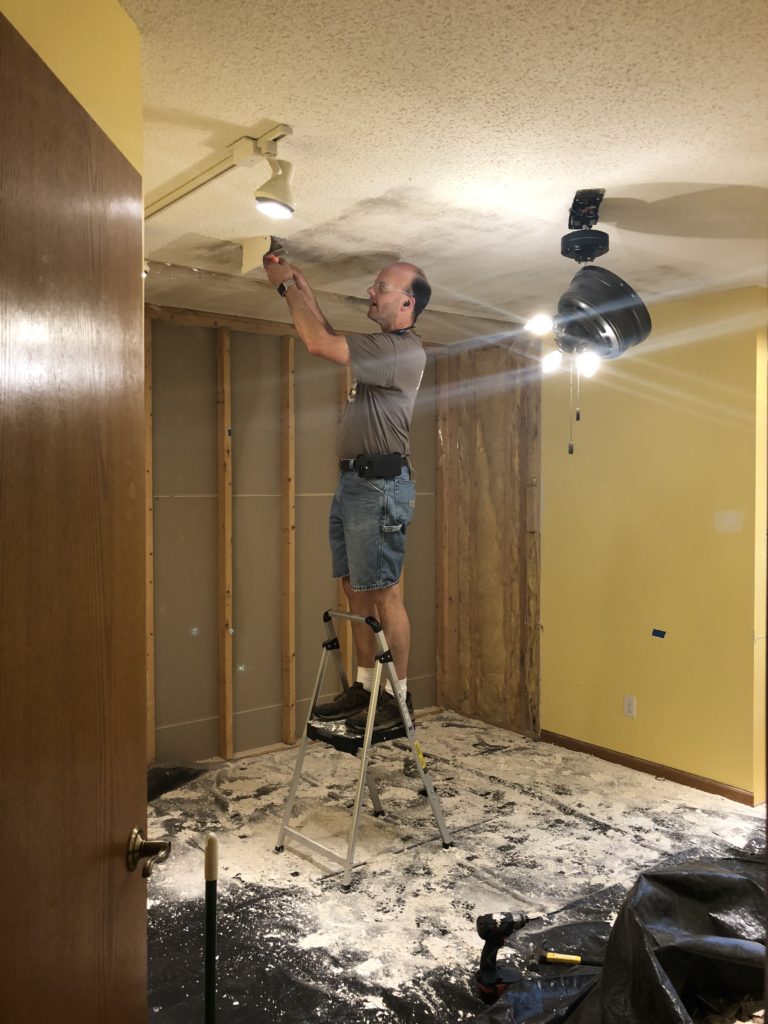
My studio remodel is coming along slowly. We took out the closet and removed the popcorn ceiling texture.

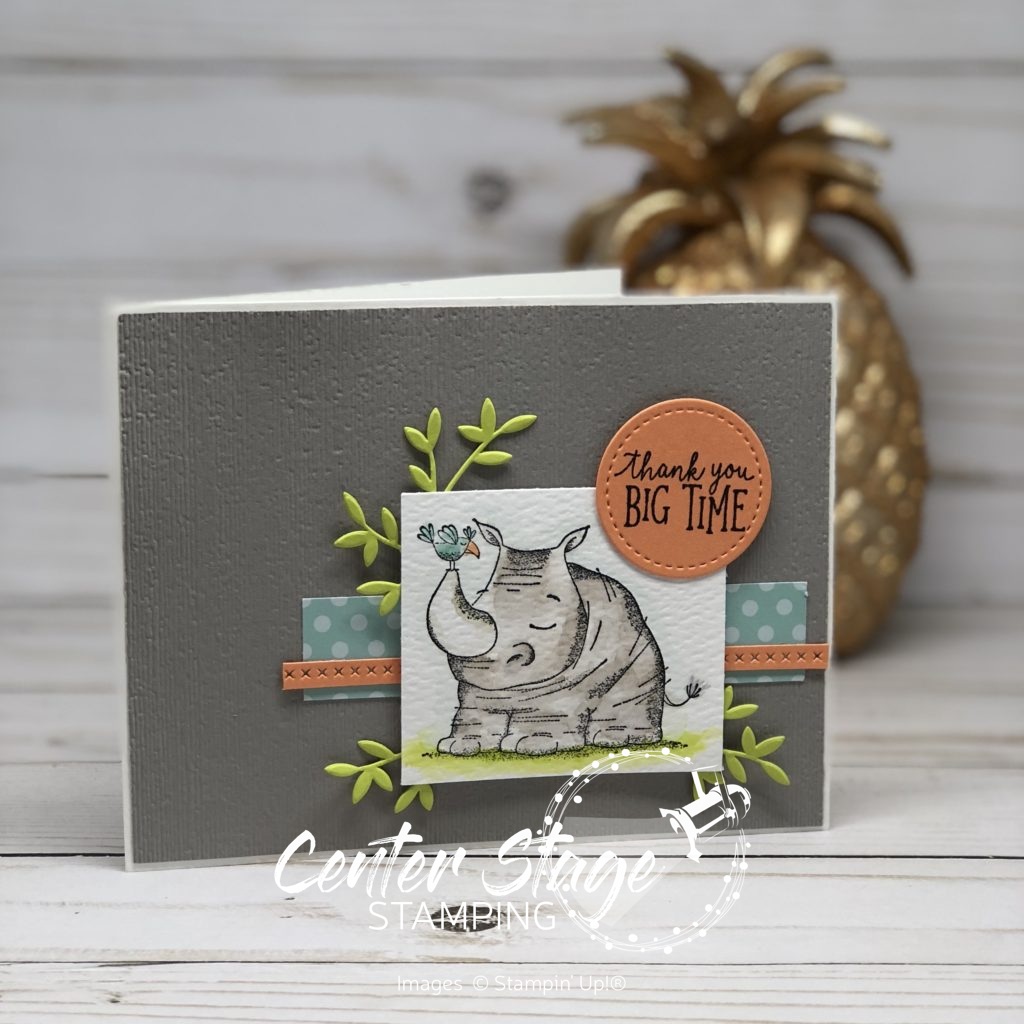
My wonderful husband, Brett is doing most of the work in the studio himself.  I owe him a BIG thank you.  Today’s card might fit the bill.  The new Animal Outing stamp set is SO cute!  I just love this little rhinoceros.  He is so much fun to watercolor and perfect for the new color Gray Granite.

Animal Outing Thank You - Center Stage Stamping

The Gray Granite layer is embossed with the new Subtle 3D Dynamic Textured Embossing Folder.  I pulled in some Lemon Lime Twist, Pool Party and Grapefruit Grove for a pop of color.  The leaves were cut with the Animal Friends thinlits.  I surprised myself by not using any extra embellishments on this.  But the die cut leaves, stitched circle and Grapefruit Grove strip cut with the Stitched Labels framelits give this card plenty of extra detail.

Thanks for stopping by! Happy Stamping!

-Mary

Share with your friends:

it’s here!

(Trumpet fanfare)  It’s here!  The new items in the 2018-19 Stampin’ Up! catalog are ready and waiting to be ordered.  If you don’t currently have a demonstrator, I would love to help you shine a spotlight on your creativity.  Let me know if you would like a catalog.  It is bursting with great products.  I can’t wait to get creating and put them center stage!

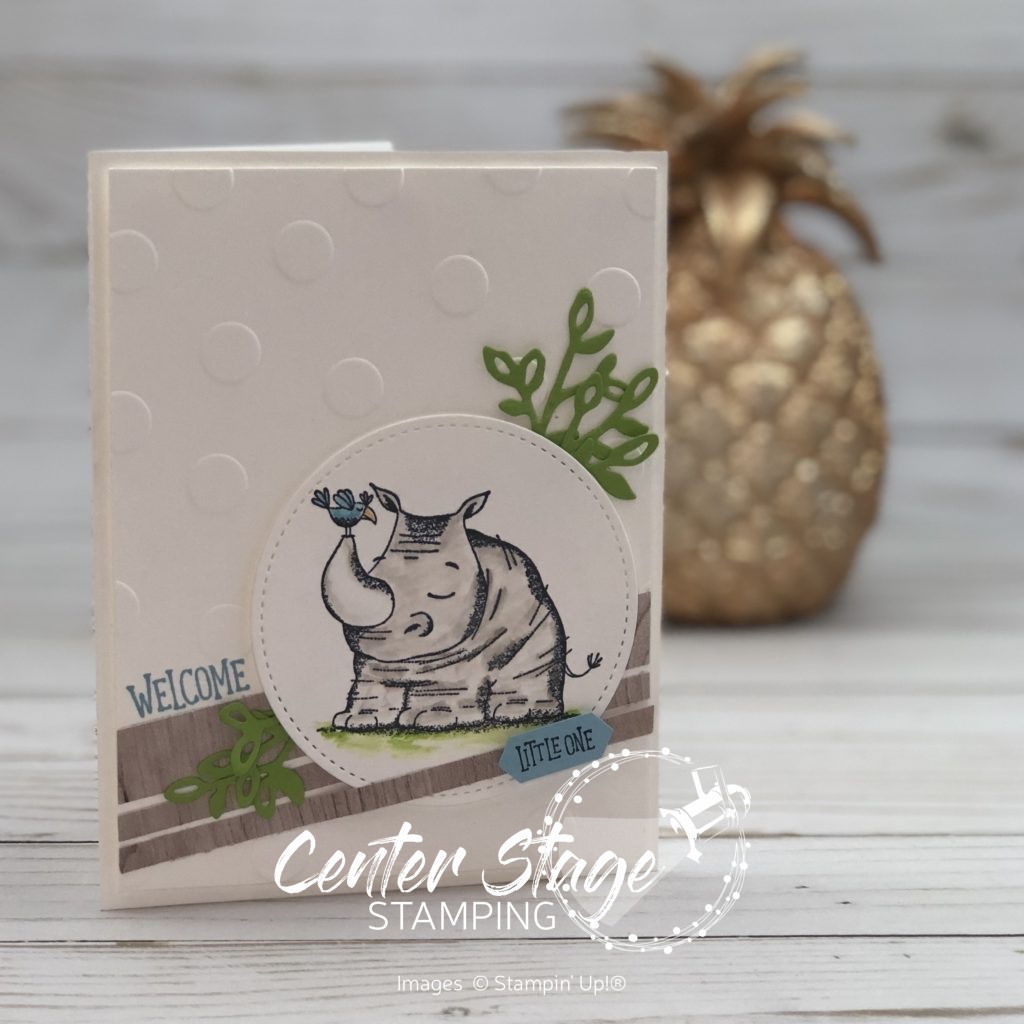
Let’s kick off this new catalog year with a sweet welcome card for a new little baby.  Introducing the NEW Animal Outing stamp set!

Welcome little one Animal Outing - Center Stage Stamping

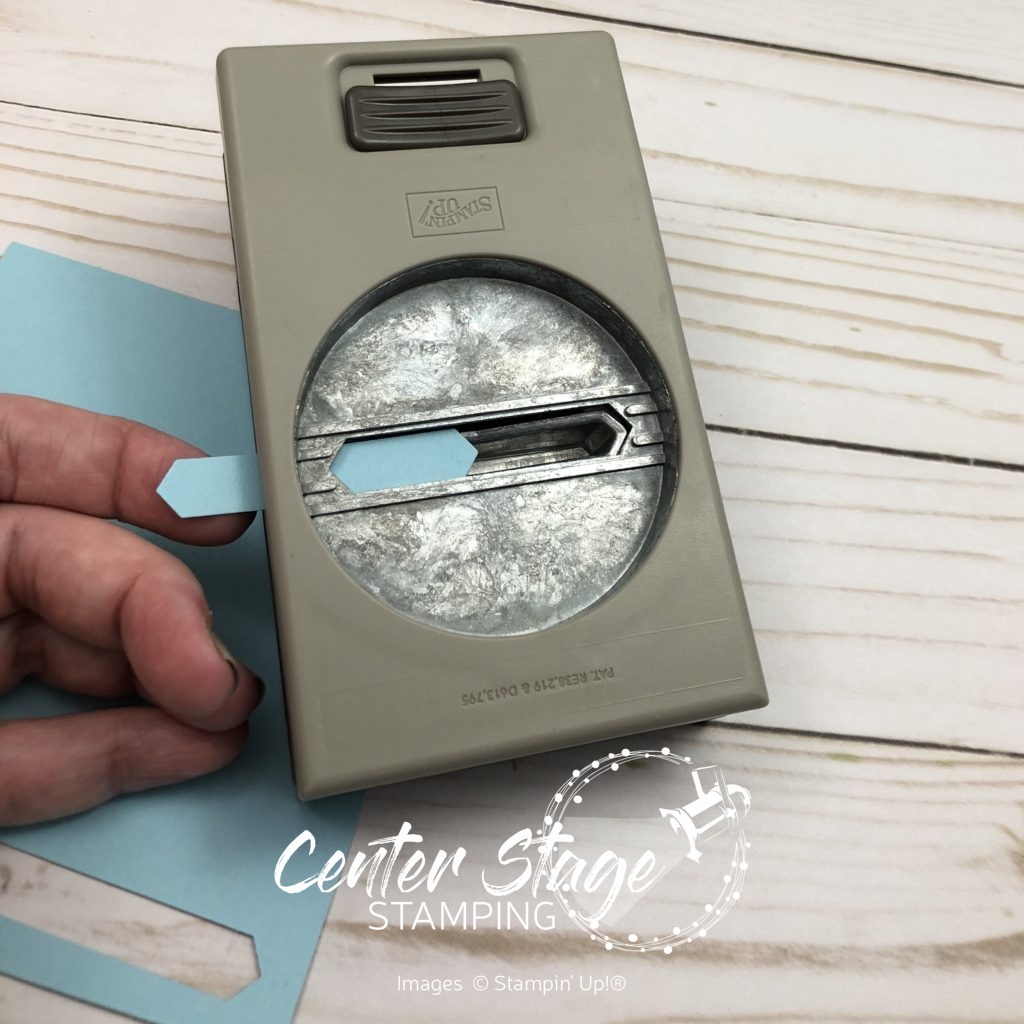
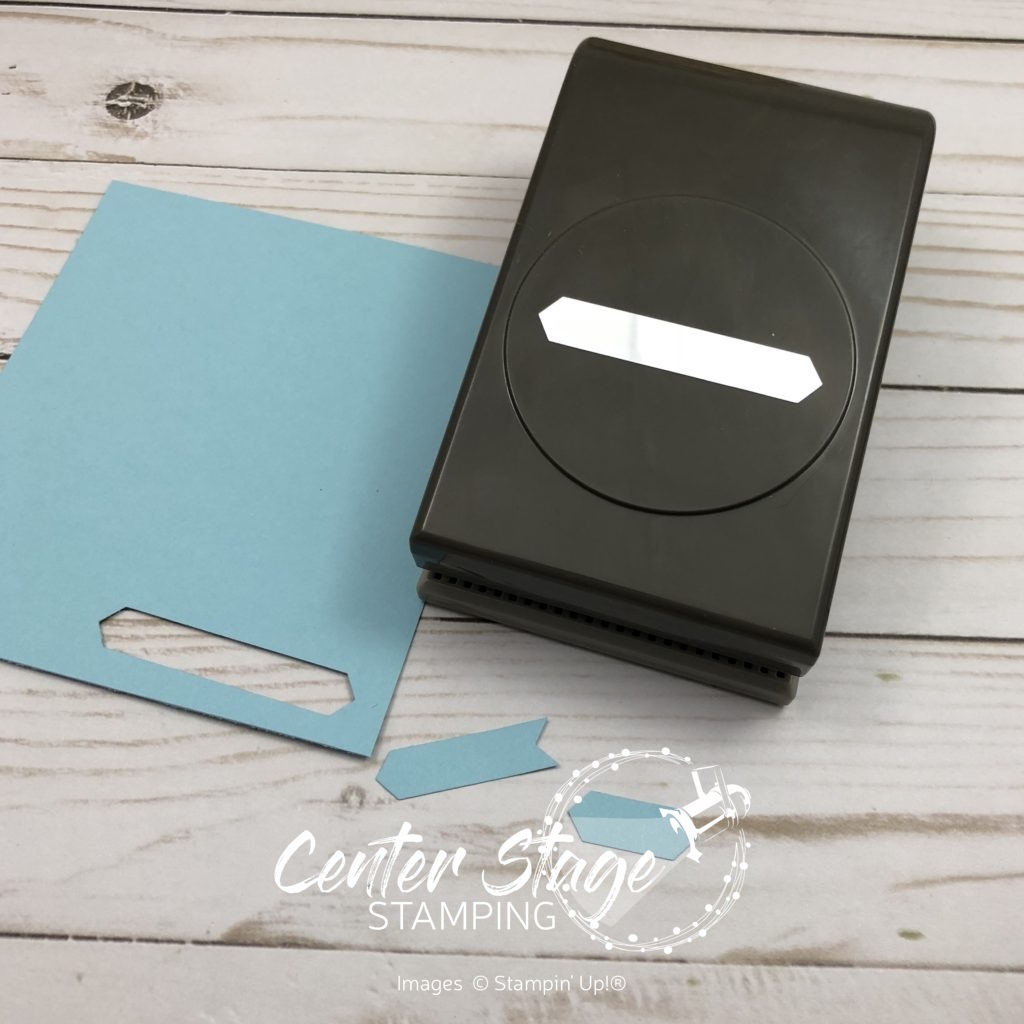
I am smitten with that little rhino.  He is so cute!  I colored him in with an aqua painter and some NEW Gray Granite ink.  What a great new color!  The leaves are from the Petals & More Thinlits.  I used a few strips of Wood Textures designer series paper.  The ‘welcome’ is stamped in Balmy Blue, another NEW color.  Coordinating Balmy Blue card stock was used for the Little One tag.  It was punched out using the Classic Label punch.  But wait, that punch is 2 1/4″ long.  To get it smaller, you simply put line up one end back into the punch and punch again.  Ta da – Smaller label!

Classic Label punch trick - Center Stage Stamping

Classic Label Punch - Center Stage Stamping

The Animal Friends Thinlits coordinate with the Animal Outing set to give you even more creative options.    Thanks for stopping by! Happy Stamping!

-Mary


Share with your friends: