stamp review crew

stamp review crew: sailing home

Hello friends! Welcome to another Stamp Review Crew blog hop. What is the Stamp Review Crew? We are an international group of paper crafters that get together to feature and review a single Stampin’ Up! stamp set on the first and third Monday of each month. All of our previous stamp set reviews are archived on the Stamp Review Crew blog. I get the honor of starting off the blog roll today.

For this hop, we are giving the Sailing Home stamp set its moment center stage. This stamp set isn’t one I normally would gravitate towards. But, I am SO glad I got it and the full Come Sail Away product suite. I have had so much fun creating with it.

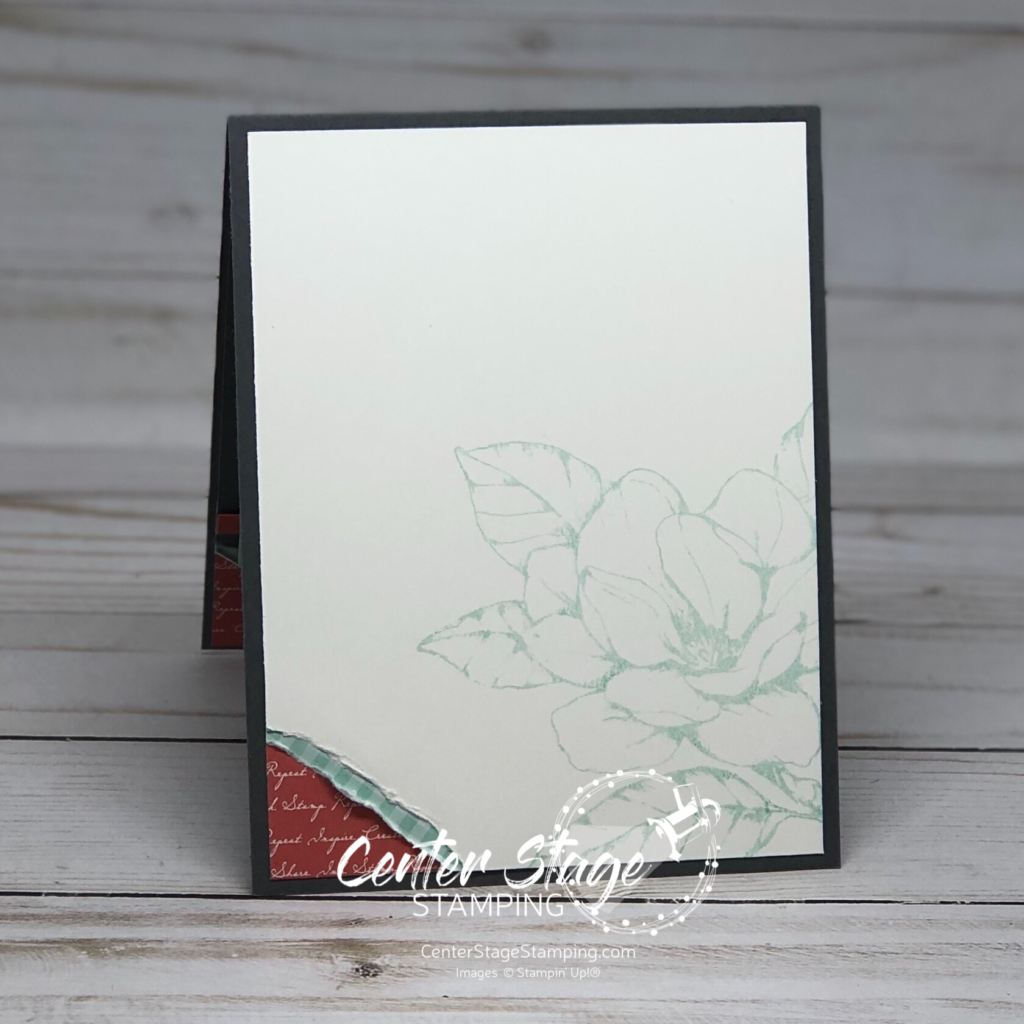
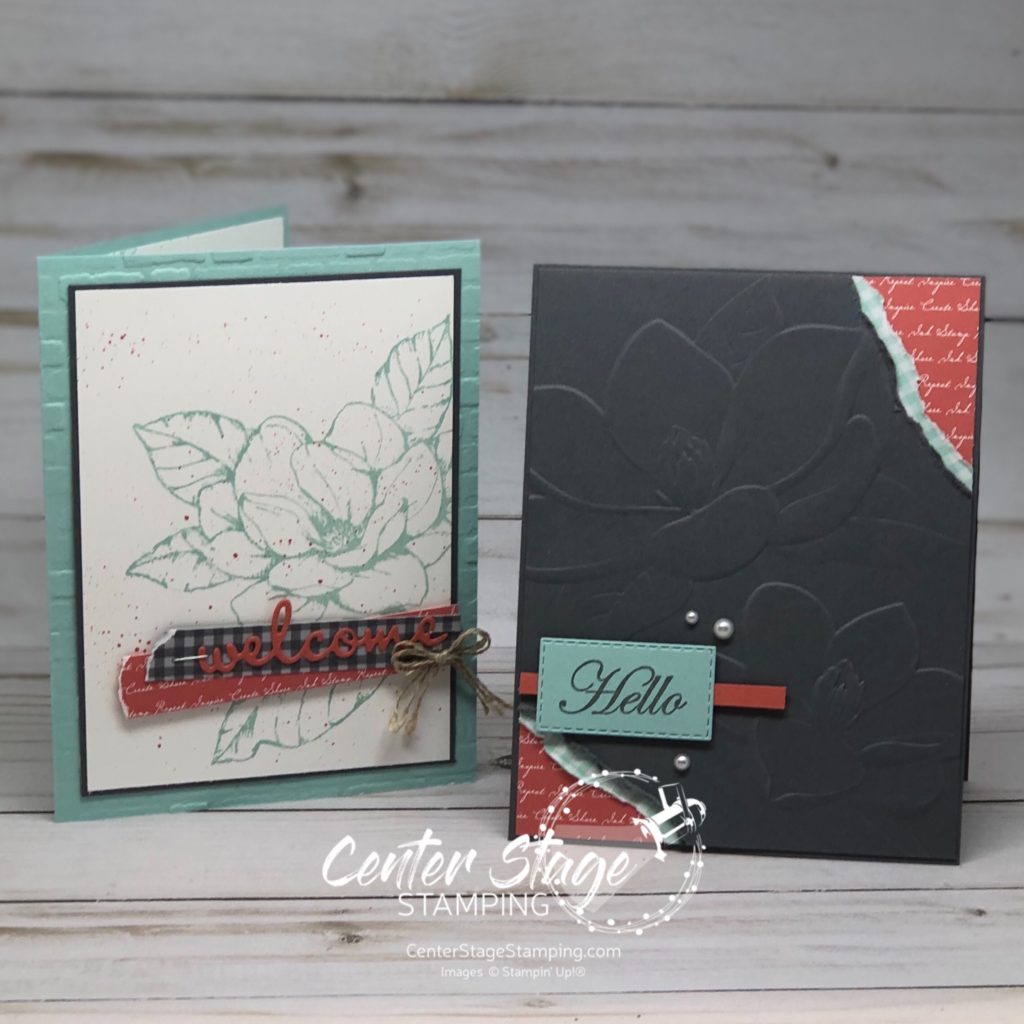
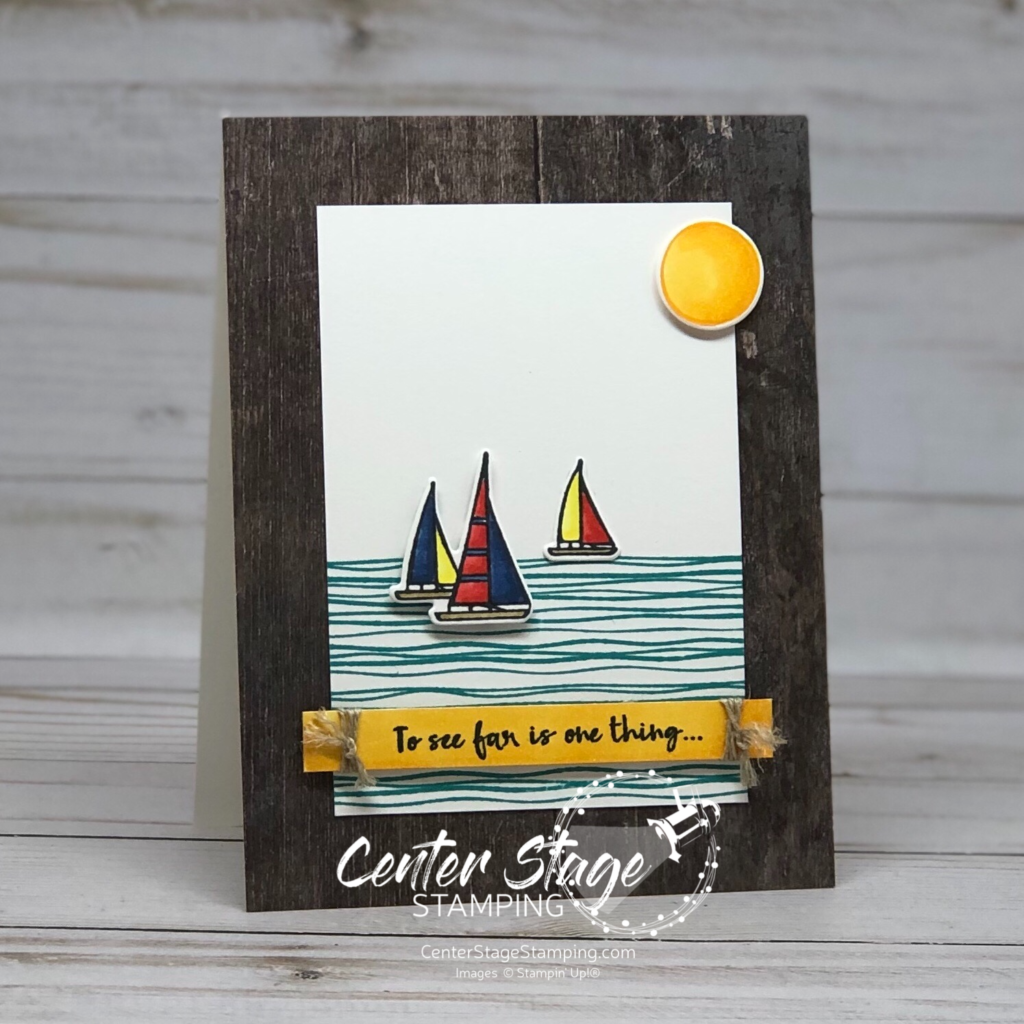
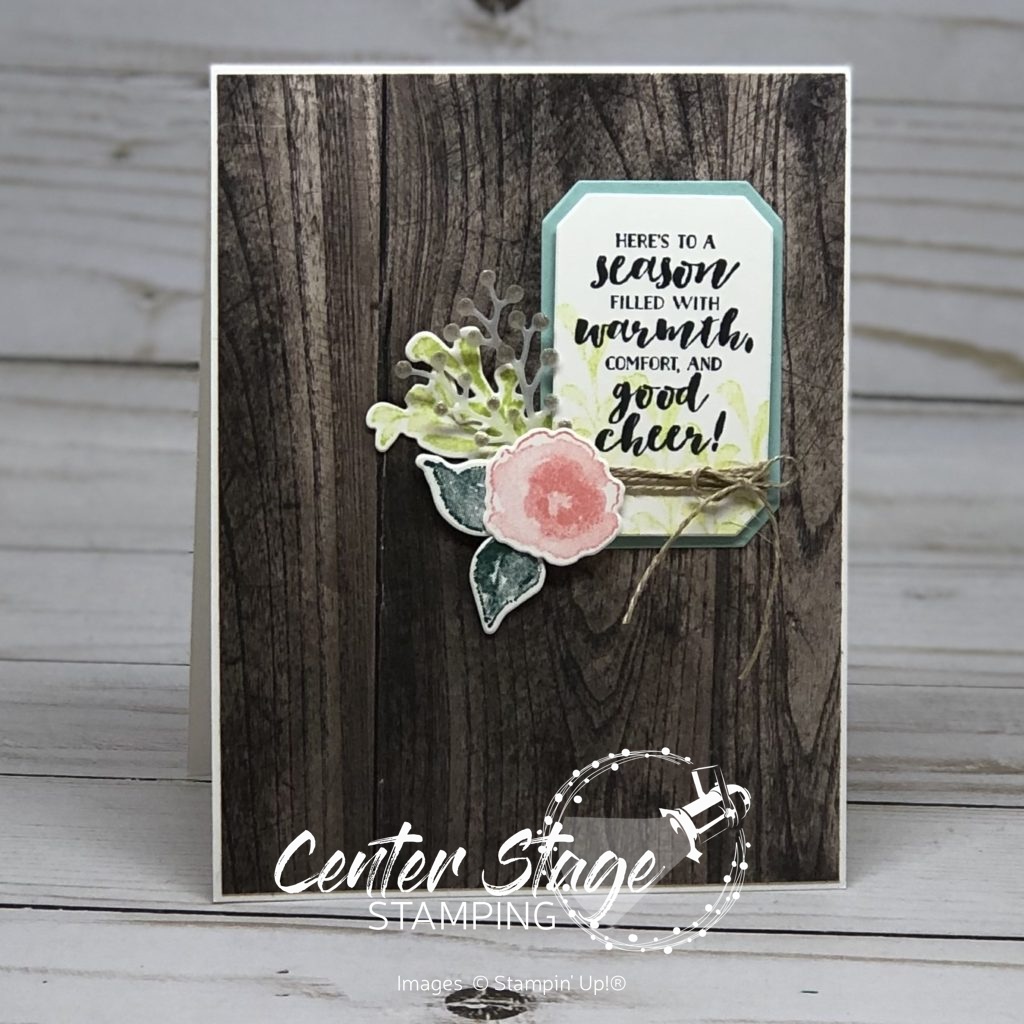
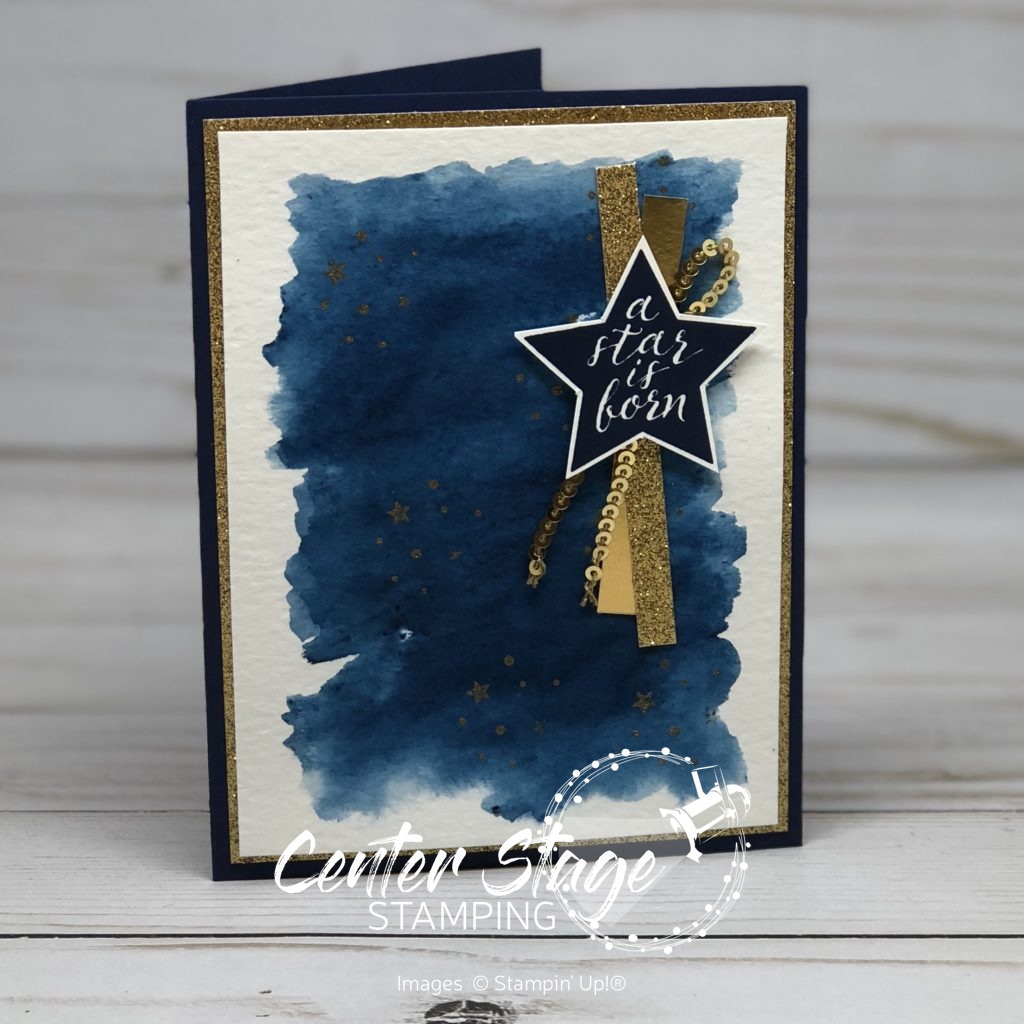
This first card is one I made for a custom order. I was asked to make a sympathy card. A boat sailing into the sunset is what was requested. Here is what I created.

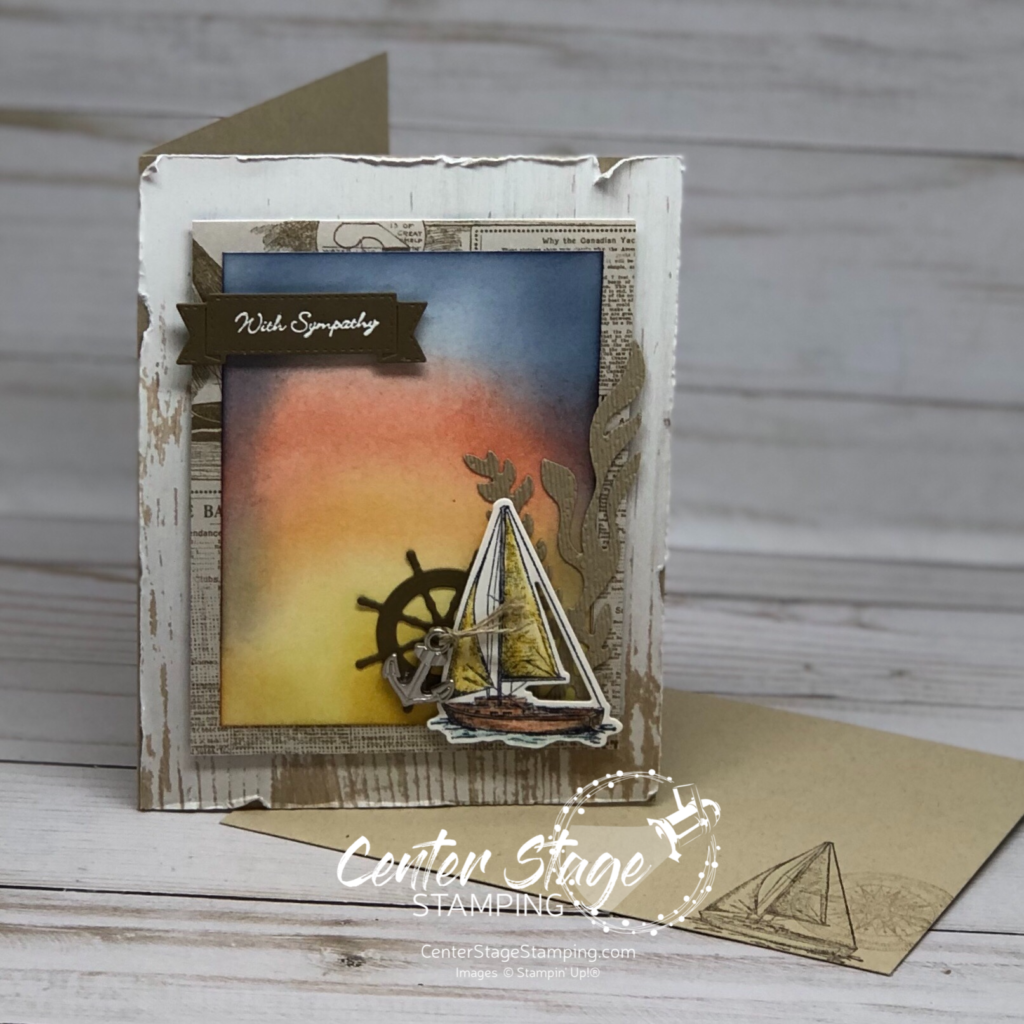
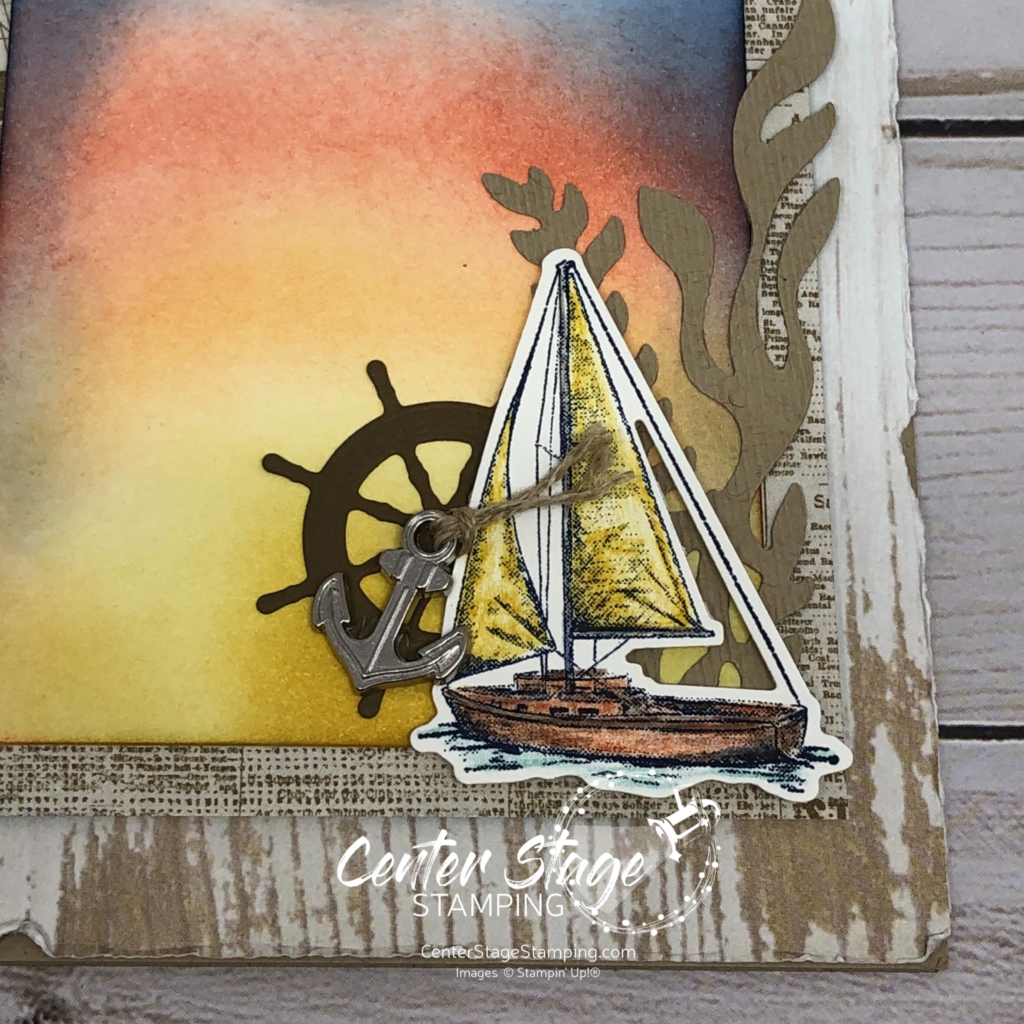
I created the sunset by sponging ink onto a Whisper White panel. I used Crushed Curry, Pumpkin Pie, Terracotta Tile, Balmy Blue and Night of Navy. I used some of the retired Wood Grains DSP and distressed the edges. The sentiment is from the retired Teeny Tiny Wishes. The boat was colored with water color pencils. Here is a closer look at the corner:

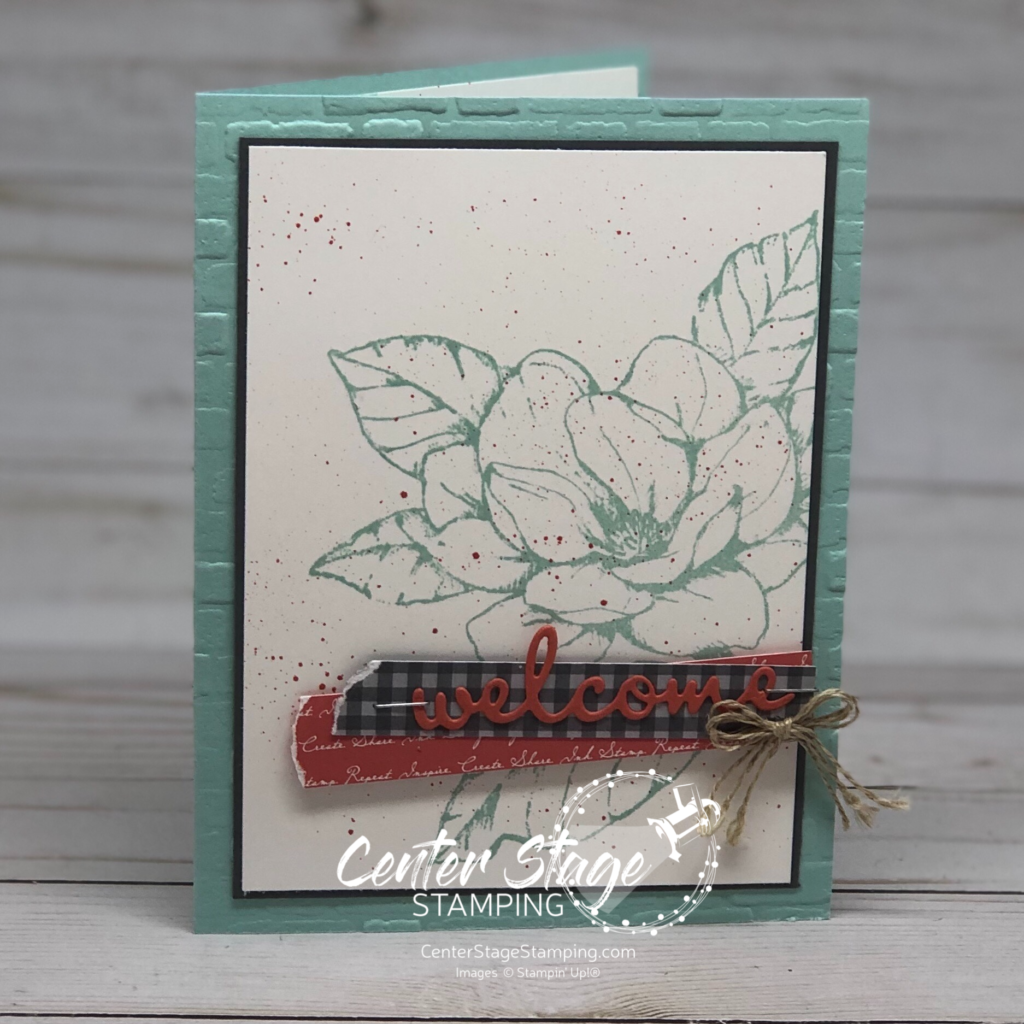
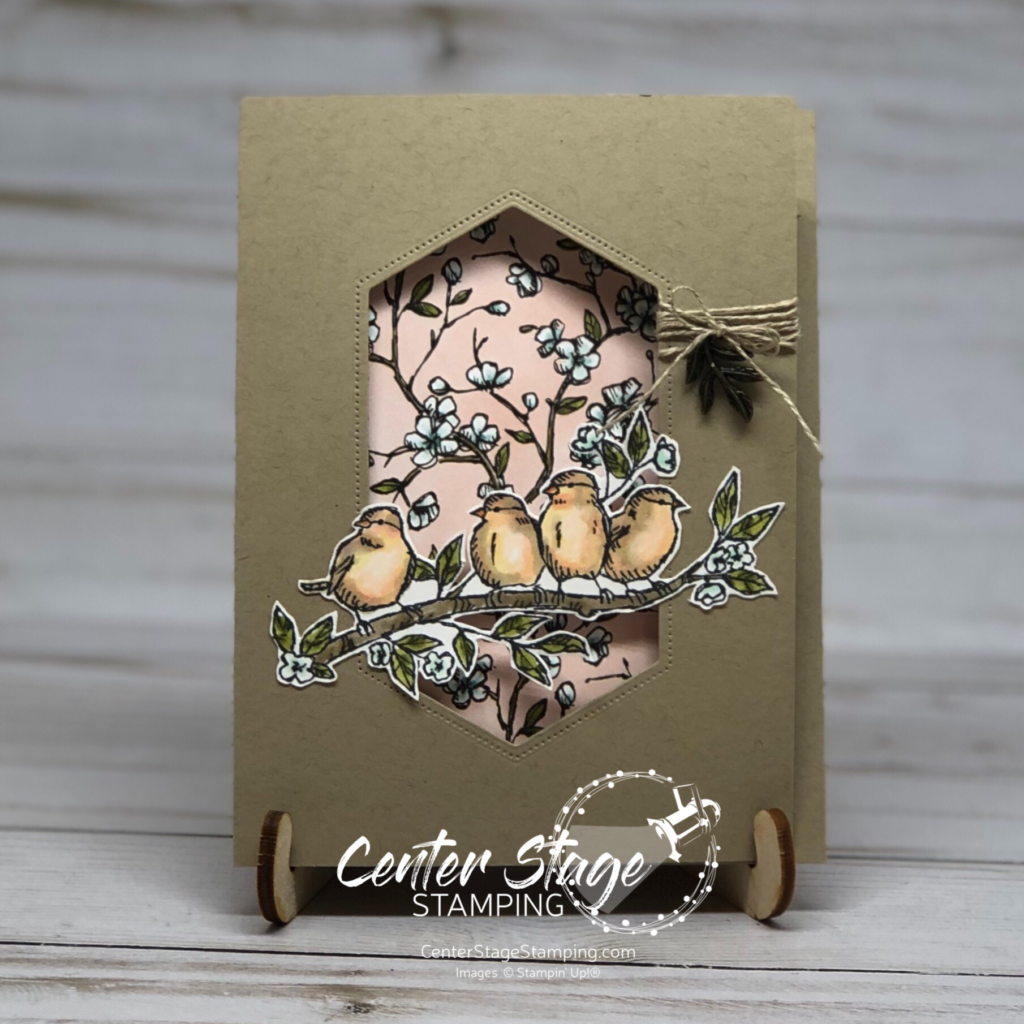
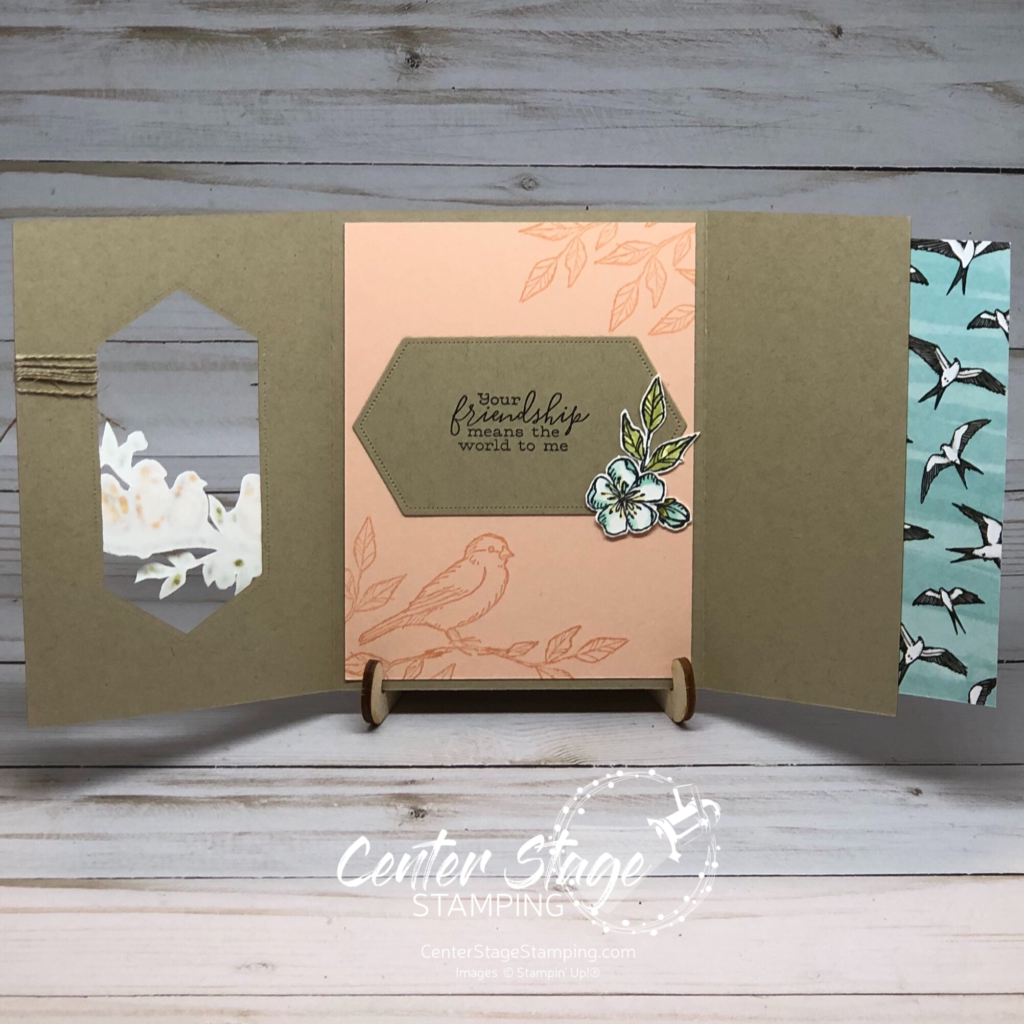
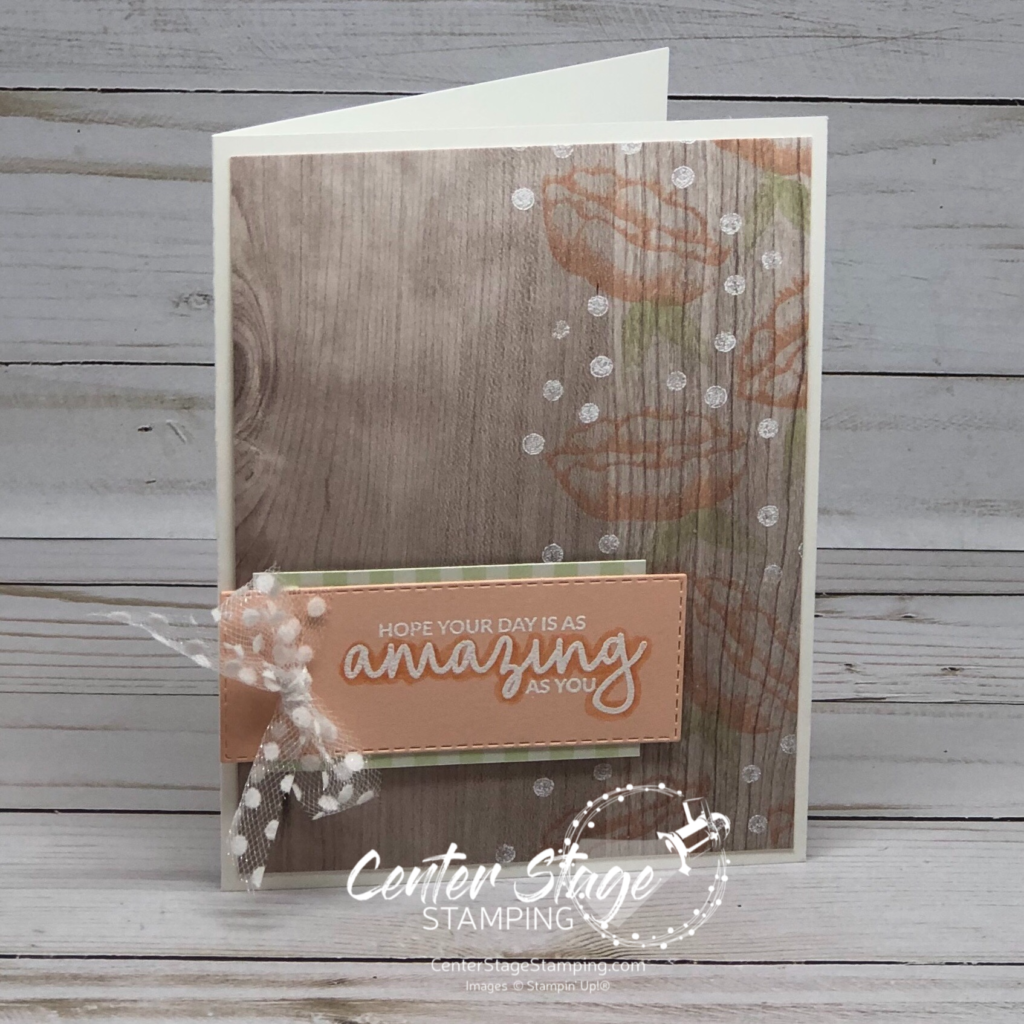
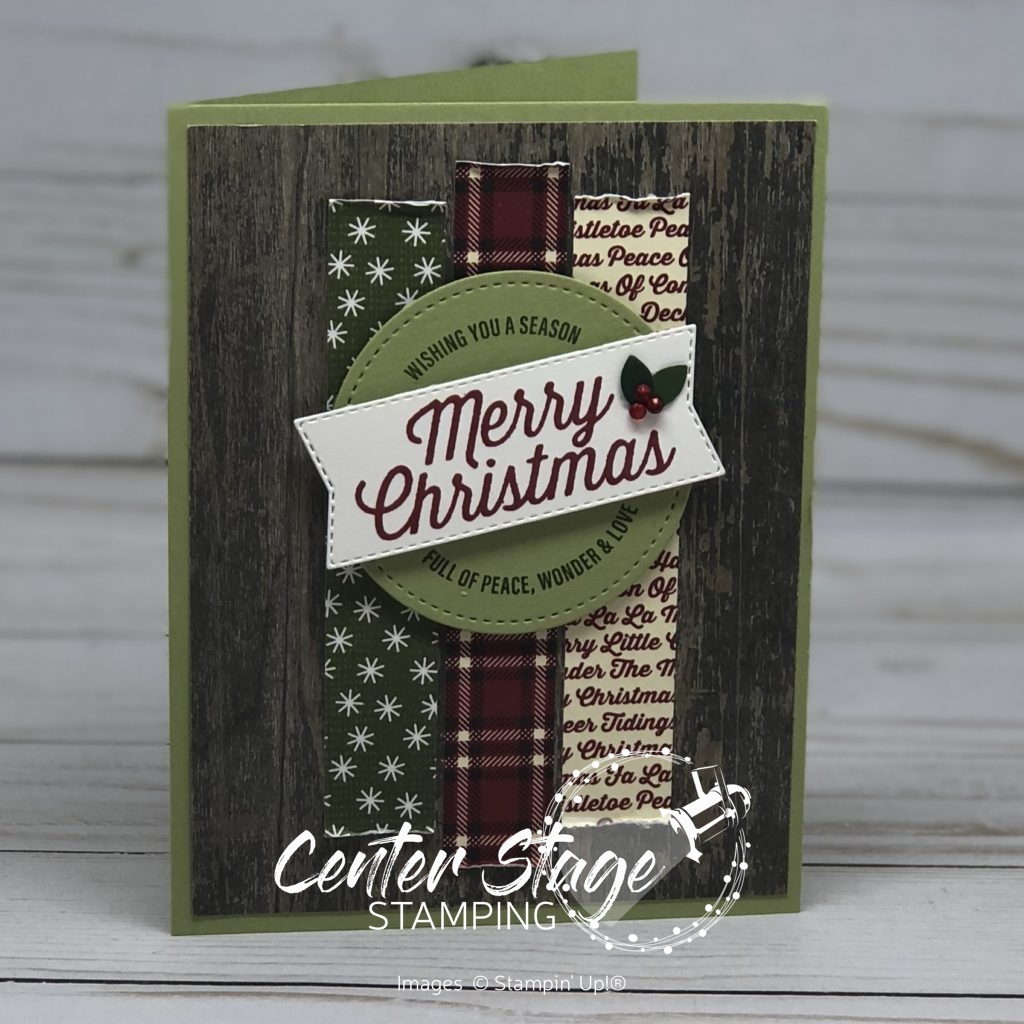
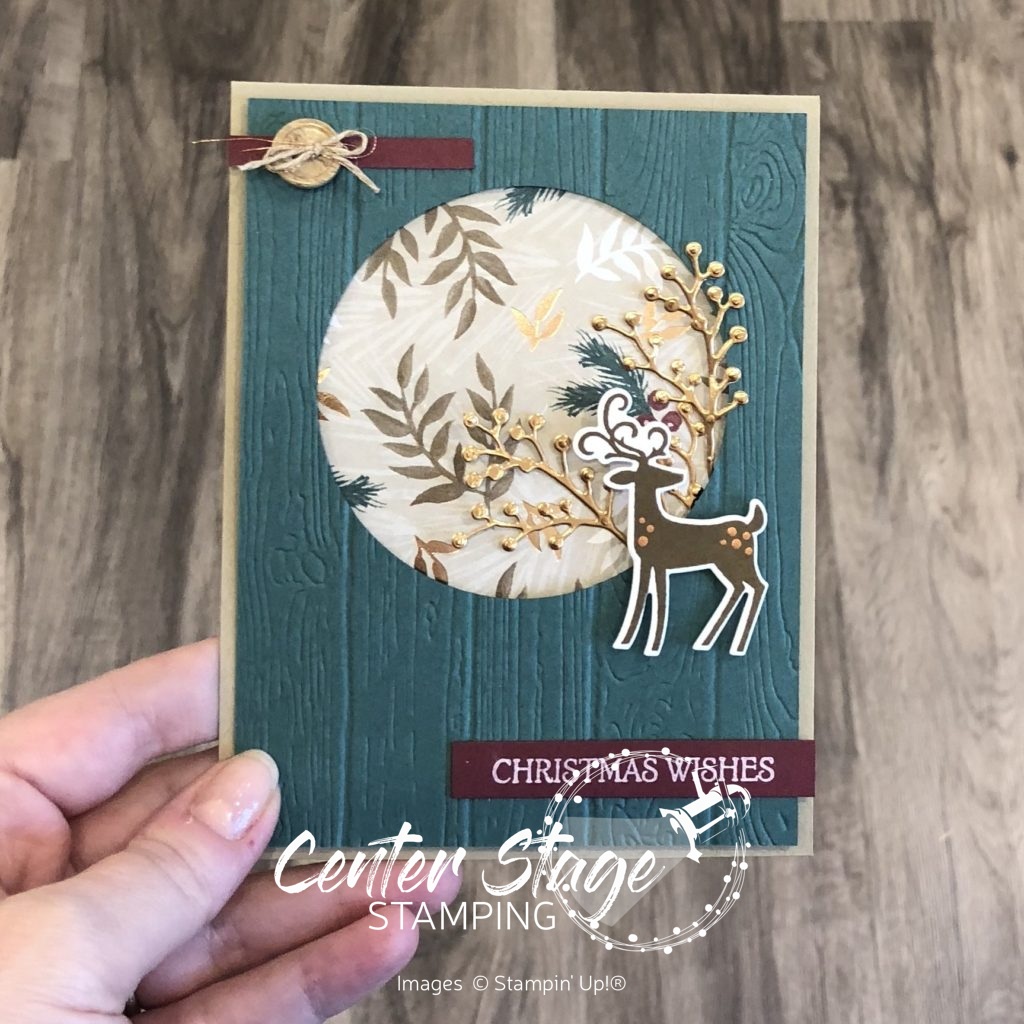
My second project today uses the card fold i learned from Ronda Wade and first showed on the Stamp Review Crew’s Bird Ballad blog hop. You can see that project HERE. I liked the fold so much so I kept playing with it.

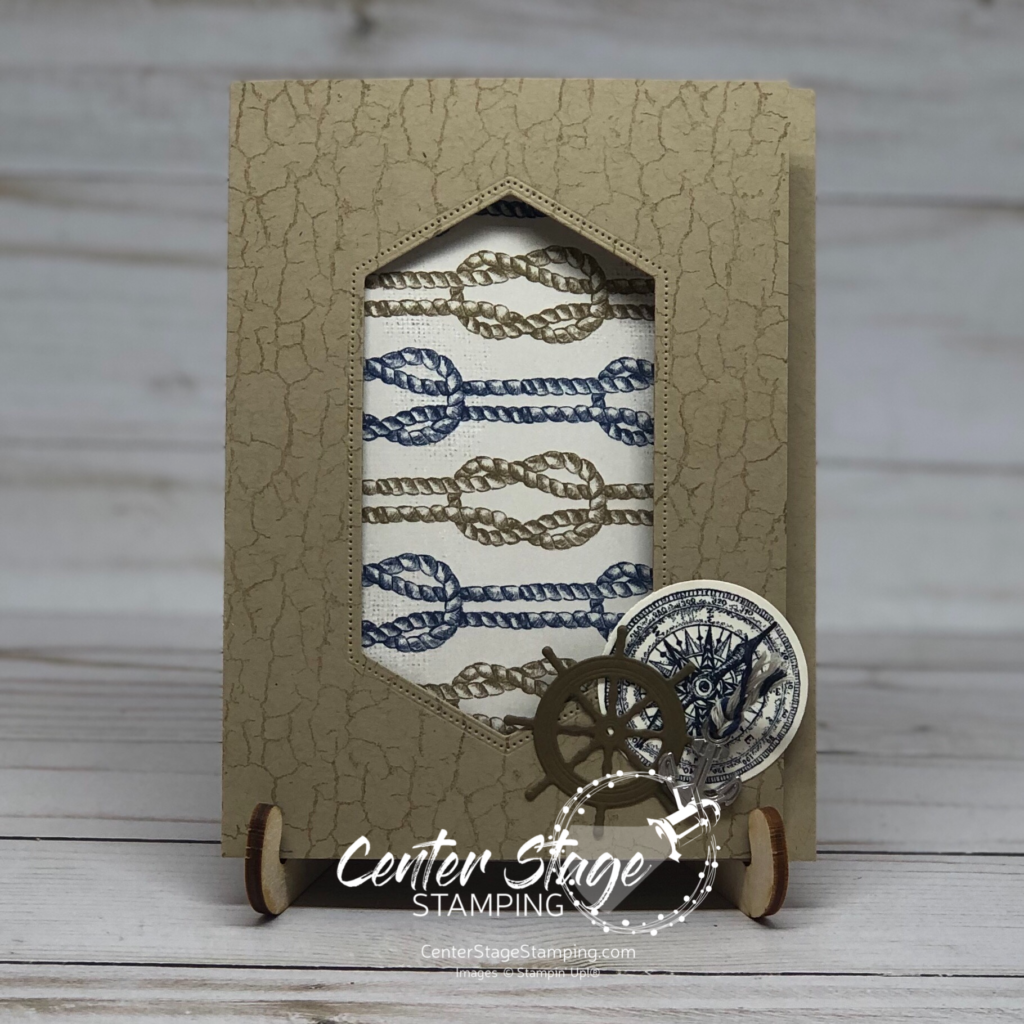
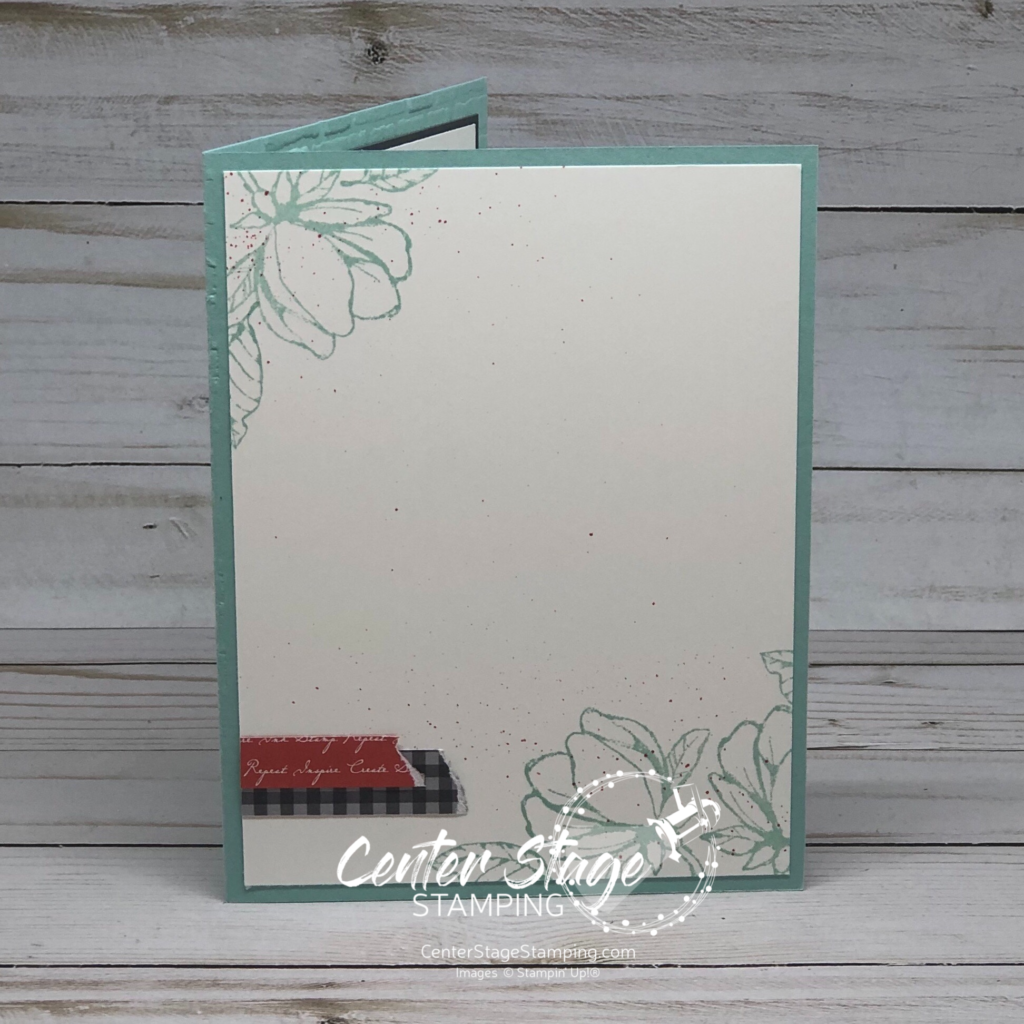
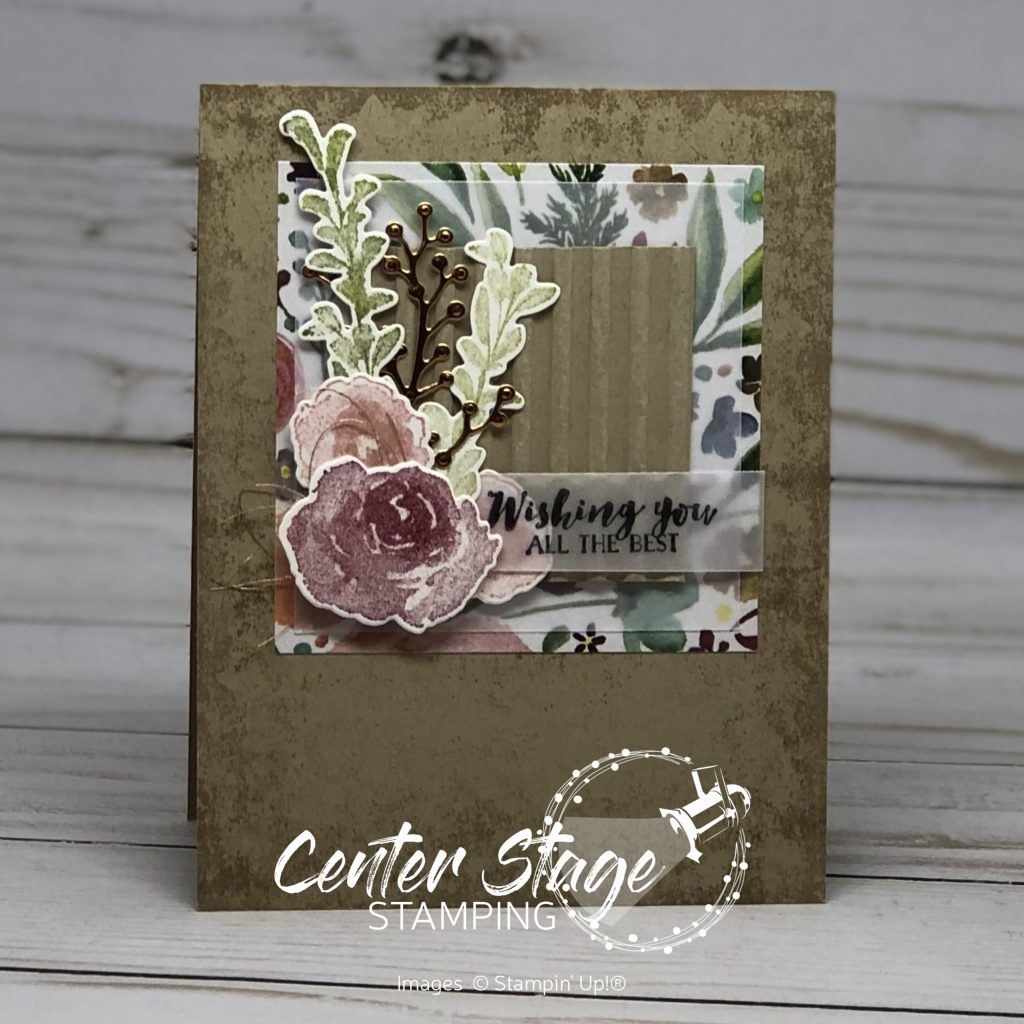
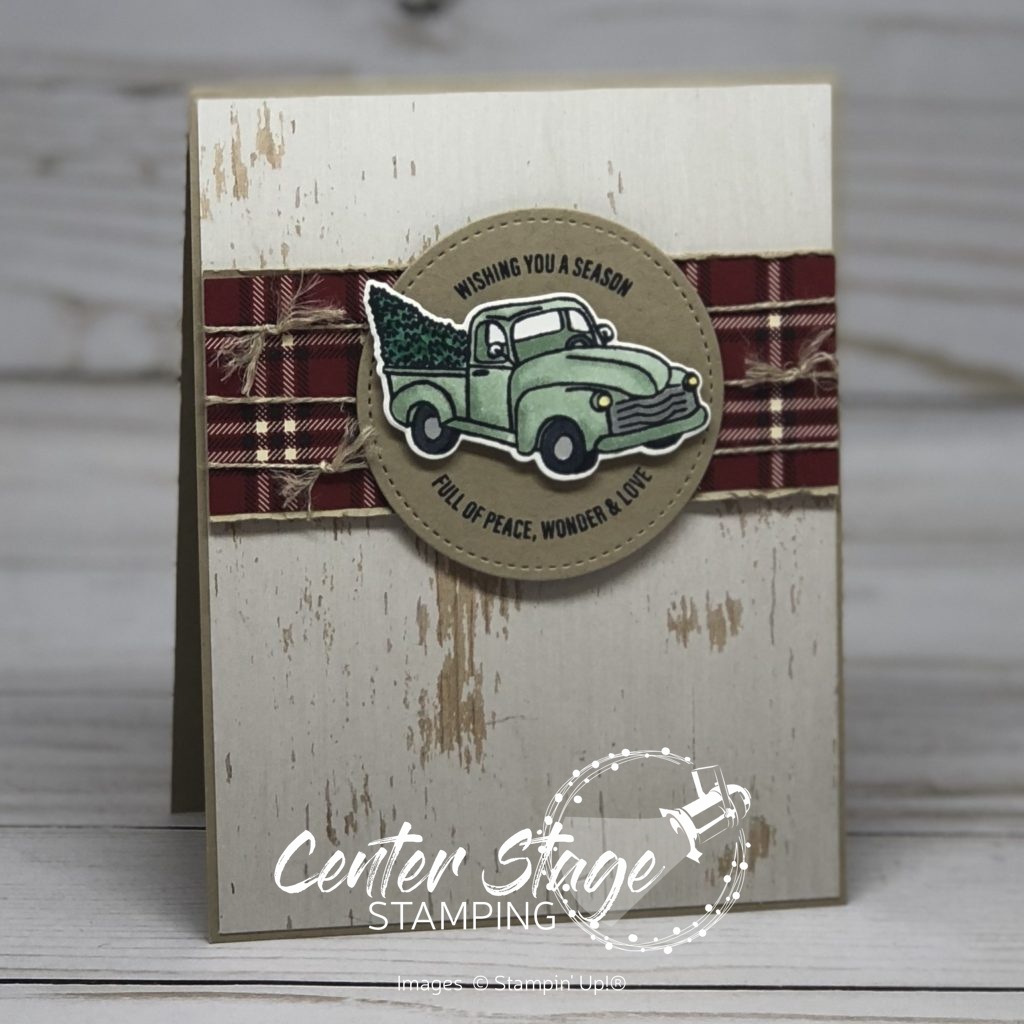
I really like the Crackle Paint background stamp with the rope pattern Come Sail Away DSP. Here is the first open:
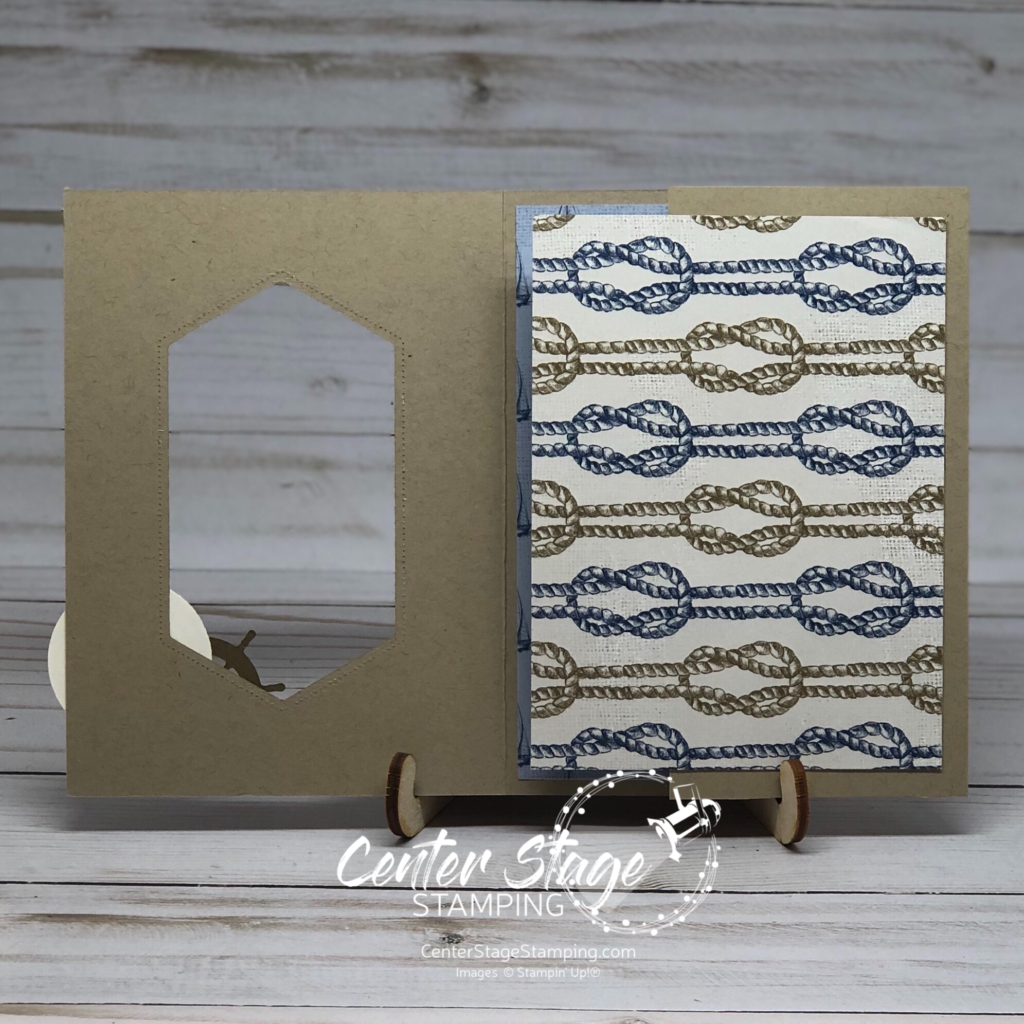
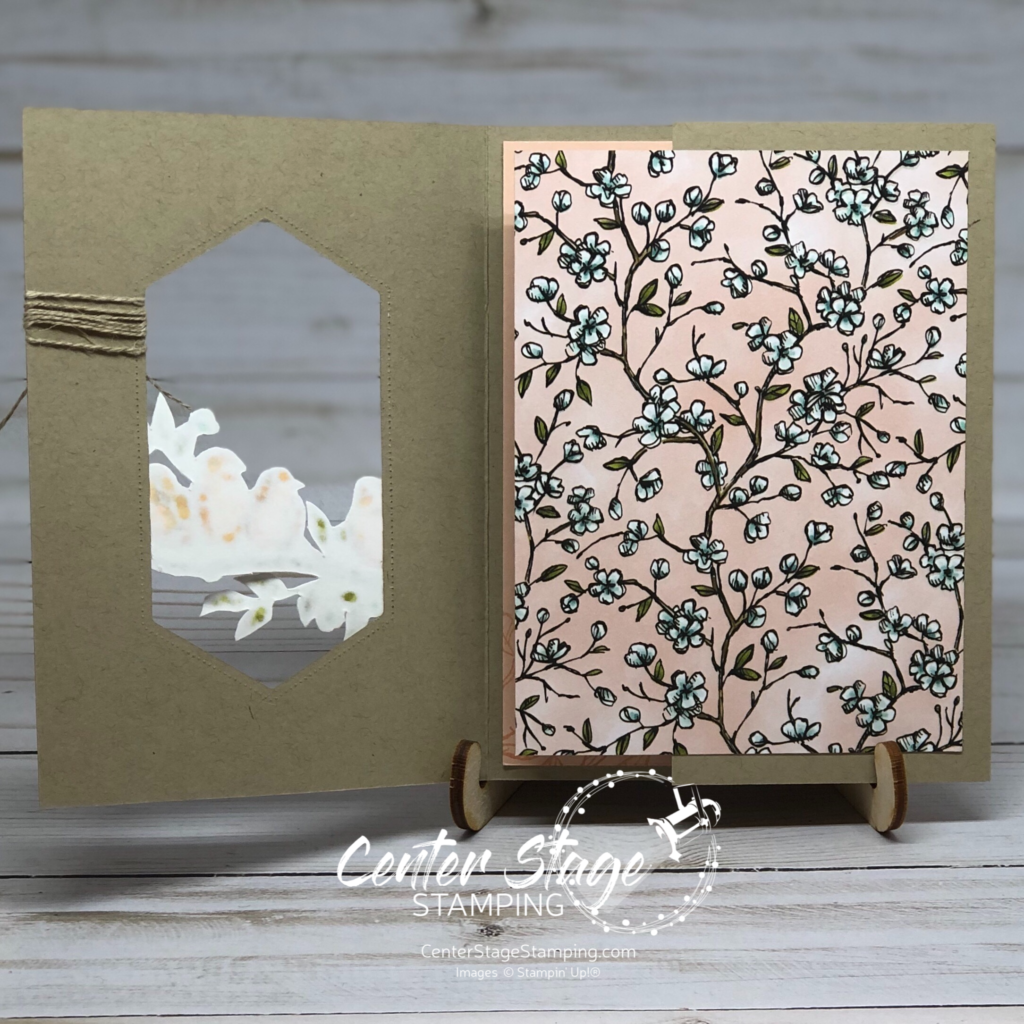
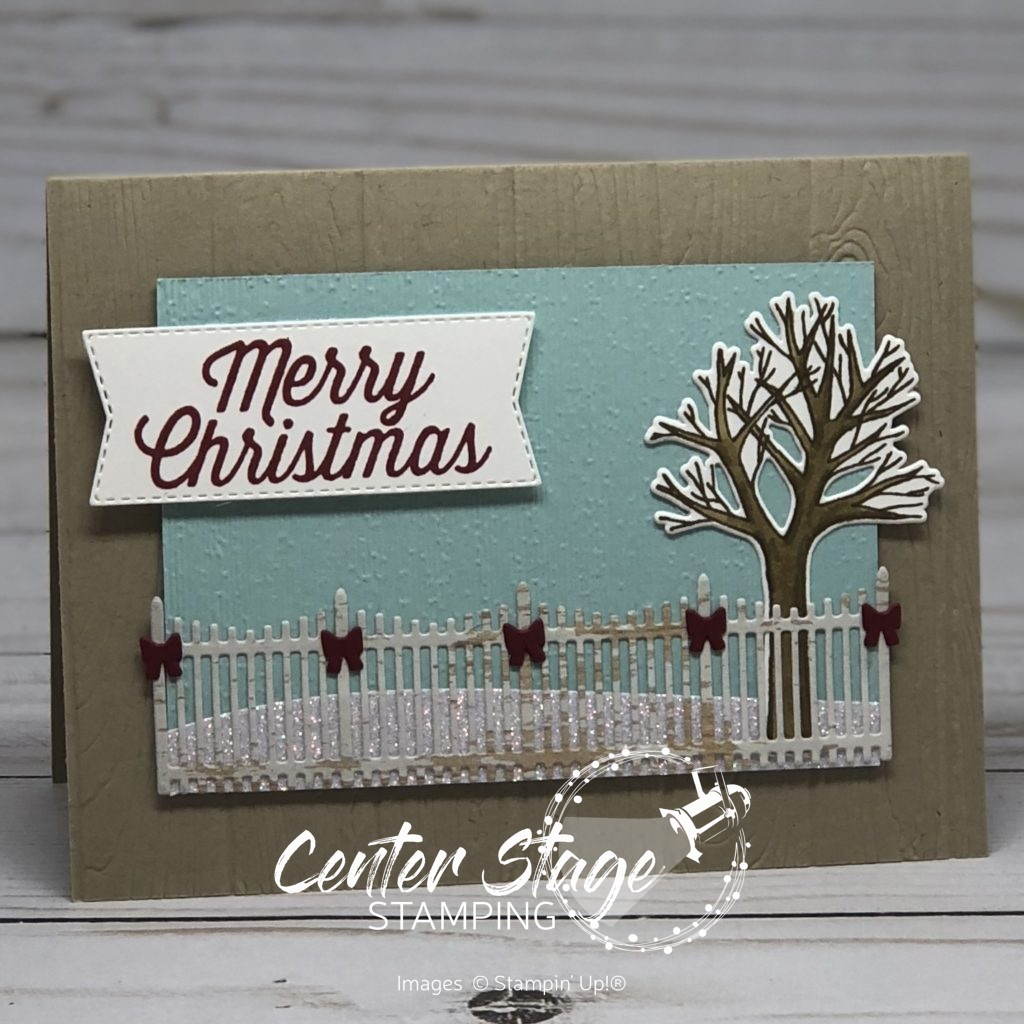
And full open:

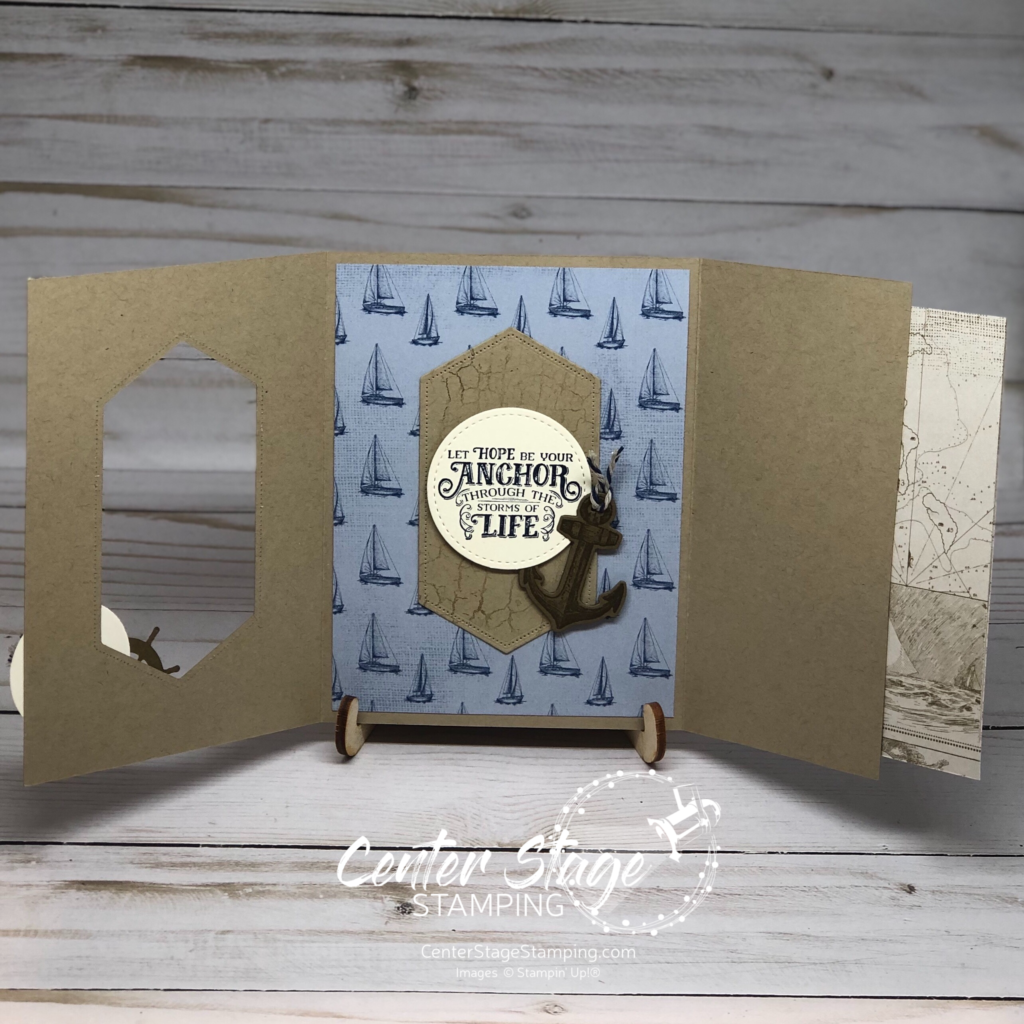
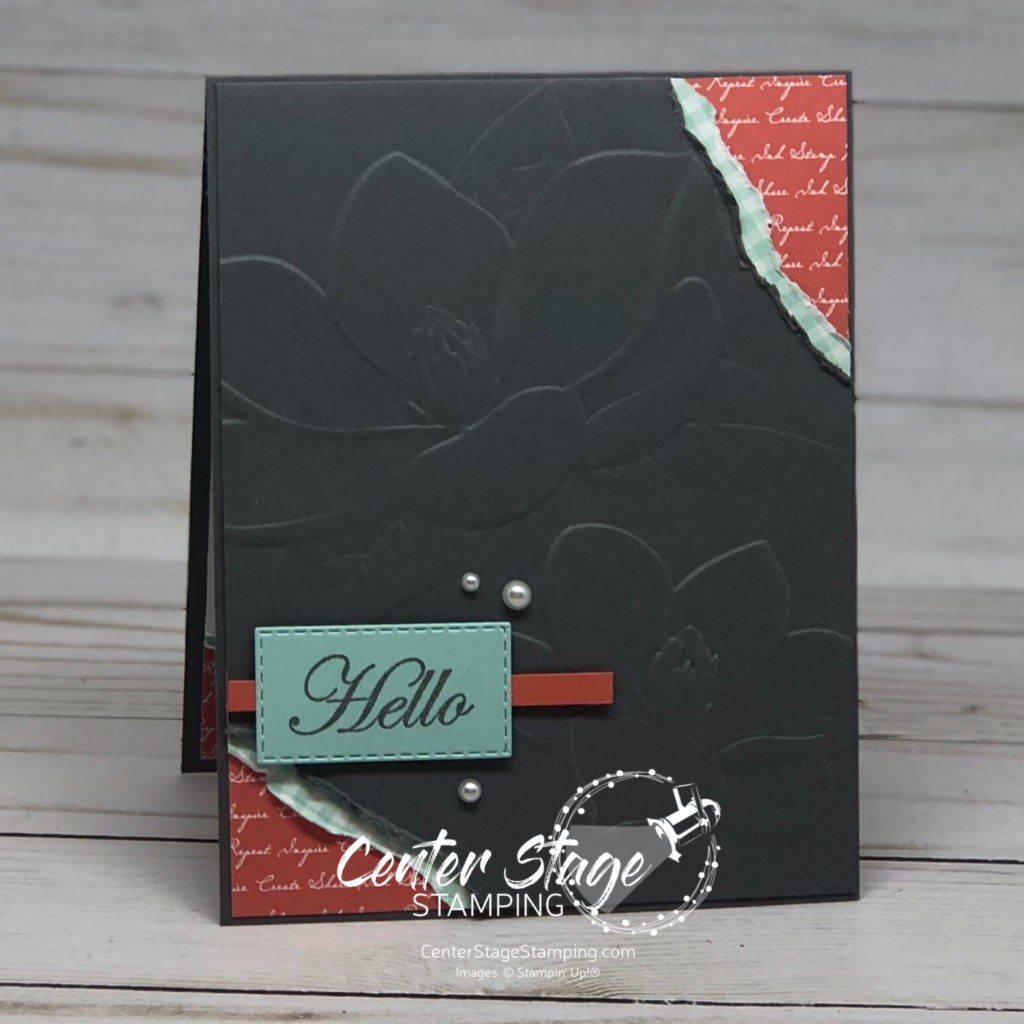
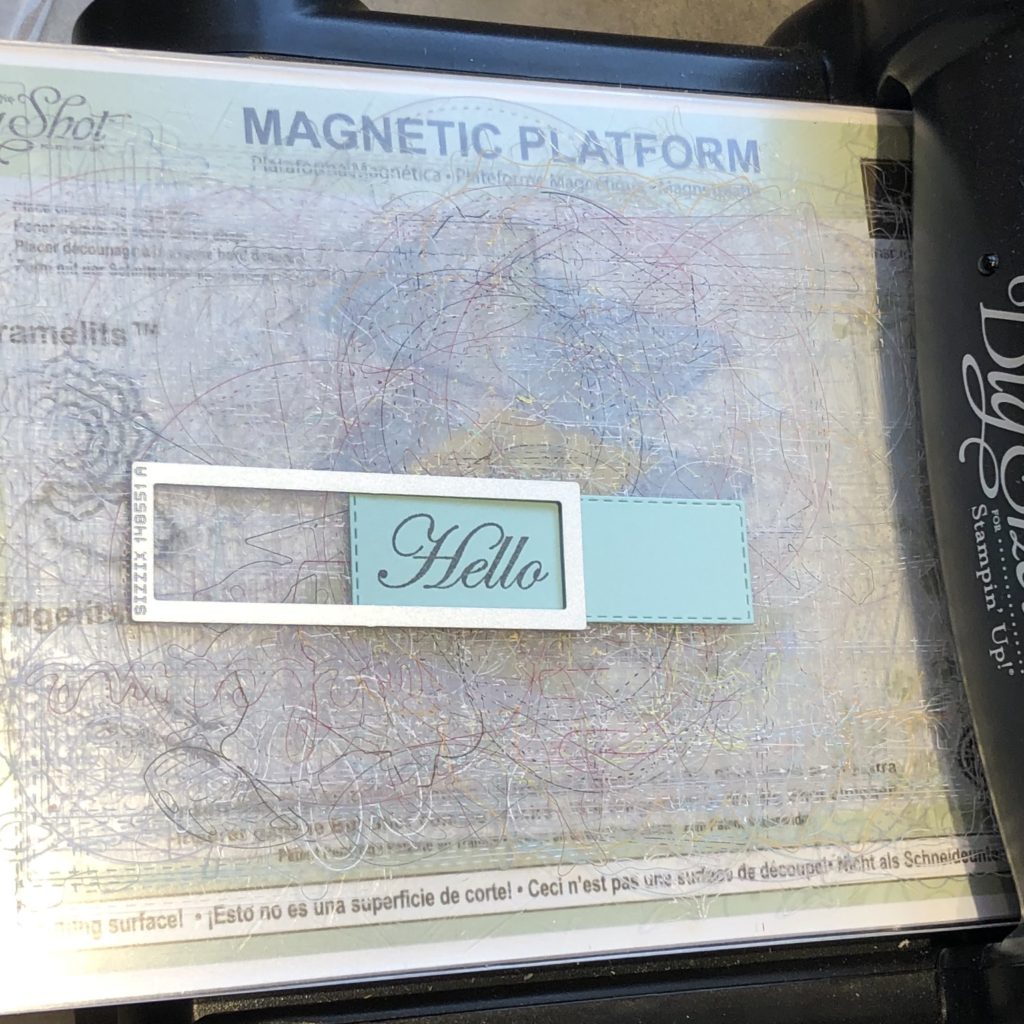
I used the stitched label that was cut out from the front of the card as a layer for the sentiment. This card fold is such a great way to showcase gorgeous designer series papers!

Are you ready for more amazing inspiration with the Sailing Home set? I’m sending you over to the talented Ann, just click on the NEXT button below. If you like you can go back to the amazing Nikki by clicking on the PREVIOUS button. Which ever way you travel be sure to hit all of the stops along the way. So much creativity and inspiration awaits!

Thanks for stopping by. Join me again to shine a spotlight on creativity!

Share with your friends:

stamp review crew: good morning magnolia

Welcome to another Stamp Review Crew blog hop! Today we are featuring the Good Morning Magnolia stamp set. This gorgeous set is part of the Magnolia Lane Suite of coordinating products, but is also very versatile on its own.

I wanted to branch out from the product suite and play with some other colors. Blue and orange are complimentary colors on the color wheel, so I paired Pool Party and the new In Color Terracotta Tile. I threw in some Basic Gray for balance.

The Pool Party card base is embossed with the new Brick and Mortar 3D Embossing Folder. The texture and detail this folder creates is amazing. The photo really doesn’t do it justice. The welcome is one of the Well Written Dies. Some Terracotta Tile spatters keep the image panel from feeling too flat. Isn’t that large magnolia stamp GORGEOUS! It inspired me to step up the inside of the card as well.


I used the smaller blossom image, some ink spatters and DSP strips. A few details on the inside really step up the card.

I really liked this color scheme, so I stuck with it for my second card.

This time I used the Magnolia 3D embossing folder. The Hello was cut out with one of the Stitched Rectangle dies. It was longer than the sentiment so I shortened it. Just line up the stitches and run it through your die cutting machine again.

Of course, I had to decorate the inside of this card as well.

When embellishing the inside of the card, use some elements from the card front. For this card it was the Designer Series Paper peeking out from the torn corner. On the first card it was the ink spatters and DSP strips.

Now continue the blog hop by clicking on the NEXT button below and check head over to see the great project Heidi has to share. Or you can click the PREVIOUS button and go back to Ann’s fantastic creations. Either way, you will want to continue through the hop to see the rest of the great projects the Stamp Review Crew has waiting!

Thanks for stopping by. Join me again to shine a spotlight on creativity!

Share with your friends:

stamp review crew: free as a bird

Time for another Stamp Review Crew Blog Hop! Today we are putting the beautiful Free As A Bird stamp set in the spotlight. This set is part of the amazing Bird Ballad Suite of products which includes the gorgeous Bird Ballad Designer Series Paper, Nested Label Dies and Bird Ballad Trinkets. (All of which I used on today’s card!)

I saw a fantastic card layout done by Ronda Wade and it inspired me to try it with these products. It is a fun tri-fold card that let’s you feature the beautiful DSP in a unique way. Here is the front of the card as it is closed. I cut a window with one of the Nested Label Dies. I love that you get the stitching on both the cut out and the negative. Next I fussy cut around the branch of birds that I had colored with my Stampin’ Blends. I wrapped some Linen Thread around the side and tied on one of the Bird Ballad Trinkets.

When you open the front of the card, you get a great view of that beautiful paper.

But, that is not where it ends! Open it one more time…

You get a peek at the reverse side of the beautiful DSP. On the center panel, I added a Petal Pink panel that I stamped on with Petal Pink ink for a tone on tone look. I used the Nested Label that I cut out from the card front for the sentiment and added a flower and leaves that I colored with Stampin’ Blends and fussy cut out.

I’m going to send you over to the talented Ann Schach. Just click on the Next Blog button below. Or you can go back to the creative Jay Soriano by clicking the Previous Blog button. Be sure to tour through the full blog hop to see the wonderful inspiration the design team has created. You can always find the full blog hop order on the Stamp Review Crew blog.

Thanks for stopping by. Join me again to shine a spotlight on creativity!

Share with your friends:

stamp review crew: piece of cake

Time for another Stamp Review Crew blog hop! Today we are shining a spotlight on Piece of Cake. This is such a fun set. I mean come on, who doesn’t like cake! As my first card says “Cake is the answer…who cares what the question is!”

I went for a bright color scheme for my first card. Bermuda Bay, Poppy Parade and I just realized I used Lemon Lime Twist which, much to my dismay, has retired. You could also use Granny Apple Green.) I used thin strip of striped Bermuda Bay DSP to balance the cakes on the opposite edge. The little heart epoxy droplet was colored with my Dark Poppy Parade Stampin’ Blends.

For my second project, I wanted to showcase the great sentiments in the set. Colors used are Pool Party, Mango Melody, Granny Apple Green and Rich Razzleberry.

What is the Stamp Review Crew? We are an international group of Stampin’ Up! demonstrators that get together to blog hop the first and third Monday of each month. For each hop we chose a single stamp set to feature. All of our hops are archived. Click here to see all of the hops!

Be sure to check out what the rest of the SRC Design Team has done with this fun set. I’m sending you over to my friend Lou or you can go back to Nikki.

Thanks for stopping by. Thank you for your comments. I really appreciate them! Join me again to shine a spotlight on creativity!

Share with your friends:

stamp review crew: lilypad lake

The Stamp Review Crew is back! Today we are featuring the wonderful Lilypad Lake. I hope you will hop through and check out the wonderful creations the design teams have to share with you!

For my first card, I went for an ombre background using Pool Party, Coastal Cabana and Bermuda Bay. I stamped the Crane in Gray granite and added a few Pool Party shadows with my aqua painter. Embossing folders help add texture and interest to an otherwise simple card. Pinewood Planks on the card base and Subtle on the Stitched Circle die cut.

My second card went a bit more rustic with the help of the Wood Textures Designer Series Paper. Reminds me of a framed painting. The sun and sentiment banner are colored with Mango Melody Stampin’ Blends.

What is the Stamp Review Crew? We are an international group of Stampin’ Up! demonstrators that get together to create projects using a specific stamp set. We blog hop on the first and third Monday of each month. I’m excited for you to see what my talented friends have created.

Thanks for stopping by. Join me again to shine a spotlight on creativity!

Share with your friends:

stamp review crew: incredible like you

After a too long hiatus, I am so happy to be back hopping with the Stamp Review Crew! We have a great blog hop featuring the fun stamp set Incredible Like You from the 2019 Occasions Catalog.

My first card features a fun floral wreath. Colors used are Flirty Flamingo, Poppy Parade, Lemon Lime Twist, Mango Melody, Granny Apple Green, and Coastal Cabana. A fun and bright greeting for a friend!

My second card has a much softer feel using Petal Pink and Soft Sea Foam. I stamped directly on the Wood Textures dsp. The dots and sentiment are embossed in white. I traced around the word amazing with my Petal Pink Stampin’ Write Marker to highlight it.

You can click the buttons below to go on to Charlet’s blog or back to Jay to check out more fantastic Incredible like you projects! As always, you can find the full blog hop roster on the Stamp Review Crew page. Join me again to shine a spotlight on creativity!

Share with your friends:

stamp review crew: first frost

Welcome to another Stamp Review Crew blog hop! *The Stamp Review Crew is a group of International Stampin’ Up! demonstrators who want to show you how much you can do with ONE stamp set. Each edition the SR Crew will showcase a new featured stamp set. Each stop along the hop will show you a different idea, or ideas using that set!* Today we are hopping to bring you some inspiration for the beautiful First Frost stamp set.  This set is part of the gorgeous Frosted Floral Suite in the 2018 Holiday Catalog.  It is perfect for occasions year round.  If you have already started the hop, you have come here from Nikki and her beautiful creation.

My first card pairs this set with the stunning Frosted Floral specialty dsp/ . This paper has a beautiful pearlized frosted look.  Trust me.  The picture doesn’t capture its true beauty.

First Frost: Wishing You All the Best - Center Stage Stamping

I cut a slightly smaller square of vellum to soften the dsp and layered a small Crumb Cake square that I ran through the Corrugated Textured Embossing Folder.I stamped the flowers and stems on Shimmer White card stock to carry over the shimmer.  The dark stem is actually cut from Copper foil and there is a bit of Copper Thread peeking behind the large flower.  The sentiment is stamped on vellum which is only adhered behind the flower. The edges of the card base were stamped with an image from the Timeless Textures set to give it a distressed look.

For my second card I had to pair this with what else but the Wood Textures dsp.  I seriously don’t know what I am going to do when this stuff retires.  I better start hoarding it soon! (Who am I kidding, I have already been hoarding it!)

First Frost: good cheer - Center Stage Stamping

I stamped the flower in Flirty Flamingo and the leaves in Lemon Lime twist and Tranquil Tide and cut them out with the coordinating Frosted Bouquet Framelits. I added some Champagne Shimmer Paint on the berries of the vellum sprig.  The sentiment label is wrapped with Linen Thread and layered on a Pool Party panel.

Thanks for stopping by!  I am sending you over to Holly for some more gorgeous inspiration!  Enjoy the hop and join me again to shine a spotlight on creativity!


Share with your friends:

stamp review crew: farm house Christmas

The Stamp Review Crew is starting off November with a fun holiday set: Farmhouse Christmas!  This set is loaded with possibilities!  Make sure you go through all of the stops on the blog hop.  You don’t want to miss any of the amazing creations we have in store for you! As always, you can find the full blog hop list on the Stamp Review Crew page.

Growing up in northern Minnesota, this set brings back a lot of great holiday memories.  My three cards today draw from those memories.  For my first card, I wanted to feature the coordinating Festive Farmhouse DSP.

Farmhouse Christmas: festive farmhouse - Center Stage Stamping

Of course, this set and DSP pairs wonderfully with the Wood Textures DSP.  (Then again, what doesn’t!?)  The card base and stitched circle are Pear Pizazz.  I took a couple of leaves off of one of the Boxwood Wreath embellishments and three of the red rhinestones to create the holly.  I think it is the perfect little embellishment.


Farmhouse Christmas: tuck - Center Stage Stamping

For this next card, I wanted to feature the fantastic little truck.  And again I went with the Festive Farmhouse and Wood Textures DSP’s.  What can I say.  When it works, it works!  I colored the truck with Mint Macron and the tree with Shaded Spruce Stampin’ Blends.

Farmhouse Christmas: tree and fence - Center Stage Stamping

This last card is all about texture with embossing folders and framelits.  The Crumb Cake card base is embossed with the Pinewood Planks and the Pool Party panel is embossed with the Subtle embossing folder.  I cut a piece of Sparkle Glimmer Paper with the snow mound die in the coordinating Farmhouse Framelits and layered it behind the fence cut from Wood Textures DSP.  The tree is cut out and colored with Stampin’ Blends.  Don’t you just love those tiny little red bows?  There is a die in the Farmhouse Framelits that cuts out six off them at once! So much fun!

Did these projects stir up any nostalgic holiday memories for you?  Leave me a comment, I’d love to know!  Now for some more creative inspiration, I am sending you over to Holly and her fantastic creations! or you can always go back to Stesha and her amazing creativity.


Thanks for stopping by.  Join me again to put a spotlight on creativity!

Share with your friends:

stamp review crew: little twinkle

It’s time for a bonus round with the Stamp Review Crew!  Join us for an inspirational blog hop shining the spotlight on Little Twinkle!  This is a very fun set and is part of the sweet Twinkle Twinkle product suite. (See what I did there?) I have previously shared a couple of cards I made with this suite.  You can see them HERE and HERE.  This time around I wanted to try something different.  I decided I wasn’t going to use the coordinating Tinkle Twinkle Designer Series Paper or similar colors – with the exception of Night of Navy.  I also wanted to see if I could come up with something other than a baby card.

Little Twinkle: Little Star - Center Stage Stamping

This card started with a White card base embossed with the Oh My Stars embossing folder.  I stamped the sentiment and stars in Night of Navy on a smaller white panel.  I used stars and dots punched from the Twinkle Builder punch in Lemon Lime Twist, Gorgeous Grape (for some reason, the Gorgeous Grape stars look Navy in the photo) and Coastal Cabana and glued them on randomly. The Take Your Pick Tool came in handy for this task!  I added a strip of Night of Navy striped pattern from the Neutrals DSP stack and tied some Night of Navy Medium Bakers Twine.  I love the bright color pops on this card.

Little Twinkle: a Star is Born - Center Stage Stamping

For this next card, I decided to have a go with my Brushos.  Would you believe I have had them since April and this is the first time I have used them!  Crazy, huh?  I started with a pice of watercolor paper.  I wet it down and sprinkled some Prussian Blue brusho on.  I moved it around with my aqua painter and added more Brusho until I got the depth of color I wanted.  Once this panel was completely dry, I stamped the small stars and embossed them in gold.  I stamped the star in Night of Navy and cut it out.  I added some Gold Foil, Gold Glimmer Paper and Gold sequin trim behind the star for  extra texture contrast. The watercolor paper panel  is layered on Gold Glimmer paper and a Nigh of Navy card base.  This would be a great card for many different occasions!

I hope now you look beyond just baby cards for this fun set.  Make sure you travel through the entire blog hop for more amazing Little Twinkle inspiration! You can head on over to Tanya or go back to Stesha and remember you can always find the full blog hop list on the Stamp Review Crew page.

Thanks for stopping by!  Join me again to put a spotlight on creativity!


Share with your friends:

stamp review crew: dashing deer

Welcome to another Stamp Review Crew blog hop!  This time we are featuring the fantastic Dashing Deer stamp set!  I have been having a lot of fun creating with this set.  And to think, I almost didn’t get it.  What was I thinking?!  I am so glad I came to my senses and ordered it right away.  I LOVE it!  I have featured it on two previous blog post that you can find here and here.  For today’s spotlight, I decided to showcase two different looks for the set.  The first is a very deep, rich card pairing Dashing Deer with the Joyous Noel Designer Series Paper.

Dashing Deer: Christmas Wishes - Center Stage Stamping

I started with a Crumb Cake card base.  I embossed the Tranquil Tide panel with the Pinewood Planks Textured Impressions Embossing Folder and used my Layering Circles Framelits to cut out a circle in the panel.  I backed this with some of the Joyous Noel DSP.  I stamped the little deer in Soft Suede and cut him out with the coordinating Detailed Deer Thinlit.  I added a few dots of Copper Shimmer Paint for some extra detail. I cut out the twig spray from the Frosted Bouquet Thinlits in copper foil paper and adhered it poking out of the circle.  The sentiment is embossed in White on Merry Merlot card stock with a smaller strip at the top of the card with a True Gentleman button tied with Linen Thread.  My second card has a much lighter color scheme.

Dashing Deer duo - Center Stage Stamping

For this card I wanted a winter white woods look. The white panel is embossed with the Woodland embossing folder.  I stamped the large deer with Gray Granite ink on Sahara Sand card stock.  The smaller deer is stamped with Sahara Sand ink on Sahara Sand card stock.  I added some Frost White Shimmer Paint dots on the smaller deer.  The sentiment is stamped in Early Espresso ink on Sahara Sand card stock with Linen Thread wrapped on the ends.  I love these two deer together.

I am now going to send you over to the wonderfully creative Tanya.  Wait until you see what she can do with this great set!  Or you can go back to Lou and her beautiful projects.  Either way, make sure to go all the way through the blog hop – you won’t want to miss any of the inspiration for the gorgeous stamp set!  You can find the full blog hop order on the Stamp Review Crew page.

That’s a wrap for me.  Join me again to put a spotlight on creativity!

Share with your friends: