Painted Poppies

stamp review crew: itty bitty greetings

Hello friends! I’m so glad you are joining me today! I’m hopping with the Stamp Review Crew and we are shining a spotlight on the Itty Bitty greetings stamp set. I get to kick things off as the first stop on today’s circuit!

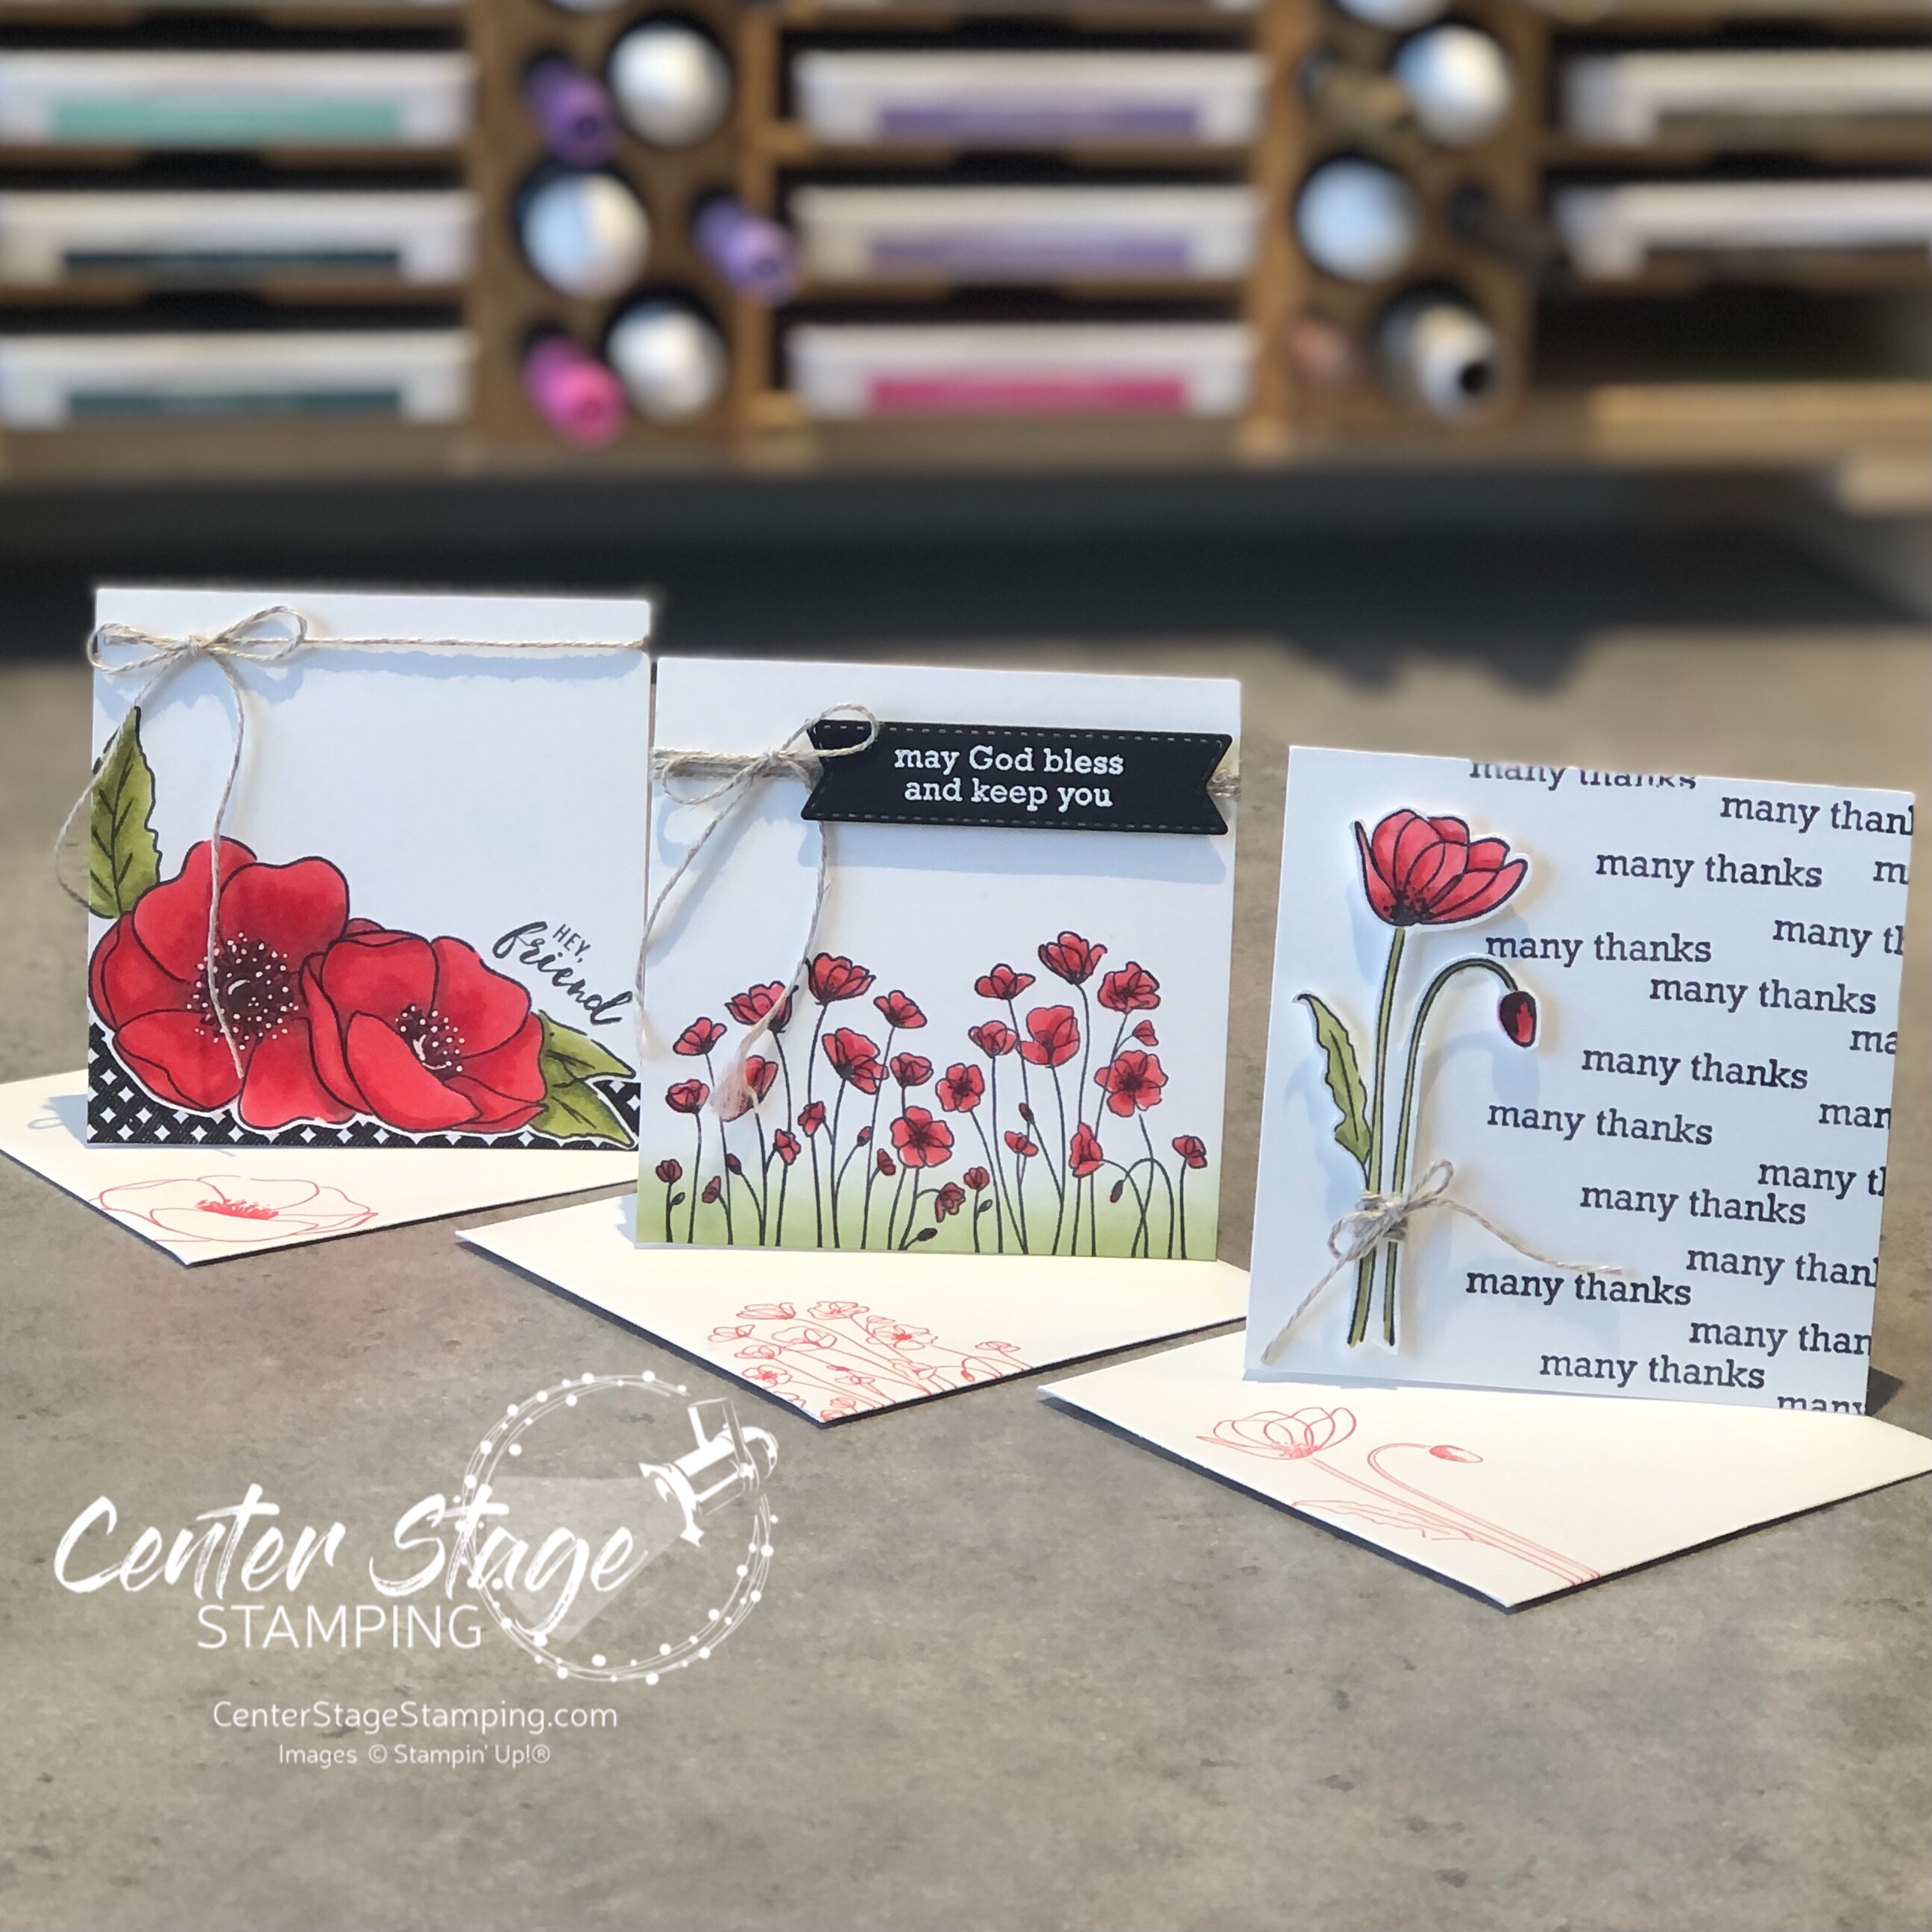
For my projects, I paired Itty Bitty Greetings with Painted Poppies. I created a trio of 3″x3″ cards. This fun size works really well with the small sentiments.

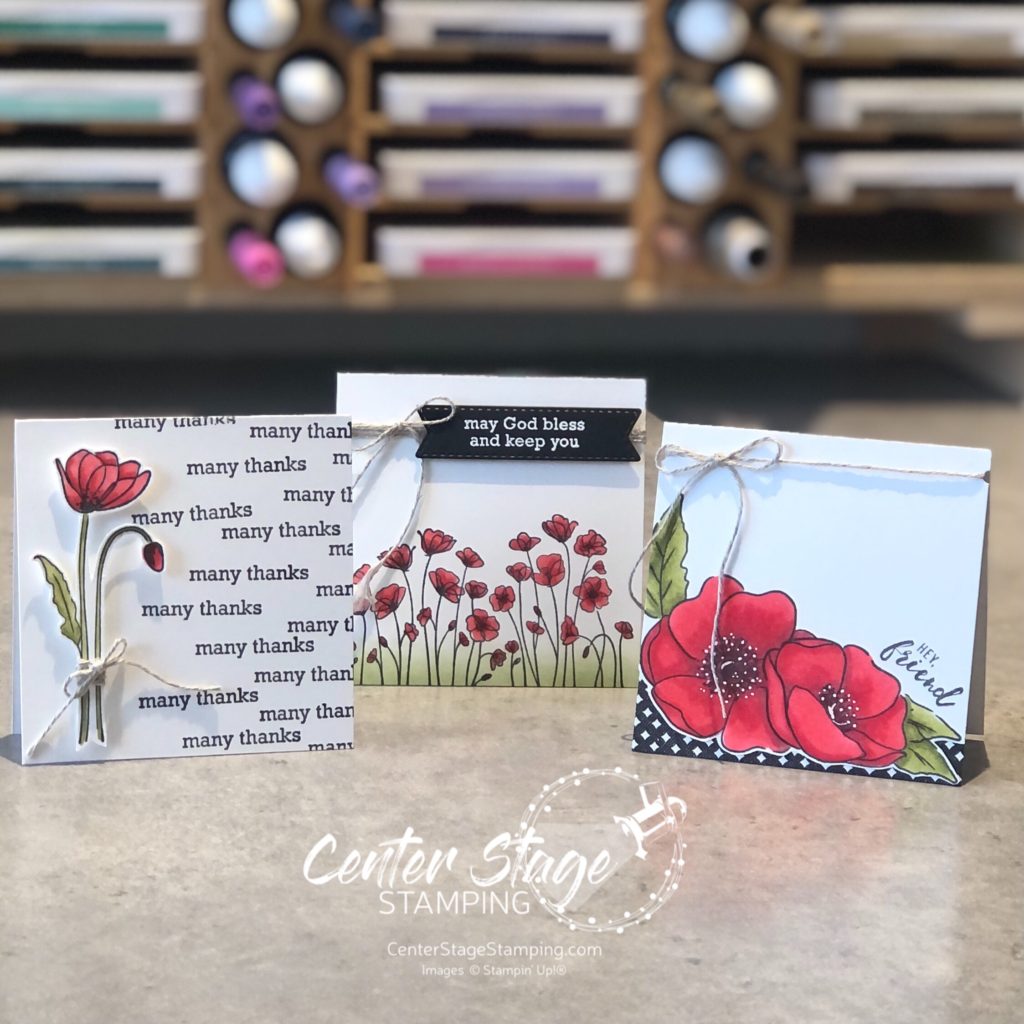
I stuck with a black and white color scheme with a pop of Poppy Parade and Old Olive. Flowers were colored with Stampin’ Blends markers. Let’s take a closer look –

I fussy cut the flower and popped it up on dimensionals. I also stamped the image on the envelope in Poppy Parade.

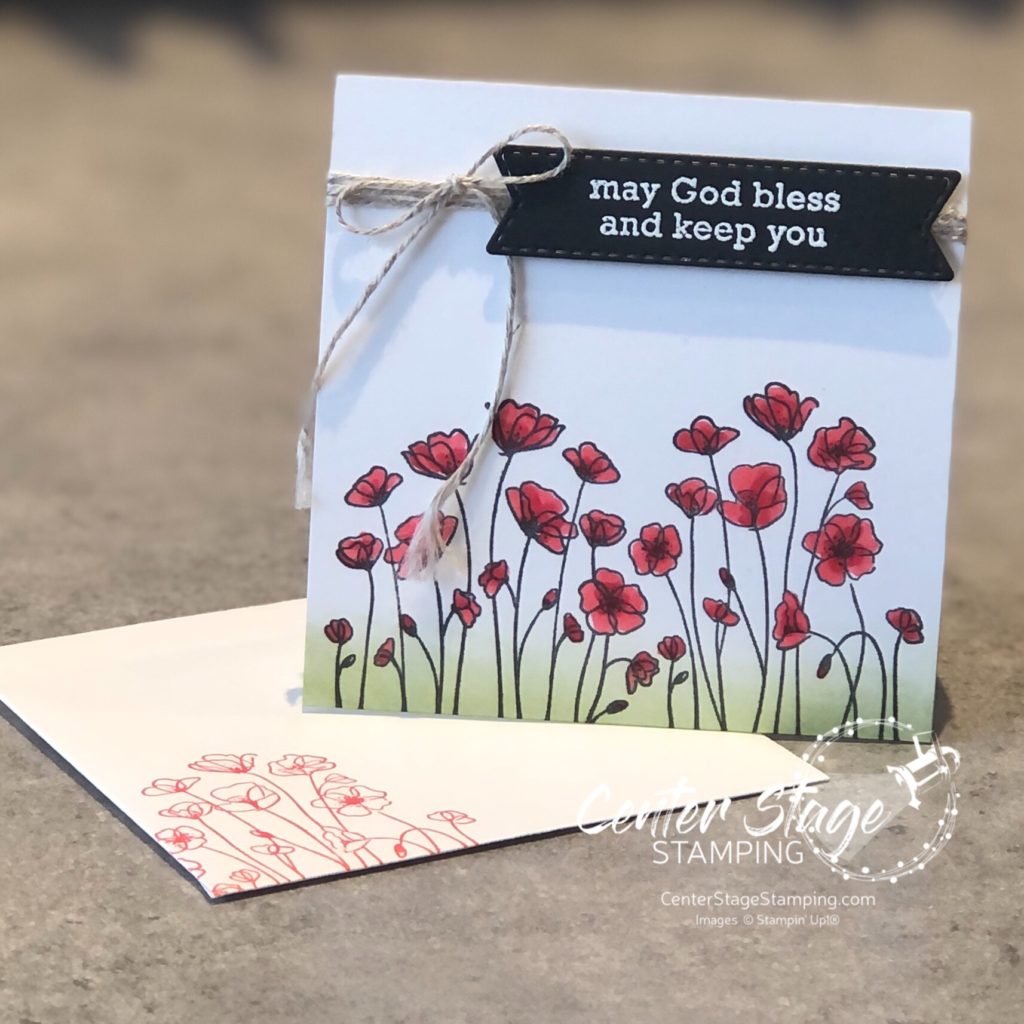
Here I used a blending brush and Old Olive ink pad to add some grass to ground the image.

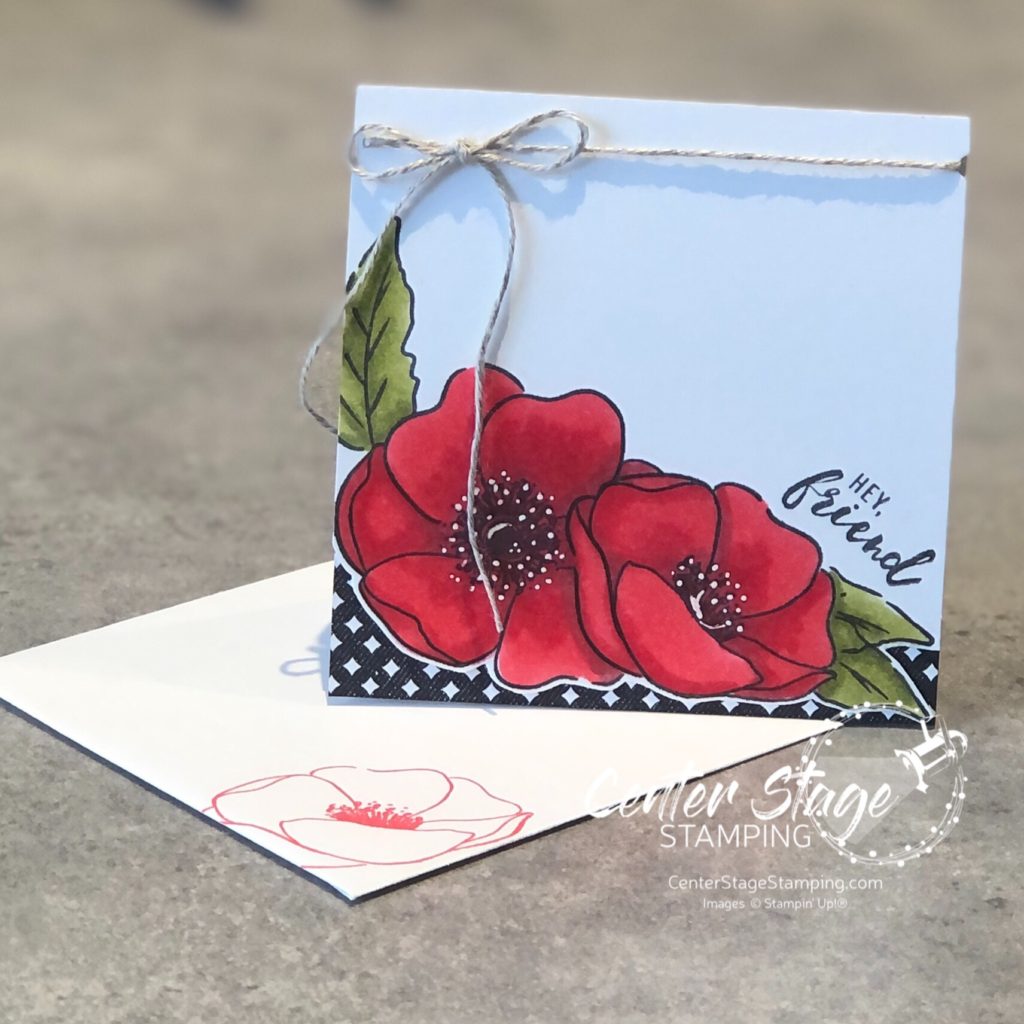
For this card, I fussy cut around the bottom edge and added a bit of True Love DSP. I used a white gel pen to add details to the flower centers.

Itty Bitty Greetings is a wonderful, versatile stamp set. Let’s check out what the rest of the SRC Design Team has for you! Head on over to Cindy by clicking on the NEXT button below. Or you can take the hop in reverse and go to Mike by clicking on the PREVIOUS button below.

Thanks for stopping by! Join me again to shine a spotlight on creativity!

Share with your friends:

stamp review crew: painted poppies

Hello crafty friends! I’m so happy to be hopping with the super creative Stamp Review Crew Design Team! Today we are shining a spotlight on Painted Poppies. This beautiful set is in the current Stampin’ Up! mini catalog and is part of a beautiful suite of products, including coordinating dies and some gorgeous designer series paper.

For stamp sets that are part of a product suite like this, I try to create a project or two not using any of the coordinating products. It helps me find more versatility in the stamp set. That’s what I did for today’s projects.

For this first card, I did a simple watercolor smooshing to create a background to stand out against images stamped in black.

I used Cherry Cobbler, Terracotta Tile and Crushed Curry Stampin’ Write markers and scribbled them on my silicon mat. Next I spritzed the mat with water and laid my Whisper White (thick) panel on to pick up the color. This technique works better with watercolor paper, but I wanted a smooth surface. You do have to be careful not to over saturate the Whisper White card stock or it will pill. Let the panel completely dry before stamping the image in Memento Black ink.

My second card uses a much bolder color scheme. I started by stamping the flower images in VersaMark ink and embossing them with white embossing powder on watercolor paper.

I did a watercolor wash across the panel, doing one color section at a time. Be sure to let dry between colors to control color bleeding. I used Daffodil Delight, Lovely Lipstick, Pumpkin Pie, Pretty Peacock, Gorgeous Grape, and Coastal Cabana. The card base was embossed with the Brick&Mortar 3D embossing folder. I painted the grout lines with a light wash of Smokey Slate to help create additional depth. The sentiment is from Very Versailles stamp set.

Thanks for stopping by! Be sure to check out the full blog hop for more inspirational projects featuring this beautiful stamp set! You can head on over to the talented Cindy by clicking on the NEXT button below or you can go back to the creative Nikki by clicking on the PREVIOUS button.

Thanks for stopping by! Join me again to shine a spotlight on creativity!

Share with your friends:

peaceful poppies

Ready for sneak peek of a GORGEOUS suite from the upcoming Stampin’ Up! 2020 Mini Catalog!?!? This was one of out make&take projects from Stampin’ Up! OnStage last month. One of my favorite things about attending Stampin’ Up! events is getting a sneak peek at NEW products and getting to create with them. Introducing the stunning Peaceful Poppies Suite…

This card features two new stamp sets, beautiful designer series paper and new ribbon. Check this out…The ribbon is Whisper White Crinkled Seam Binding. What’s that? The ribbon on the card looks green, you say? Yes, yes it does. How did we do that? We STAMPED ON IT! Seriously, stamped right on the ribbon. Think of the possibilities!!!!

Thanks for stopping by. Join me again for more sneak peeks and to shine a spotlight on creativity!

Share with your friends: