Friend

everything is rosy dear friend

Well, it is May 23 and Minnesota weather is still yucky. I want a spring do over. Remind me why do I live here again? I guess I will just keep bringing out the spring in my craft room by creating with bright colors and flowers. The Everything IS Rosy Medley from Stampin’ Up! is currently in a prominent place on my desk.

: Dear Friend card - Center Stage Stamping

I had to throw in my rose gold pineapple in the back ground again. I LOVE this designer series paper. The Rose Gold accents are just ah-mazing! I need more of it. I added the little dots of Rose Gold shimmer paint with the stylus tip of my Take Your Pick tool. I LOVE the Everything Rosy medley. Especially all the glorious ROSE GOLD accents. It fits perfectly in my studio which is full of rose gold accents. Here’s a look at the top corner of my Ikea Kallax shelf:

And check out these gorgeous necklaces my friend Michelle over at Stampin’ Robin made for me with the Everything is Rosy dsp!

Love, love, LOVE them! Thanks for stopping by. Join me again to shine a spotlight on creativity!

Share with your friends:

Posted in 3D, Create, Friend | Comments Off on everything is rosy dear friend

stamp review crew: incredible like you

After a too long hiatus, I am so happy to be back hopping with the Stamp Review Crew! We have a great blog hop featuring the fun stamp set Incredible Like You from the 2019 Occasions Catalog.

My first card features a fun floral wreath. Colors used are Flirty Flamingo, Poppy Parade, Lemon Lime Twist, Mango Melody, Granny Apple Green, and Coastal Cabana. A fun and bright greeting for a friend!

My second card has a much softer feel using Petal Pink and Soft Sea Foam. I stamped directly on the Wood Textures dsp. The dots and sentiment are embossed in white. I traced around the word amazing with my Petal Pink Stampin’ Write Marker to highlight it.

You can click the buttons below to go on to Charlet’s blog or back to Jay to check out more fantastic Incredible like you projects! As always, you can find the full blog hop roster on the Stamp Review Crew page. Join me again to shine a spotlight on creativity!

Share with your friends:

stamp review crew: waterfront

Welcome back to another Stamp Review Crew blog hop!  I’m so glad you have joined us as we put the Waterfront stamp set in the spotlight.  This set is a lot of fun to play with and creates wonderful watercolor style landscapes and more when you let your creativity cut loose.  I have to admit, I have had the set for several months, but this is the first time I have created anything with it.  I assure you, it won’t be the last!

Waterfront: Friends make the good times better - Center Stage Stamping

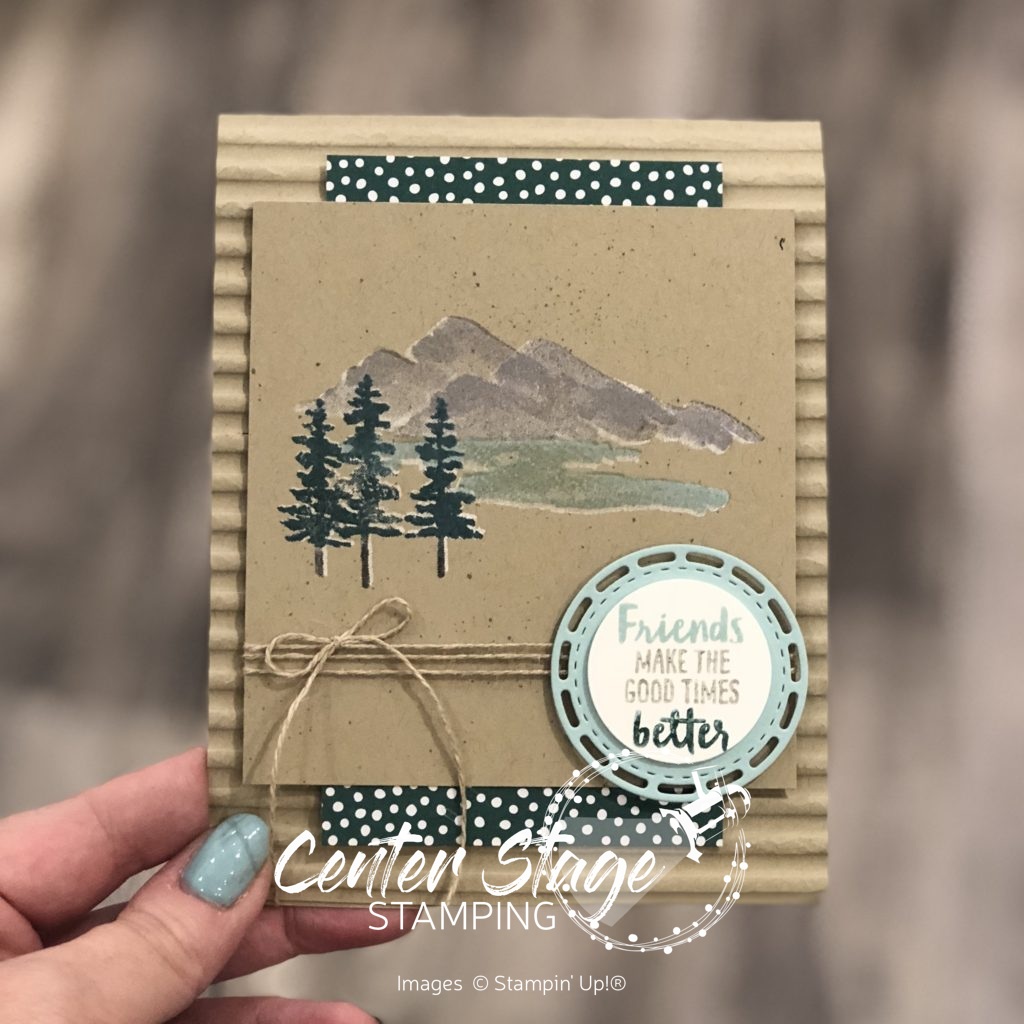
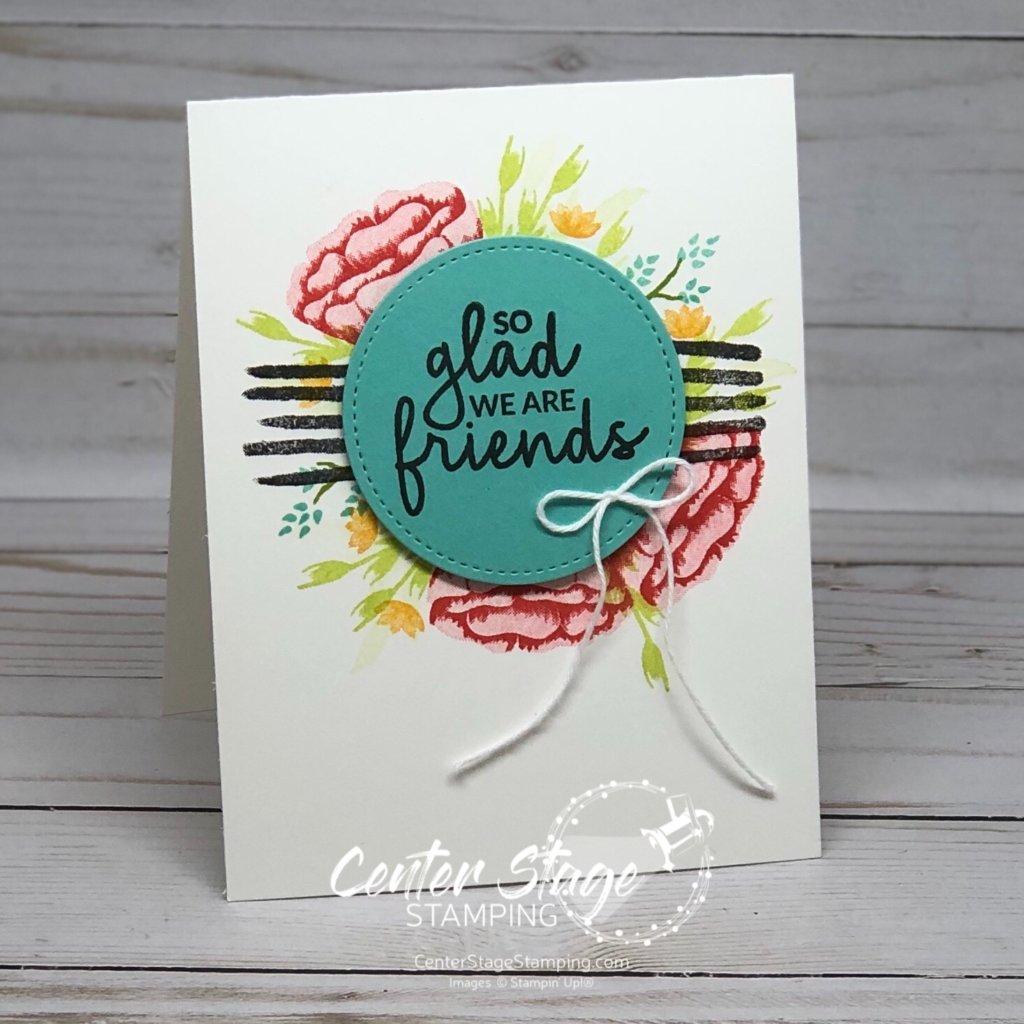
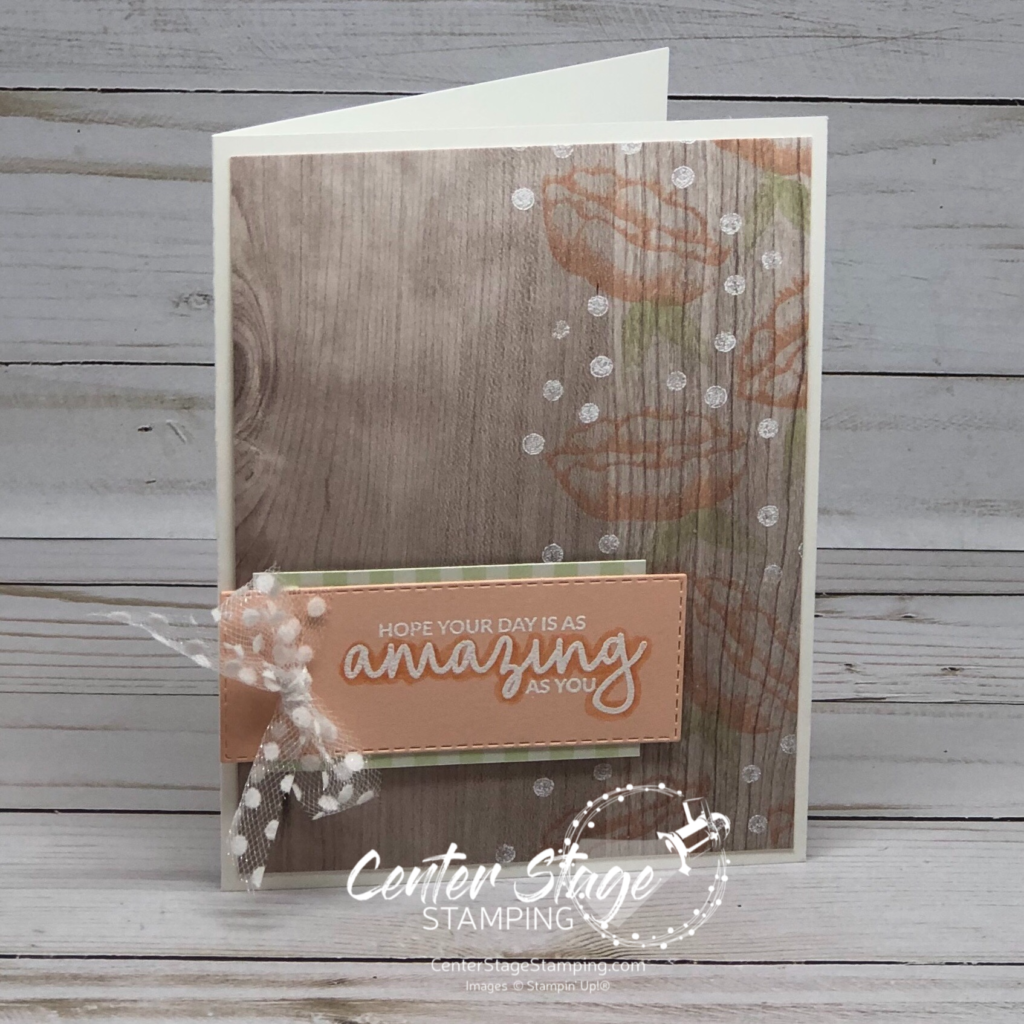
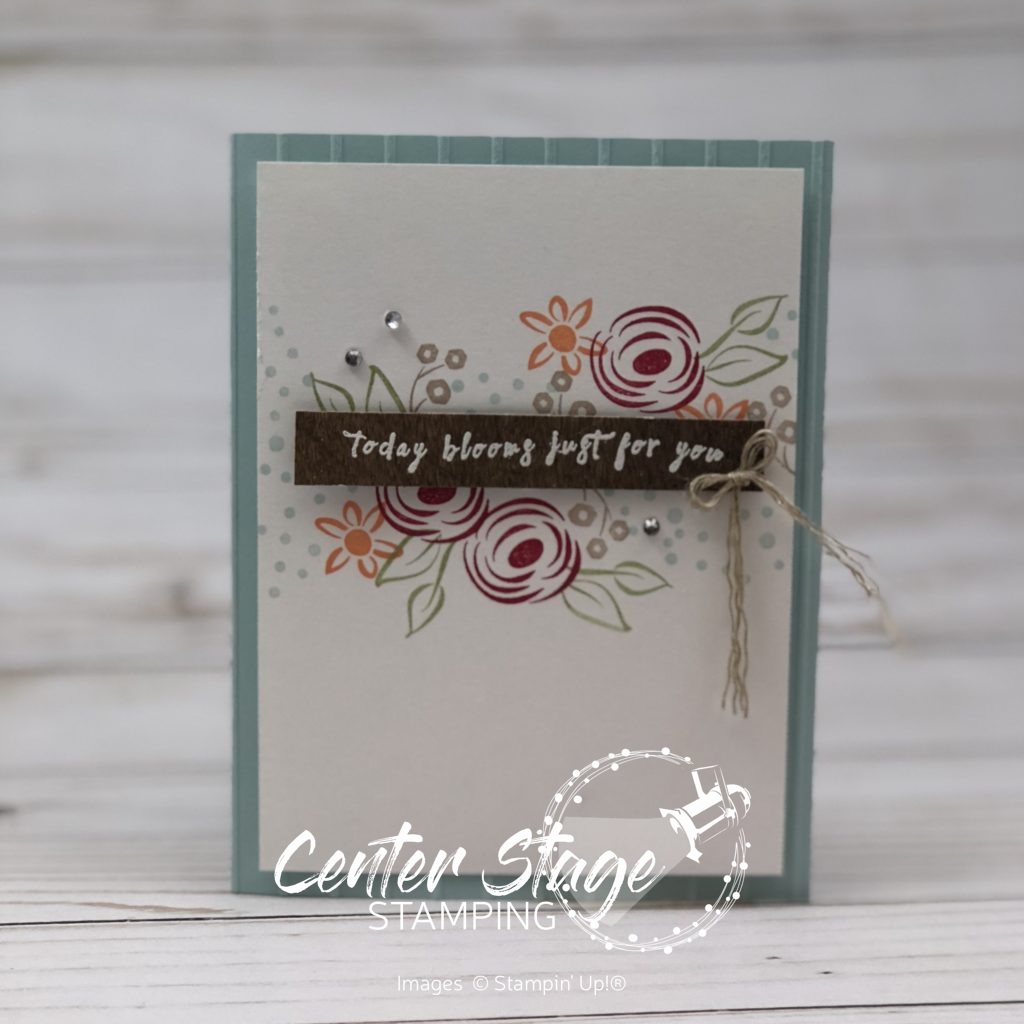
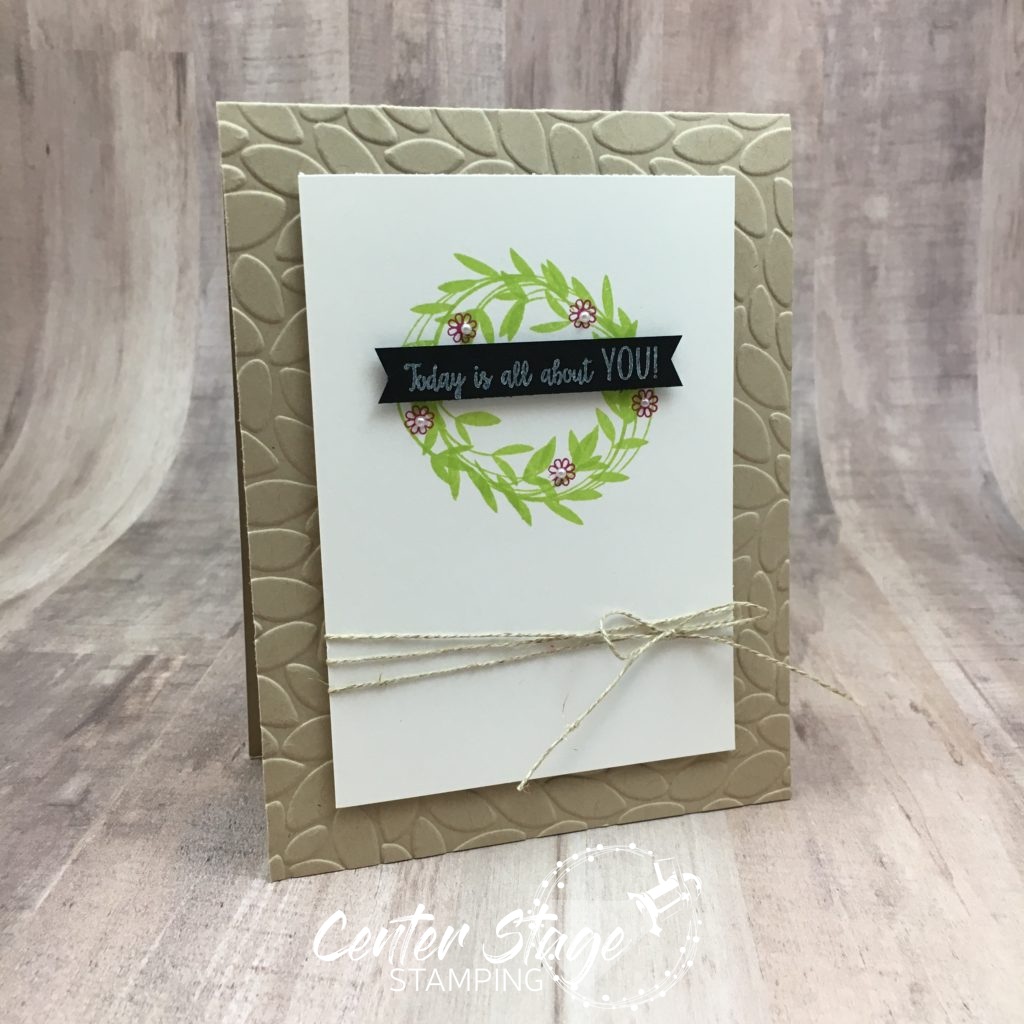
For this card, I stamped the mountains, lake and trees first in Whisper White craft ink on Crumb Cake card stock and let it completely dry.  Once dry, I stamped over the images with the colors Gray Granite, Pool Party and Tranquil Tide (with a little Early Espresso for the tree trunks).  Since the stamps are photopolymer, it made lining up the images a breeze.  I didn’t try to line them up perfectly.  The bits of white peeking out give some nice highlights. I layered the image panel on a piece of Tranquil Tide dots from the ’17-’19 In Colors Designer Series Paper stack.  The front of the card base was run through the NEW Corrugated Dynamic Textured Impressions Embossing Folder.  Isn’t it just AMAZING!  I can tell it will be used A LOT!

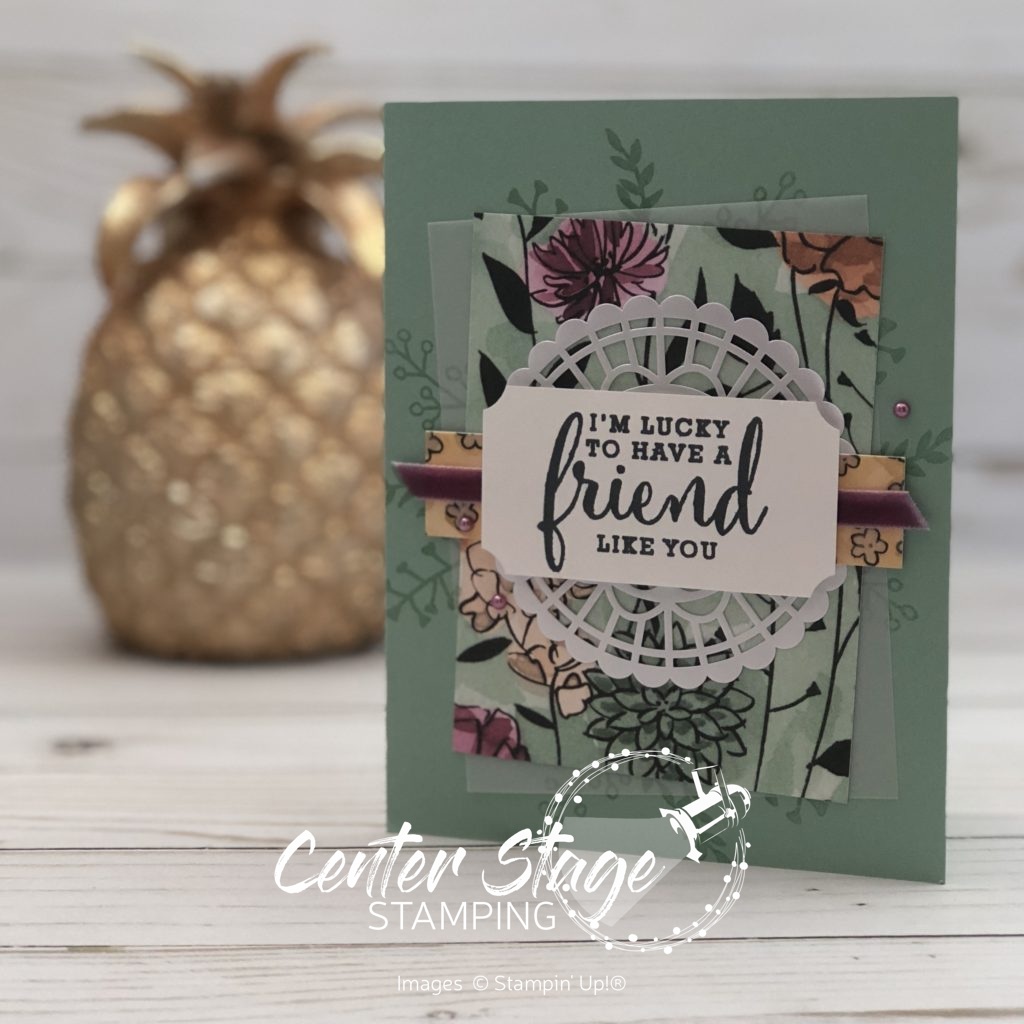
I used Stampin’ Write markers to ink the sentiment stamp and layered it on a Pool Party circle cut from the Stitched Labels Framelits.  Then adhered it over a bit of Linen Thread wrapped around the image panel.

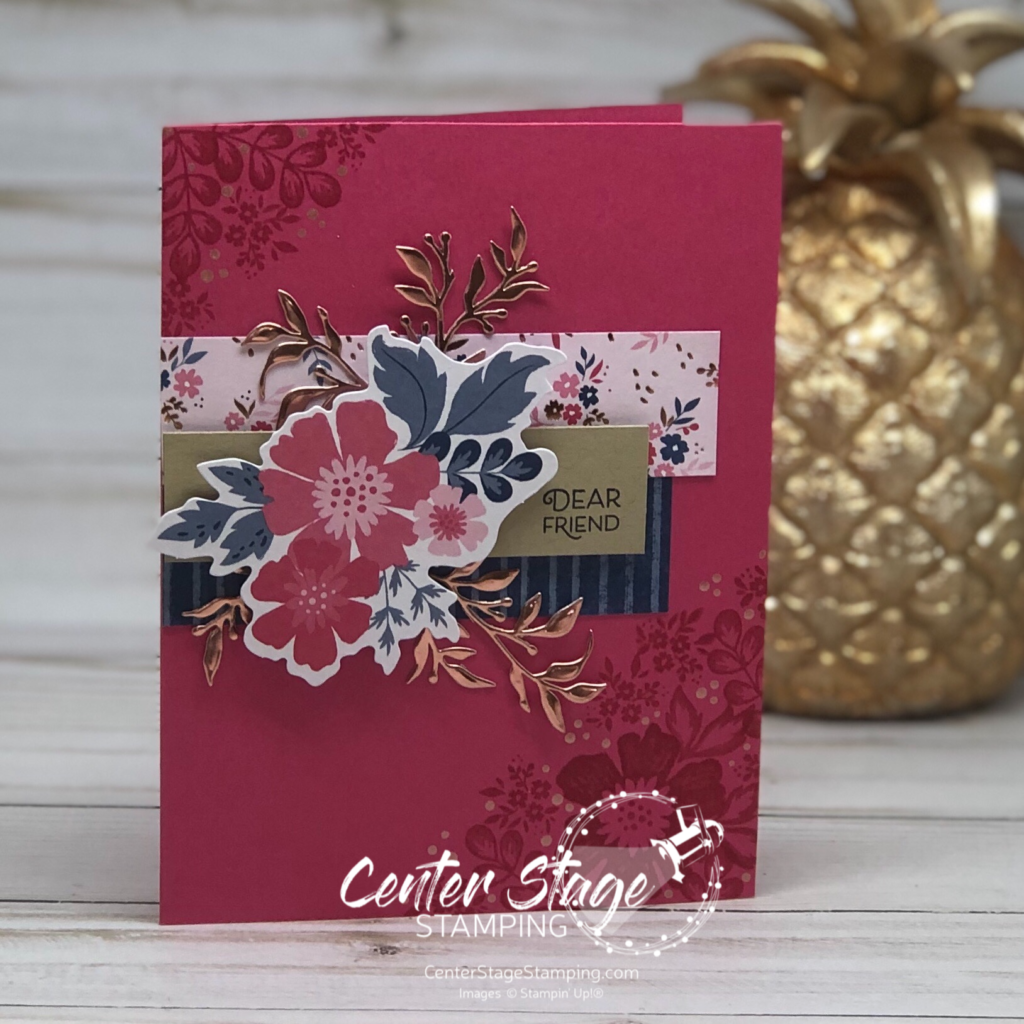
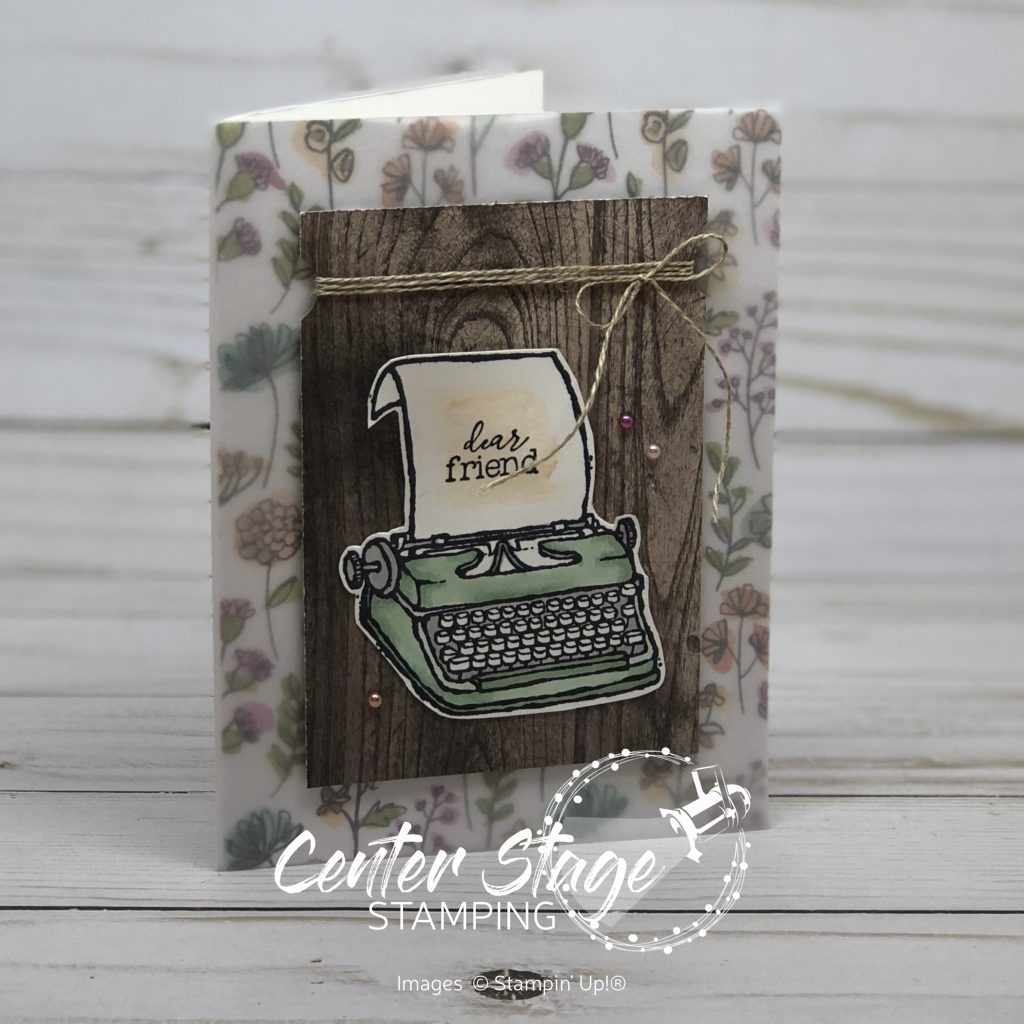
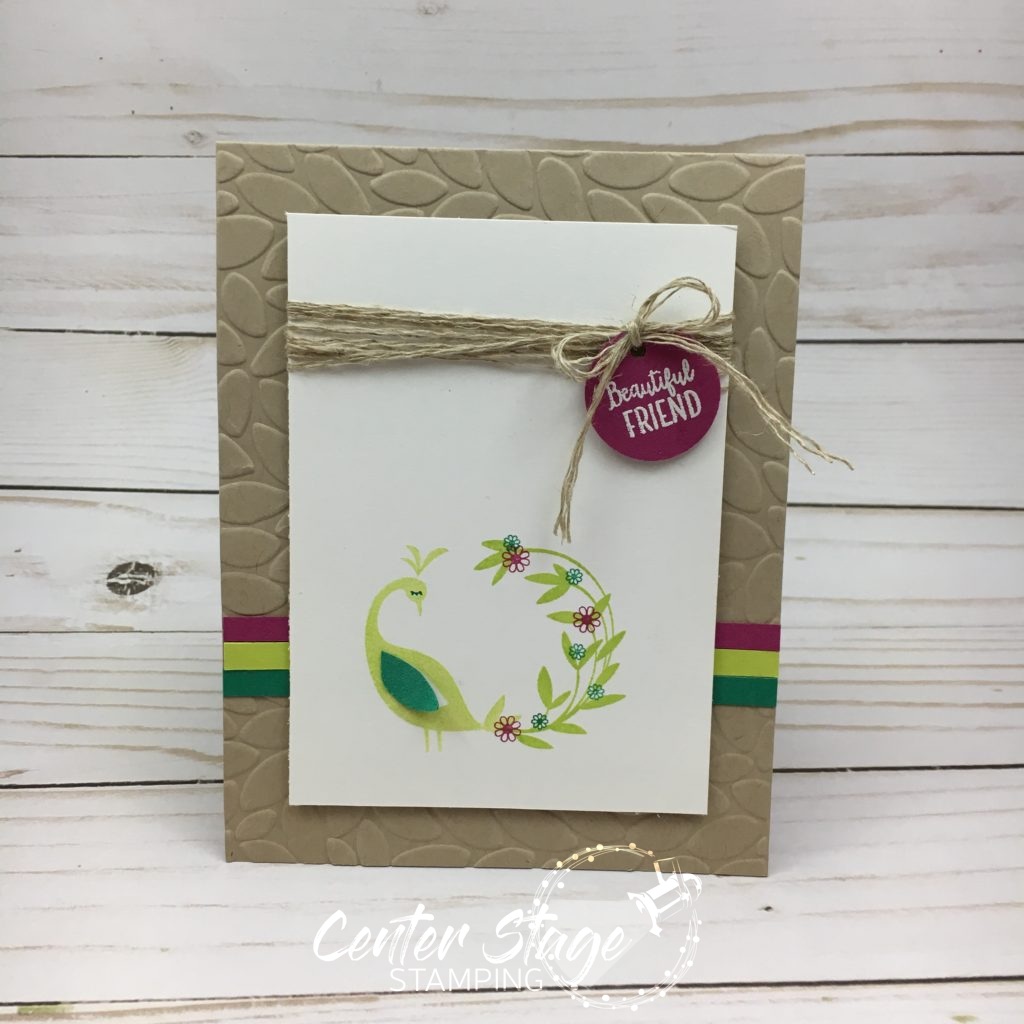
I had been watching an episode of Murder She Wrote when I came up with the idea for this next card.  I hand an image in my mind of a quaint painting hanging on a weathered cottage wall,  Here’s what I came up with:

Waterfront: thanks friend - Center Stage Stamping

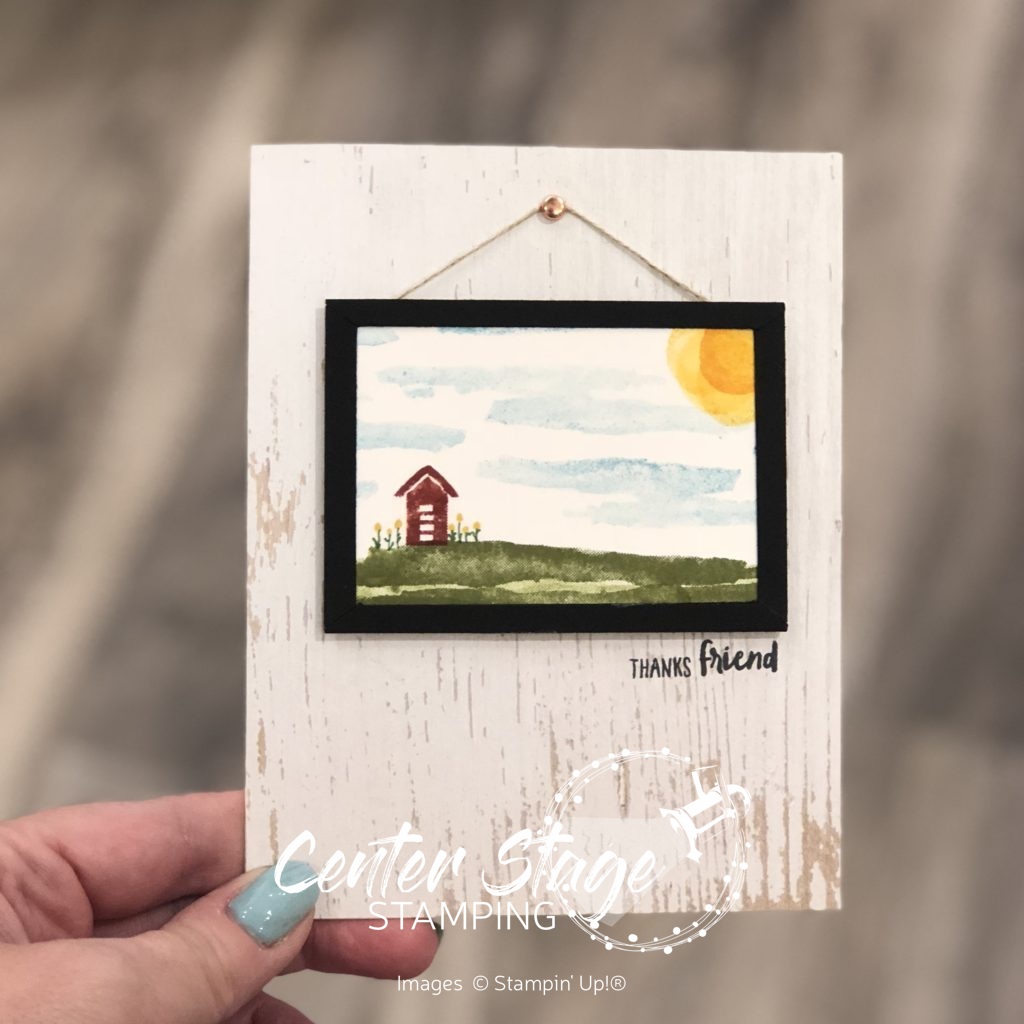
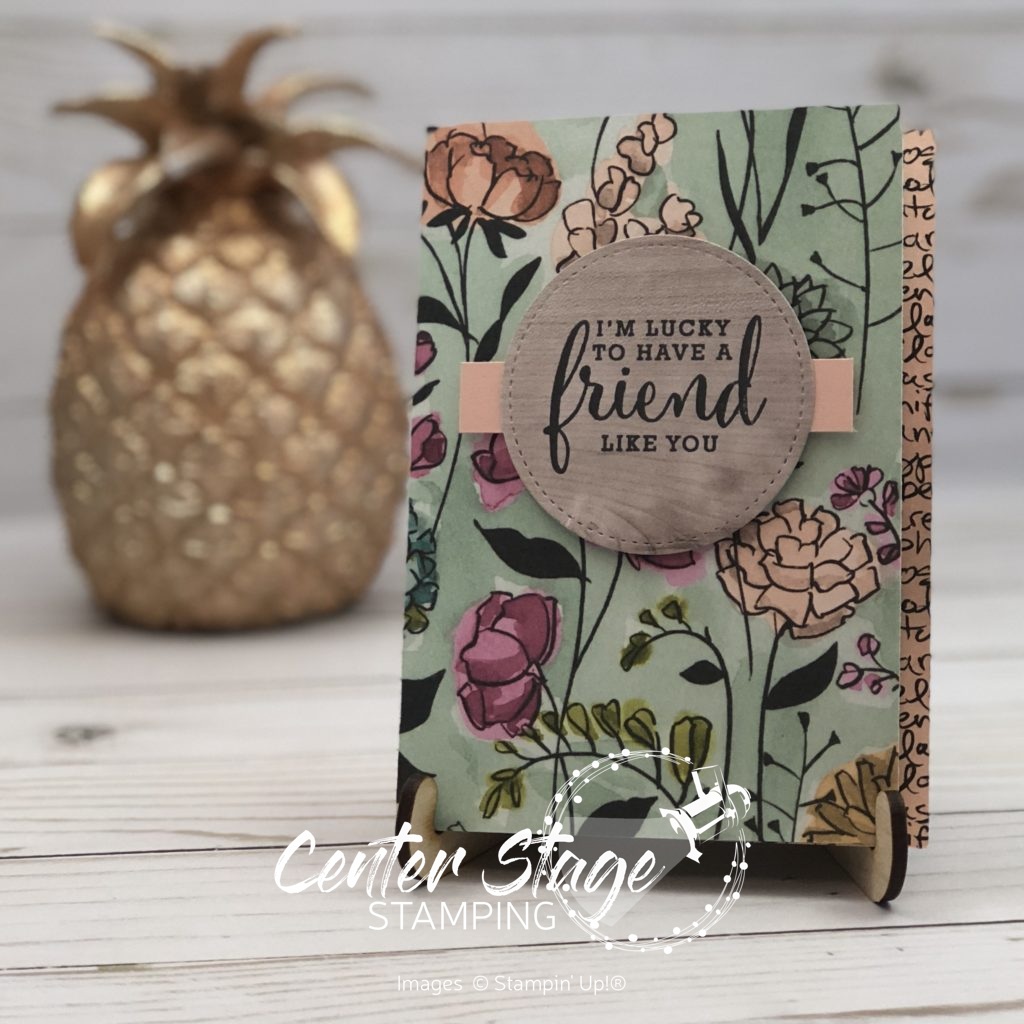
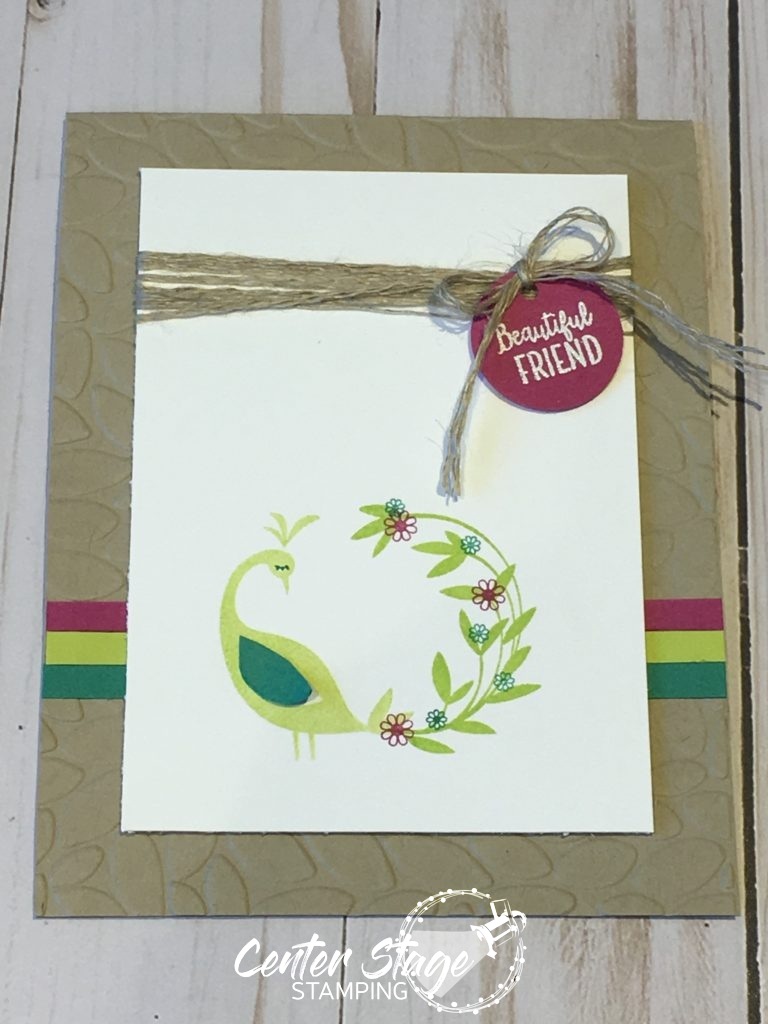
I covered the card base with a piece of the Wood Textures designer series paper – seriously, my FAVE!  I stamped the scene on a piece of thick Whisper White card stock.  I hand drew the flowers with Stampin’ Write markers.  Then I framed the painting.  First I cut a pice of Basic Black card stock the same dimension as my “painting”.  Next, I cut diagonally corner to corner both directions.  Finally, I trimmed about 1/4″ off the outer most edge of each triangle.  Here is a picture to help you see what I did.

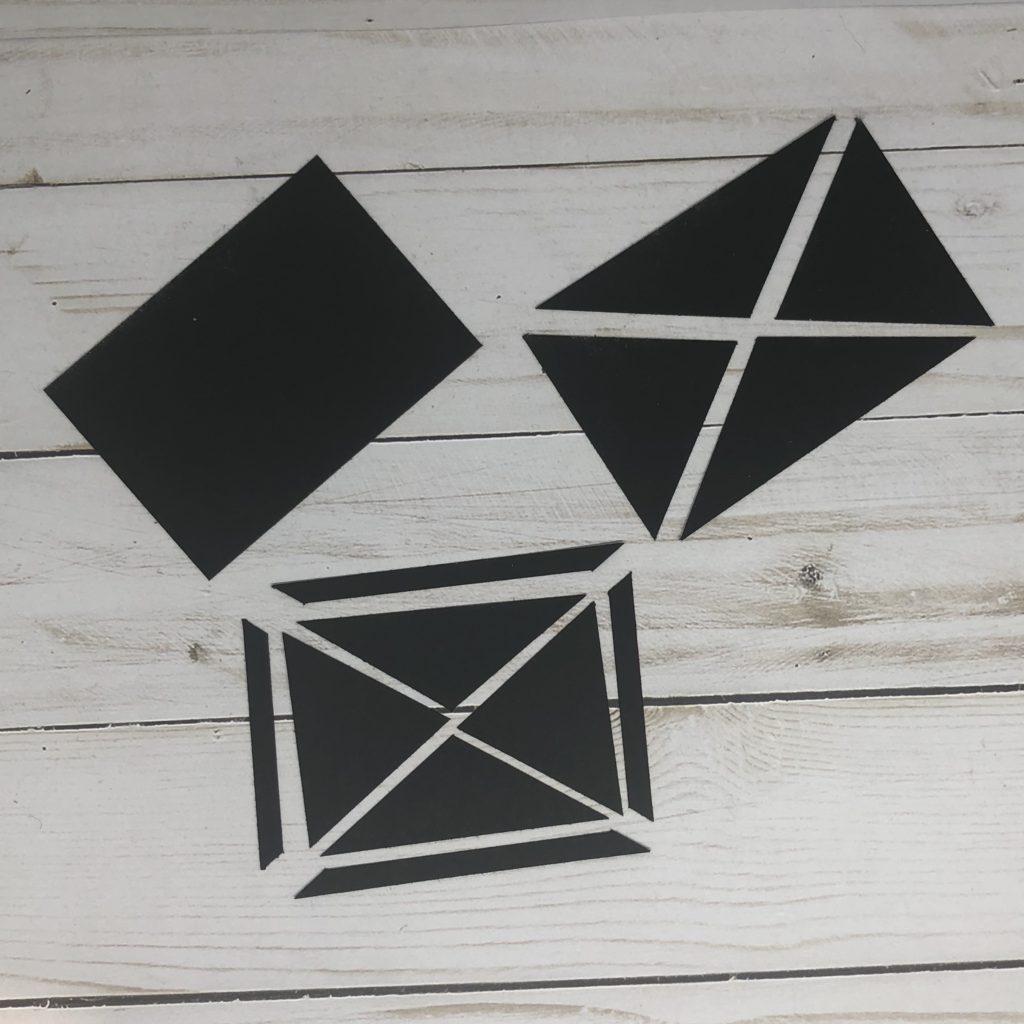
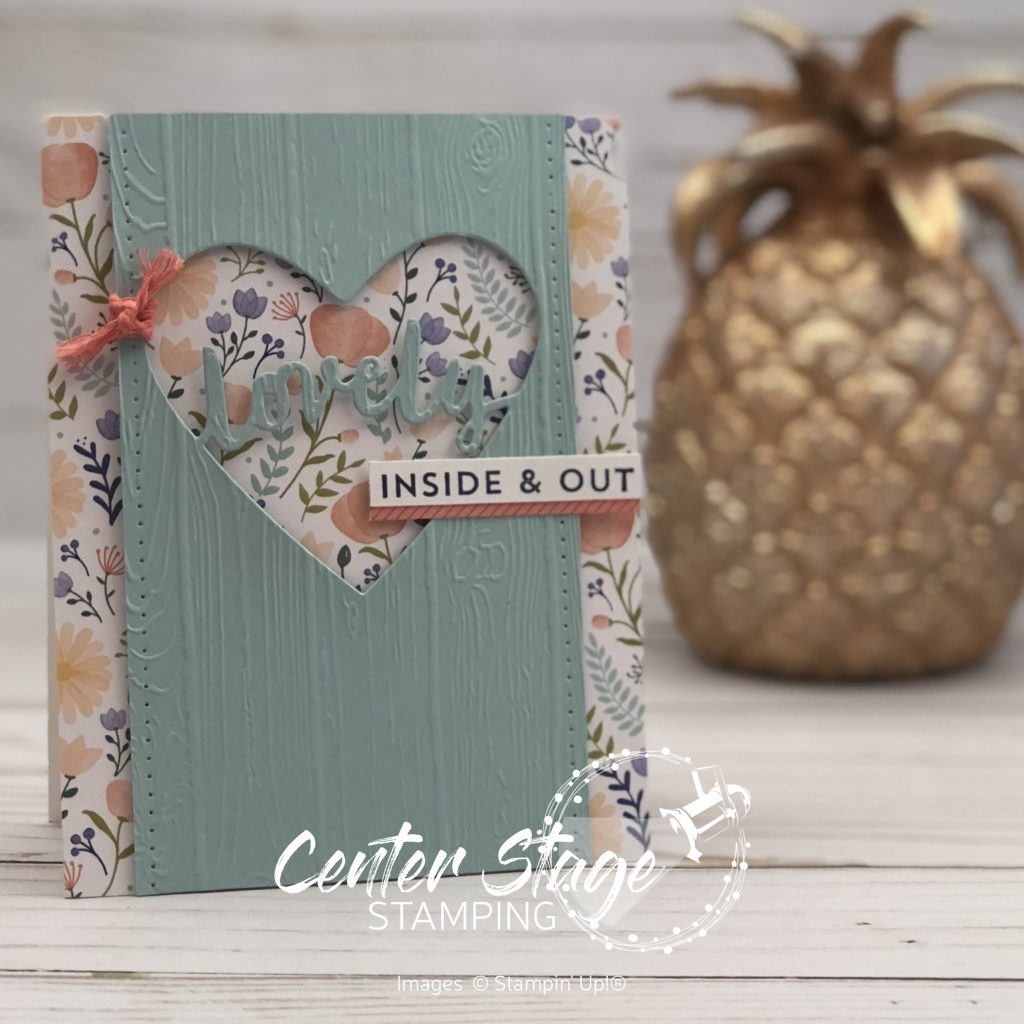
I could have just mounted the “painting” on a piece of Basic Black and called it good.  But this way, I get the mitered corners like a real frame.

Waterfront: thanks friend close up - Center Stage Stamping

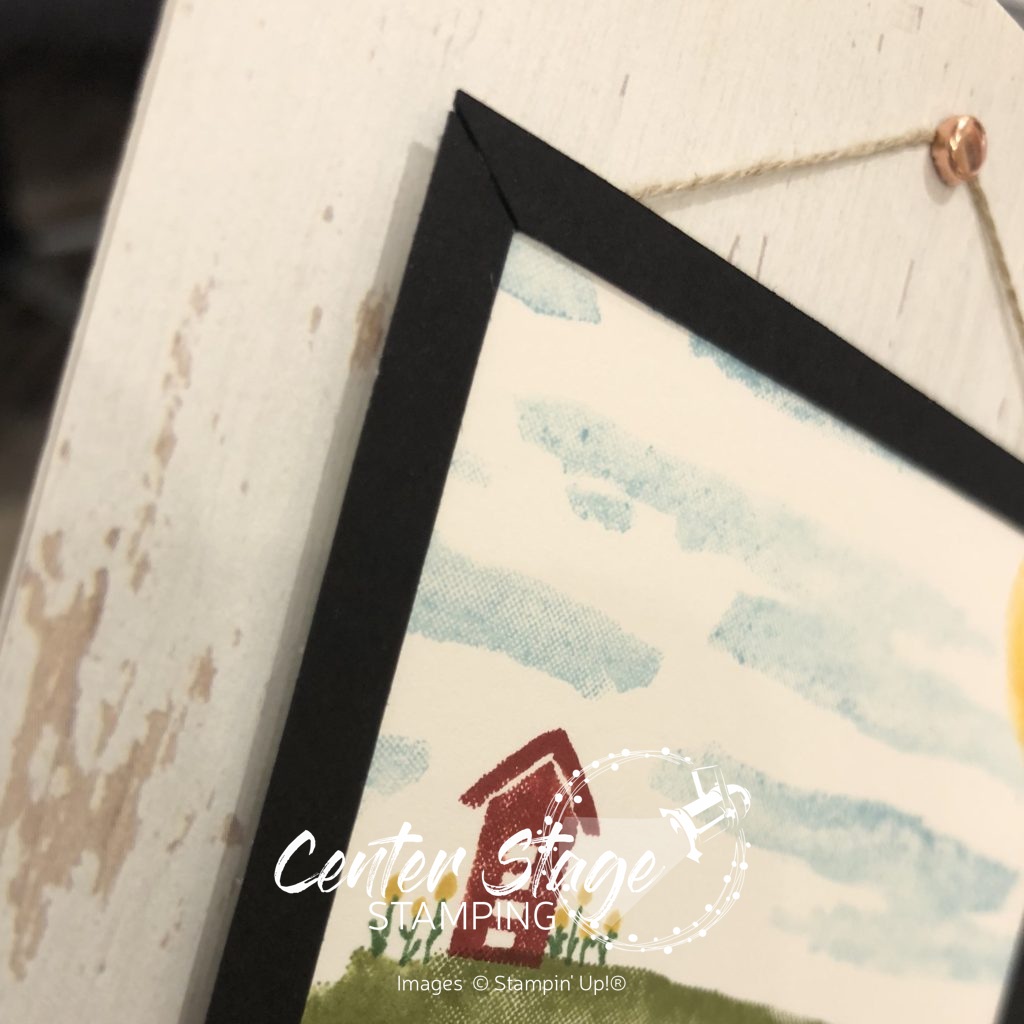
It’s a really small detail and most probably won’t notice it, but I thought it was neat.

If you started this blog hop from the beginning, I am the final stop.  If you picked it up somewhere in the middle, make sure you go around and check out all the great inspiration with the Waterfront stamp set!  From here you can go back to Heidi or on to Debra

*The Stamp Review Crew is a group of International Stampin’ Up! demonstrators who want to show you how much you can do with ONE stamp set. Each edition the SR Crew will showcase a new featured stamp set. Each stop along the hop will show you a different idea, or ideas using that set!**


That’s a wrap for now.  I hope you will come back and join me in putting a spotlight on creativity!


Share with your friends:

dear friend

I was playing around with the P.S. You’re the Best stamp set.  I just love the typewriter.  I started by adhering a panel of the Share What You Love DSP to a Whisper White card base.  I set this inside a folded piece of vellum card stock to soften the DSP some.

Dear Friend, P.S. You're the Best - Center Stage Stamping

I colored this cute little typewrite with Mint Macron Stampin’ Blends.  Seriously, these markers are the BEST!  It is so easy to get great shading and depth.  I added a Petal Pink watercolor wash on the “paper”.  Once it was completely dry, I stamped the sentiment.  I popped this up with dimensionals on a piece of Wood Textures DSP that I had punched notches out of with my 1/2″ circle punch and wrapped with Linen Thread.  I finished up with three of the Share What You Love Artisan Pearls.

This makes me think of an author working away at a quaint little cottage with a wonderful flower garden.  Like maybe where L.M. Montgomery might have written Anne of Green Gables.  Yeah, I like that.

That’s a wrap for today.  Thanks for stopping by!  Be sure to come back and join me again as I put a spotlight on creativity!

Share with your friends:

lovely inside and out

My husband, Brett, and I will be celebrating our 25th wedding anniversary in June. (Wow, 25 years, where did the time go?)  June is pretty busy for me as I run the YoungStars Children’s Theatre Workshop, so today we are departing on an amazing trip to celebrate early.  We are heading to Europe for two weeks – London, then Amsterdam, Rome and finishing with a week long mediterranean cruise!  We have been planning this trip for a long time.  I can’t believe it is finally here!  I will share some pics when I get back.  I will share some on Instagram while I’m gone if you want to see what we are up to.

As I continue my farewell to some great stamp sets, I realized the my few projects have shared a Pool Party / Calypso Coral color combo.  What can I say, when something works, it works!

Lovely - Center Stage Stamping

I love the floral pattern peeking out from behind the die cut panel.  I added the Pinewood Planks embossing folder and piercing for even more texture.  What a fun stamp and die set!  A great card to lift up a friend.

Thanks for stopping by! Happy Stamping!

-Mary

Share with your friends:

love what you do

What a beautiful weekend!  Finally, some sunshine and warmth.  I’m back with another card made with the Share What You Love suite.  Seriously, you need these great products!  They will be in the NEW 2018-19 Stampin’ Up! catalog.  But, you can get them now!  You can find them HERE.

Love What You Do - Center Stage Stamping

This card spotlights a few different patterns in the Share What You Love Specialty Designer Series Paper.  It is great paired with the Wood Textures Designer Series Paper.  I die cut a stitched circle from the Wood Textures Designer Series Paper and stamped the sentiment and flowers on.  The Linen Thread works with the distressed look of the wood.

Thanks for stopping by!  Happy Stamping!

-Mary


Share with your friends:

share what you love

Stampin’ Up! has released a new suite from the 2018-19 catalog for an early sneak peek – The NEW Share What you Love Suite!

There are three different bundles available for every crafter.  You can find information on them HERE

I thought I’d share a couple of cards I create with this fabulous suite of products.

Love What You Do - Center Stage Stamping

This first card was one of our make and take projects from On Stage last month.  Can you find all of the fun new products used?  Let’s start with the amazing Share What You Love Specialty designer series paper.  It is a heavier weight paper, and four of the patterns in the pack have a wonderful pearlized accent.  The fun accents come in the Pearlized Doilies, Share What You Love Artisan Pearls, and Rich Razzleberry 1/4″ Velvet Ribbon.

Friend Liek You - Center Stage Stamping

For this card, I used the same pattern of the Share What You Love Specialty designer series paper. Since it is a heavier weight paper, I folded it in half and used it as the card base.  This was, I get pattern outside and inside the card.  I trimmed of a strip of the card front so the inside pattern would show when the card is closed.  I did put a panel of Whisper White on the inside to write on.  I added a stitched shape circle of Wood Textures designer series paper for the greeting.  It pairs great with the Share What You Love Specialty designer series paper. I decided to let the paper take center stage and didn’t add any other embellishments.

This is a fantastic suite of products.  Take advantage of the early release and grab yours today!

Thanks for stopping by! Happy Stamping!

-Mary

Share with your friends:

Today Blooms

Just popping on with a quick post today.  I’m getting prepped to start blocking at today’s rehearsal for the High School play I’m directing.  The most tedious part of directing – figuring out who moves where, when and why.  At least today’s card wasn’t tedious to make, even though I made 20 of them for a recent swap. I really love the delicate feel of this one.

Perennial Birthday - Center Stage Stamping

I used the Perennial Birthday set.  Colors are Rose Red, Soft Sky, Peekaboo Peach, Pear Pizzazz and Crumb Cake.  The Soft Sky card base has been embossed with the Simple Stripes Textured Impressions embossing folder.  The sentiment is embossed in white on a strip of Wood Textures designer series paper.  This is hands down my favorite designer series pack.  I LOVE the various wood textures/ grains.  They are a great addition to many projects.  A few rhinestones and a small linen thread bow add the finishing details.

Thanks for stopping by! Happy Stamping!

-Mary

Share with your friends:

Beautiful Wreath

We are back in a cold snap, so how about another little hint of spring?  Today’s card uses the Beautiful Peacock Sale-A-Bration set in a different way. I used the sweet bird previously on this card. For today’s card I decided to use one of the “tail” stamps to create a delicate wreath.

SU beautiful Friend - Center Stage Stamping

I stamped the leaves in Lemon Lime Twist.  I think the Petal Burst Embossing Folder nicely compliments the wreath.  Add a few Berry Burst flowers with tiny pearls, a Linen Thread bow and a tiny bit of doily on the sentiment to finish it off.  I decided to make another one with this same idea, but changed it up just a bit.

SU Beautiful Peacock wreath - Center Stage Stamping

This time I put the greeting on a banner across the center of the wreath and wrapped the linen thread around the bottom.  I think I like this one better.  What do you think?

Thanks for stopping by! Happy Stamping!

-Mary

Share with your friends:

Beautiful Friend

Today, I am playing along with my friend Mindy and the Fab Friday crew.  They have a great color challenge going on.  I love the jewel tones of this combo.

And here the card I made using the Beautiful Peacock set.  This is one of the great Sale-A-Bration offerings this year.  It can be yours FREE with a $50 purchase!


On the Emerald Envy wing – I peeled off a layer of the card stock so it has a soft texture you can’t see in the photo.  I drew on the eye lashes to give a more demure look.  The Petal Burst embossing folder compliments the feather / leaves in the tail.  Sweet card to give a dear friend.

SU Beatiful Peacock

Thanks for visiting!  Happy Stamping!

-Mary

Share with your friends: