designer series paper

wild about you

I just love the Animal Outing stamp set and coordinating Animal Expedition designer series paper. For today’s card, I decided to let the paper take center stage.

These animals are so darn cute!  I fussy cut out one of the little chameleons from a different sheet of Animal Expedition designer series paper to accent the lower corner of the card.  I stamped the sentiment on Pool Party, Berry Burst and Lemon Lime Twist and cut out one word from each.  I angled the cuts to keep with the whimsical feel of the card.  This set and paper is proving to be very versatile and a whole lotta fun!

Thanks for stopping by! Happy Stamping!

-Mary

Share with your friends:

lovely inside and out

My husband, Brett, and I will be celebrating our 25th wedding anniversary in June. (Wow, 25 years, where did the time go?)  June is pretty busy for me as I run the YoungStars Children’s Theatre Workshop, so today we are departing on an amazing trip to celebrate early.  We are heading to Europe for two weeks – London, then Amsterdam, Rome and finishing with a week long mediterranean cruise!  We have been planning this trip for a long time.  I can’t believe it is finally here!  I will share some pics when I get back.  I will share some on Instagram while I’m gone if you want to see what we are up to.

As I continue my farewell to some great stamp sets, I realized the my few projects have shared a Pool Party / Calypso Coral color combo.  What can I say, when something works, it works!

Lovely - Center Stage Stamping

I love the floral pattern peeking out from behind the die cut panel.  I added the Pinewood Planks embossing folder and piercing for even more texture.  What a fun stamp and die set!  A great card to lift up a friend.

Thanks for stopping by! Happy Stamping!

-Mary

Share with your friends:

beautiful day

Hi There!  I am having so much fun creating with the Share What You Love bundle! The pearlized effect on this specialty designer series paper is just gorgeous.  It is hard to capture it in a photo.  You really need to see it in person.  Beautiful Day - Center Stage Stamping

On this print, the flowers and leaves are pearlized.  I sponged some Crumb Cake around the edges of the card base and the stamped panel to soften them a bit.   I chose to keep the stamping and embellishments simple to let the great pattern of the paper take center stage.  I love the script font of the sentiments in this set.

Thanks for stopping by! Happy Stamping!

-Mary


Share with your friends:

love what you do

What a beautiful weekend!  Finally, some sunshine and warmth.  I’m back with another card made with the Share What You Love suite.  Seriously, you need these great products!  They will be in the NEW 2018-19 Stampin’ Up! catalog.  But, you can get them now!  You can find them HERE.

Love What You Do - Center Stage Stamping

This card spotlights a few different patterns in the Share What You Love Specialty Designer Series Paper.  It is great paired with the Wood Textures Designer Series Paper.  I die cut a stitched circle from the Wood Textures Designer Series Paper and stamped the sentiment and flowers on.  The Linen Thread works with the distressed look of the wood.

Thanks for stopping by!  Happy Stamping!

-Mary


Share with your friends:

share what you love

Stampin’ Up! has released a new suite from the 2018-19 catalog for an early sneak peek – The NEW Share What you Love Suite!

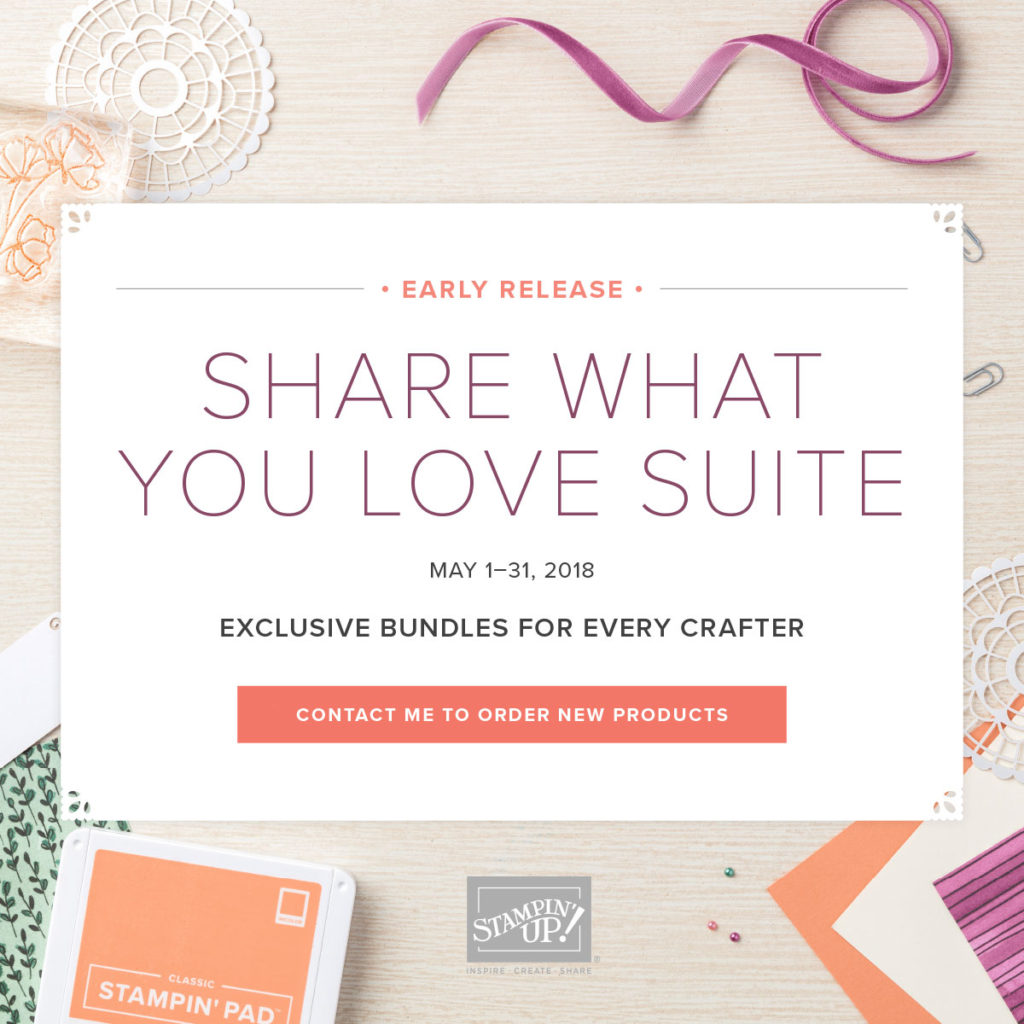
There are three different bundles available for every crafter.  You can find information on them HERE

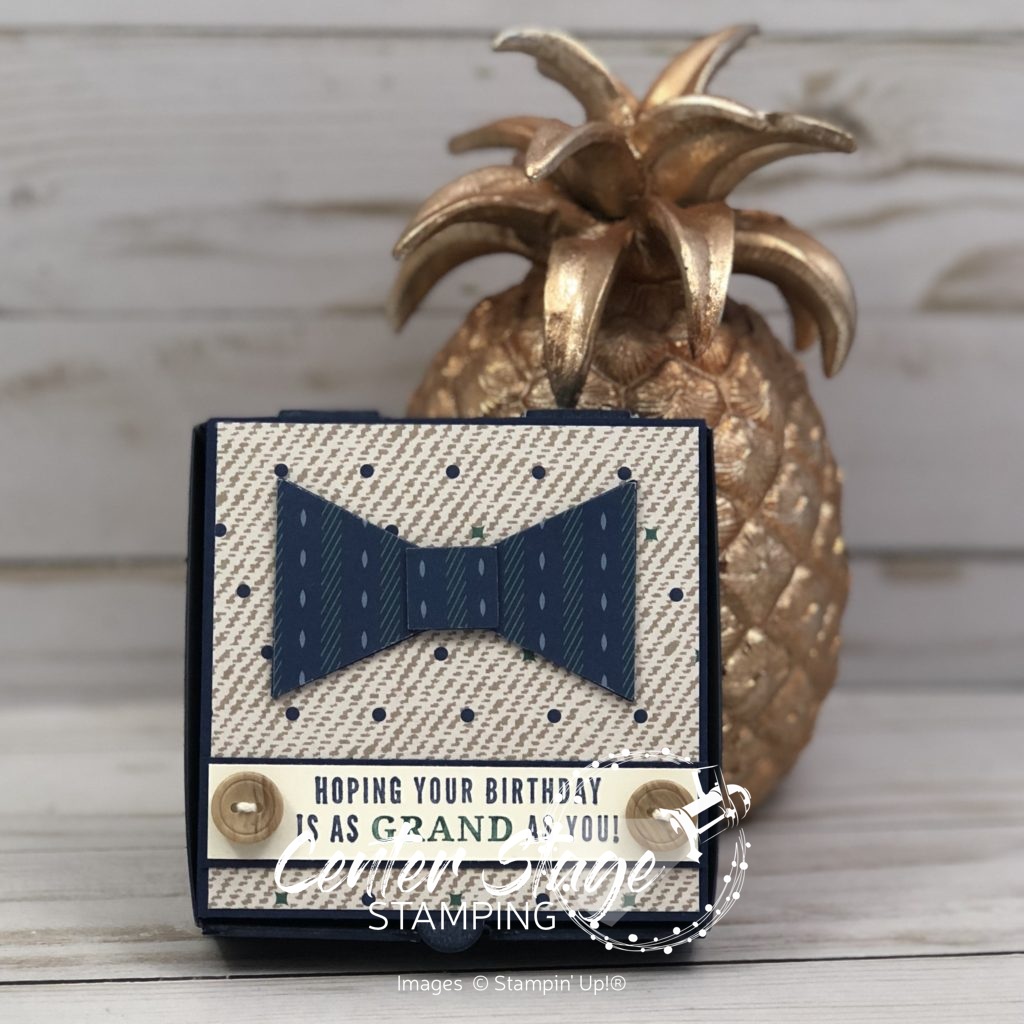
I thought I’d share a couple of cards I create with this fabulous suite of products.

Love What You Do - Center Stage Stamping

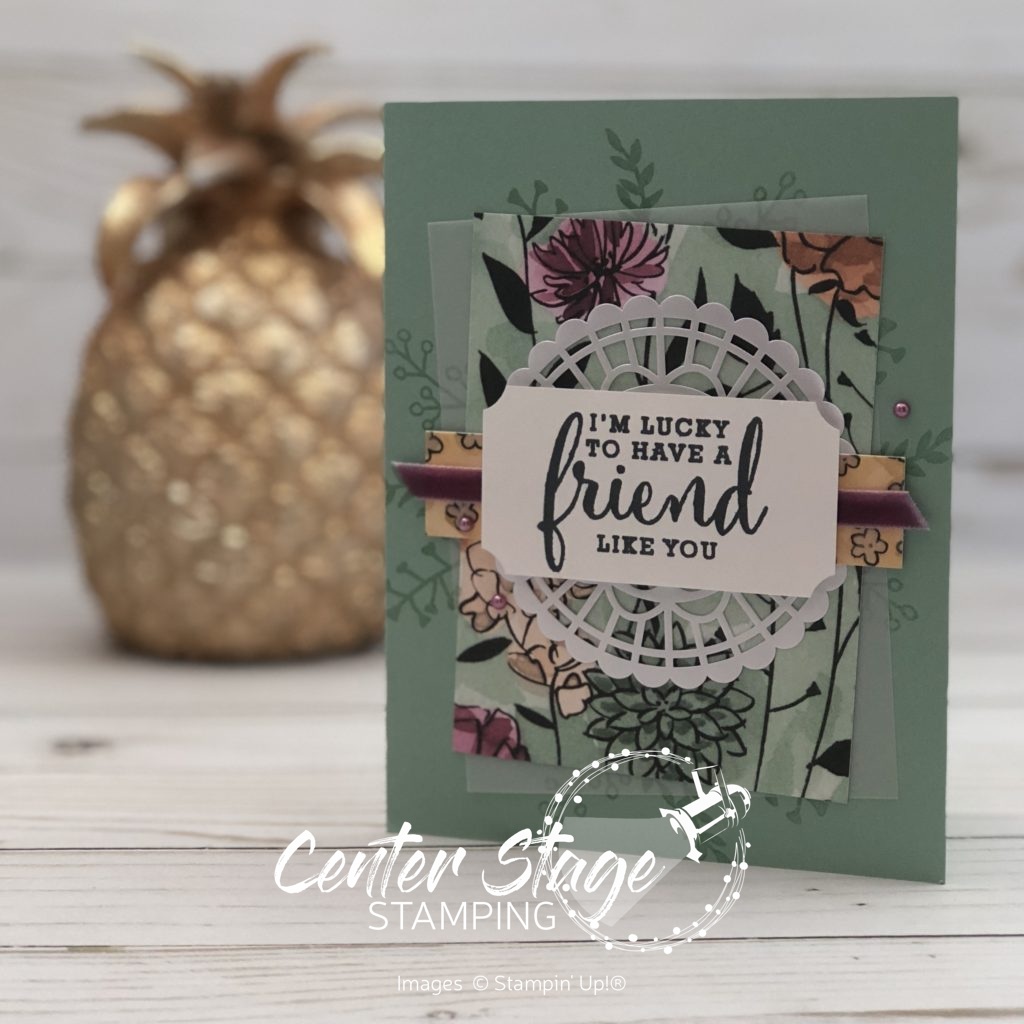
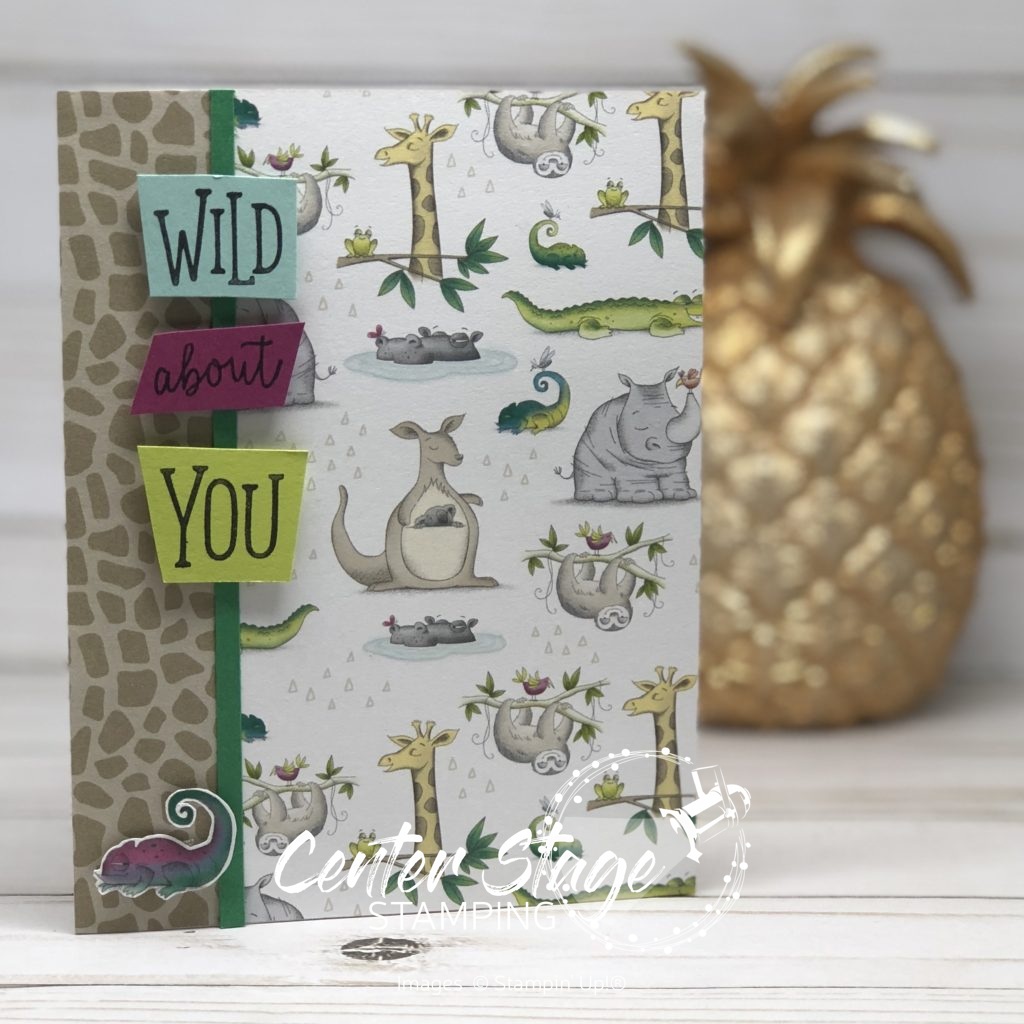
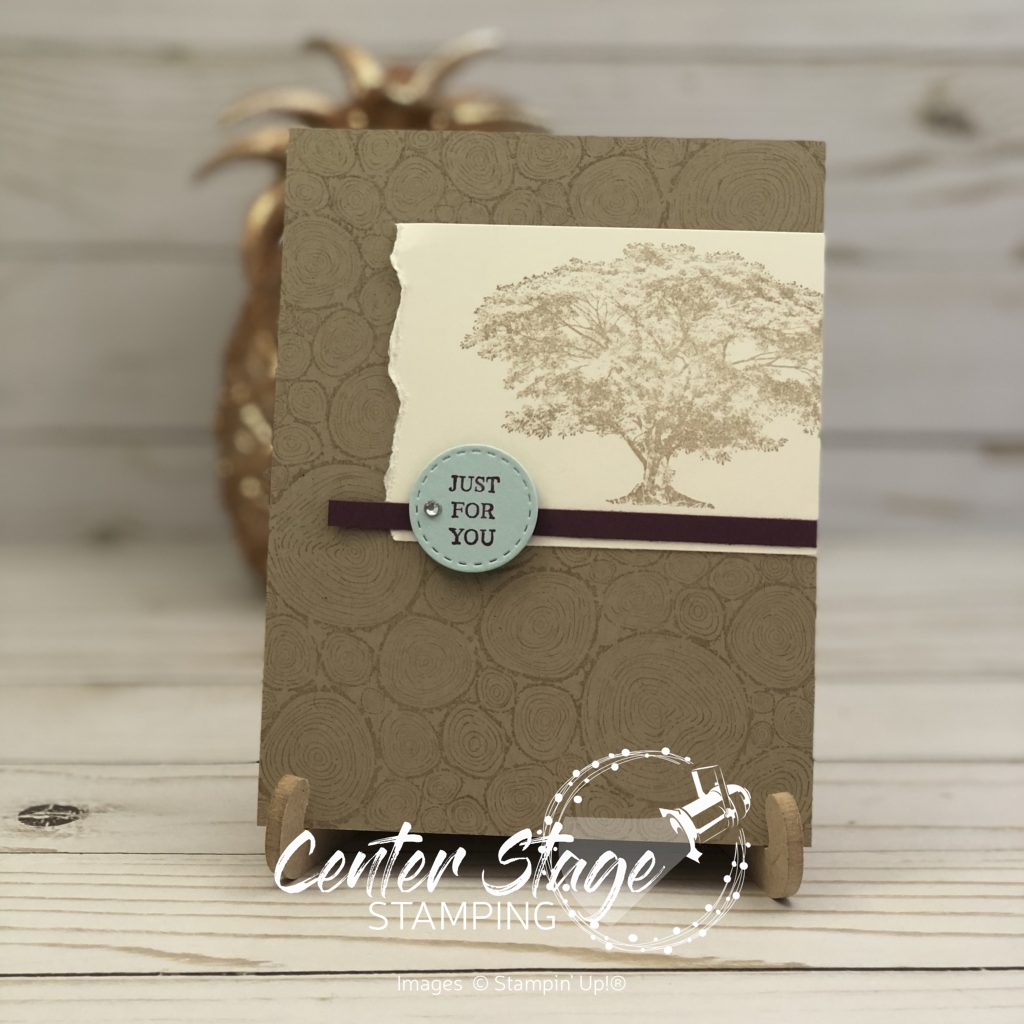
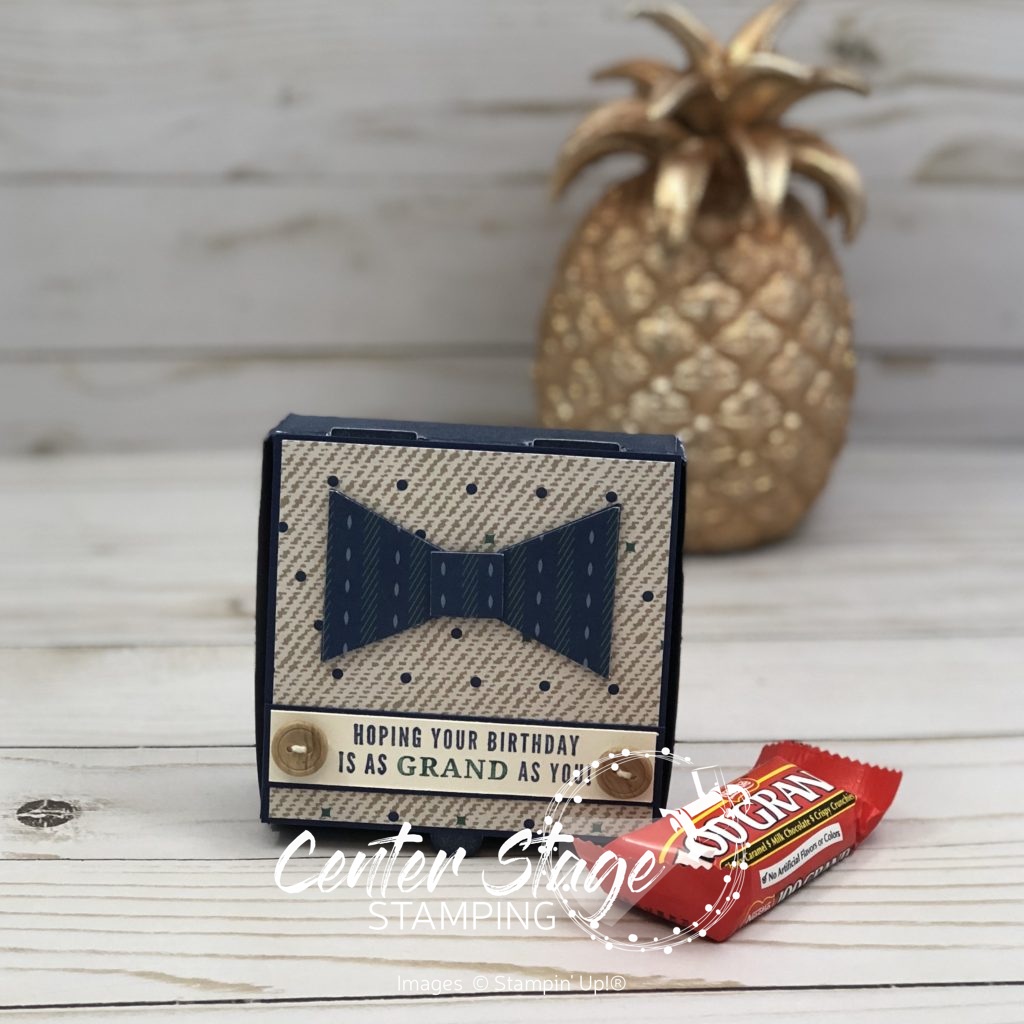
This first card was one of our make and take projects from On Stage last month.  Can you find all of the fun new products used?  Let’s start with the amazing Share What You Love Specialty designer series paper.  It is a heavier weight paper, and four of the patterns in the pack have a wonderful pearlized accent.  The fun accents come in the Pearlized Doilies, Share What You Love Artisan Pearls, and Rich Razzleberry 1/4″ Velvet Ribbon.

Friend Liek You - Center Stage Stamping

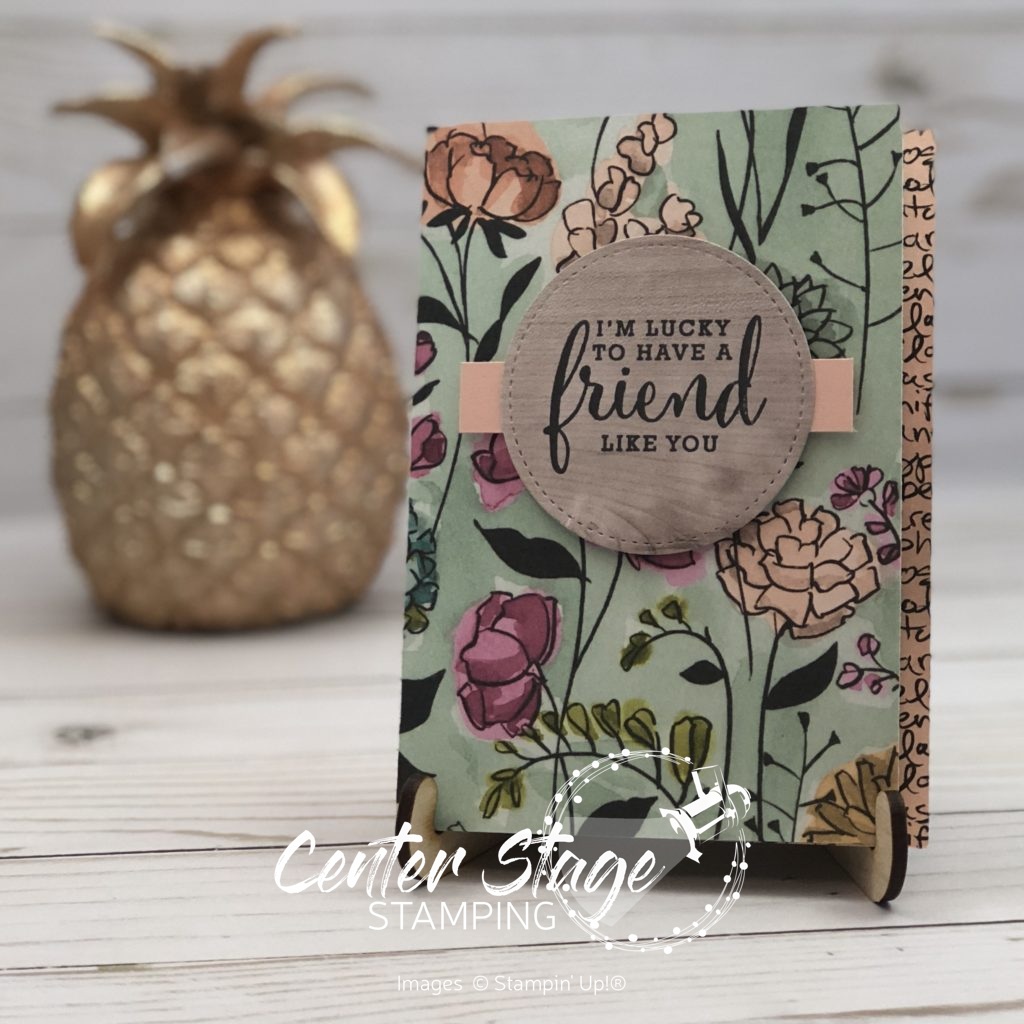
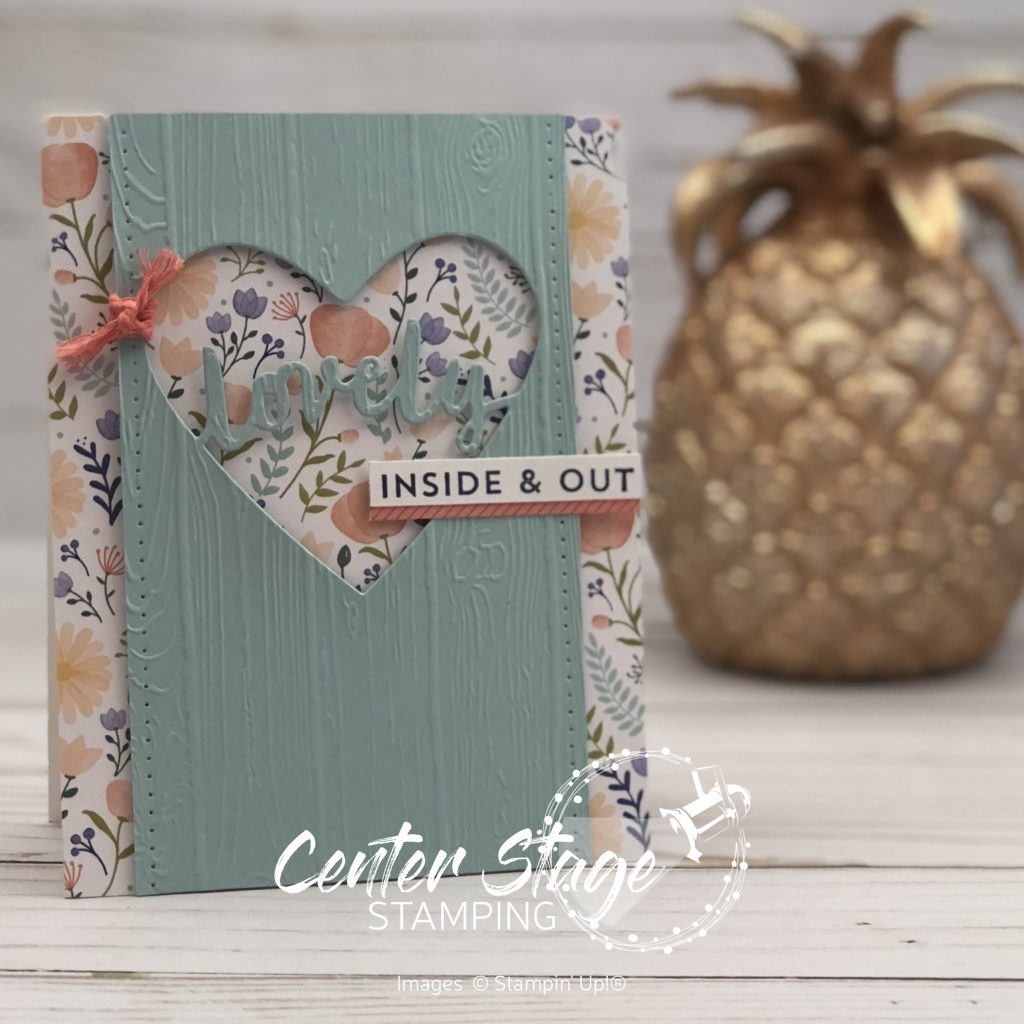
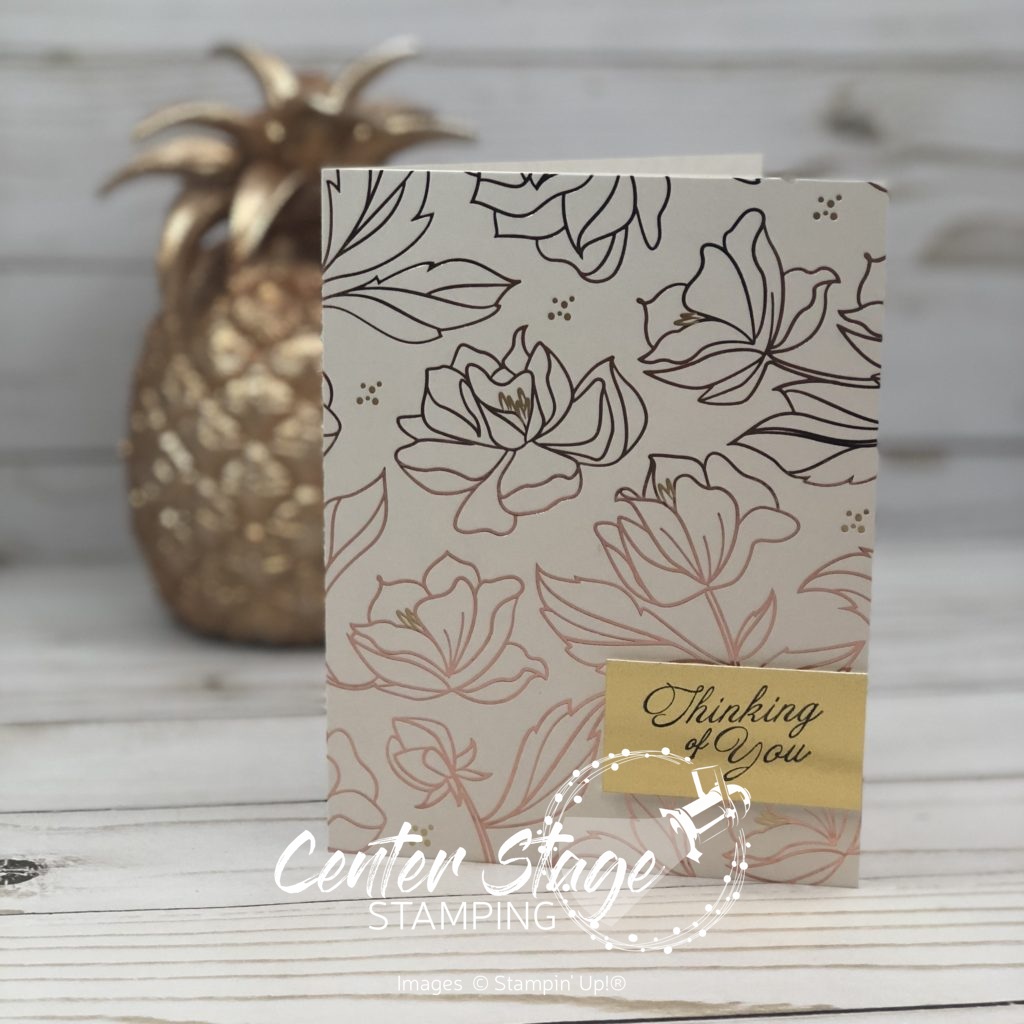
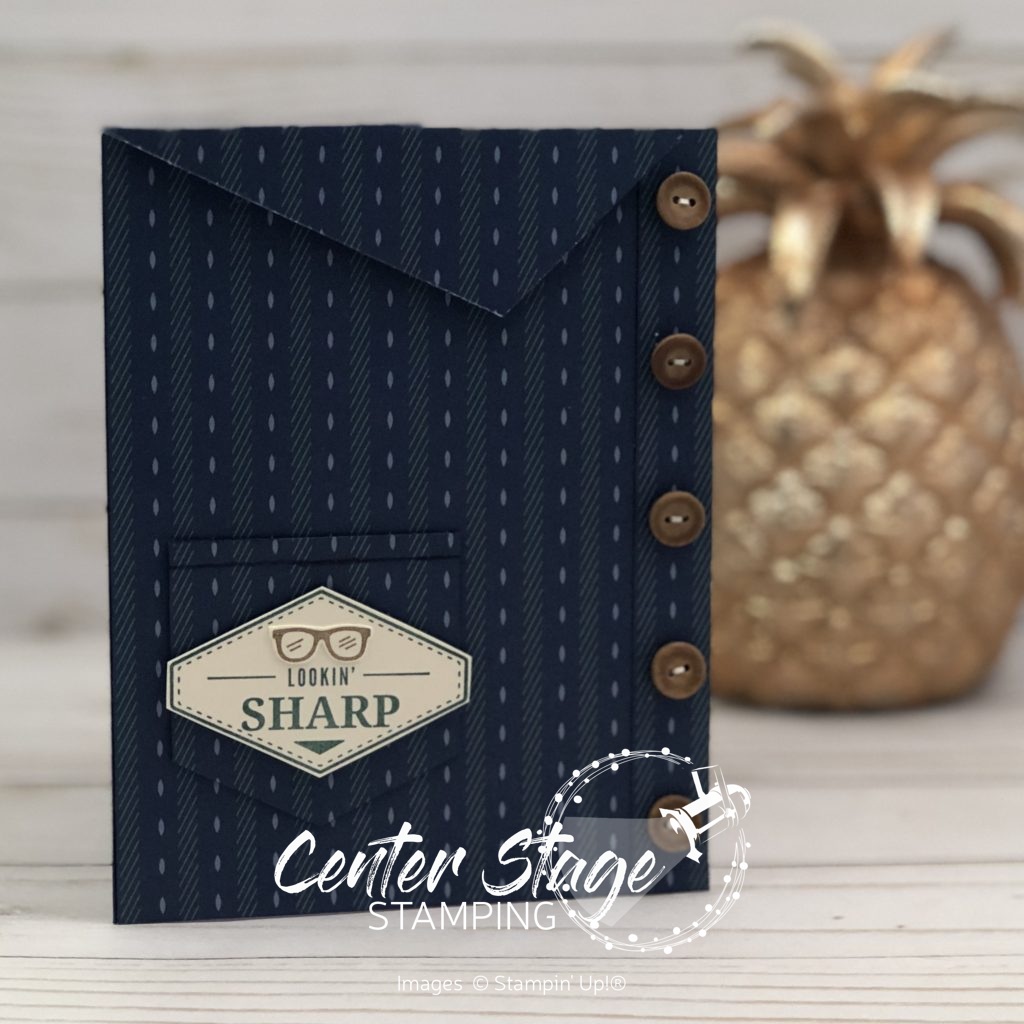
For this card, I used the same pattern of the Share What You Love Specialty designer series paper. Since it is a heavier weight paper, I folded it in half and used it as the card base.  This was, I get pattern outside and inside the card.  I trimmed of a strip of the card front so the inside pattern would show when the card is closed.  I did put a panel of Whisper White on the inside to write on.  I added a stitched shape circle of Wood Textures designer series paper for the greeting.  It pairs great with the Share What You Love Specialty designer series paper. I decided to let the paper take center stage and didn’t add any other embellishments.

This is a fantastic suite of products.  Take advantage of the early release and grab yours today!

Thanks for stopping by! Happy Stamping!

-Mary

Share with your friends:

display samples – part 5

Today’s display samples feature the NEW Rooted in Nature stamp set.  This is a great set which offers a lot of versatility.  I love the sentiments in it.

Just for you - Center Stage Stamping

The Tree Rings background stamp pairs perfectly with this beautiful tree. I used a thin strip of Fresh Fig to ground the Vanilla Panel.  I die cut the small circle from the Stitched Label framelits in Soft Sky and stamped the sentiment in fresh Fig.

thinking of you copper - Center Stage Stamping

For this card, I started with a piece of the Nature’s Poem Designer Series Paper.  I stamped the splatter from Artisan Textures with Versa Mark and embossed with Copper embossing powder. The Circles are from the Stitched Shapes and Stitched Labels framelits.  I love the little bit of copper accents with Powder Pink and Blackberry Bliss.  I’m happy Blackberry Bliss is joining the core color line with the new catalog!

For You - Center Stage Stamping

I love gray and yellow together.  The leaves are embossed with the new Pineapple Punch embossing powder.  Pineapple Punch is one of the new In Colors for 2018.  Such a bright cheerful yellow.  I used the lines from Artisan Textures to help break up the white space.

Thanks for stopping by! Happy Stamping!

-Mary


Share with your friends:

petal palette duo

I can’t believe it is April already.  Spring is coming – well, eventually.  Unfortunately, Minnesota didn’t get the memo.  We had snow last Friday and more is coming this week.  UGH!  Enough already!  At least today’s cards have a springtime feel to them.  They spotlight the Petal Palette stamp set and coordinating Petal Passion DSP in the Occasions catalog.  I used the same colors and layout for these cards.  I changed up how color was added to the DSP and the sentiment.Petal Palette - Center Stage Stamping

The black and white prints of the dsp offer great versatility for your projects.  Add in a pop of color (Calypso Coral for these) and you can customize the DSP to you project.  For the card on the left, color was added to select flowers in the DSP with a blender pen and ink in the lid of the ink pad.  The card on the right, I stamped one of the flower images int he Petal Palette set in Calypso Coral to give more depth to the DSP.

Try customizing your DSP.  It’s a lot of fun and adds a fun element to your project!

Thanks for stopping by! Happy Stamping!

-Mary


Share with your friends:

Thinking of Springtime

I am so over winter – COME ON SPRING!  It has been cloudy with snow, sleet, rain then sleet again today. I am done.  Brett has been gone for the past week taking Stamp-n-Storage on the road to Arizona and California.  I am a little jealous. I need sunshine and warmth.

Today’s card is featuring the Sale-a-Bration Springtime Foil Specialty DSP.  This paper is gorgeous!  The picture really doesn’t show off how stunning this paper really is.  The metallic shine is so pretty.  And this pattern features gold and my favorite Rose Gold!  I really hope Stampin’ Up! brings out more Rose Gold stuff.  Ooooh – how about a Rose Gold embossing powder!  That’s what I need.  Anyway, here’s todays card.

Springtime Foil - Center Stage Stamping

I kept it very simple to let the beauty of the paper stand out.  The flowers are rose gold foil. The flower centers and dots are gold foil.  As I said, the photo doesn’t capture the elegance of the Rose Gold. The sentiment is from the Heartfelt Blooms set.  I stamped it in black on Gold Foil paper.  The Springtime Foil specialty designer series paper would be perfect for wedding cards. Grab this paper while you can – once Sale-a-Bration is done, it is gone forever!

Thanks for stopping by! Happy Stamping!

-Mary

Share with your friends:

You’re Grand

Sharing one last project with the Truly Tailored Suite today.  How about a little treat box filled with goodies to let someone know how “grand” they are.

Grand Day - Center Stage Stamping

I started with on of the adorable little pizza boxes.  I sponged Night of Navy all over it and let it dry over night.  I layered the DSP and stamped image on top.  I created the bow tie by punching out a piece of DSP with the Tailored Tag punch and cutting it in half and adding the tiny center piece. A couple of True Gentleman buttons finish off the box.  And then I had to find the perfect treat to put inside –

Grand Day - Center Stage Stamping

100 Grand bars, of course (three will fit nicely in this little box).

Make sure you stop by on Friday.  It’s time for another Inky Friends blog hop and we have some great projects lined up.  Thanks for stopping by! Happy Stamping!

-Mary

Share with your friends:

Lookin’ Sharp

I was on a roll with the Truly Tailored Suite.  I finally have several masculine cards in my stash!  I saw a card similar to this one on Pinterest and knew this product suite would be great for my version.

How cool is that!?  The True Gentleman Designer Series Paper is perfect for the fabric of this shirt card.  I used the Tailored Tag punch to do the bottom of the pocket. I added one detail that you really don’t notice, but I think it makes a difference when you see the card in person.  I went over the edges of all the dsp with a Night of Navy marker to cover the white core of the paper.  I think it made it seem more like fabric.    There is a thin strip added under the buttons and at the top of the pocket to help the seams stand out.  The collar is adhered with a dimensional strip at the top (I also colored the Night of Navy to hide the white).

Thanks for stoping by! Happy stamping!

-Mary

Share with your friends: