Thank You

inky friends: thankful for… blog hop

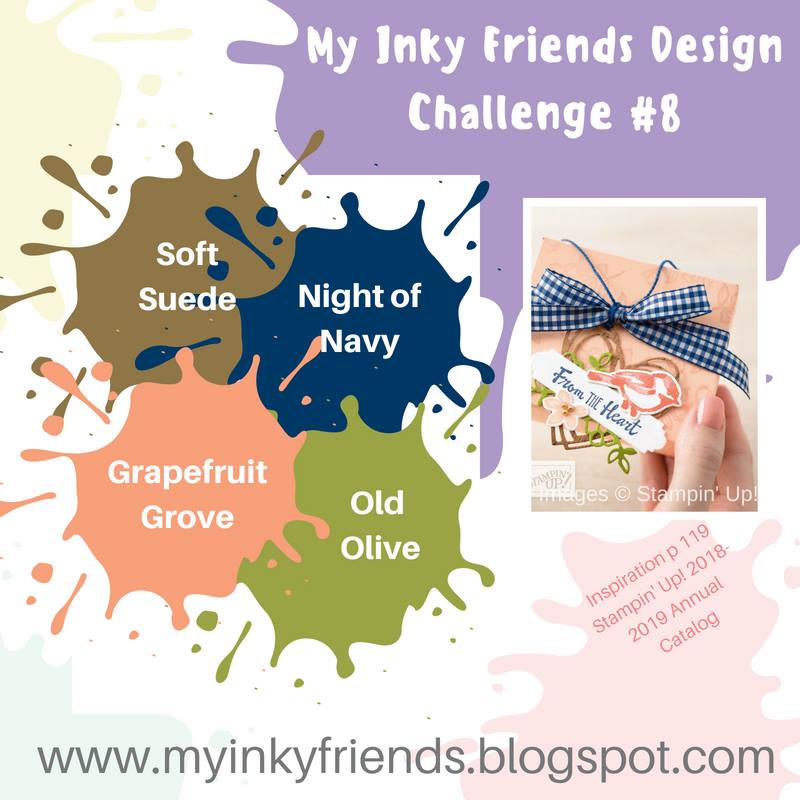
Today, I am joining My Inky Friends Thankful For… blog hop. You are in for a great variety of inspiration on today’s hop.  We are each featuring a Stampin’ Up! stamp set or product that we are thankful for.  If you are following in order, you have arrived here from Holly and her wonderful projects.  Weren’t they great.  If you are starting here make sure you check out all the stops and see what everyone is thankful for!

I am thankful for… Stampin’ Blends!  These markers are so amazing and really easy to use.  They make me feel like a real artist!  There is so much you can do with them!

First off, how about no-line coloring.  I’ve seen it done with watercolors and thought why not try it with my Stampin’ Blends!  I love the outcome!

Country Home: no line with blends - Center Stage Stamping

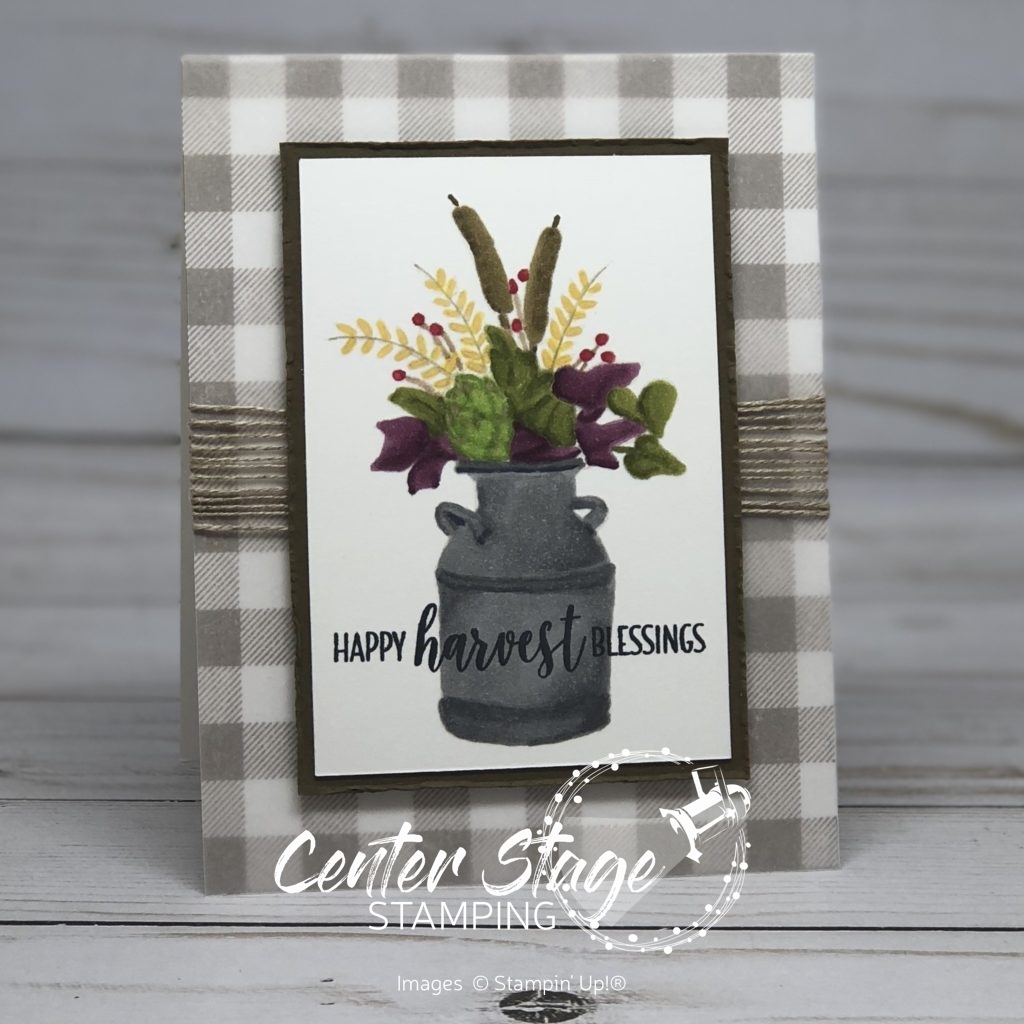
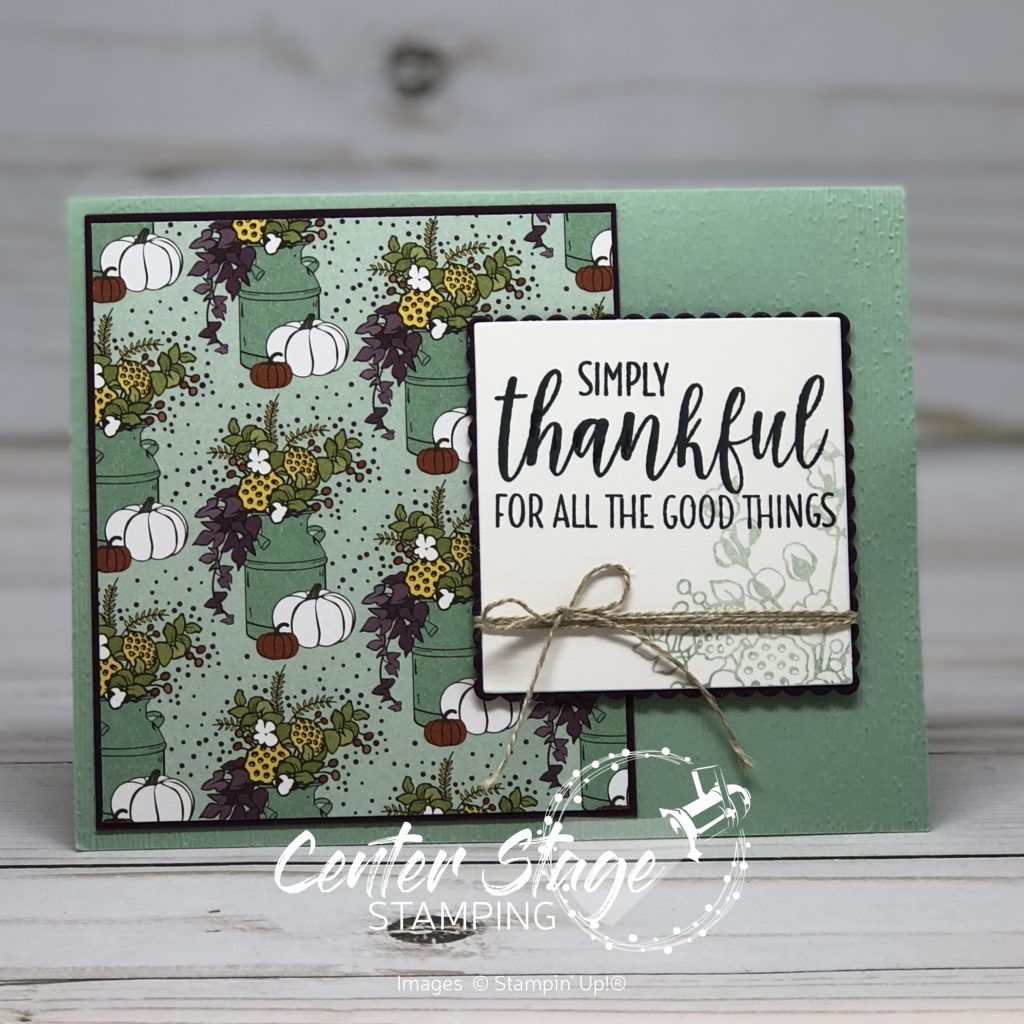
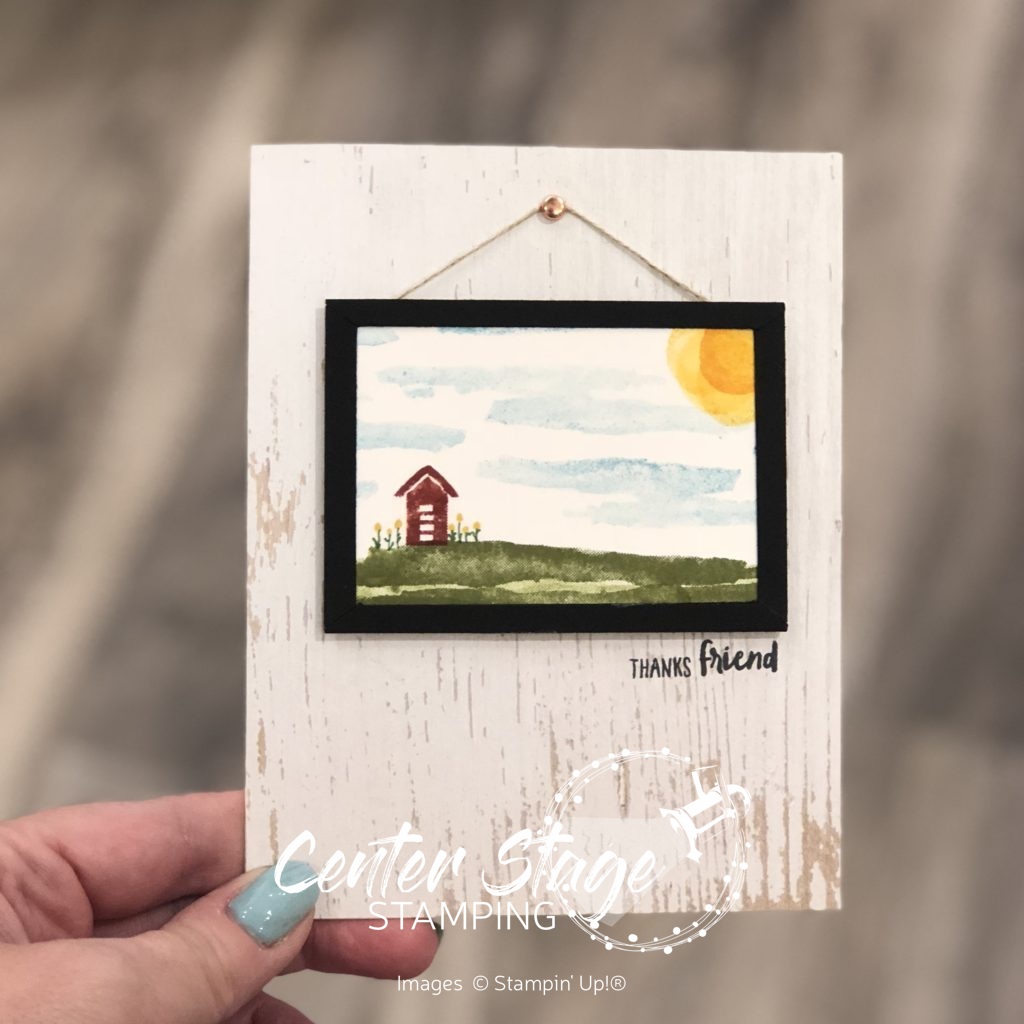
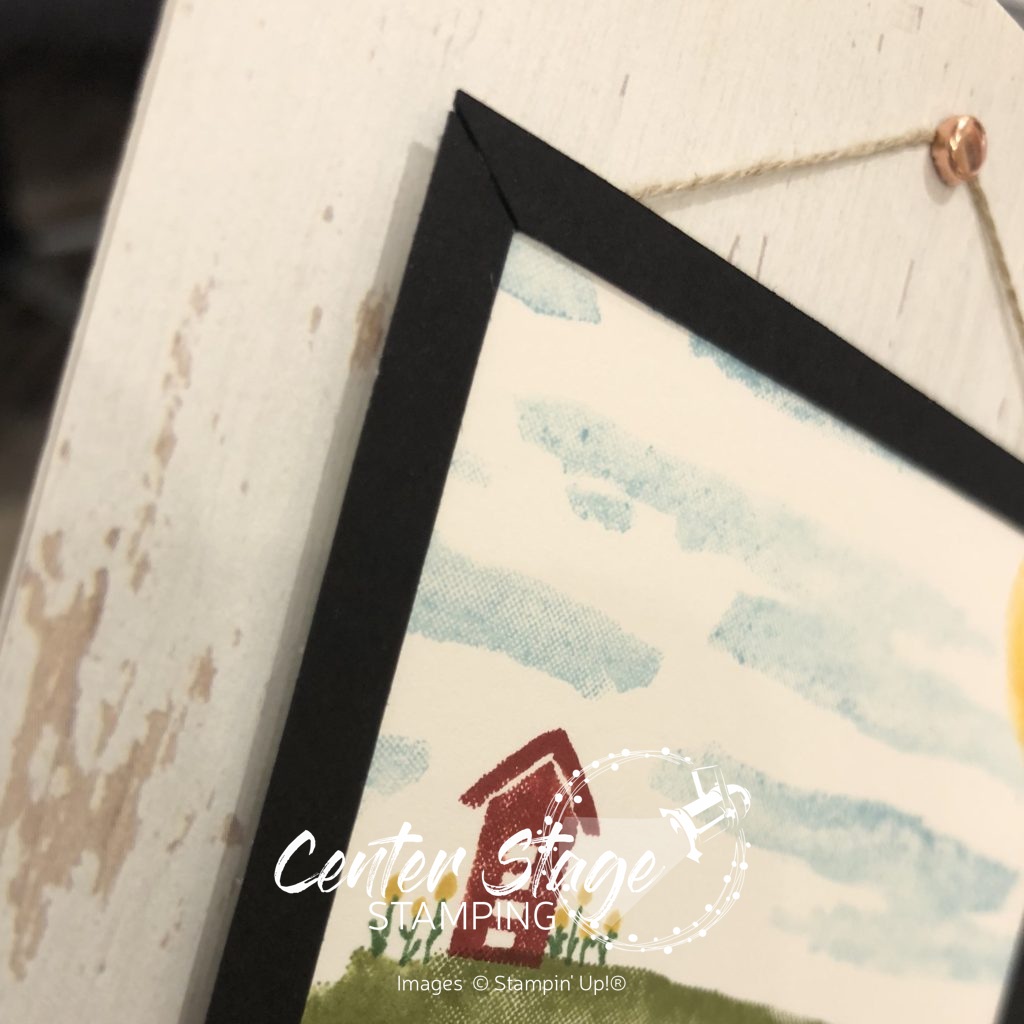
I stamped the milk can and flowers in Sahara Sand that was stamped off to make it lighter.  Then I colored it in.  I used the stamps as a guide if I could no longer see the inked outline.  I really like how the milk can turned out! It’s even better in person.

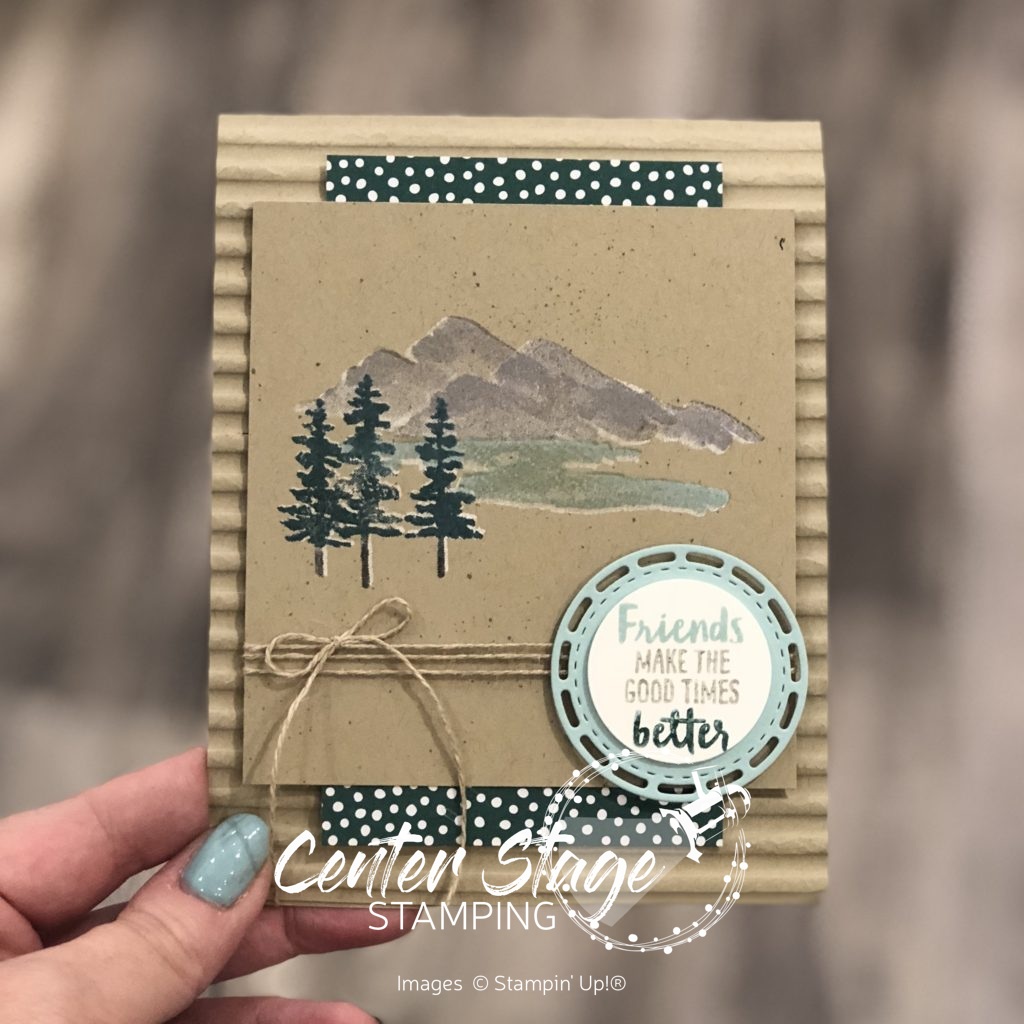
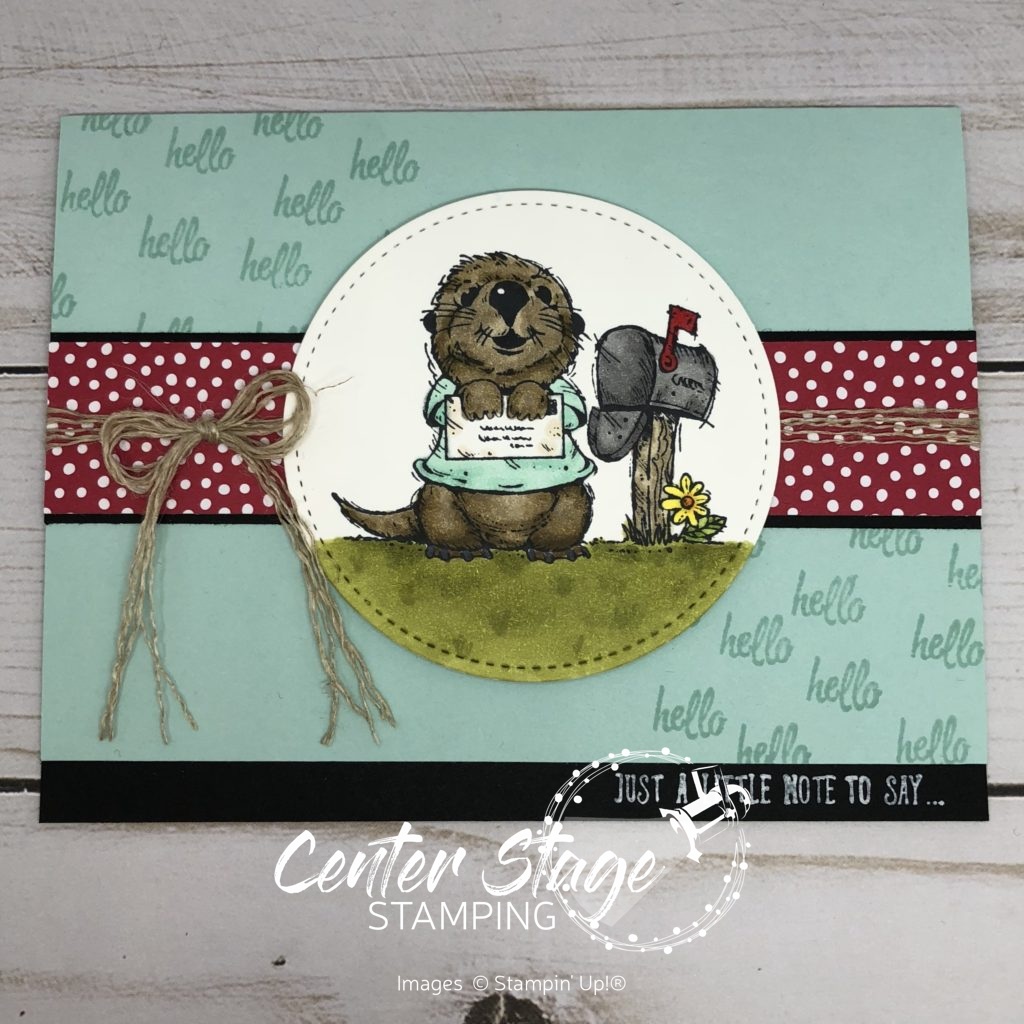
Next up, I went with basic coloring.  Postcard Palls is a great set for this.  Isn’t that little otter just adorable!  The Stampin’ Blends make it possible to get so much depth with the shading.

Postcard Palls: Otter - Center Stage Stamping

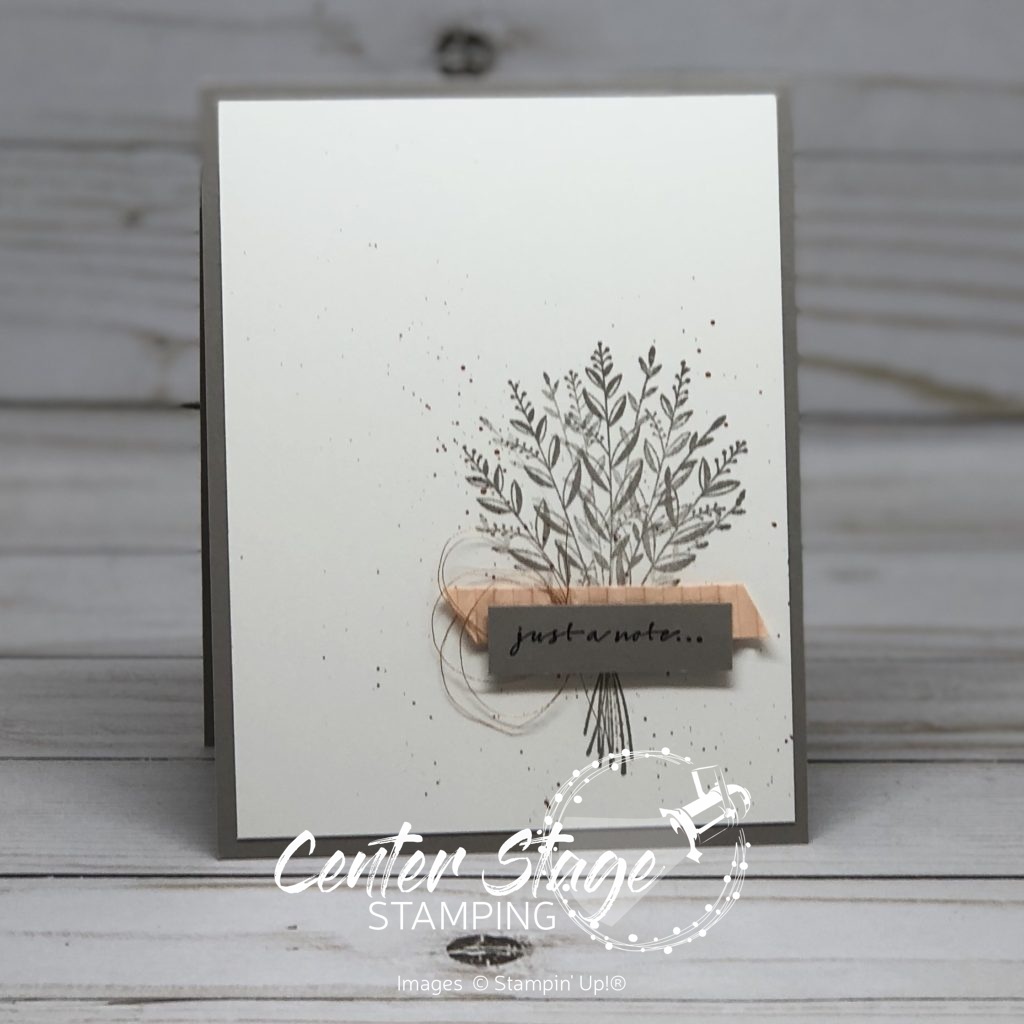
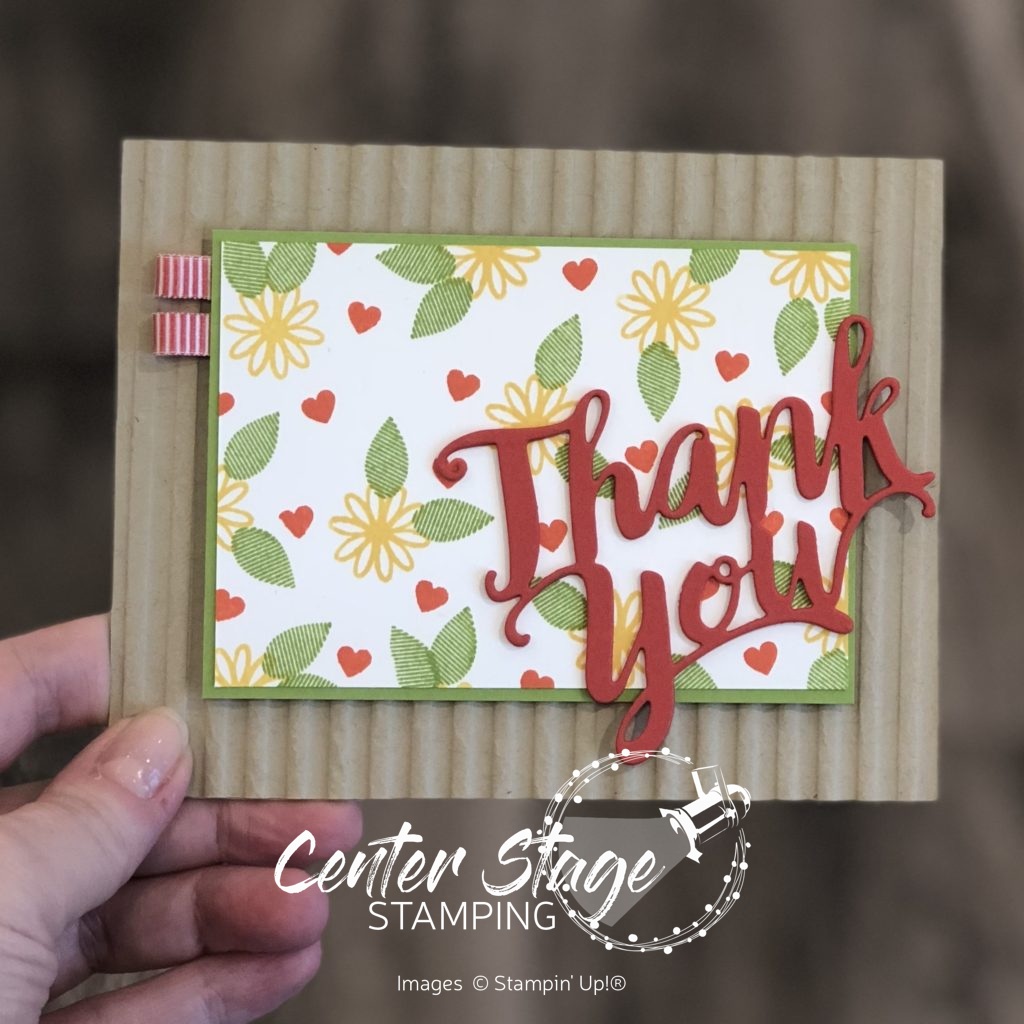
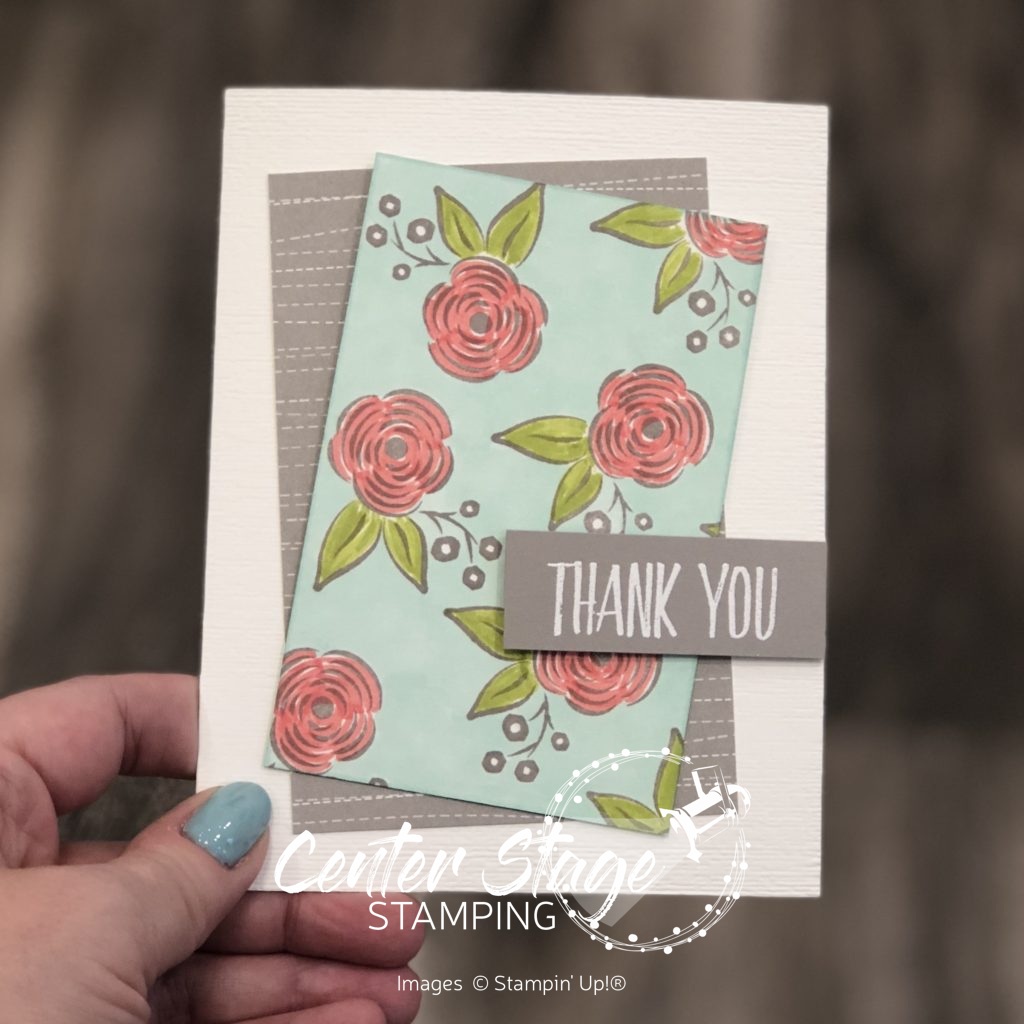
Finally, I made my own designer paper – the flowers and background are colored with Stampin’ Blends.  The possibilities are endless!Perennial Birthday: stampin' blends - Center Stage Stamping

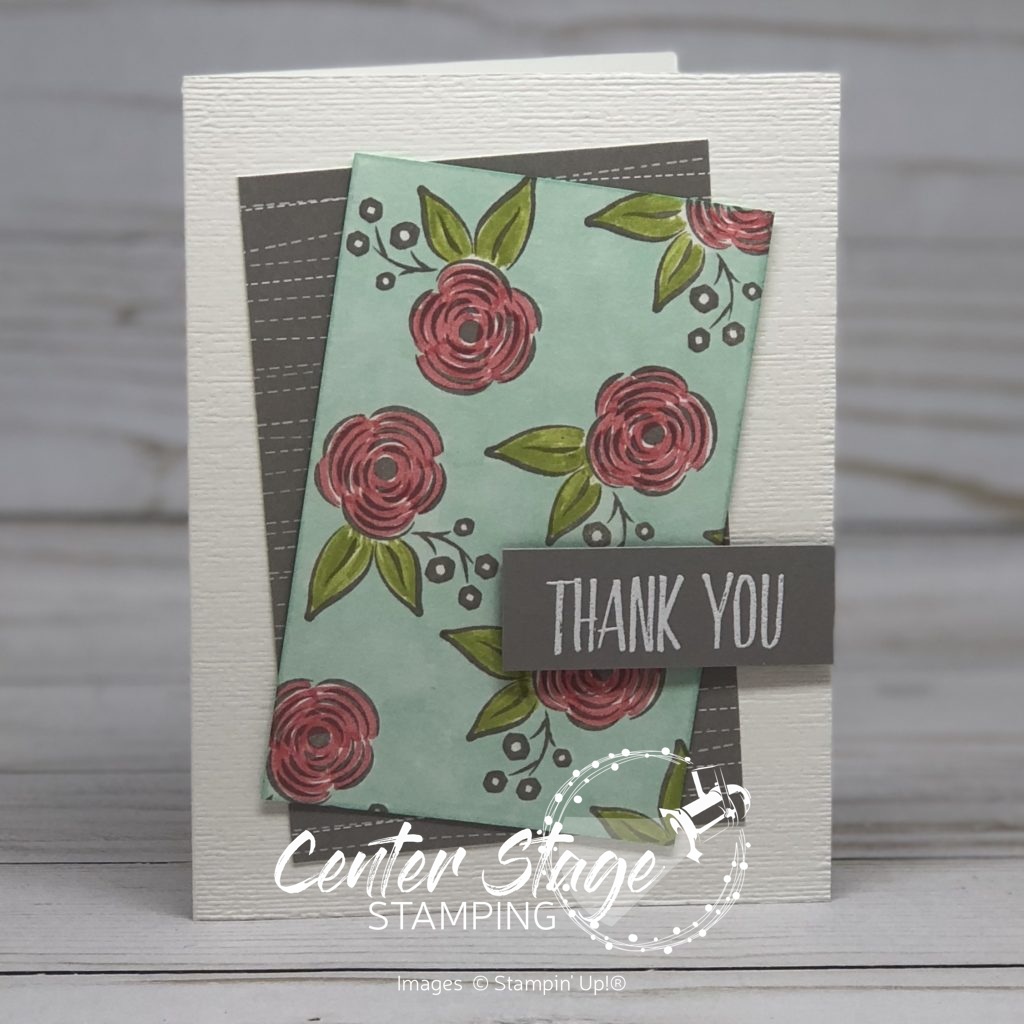
If you haven’t tried Stampin’ Blends yet, you need to.  They make coloring so much fun!  I now send you over to Cindy and her fantastic creations!

Thanks for stopping by!  Join me again to put a spotlight on creativity!


Share with your friends:

october creative class projects

I taught a Creative Class at Stamp-n-Storage on Saturday, October 20.  We had a great time stamping and creating five fall themed cards.  I thought I would pop on today and share those projects with you.

Country Home: Thankful for all the good things - Center Stage Stamping

Coffee Cafe: thanks a latte - Center Stage Stamping

Rooted in Nature: Be Bold fall - Center Stage Stamping

Wishing You Well: just a note - Center Stage Stamping

Happy Birthday: bubble wrap water color - Center Stage Stamping

We had a lot of fun putting these cards together.  Especially that last one!  I was able to teach a fun new water color technique.  I will be back on Wednesday with a quick tutorial for this.

Stamp-n-Storage Oct Creative Class projects - Center Stage Stamping

Here is everyone with their finished projects!  They all did a great job.

Stamp-n-Storage Oct Creative Class group photo

The next Stamp-n-Storage Creative Class is Saturday, November 17 at 1:00PM.  You can find more details and register for the class over on the Stamp-n-Storage website HERE.  I’d love to have you join us!

That’s a wrap for today.  Join me again to put a spotlight on creativity!


Share with your friends:

thank you elephant

Just a quick post today to share this adorable guy!

Little elephant: thank you - Center Stage Stamping

With Basic Gray as a backdrop and pops of pool Party, Lemon Lime Twist and Grapefruit grove, this cute little elephant steals the show.  I decided to keep the card pretty simple with a few fun details to spotlight my little pachyderm friend. I punched out a Whisper White 1-3/4″ circle and a Lemon Lime Twist 1-3/4″ circle, then trimmed down the Lemon Lime Twist one and fringed the top edge for the grass. The little Basic Gray elephant is punched out with the coordinating Elephant Builder punch and made it a breeze to give him a Pool Party ear.  I fussy cut the Grapefruit grove heart sentiment.  This little guy is definitely deserves to be center stage!

That’s a wrap for today.  Join me again to put a spotlight on creativity!

Share with your friends:

inky friends: dc 10

My Inly Friends are back with their 10th design challenge!  This is a color challenge based on a sample on page 115 of the Stampin’ Up! 2018-19 Annual catalog.  A very bright combination of colors! You can head over to the My Inky Friends page to see what all of the Design Team created with this color inspiration.  Here is my creation:

Inky Friends DC 10: Thank You - Center Stage Stamping

I used the A Big Thank You stamp set and coordinating Thank You Thinlit.  The small images work great to create your own background paper. The Crumb Cake card base is embossed with the Corrugated Dynamic Textured Impressions Embossing Folder.  I just love the texture and dimension it gives.  I added two little ribbon loops on the top left corner of the image panel to finish it off.  I let the die cut thank you hang off the image panel a bit to pull it into the card base some.  I think it helps it stand out more.

Head over to the My Inky Friends page and check out the other design team creations, then have a go at this color combo yourself!  Be sure to upload your creation to the My Inky Friends page so we can share in your creativity!

That’s a wrap for today.  Join me again to put a spotlight on creativity!

Share with your friends:

stamp review crew: waterfront

Welcome back to another Stamp Review Crew blog hop!  I’m so glad you have joined us as we put the Waterfront stamp set in the spotlight.  This set is a lot of fun to play with and creates wonderful watercolor style landscapes and more when you let your creativity cut loose.  I have to admit, I have had the set for several months, but this is the first time I have created anything with it.  I assure you, it won’t be the last!

Waterfront: Friends make the good times better - Center Stage Stamping

For this card, I stamped the mountains, lake and trees first in Whisper White craft ink on Crumb Cake card stock and let it completely dry.  Once dry, I stamped over the images with the colors Gray Granite, Pool Party and Tranquil Tide (with a little Early Espresso for the tree trunks).  Since the stamps are photopolymer, it made lining up the images a breeze.  I didn’t try to line them up perfectly.  The bits of white peeking out give some nice highlights. I layered the image panel on a piece of Tranquil Tide dots from the ’17-’19 In Colors Designer Series Paper stack.  The front of the card base was run through the NEW Corrugated Dynamic Textured Impressions Embossing Folder.  Isn’t it just AMAZING!  I can tell it will be used A LOT!

I used Stampin’ Write markers to ink the sentiment stamp and layered it on a Pool Party circle cut from the Stitched Labels Framelits.  Then adhered it over a bit of Linen Thread wrapped around the image panel.

I had been watching an episode of Murder She Wrote when I came up with the idea for this next card.  I hand an image in my mind of a quaint painting hanging on a weathered cottage wall,  Here’s what I came up with:

Waterfront: thanks friend - Center Stage Stamping

I covered the card base with a piece of the Wood Textures designer series paper – seriously, my FAVE!  I stamped the scene on a piece of thick Whisper White card stock.  I hand drew the flowers with Stampin’ Write markers.  Then I framed the painting.  First I cut a pice of Basic Black card stock the same dimension as my “painting”.  Next, I cut diagonally corner to corner both directions.  Finally, I trimmed about 1/4″ off the outer most edge of each triangle.  Here is a picture to help you see what I did.

I could have just mounted the “painting” on a piece of Basic Black and called it good.  But this way, I get the mitered corners like a real frame.

Waterfront: thanks friend close up - Center Stage Stamping

It’s a really small detail and most probably won’t notice it, but I thought it was neat.

If you started this blog hop from the beginning, I am the final stop.  If you picked it up somewhere in the middle, make sure you go around and check out all the great inspiration with the Waterfront stamp set!  From here you can go back to Heidi or on to Debra

*The Stamp Review Crew is a group of International Stampin’ Up! demonstrators who want to show you how much you can do with ONE stamp set. Each edition the SR Crew will showcase a new featured stamp set. Each stop along the hop will show you a different idea, or ideas using that set!**


That’s a wrap for now.  I hope you will come back and join me in putting a spotlight on creativity!


Share with your friends:

thank you blooms

I can’t believe it is the end of August.  Boy, the summer just flew by.  And here we are going into Labor day weekend.  At least my youngest two will be home for the long weekend.  And on Saturday we are going to see……HAMILTON!!  I have been looking forward to this coming to Minneapolis for over a year.  And I was fortunate to be able to get tickets for the four of us to go!  Eeeeek!  (I’m just a little bit excited.) I am not throwin’ away my shot!


We were doing a photo shoot in my studio for the upcoming Stamp-n-Storage catalog a couple of weeks ago.  And I was told to “grab some stuff and look like I was working on a project”.  So, I pulled out some things and just started stamping.  When the photo shoot was done, I had to finish up the card.  This is the finished product:

Thank you blooms - Center Stage Stamping

The card base is embossed with the Subtle 3D Dynamic Textured Impressions Embossing Folder.  The striped layer is from the Twinkle Twinkle designer series paper pack. For the flower panel, I stamped the flowers from Perennial Birthday in Gray Granite.  Next I colored them with my Stampin’ Blends in Flirty Flamingo and Granny Apple Green (the lighter shade). Then I grabbed my Light Pool Party Stampin’ Blend and colored the background.  Ta Da – I made my own DSP!!!!  I embossed the greeting in white on a piece of Gray Granite card stock and adhered it to the card.  So easy!  Have you tried coloring with Stampin’ Blends yet?  You really need to.  They are fabulous!

Hey, I just realized my manicure even coordinates with this card!

That’s a wrap for today.  Thanks for stopping by. Come back soon and join me in putting a spotlight on creativity!

Share with your friends:

inky friends – dc8

Hey everybody!   It’s time for another My Inky Friends challenge! This inspiration for this one is a color combo found on page 119 of the 2018-19 Stampin’ Up! catalog.

I have to admit this was a tough combo for me.  I wasn’t sure how to handle the balance of these colors.  I finally decided less is more and went with a white back ground and small amounts of these colors.

Love and Thanks - Center Stage Stamping

I embossed a white panel with the Pinewood Planks Textured Embossing Folder.  I wrapped a bit of the Night of navy Gingham Ribbon tied offf with some Linen Thread and layered it on a Whisper White card base.  I cut out three leaves from the Tropical Thinlits in Soft Suede, Old Olive and Grapefruit Grove and centered them on the ribbon.  The sentiment is from Tropical Chic.  I masked off part of it, stamped it in Night of Navy ink, and fussy cut around it.  It is popped up on dimensionals over the leaves.  The finishing touch is the three Grapefruit Grove pearls from the Share What You Love Artisan Pearls.

Head on over to My Inky Friends blog to see what the rest of the design team did with this color challenge and then play along.  I’d love to see what you come up with!

Thanks for stopping by! Happy Stamping!

-Mary

Share with your friends:

animal outing thank you

Hello! Let’s kick off this week with a fun thank you card featuring the super cute Animal Outing set.

Animal Outing Thank You - Center Stage Stamping

I stamped the giraffe and branches with Memento Black ink and colored them with my Stampin’ Blends.  I love these markers.  They make it so easy to get a very artistic look with the shading you can do.  I cut them out with one of the circles form the Stitched Shapes Framelits.  The dotted panel is from the Brights Designer Series Paper stack in Daffodil Delight.  The Crumb Cake panel is embossed with the Petal Burst Textured Impressions Embossing Folder and I roughed up the edges before adhering it to the Whisper White card base.  I masked off just the “thank you” from the “thank you big time” sentiment and stamped it in Whisper White ink on basic Black card stock.  I love how the giraffe looks like he is saying “thank you”! Or maybe he’s singing.

Animal Outing Thank You close up - Center Stage Stamping

Thanks for stopping by! Happy Stamping!

-Mary

Share with your friends:

thank you big time

My studio remodel is coming along slowly. We took out the closet and removed the popcorn ceiling texture.

My wonderful husband, Brett is doing most of the work in the studio himself.  I owe him a BIG thank you.  Today’s card might fit the bill.  The new Animal Outing stamp set is SO cute!  I just love this little rhinoceros.  He is so much fun to watercolor and perfect for the new color Gray Granite.

Animal Outing Thank You - Center Stage Stamping

The Gray Granite layer is embossed with the new Subtle 3D Dynamic Textured Embossing Folder.  I pulled in some Lemon Lime Twist, Pool Party and Grapefruit Grove for a pop of color.  The leaves were cut with the Animal Friends thinlits.  I surprised myself by not using any extra embellishments on this.  But the die cut leaves, stitched circle and Grapefruit Grove strip cut with the Stitched Labels framelits give this card plenty of extra detail.

Thanks for stopping by! Happy Stamping!

-Mary

Share with your friends:

inky friends – dc 6

It’s time for another Inky Friends design challenge.  We picked a color combo from page 63 of the 2017-18 Stampin’ Up! annual catalog.  This is a great color scheme, perfect to get in the mood for summer.  The colors are very bold, so I chose to use them in moderation to let them shine.

Thanks Varied Vases - Center Stage Stamping

I used the NEW Varied Vases set (designed by Stampin’ Up! Million Sales Achiever, Mary Fish).  I LOVE this set.  It even has a coordinating punch!  For this challenge, I decided to go a bit minimalist.  I masked the center vase so it would look like it is in front.  The fun scallop line makes a great shelf for the vases. A few enamel dots compliment the trio of vases.  I stamped the Hardwood background stamp in Bermuda Bay.  I stamped it off first to mute the color just a bit.  The front panel is raised with Stampin’ Dimensionals for more depth.

Thanks for stopping by.  I hope you will drop by the Inky Friends blog and play along with our color challenge.  It’s more fun when others play along.  Create a project using this color scheme and upload a link to it on the Inky Friends page.  Happy Stamping!

-Mary


Share with your friends: