Design Challenge

stamp review crew: little twinkle

It’s time for a bonus round with the Stamp Review Crew!  Join us for an inspirational blog hop shining the spotlight on Little Twinkle!  This is a very fun set and is part of the sweet Twinkle Twinkle product suite. (See what I did there?) I have previously shared a couple of cards I made with this suite.  You can see them HERE and HERE.  This time around I wanted to try something different.  I decided I wasn’t going to use the coordinating Tinkle Twinkle Designer Series Paper or similar colors – with the exception of Night of Navy.  I also wanted to see if I could come up with something other than a baby card.

Little Twinkle: Little Star - Center Stage Stamping

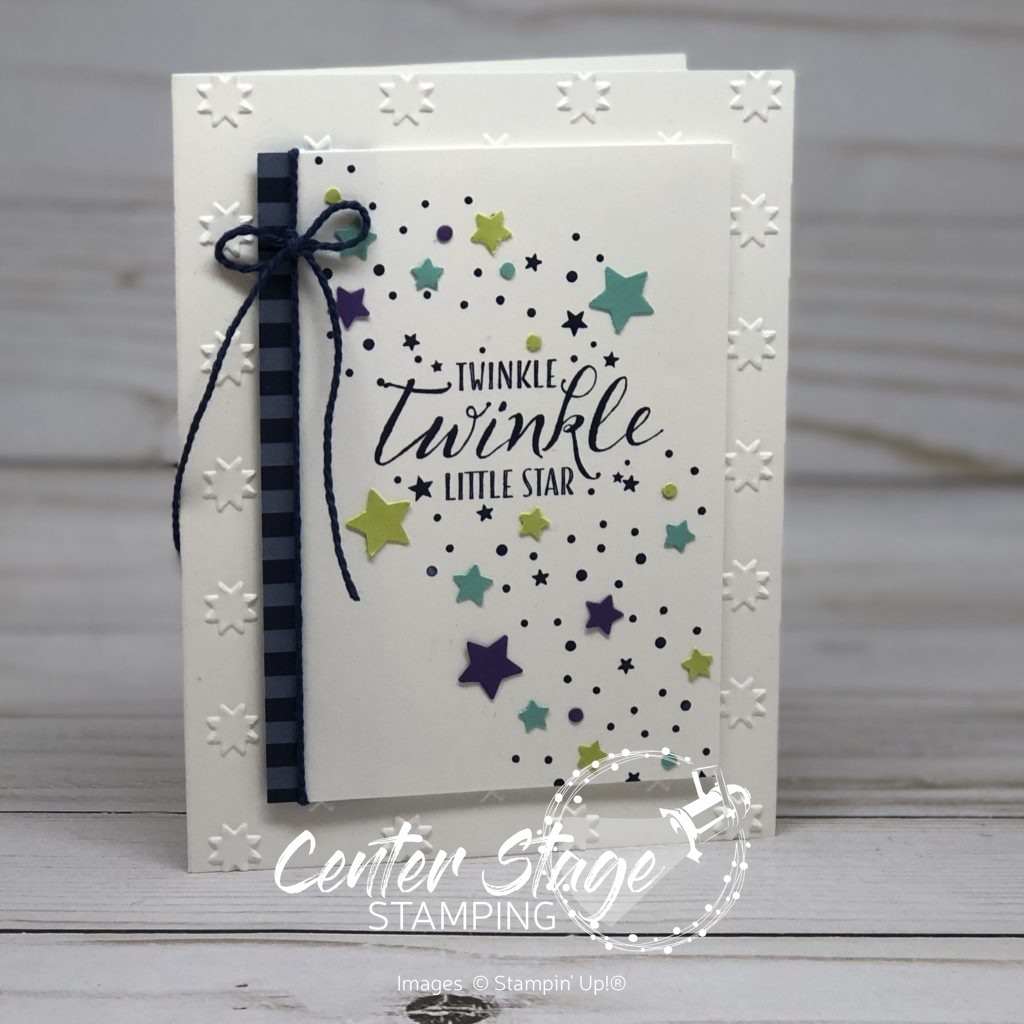
This card started with a White card base embossed with the Oh My Stars embossing folder.  I stamped the sentiment and stars in Night of Navy on a smaller white panel.  I used stars and dots punched from the Twinkle Builder punch in Lemon Lime Twist, Gorgeous Grape (for some reason, the Gorgeous Grape stars look Navy in the photo) and Coastal Cabana and glued them on randomly. The Take Your Pick Tool came in handy for this task!  I added a strip of Night of Navy striped pattern from the Neutrals DSP stack and tied some Night of Navy Medium Bakers Twine.  I love the bright color pops on this card.

Little Twinkle: a Star is Born - Center Stage Stamping

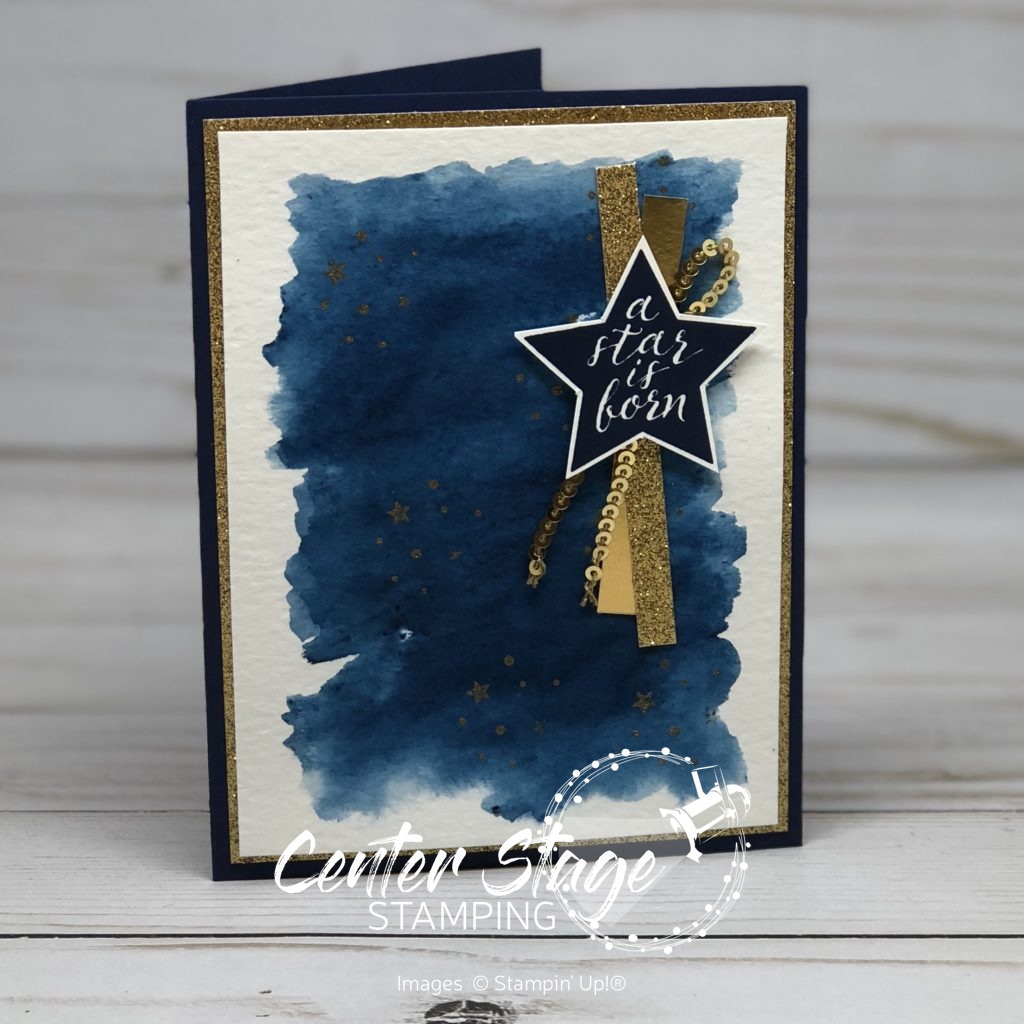
For this next card, I decided to have a go with my Brushos.  Would you believe I have had them since April and this is the first time I have used them!  Crazy, huh?  I started with a pice of watercolor paper.  I wet it down and sprinkled some Prussian Blue brusho on.  I moved it around with my aqua painter and added more Brusho until I got the depth of color I wanted.  Once this panel was completely dry, I stamped the small stars and embossed them in gold.  I stamped the star in Night of Navy and cut it out.  I added some Gold Foil, Gold Glimmer Paper and Gold sequin trim behind the star for  extra texture contrast. The watercolor paper panel  is layered on Gold Glimmer paper and a Nigh of Navy card base.  This would be a great card for many different occasions!

I hope now you look beyond just baby cards for this fun set.  Make sure you travel through the entire blog hop for more amazing Little Twinkle inspiration! You can head on over to Tanya or go back to Stesha and remember you can always find the full blog hop list on the Stamp Review Crew page.

Thanks for stopping by!  Join me again to put a spotlight on creativity!


Share with your friends:

inky friends: dc 11


It is time for another design challenge with My Inky Friends!  This one is based on a card layout on page 122 of the 2018-19 Stampin’ Up! catalog.  Here is my creation.

Inky Friends DC11: Dashing Deer - Center Stage Stamping

I used Dashing Deer and Detailed Deer Thinlits.  I think this is my favorite Christmas bundle in the Holiday Catalog.  The Crumb Cake card base has a Crumb Cake layer that I ran through the Corrugated Dynamic Textured Impressions Embossing Folder.  The sentiment is from Merry Christmas to All.  I colored it and the swag with Cherry Cobbler, Mossy Meadow and Crumb Cake markers to get the multi color images.  It is hard to see in the photo, but the Cherry Cobbler circle was stamped with the Burlap background stamp before I cut it out with the Stitched Shapes circle.  I finished off with a few strips of Festive Farmhouse designer series paper and some Linen Thread.

Make sure to check out what the rest of the design team has created for this challenge and then play along!  Make your own creation based on the sketch and share it by linking it to the My Inky Friends page.

Thanks for stopping by! Join me again to shine a spotlight on creativity!


Share with your friends:

inky friends: dc 10

My Inly Friends are back with their 10th design challenge!  This is a color challenge based on a sample on page 115 of the Stampin’ Up! 2018-19 Annual catalog.  A very bright combination of colors! You can head over to the My Inky Friends page to see what all of the Design Team created with this color inspiration.  Here is my creation:

Inky Friends DC 10: Thank You - Center Stage Stamping

I used the A Big Thank You stamp set and coordinating Thank You Thinlit.  The small images work great to create your own background paper. The Crumb Cake card base is embossed with the Corrugated Dynamic Textured Impressions Embossing Folder.  I just love the texture and dimension it gives.  I added two little ribbon loops on the top left corner of the image panel to finish it off.  I let the die cut thank you hang off the image panel a bit to pull it into the card base some.  I think it helps it stand out more.

Head over to the My Inky Friends page and check out the other design team creations, then have a go at this color combo yourself!  Be sure to upload your creation to the My Inky Friends page so we can share in your creativity!

That’s a wrap for today.  Join me again to put a spotlight on creativity!

Share with your friends:

inky friends: dc9

Time for a design challenge from My Inky Friends! For this challenge, we are featuring a square sketch, inspired by page 16 of the Annual Catalog.

I decided to use some new items from the Stampin’ Up! Holiday catalog which goes live tomorrow!  It is chock full of fantastic goodies for all of your holiday projects!  For this challenge, I used the Dashing Deer Bundle – stamp set and coordinating thinlits – and the Joyous Noel Specialty Designer Series Paper. Oh. My. Goodness.  It is sooooooo pretty!  The copper foil accents are stunning.

Dashing Deer Happiest Christmas

Colors are Sahara Sand, Gray Granite and Copper.  A close up look at a few details:

Dashing Deer Happiext Christmas close up - Center Stage Stamping

The vellum circle is cut out with one of the Stitched Shaped Framelits.  The sprig is from the Frosted Bouquet Framelits (part of the Frosted Floral Suite) cut out of Copper Foil.  For the Soft Suede strip I crumpled it up then separated the layers so it has a look of suede (difficult to see in the photo). I used the Bright Copper Shimmer Paint and the stylus end from the Take your Pick too. to put the copper details on the image at the bottom of the card.

Finished project is a 5″x5″ card.  I love the neutral tones on this.  What a fantastic Christmas greeting to send.

Head over to My Inky Friends blog and check out the other projects based on this sketch.  I hope you will join us and play along.  Create your project based on this sketch then upload a link to it on My Inky Friends blog to share it with us.  We love to see your projects!

That’s a wrap for today.  Join me again to put a spotlight on creativity!

Share with your friends:

inky friends – dc8

Hey everybody!   It’s time for another My Inky Friends challenge! This inspiration for this one is a color combo found on page 119 of the 2018-19 Stampin’ Up! catalog.

I have to admit this was a tough combo for me.  I wasn’t sure how to handle the balance of these colors.  I finally decided less is more and went with a white back ground and small amounts of these colors.

Love and Thanks - Center Stage Stamping

I embossed a white panel with the Pinewood Planks Textured Embossing Folder.  I wrapped a bit of the Night of navy Gingham Ribbon tied offf with some Linen Thread and layered it on a Whisper White card base.  I cut out three leaves from the Tropical Thinlits in Soft Suede, Old Olive and Grapefruit Grove and centered them on the ribbon.  The sentiment is from Tropical Chic.  I masked off part of it, stamped it in Night of Navy ink, and fussy cut around it.  It is popped up on dimensionals over the leaves.  The finishing touch is the three Grapefruit Grove pearls from the Share What You Love Artisan Pearls.

Head on over to My Inky Friends blog to see what the rest of the design team did with this color challenge and then play along.  I’d love to see what you come up with!

Thanks for stopping by! Happy Stamping!

-Mary

Share with your friends:

inky friends – dc7

It’s time for another design challenge from My Inky Friends!  This time it is a layout based on a card on page 48 of the 2018-19 Stampin’ Up! catalog.  I knew the Broadway Bound suite would be great for this challenge.  This set was a must get on my first order from the new catalog.  Hmmmm, I wonder why?  I decided to turn the sketch on its side.


Broadway Birthday Wish - Center Stage Stamping

The only stamping is the “make a” banner.  Gotta love the Broadway Lights framelits!!  The marquee is perfect to fill in with the Metallic Pearls featured in the suite, or my favorite embellishment -Basic Rhinestones!  Perfect for a little Broadway Bling!

Make sure you go over to My Inky Friends and see all the other great ideas for this card layout, then play along! Create your own project based on this sketch and share it with us.

Thanks for stopping by! Happy Stamping!

-Mary

Share with your friends:

inky friends – dc 6

It’s time for another Inky Friends design challenge.  We picked a color combo from page 63 of the 2017-18 Stampin’ Up! annual catalog.  This is a great color scheme, perfect to get in the mood for summer.  The colors are very bold, so I chose to use them in moderation to let them shine.

Thanks Varied Vases - Center Stage Stamping

I used the NEW Varied Vases set (designed by Stampin’ Up! Million Sales Achiever, Mary Fish).  I LOVE this set.  It even has a coordinating punch!  For this challenge, I decided to go a bit minimalist.  I masked the center vase so it would look like it is in front.  The fun scallop line makes a great shelf for the vases. A few enamel dots compliment the trio of vases.  I stamped the Hardwood background stamp in Bermuda Bay.  I stamped it off first to mute the color just a bit.  The front panel is raised with Stampin’ Dimensionals for more depth.

Thanks for stopping by.  I hope you will drop by the Inky Friends blog and play along with our color challenge.  It’s more fun when others play along.  Create a project using this color scheme and upload a link to it on the Inky Friends page.  Happy Stamping!

-Mary


Share with your friends:

inky friends dc 5

My Inky Friends are back with another Design Challenge.  This one is based on a card layout on page 35 of the 2017-18 Stampin’ Up! catalog.

Thanks a Latte - Center Stage Stamping

I decided to use the Coffee Cafe set and added the “coffee” from Balloon Celebration and the coffee rings from Timeless Textures.  The Wood Textures circle is cut out with the Stitched Shapes Framelits, the stitching is hard to see on the dark wood paper. For the Pear Pizazz piece under the Thanks a Latte oval, I went over it with my bone folder to break the fibers.  Next I peeled the paper into two layers.  The piece now has a soft, fuzzy look.

I hope you go check out the other great creations based on this sketch.  Thanks for stopping by! Happy Stamping!

-Mary

Share with your friends:

Inky Friends Blog Hop

I am interrupting my display samples to join my Inky Friends in another blog hop.  This time we are putting the retiring 2016-18 in colors in the spotlight: Dapper Denim, Peek-a-boo Peach, Flirty Flamingo (Will becoming part of the core color line!), Emerald Envy, and Sweet Sugarplum.  We have some fun projects showing off these colors, so make sure you follow the blog hop for all the inspiration!  You may have come here from the talented Tanya or from the Sensational Shelley if you are traveling backwards through the hop.


I am putting Peek-a-boo Peach in the spotlight.  I love how fresh and fun this color is.

You are Amazing - Center Stage Stamping


This card uses Swirly Bird and All Things Thanks stamp sets. I used the small swirl to create a fun background.  The banner die cut is a fun way to highlight part of the sentiment.

Floral Hello - Center Stage Stamping

I love Peek-a-boo Peach with the Wood Textures Designer Series Paper.  The dainty flowers of the Floral Sentiments set help showcase this great color.

I hope you are inspired to give Peek-a-Boo Peach a little love.  Make sure you continue through to all the blogs in our hop for more great color projects!

Thanks for stopping! Happy Stamping!

-Mary


Share with your friends:

Inky Friends DC 4

I’m back with my Inky Friends for another design challenge. This time it’s a color scheme found on page 79 of the 2017-18 Annual Catalog.

This one had me stumped for a bit.  I rarely use Marina Mist or Blushing Bride. But, I like a challenge and it is good to step out of your comfort zone occasionally.  After some thought, I settled on this:

Lavender Thank You - Center Stage Stamping

I used Lots of Lavender set with the addition of Basic Gray for the outline and sentiment.   Stop by the Inky Friends blog and see what the other designers created with this color scheme.  There really is a lot you can do with it!  Then play along and share your creation.

Thanks for stopping by!  Happy Stamping!

-Mary

Share with your friends: