Create

never too old to make a wish

When I first saw the Broadway Bound suite of products in the new Stampin’ Up! catalog I knew I had to have it.  I know, shocking, right?  They had me at broadway.  The entire suite is amazing.  I think used most of the products in it on today’s card.

Never too old to make a wish - Center Stage Stamping

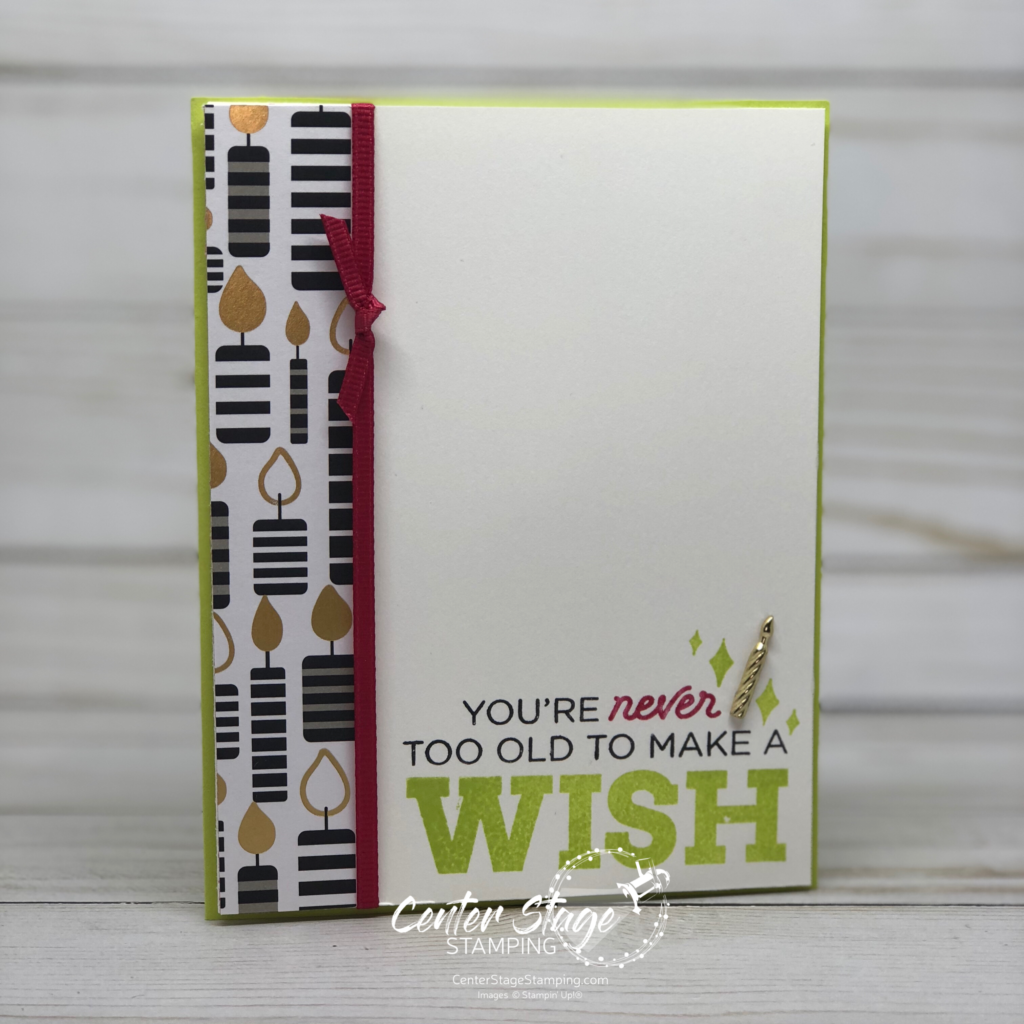
I started with a strip of the Broadway Bound Specialty Designer Series Paper.  One side of each sheet has wonderful gold foil accents on it!  Next I stamped ‘WISH” in Lemon Lime Twist.  Above that I stamped the remainder of the sentiment that I colored with Stampin’ Write Markers so I could get more than one color.  I then stamped the little diamond shapes, added the fun little gold candle embellishment and wrapped a little Lovely Lipstick ribbon around. Who wouldn’t love bright, fun birthday reminder like this?

Thanks for stopping by! Happy Stamping!

-Mary

Share with your friends:

in the stars

My studio remodel is slowly moving forward.  We should be ready to prime the ceiling and walls this week!  Once primed, we can paint and then we can move my desk back in!  I am getting really excited.  I have been thinking about decor for the room.  I am planning a trip to Hobby Lobby this week to get some ideas.  I can’t wait to share photos of the finished room!

I have been able to get some stamping done at my temporary location.  Although it is difficult with a small fraction of the space I’m used to and many more distractions being in the center of family activity, it isn’t all bad.  I am enjoying the company of my daughter and son who are home from college for the summer.  Here is one of the cards I create at my kitchen desk.  I used the new Little Twinkle stamp set and coordinating Twinkle Twinkle designer series paper.

written in the stars - Center Stage Stamping

I started with a piece of watercolor paper and did a simple wash of Petal Pink with my aqua painter and ink refill.  Once that was dry, I stamped the heart constellation in Night of Navy and the small star cluster in Petal Pink.  I layered this onto small strips of the striped pattern paper and then onto the Night of Navy layer, which is adhered onto a thick Whisper White card base. the sentiment is stamped on Petal Pink card stock and cut out.  Finally I added a little Nigh of Navy bakers twine and a few rhinestones.  A fun card that could be used for a variety of occasions.

Thanks for stopping by! Happy Stamping!

-Mary

Share with your friends:

wild about you

I just love the Animal Outing stamp set and coordinating Animal Expedition designer series paper. For today’s card, I decided to let the paper take center stage.

These animals are so darn cute!  I fussy cut out one of the little chameleons from a different sheet of Animal Expedition designer series paper to accent the lower corner of the card.  I stamped the sentiment on Pool Party, Berry Burst and Lemon Lime Twist and cut out one word from each.  I angled the cuts to keep with the whimsical feel of the card.  This set and paper is proving to be very versatile and a whole lotta fun!

Thanks for stopping by! Happy Stamping!

-Mary

Share with your friends:

a star is born

I had some fun this weekend creating with the new Little Twinkle stamp set.  I paired it with the Twinkle Twinkle designer series paper and came up with this sweet card.

A Star is Born - Center Stage Stamping

I started with a Gray Granite card base that I embossed with the Pinewood Planks 3D Dynamic Textured Impressions Folder.  The Star is stamped in Pool Party and cut out by hand.  I added the paper strips to give it a shooting star feel.  For the bow, I took a piece of the Petal Pink/ Silver Bakers Twine and pulled it apart to get just the Petal Pink threads.  I doubled it and tied a bow.

This would be a great card to send to any of my theatre friends with a new baby.  Or, you could change the color scheme and it could celebrate someone’s performance in a show!

Thanks for stopping by! Happy Stamping!

-Mary

Share with your friends:

thank you big time

My studio remodel is coming along slowly. We took out the closet and removed the popcorn ceiling texture.

My wonderful husband, Brett is doing most of the work in the studio himself.  I owe him a BIG thank you.  Today’s card might fit the bill.  The new Animal Outing stamp set is SO cute!  I just love this little rhinoceros.  He is so much fun to watercolor and perfect for the new color Gray Granite.

Animal Outing Thank You - Center Stage Stamping

The Gray Granite layer is embossed with the new Subtle 3D Dynamic Textured Embossing Folder.  I pulled in some Lemon Lime Twist, Pool Party and Grapefruit Grove for a pop of color.  The leaves were cut with the Animal Friends thinlits.  I surprised myself by not using any extra embellishments on this.  But the die cut leaves, stitched circle and Grapefruit Grove strip cut with the Stitched Labels framelits give this card plenty of extra detail.

Thanks for stopping by! Happy Stamping!

-Mary

Share with your friends:

granny apple mango hello

The craft studio remodel continues slowly.  That’s the problem when you do it yourself.  We were gone every evening last week, therefore nothing happened in the studio.  Hopefully we can find some time to make some good progress soon.  Meanwhile, I am trying to create some new projects in my confined space. Here is one I made before we started remodeling.  I love the fresh new colors Mango Melody and Granny Apple Green.  Perfect for summertime.

Mango melody Varied Vases - Center Stage Stamping

I thought these two new colors were perfect for the Varied Vases set.  Two of the tiny flowers stamped randomly make a fun background. I masked the mango vase when I stamped the granny apple one so it would appear to be in front.  I also masked it when I stamped the flowers to shorten the stem. Stamping the flowers and sentiment in black created a nice contrast with the rest of the card.  I used the Layering Squares Framelits to cut the “polaroid” frame in Mango Melody card stock and layered it over the white panel stamped with the vases.  This panel is popped up with dimensionals to create some depth.  A little white Baker’s Twine and a rhinestone add just the right accent.

Thanks for stopping by! Happy Stamping!

-Mary

Share with your friends:

curtain call

As curtain is about to go down on the  2017-18 Stampin’ Up! catalog and 2018 Occasions catalog, how about one final bow for all of the great Stampin’ Up! sets and colors whose run has come to an end.  Center Stage Stamping

Bravi, Bravi, Bravissimi.  (Sorry, I couldn’t help throwing in a little Phantom of the Opera quote there.)  June 1 is curtains up on the NEW 2018-19 Stampin’ Up! catalog!  I’m looking forward to it’s time on stage and sharing many more great creations with you.  Thanks for stopping by! Happy Stamping!

-Mary


Share with your friends:

you’ve got this birthday

I have loved working with the You’ve Got This stamp set.  I love the flower and background stamp.  Here is a fun birthday card featuring that glorious flower.

You've Got This birthday- Center Stage Stamping

I love the clean look of this card.  I heat embossed the flower with white embossing powder on Crumb Cake card stock.  Next I watercolored the flower with Bermuda Bay and Always artichoke.  I really like how it turned out.  I popped up this panel an another layer of Crumb Cake and drew around it with a white watercolor pencil.  It is on a Whisper White card base and the sentiment is embossed in white on a thin Bermuda Bay strip.

I love detailed cards, but sometimes it is fun to keep it simple and let the art work of a stamped image really take center stage.  Thanks for stopping by! Happy Stamping!

-Mary

Share with your friends:

Posted in Birthday, Create | Comments Off on you’ve got this birthday

inky friends – dc 6

It’s time for another Inky Friends design challenge.  We picked a color combo from page 63 of the 2017-18 Stampin’ Up! annual catalog.  This is a great color scheme, perfect to get in the mood for summer.  The colors are very bold, so I chose to use them in moderation to let them shine.

Thanks Varied Vases - Center Stage Stamping

I used the NEW Varied Vases set (designed by Stampin’ Up! Million Sales Achiever, Mary Fish).  I LOVE this set.  It even has a coordinating punch!  For this challenge, I decided to go a bit minimalist.  I masked the center vase so it would look like it is in front.  The fun scallop line makes a great shelf for the vases. A few enamel dots compliment the trio of vases.  I stamped the Hardwood background stamp in Bermuda Bay.  I stamped it off first to mute the color just a bit.  The front panel is raised with Stampin’ Dimensionals for more depth.

Thanks for stopping by.  I hope you will drop by the Inky Friends blog and play along with our color challenge.  It’s more fun when others play along.  Create a project using this color scheme and upload a link to it on the Inky Friends page.  Happy Stamping!

-Mary


Share with your friends:

blooms for you

Today I have a fun technique to share as we say good bye to the Blooms and Wishes set.  This is a fun way to make colors really stand out on Crumb Cake or kraft card stock.

Blooms for you - Center Stage Stamping

First, I stamped the various images with Whisper White ink on the Crumb Cake panel and let it dry.  Next, I stamped the same images, but in color.  I din’t worry about lining up the images perfectly.  It gives some great shading if it is slightly off. I stamped the sentiment and heat embossed it with white embossing powder.  The final touch was to take a white colored pencil and draw the border lines to tie things together.  I adhered this panel to the card base with dimensionals.  How much fun is that! I really love this effect.

Thanks for stopping by! Happy Stamping!

-Mary

Share with your friends: