3D

oast blog hop: end of summer

Hello crafty friends! Can you believe it is August already? Man the summer went fast. I’m really not ready to head into fall yet. Fitting that today’s One Stamp At A Time blog hop theme is End of Summer. Get ready for some great creative inspiration!

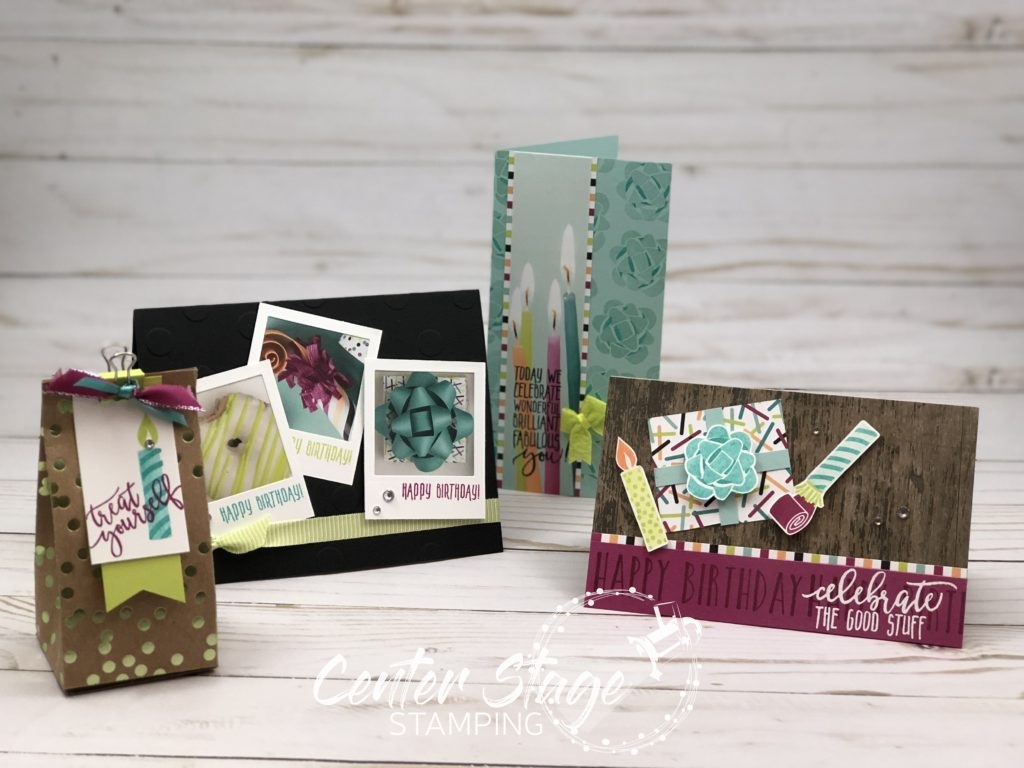
My take on this theme was to focus on adventure. Adventure that was had this summer or adventure yet to come: the next school year, going off to college, going from college into the work force, one more get away before fall, or maybe looking ahead to next summer’s adventures.

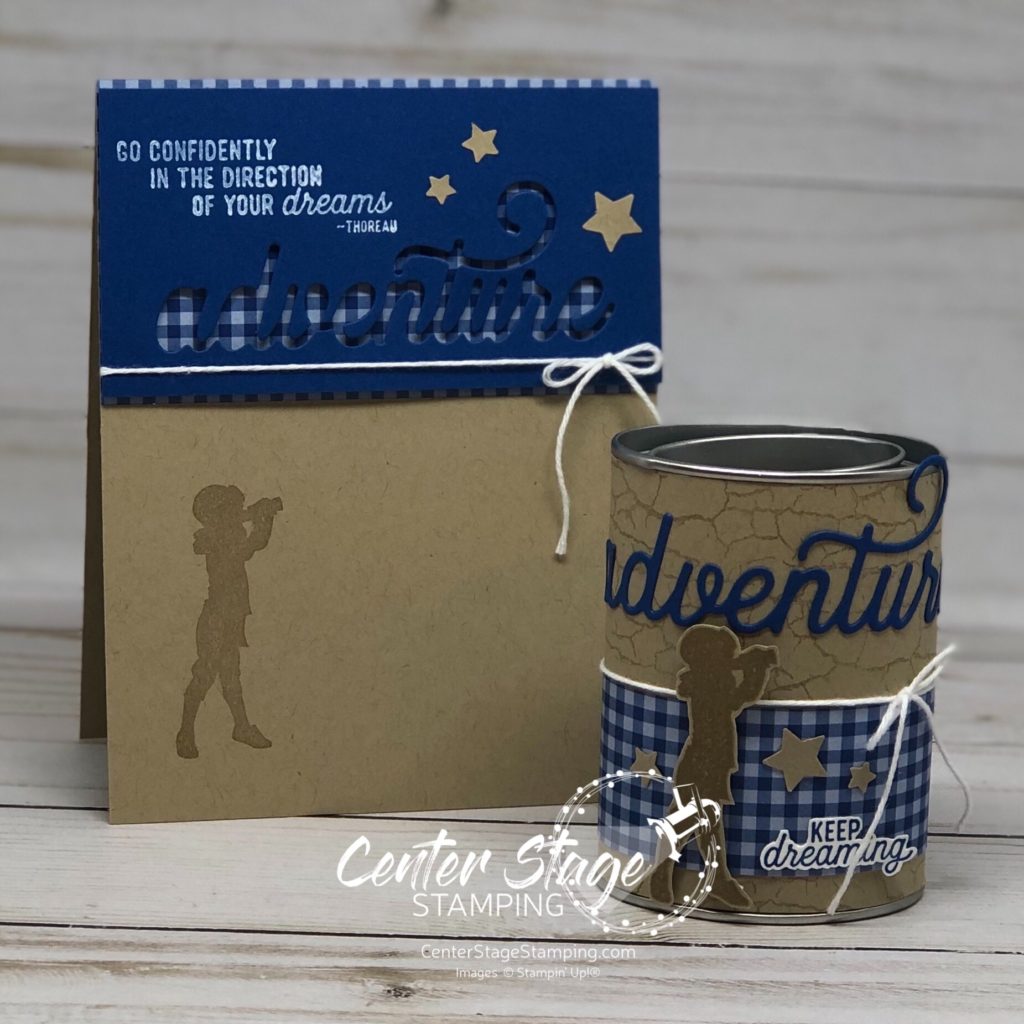
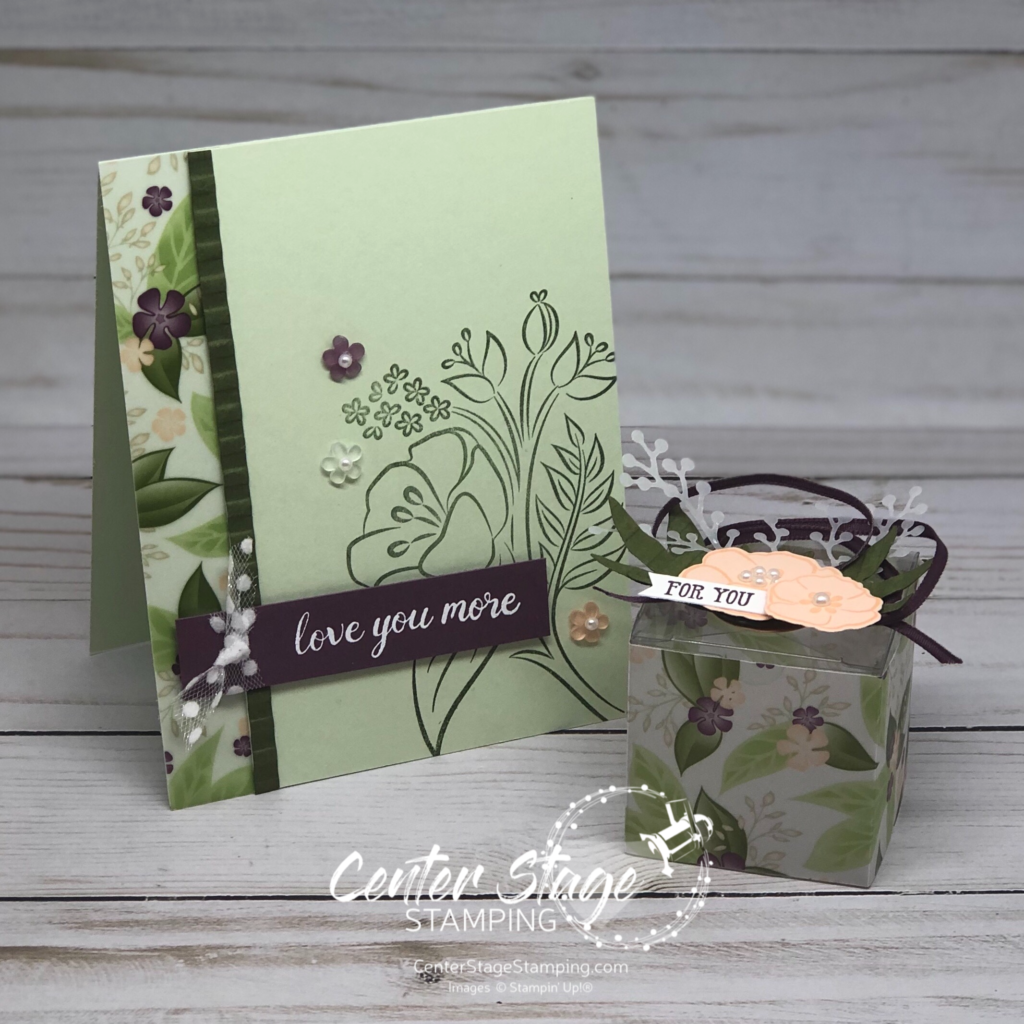
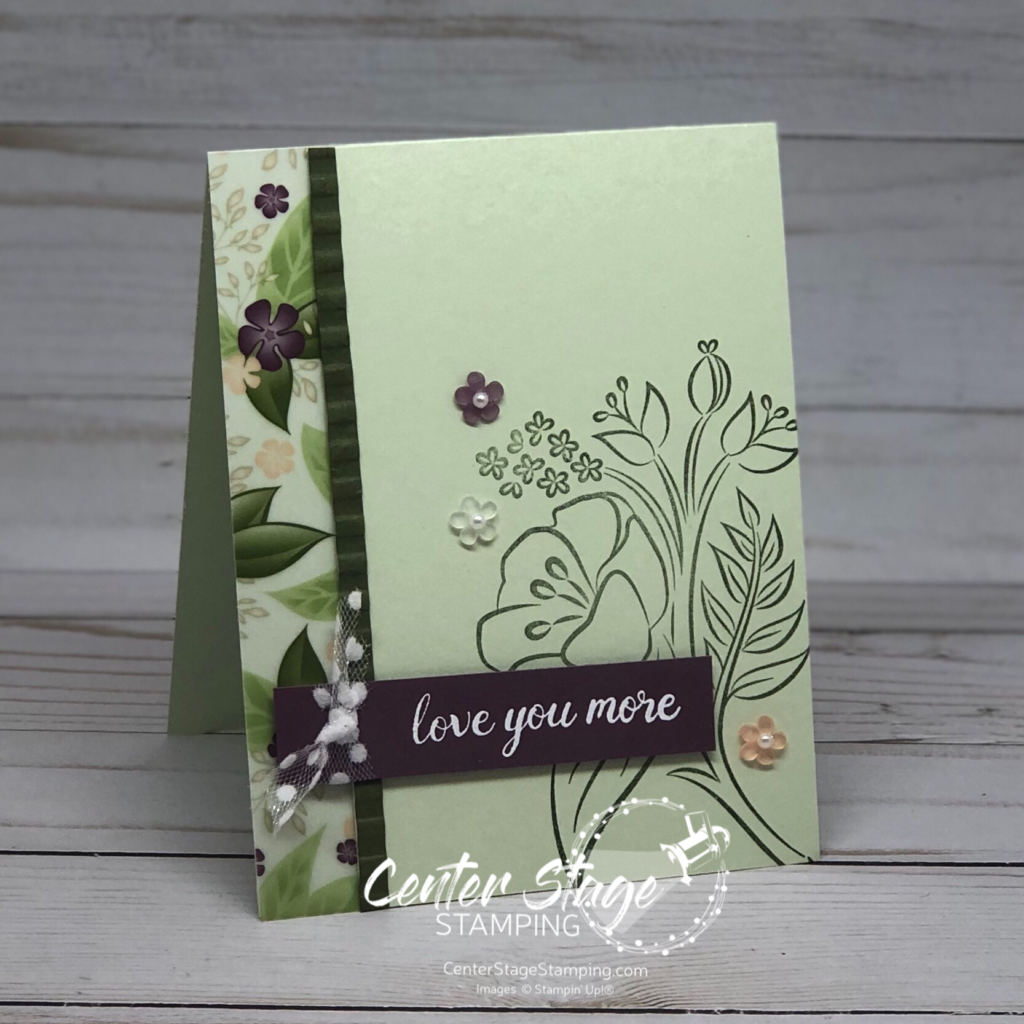
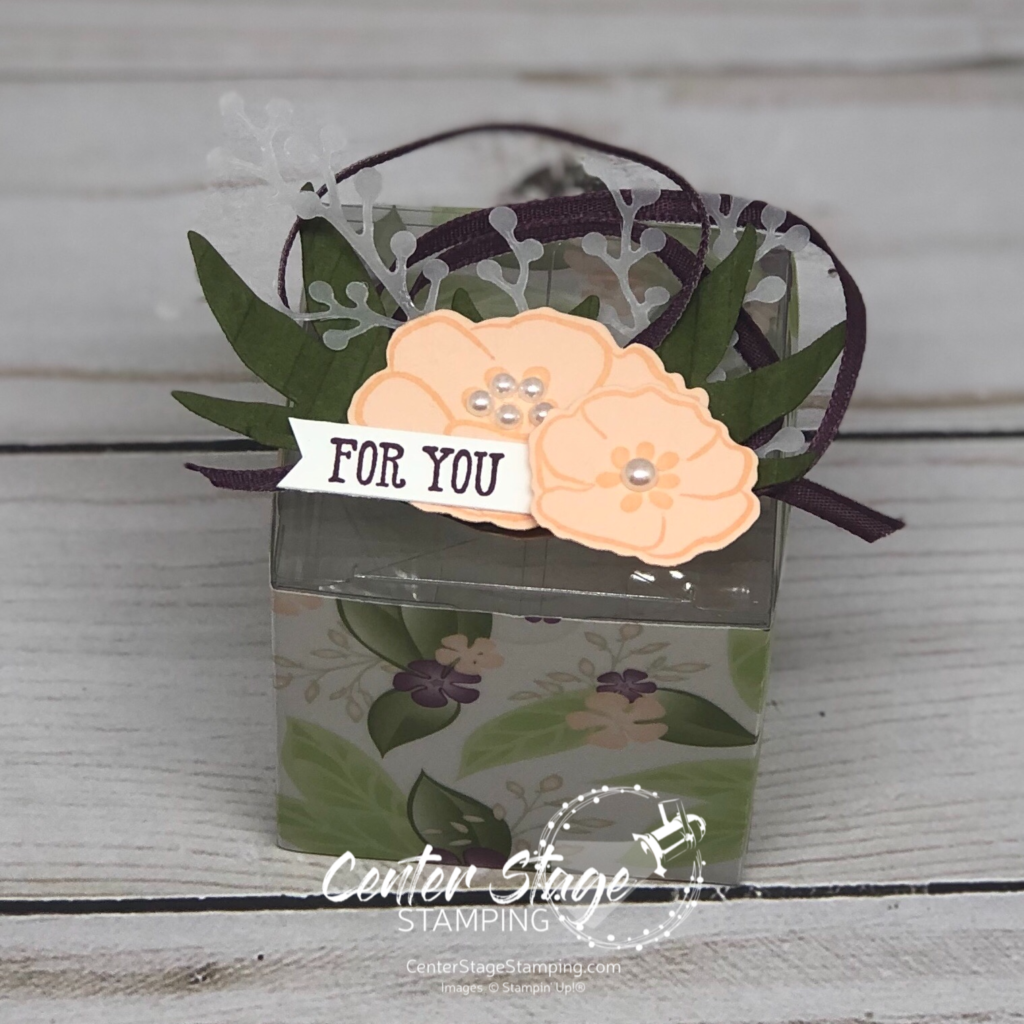
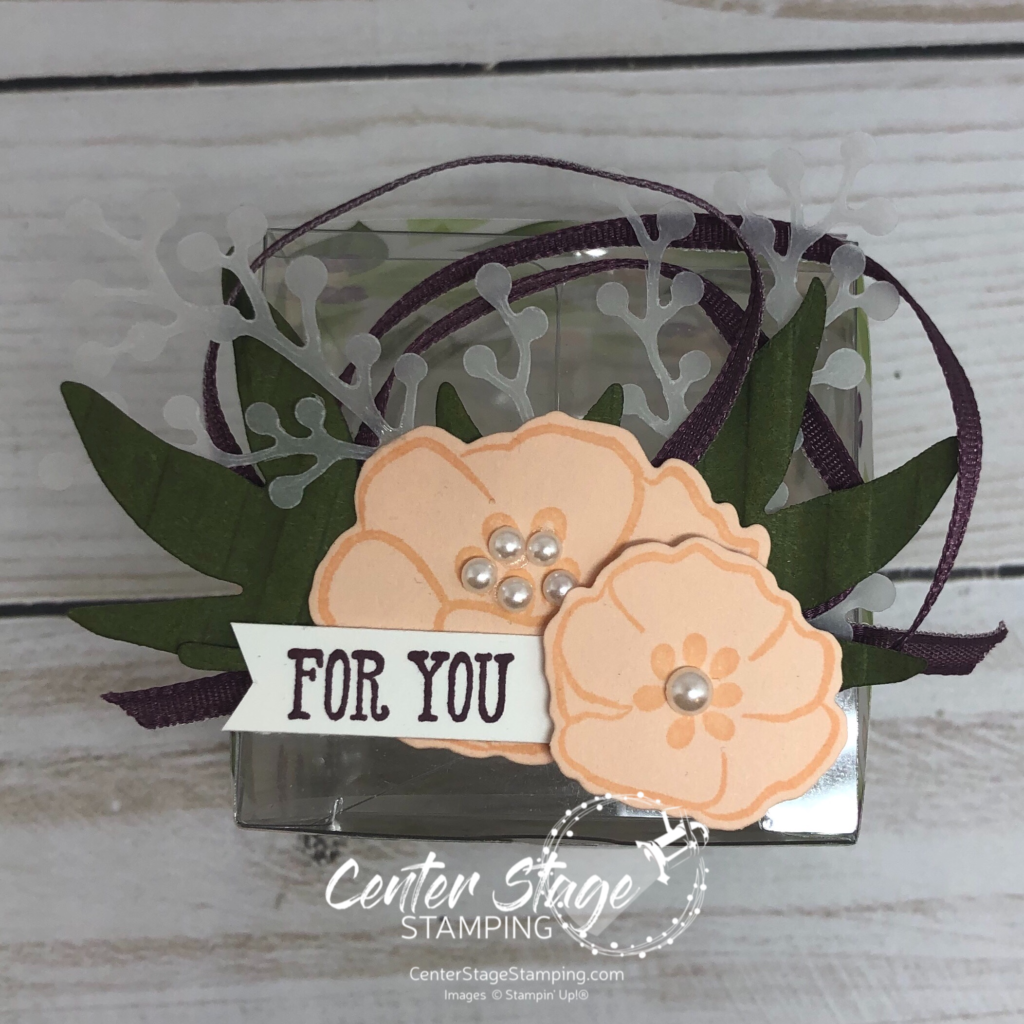
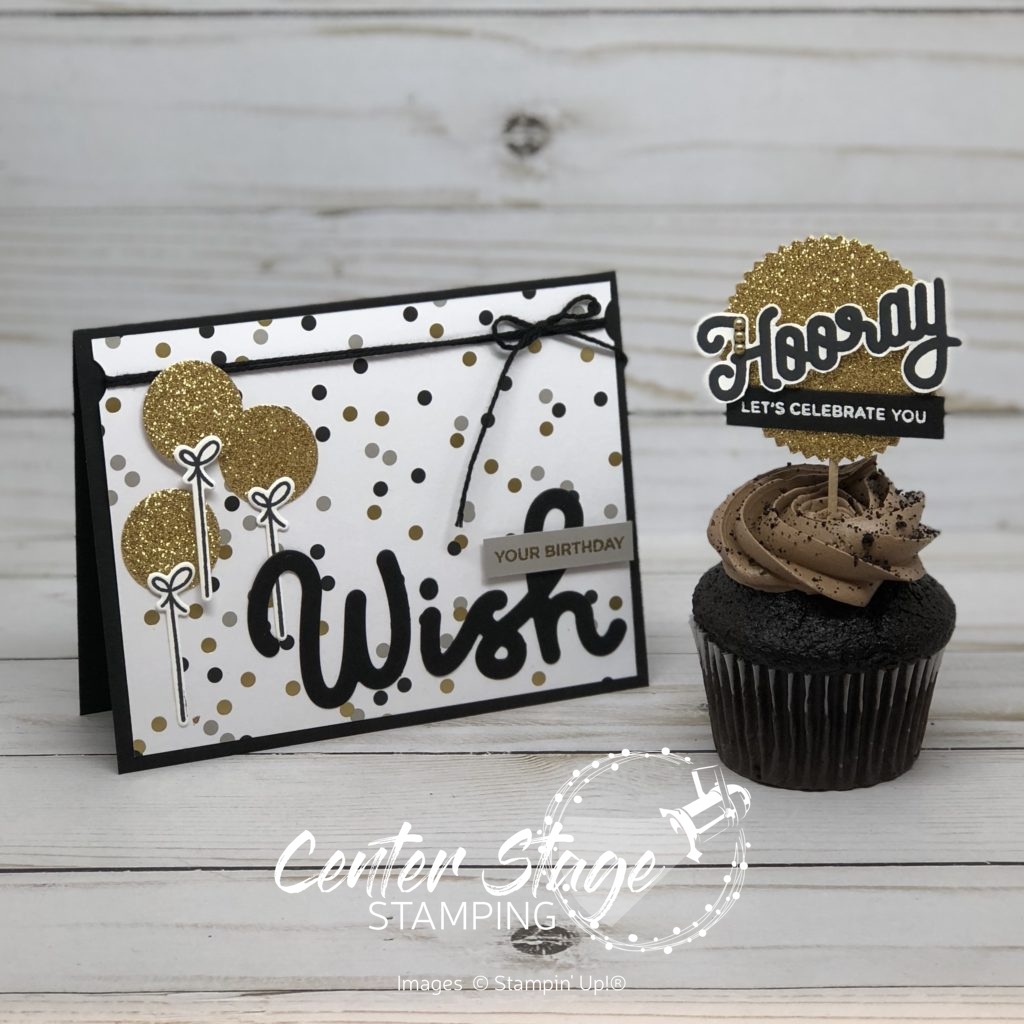
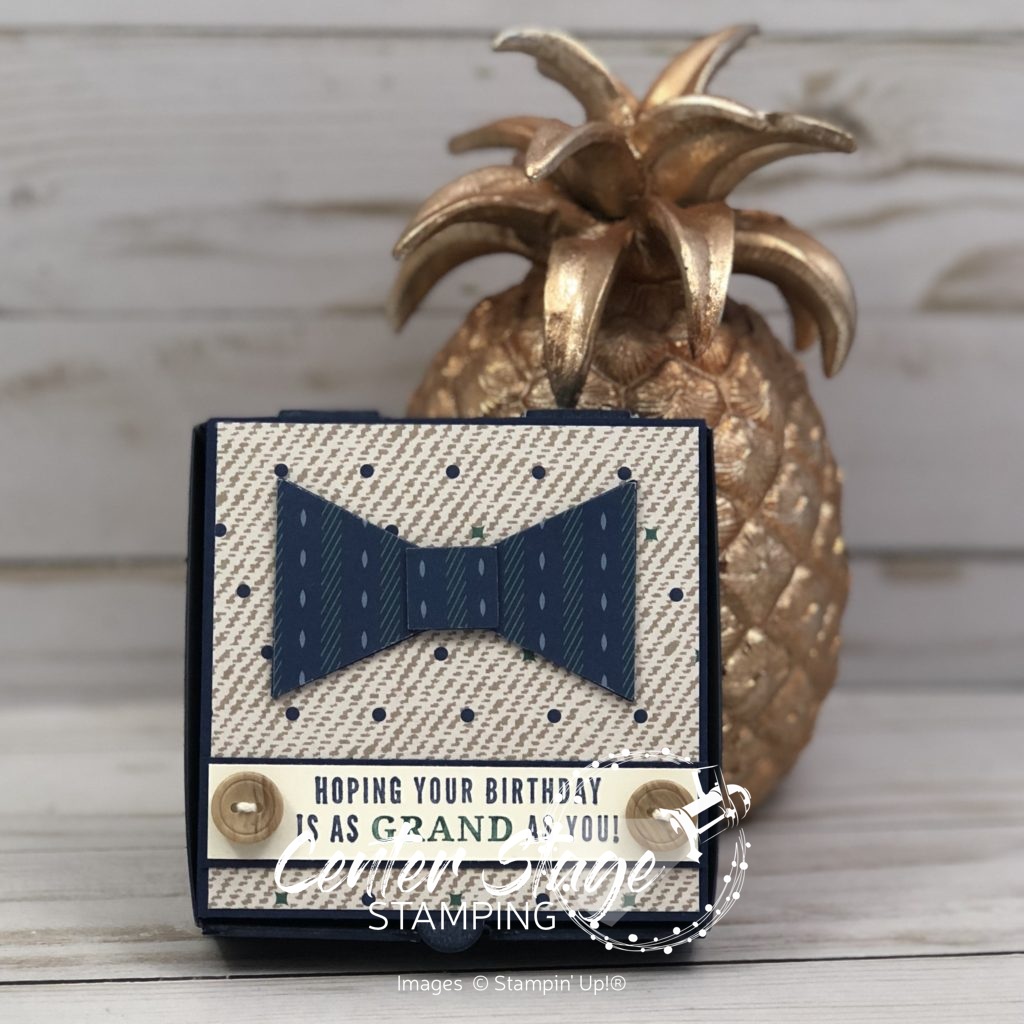
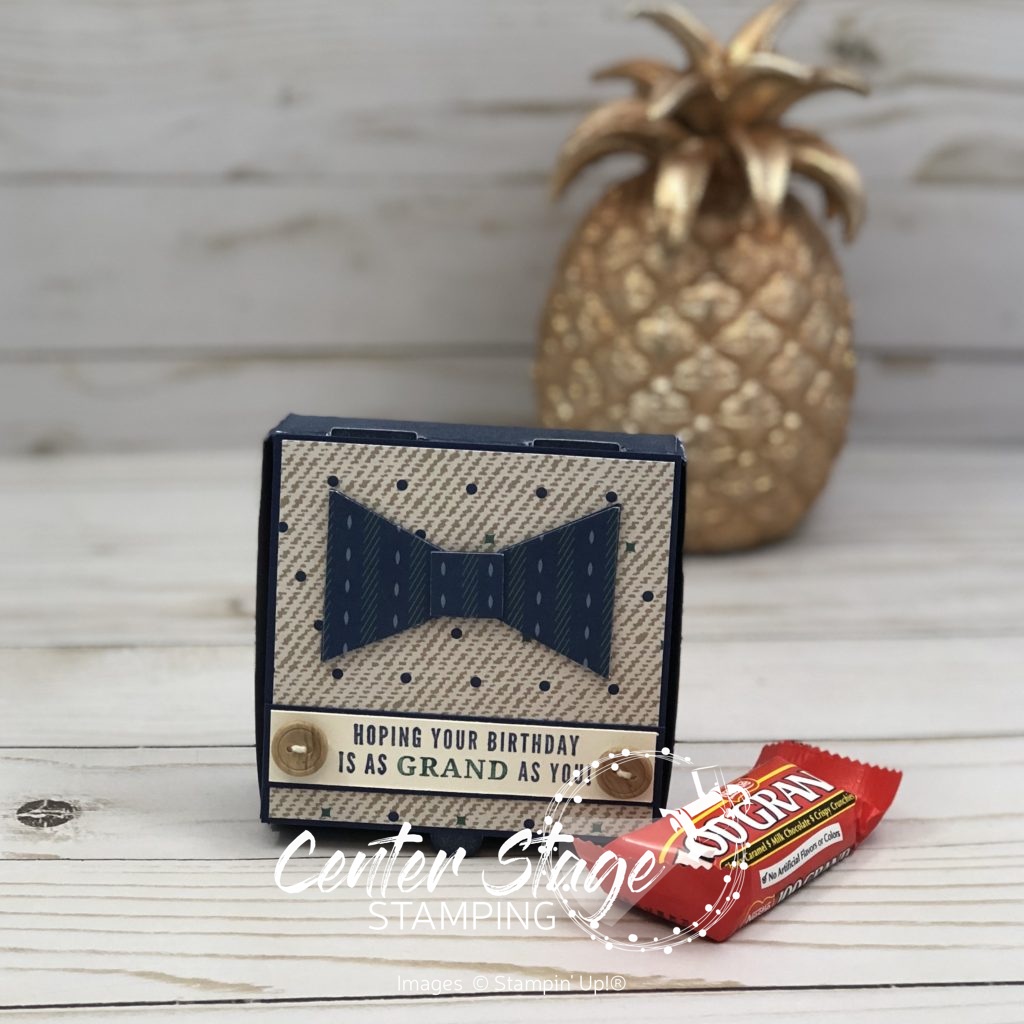
This fun card and coordinating tin would be great to send off a college freshman or for someone starting a new job or moving. The feature the Silhouette Scenes stamp set and coordinating Sweet Silhouettes dies.

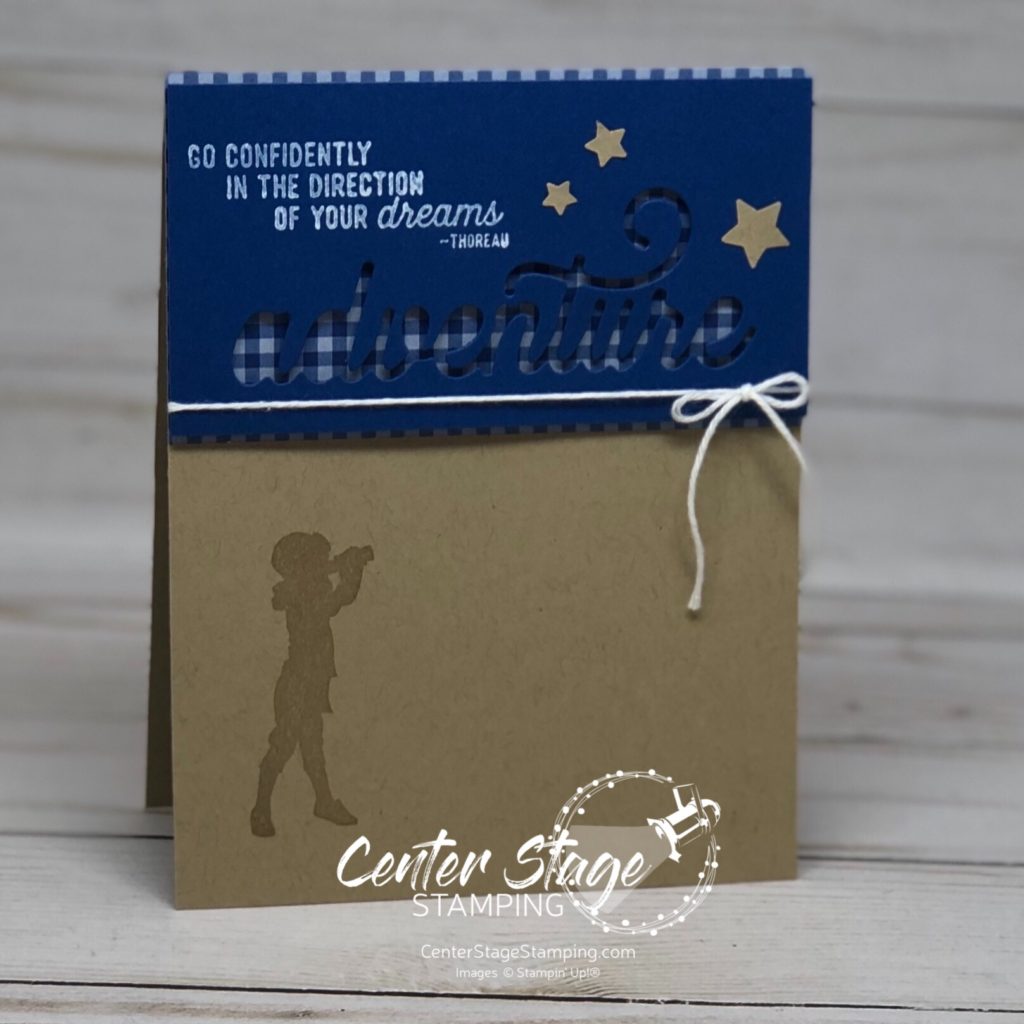
I love the Blueberry Bushel gingham print peeking out.

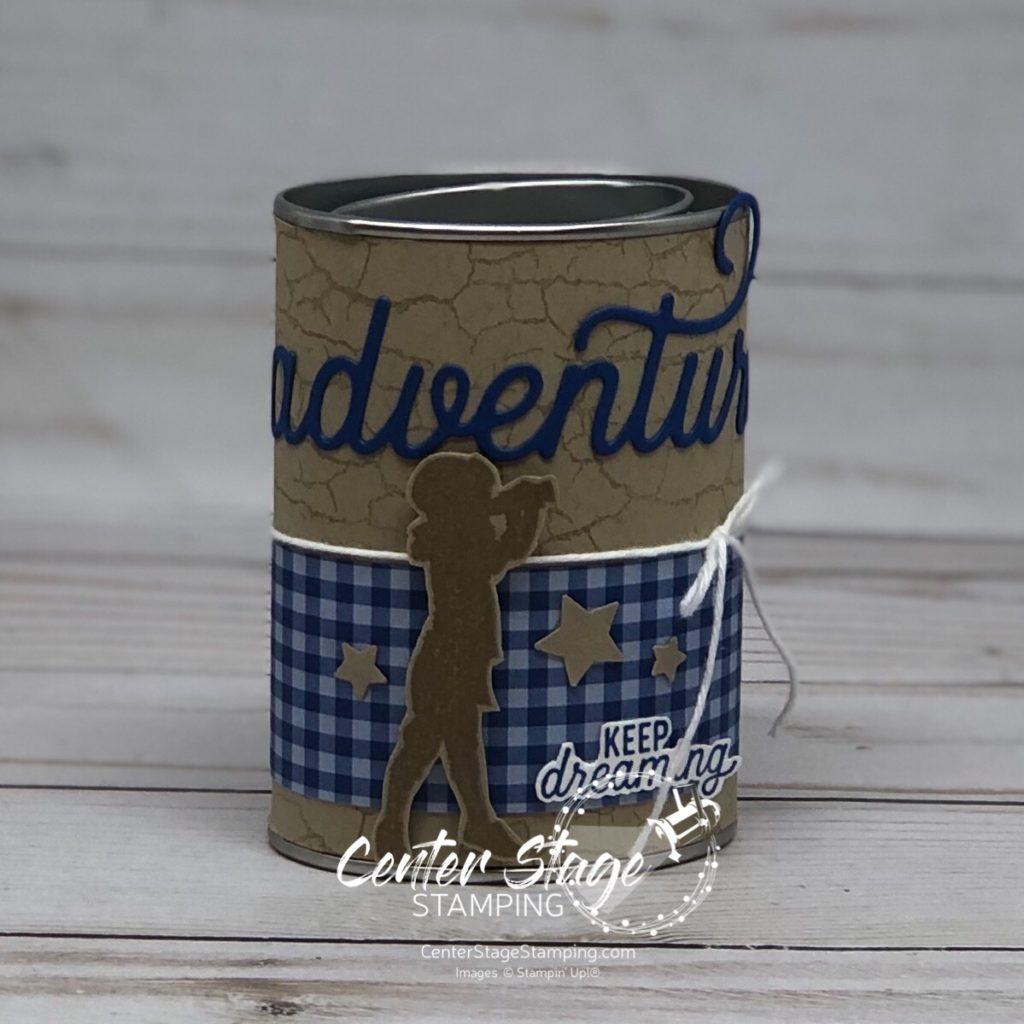
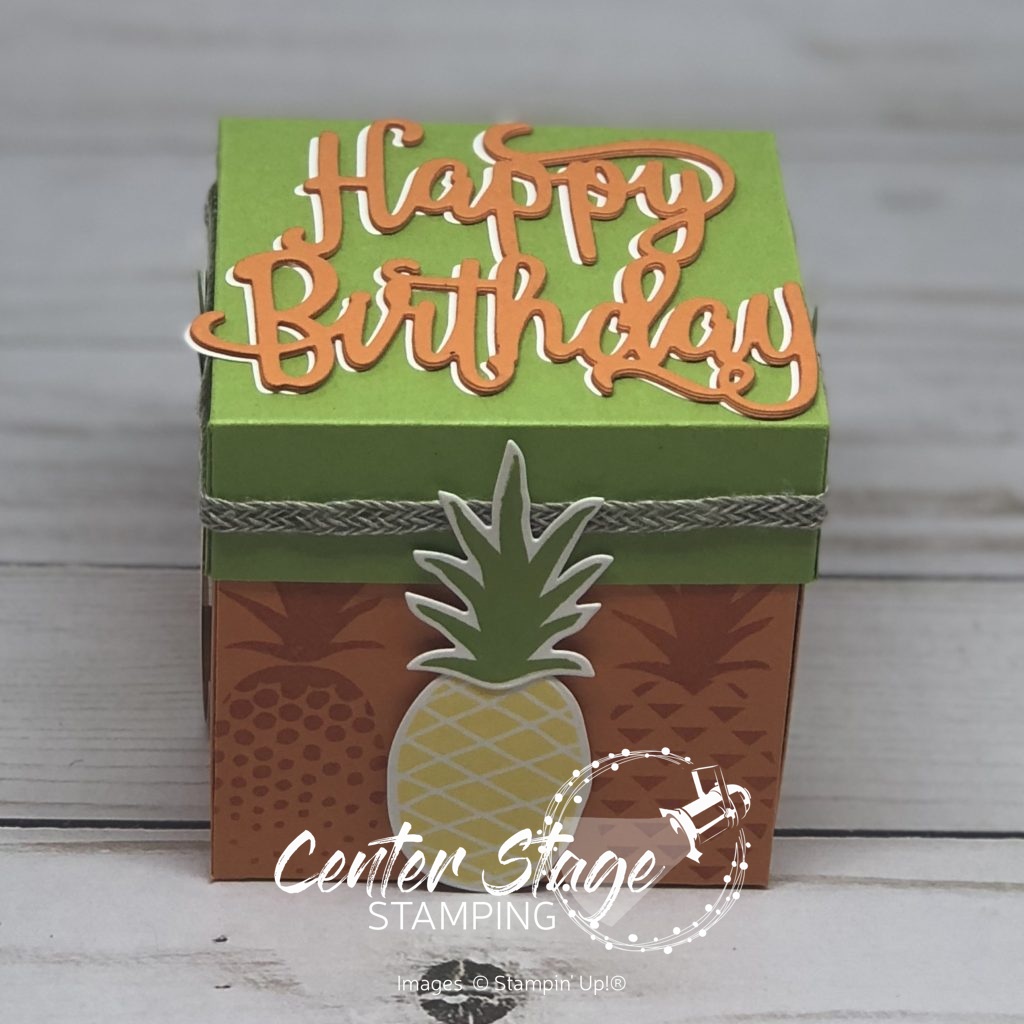
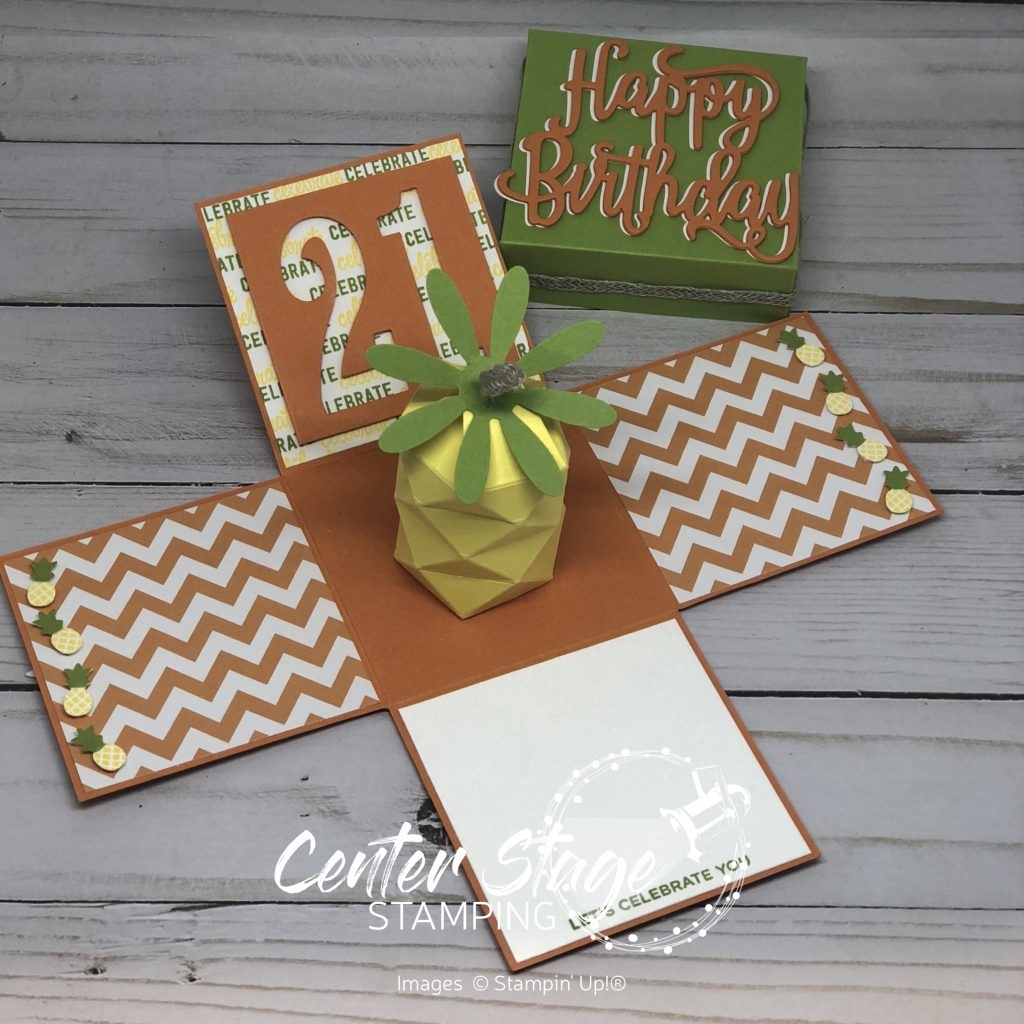
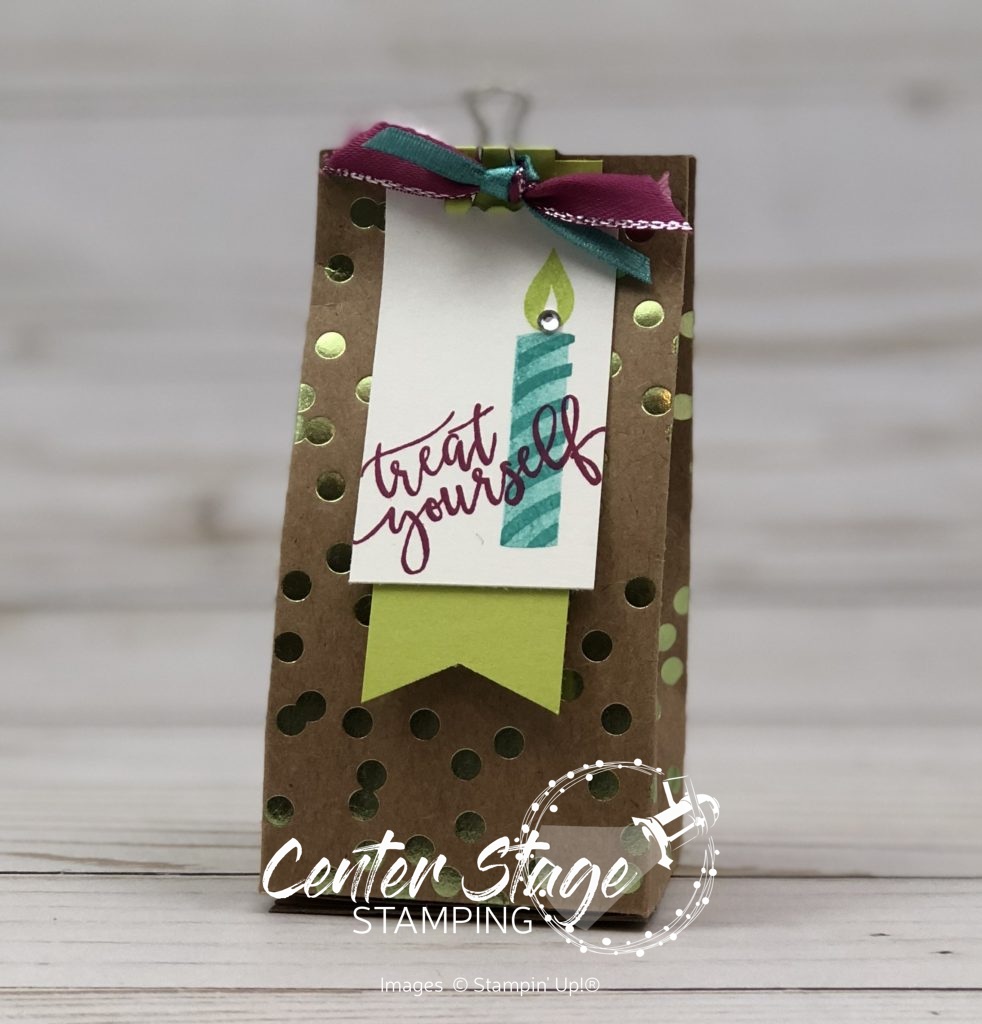
I had this cute little tin so I decided to decorate it. It would be a great way to give a gift of cash to a graduate or to save up for your own adventure! I added some depth with the Crackle Paint background stamp.

I’m going to send you on over to Jeanna. You will love her interpretation of this fun theme.

You can find the full blog roll by clicking on the blue button below.

Thanks for stopping by. Join me again to shine a spotlight on creativity!

Share with your friends:

everything is rosy dear friend

Well, it is May 23 and Minnesota weather is still yucky. I want a spring do over. Remind me why do I live here again? I guess I will just keep bringing out the spring in my craft room by creating with bright colors and flowers. The Everything IS Rosy Medley from Stampin’ Up! is currently in a prominent place on my desk.

: Dear Friend card - Center Stage Stamping

I had to throw in my rose gold pineapple in the back ground again. I LOVE this designer series paper. The Rose Gold accents are just ah-mazing! I need more of it. I added the little dots of Rose Gold shimmer paint with the stylus tip of my Take Your Pick tool. I LOVE the Everything Rosy medley. Especially all the glorious ROSE GOLD accents. It fits perfectly in my studio which is full of rose gold accents. Here’s a look at the top corner of my Ikea Kallax shelf:

And check out these gorgeous necklaces my friend Michelle over at Stampin’ Robin made for me with the Everything is Rosy dsp!

Love, love, LOVE them! Thanks for stopping by. Join me again to shine a spotlight on creativity!

Share with your friends:

Posted in 3D, Create, Friend | Comments Off on everything is rosy dear friend

osat blog hop: fabulous florals

It is time for another One Stamp at a Time blog hop! Today, we are spotlighting those fabulous florals. I am SO ready for them to start blooming around here. I was over winter three months ago! And yet we keep getting cold weather and snow… ah, spring time in Minnesota.

My projects feature the beautiful All That You Are stamp set and the gorgeous Floral Romance Designer Series Paper in the 2019 Occasions Catalog.

This card and sweet little gift box would be great for a bridal shower or for a good friend.

I started with a Soft Sea Foam card base and stamped the floral spray in Mossy Meadow. The floral vellum in the Floral Romance dsp is so beautiful. And the dark leaves help hide the adhesive as does the corrugated Mossy Meadow strip. The sentiment is embossed in white on Fresh Fig card stock and tied with a bit of the Polka Dot Tulle Ribbon. A few Frosted Flower embellishments with pearls in the center complete the card.

This adorable little gift box uses one of the Clear Tiny Treat boxes wrapped in the floral vellum. The top is decorated with the flowers and other dies from the Frosted Bouquet Framelits.

A little bit of Fresh Fig ribbon and some pearls are the perfect accents for the florals. The sentiment is from the Well Said stamp set also in the 2019 Occasions Catalog.

Thanks for stopping by! Be sure to check out all of the great Fabulous Floral projects the OSAT design Team has to share! Please click on the blue box below for a pop up list of the design team.

Join me again to shine a spotlight on creativity!

Share with your friends:

osat blog hop: #simplestamping

It is the second Thursday of the month. That means it is time for another One Stamp at a Time blog hop! The theme for this month is #simplestamping. Stampin’ Up! challenged us this year to get back to basics: stamps, ink and paper. As fun as it can be to go crazy with layers, embellishments and details, clean and simple can be just as effective.

Varied Vases is a great set for simple stamping! Stamp a few vases and a bold greeting and you have a great card to send someone a little hello. Vase colors are Pear Pizzazz, Calypso Coral and Petal Pink.

Varied Vases:  sour cream treat container - Center Stage Stamping

Simple Stamping also works for a cute little treat like this little sour cream container. I added a 1″ circle punch and a bit of Petal Pink metallic bakers twine for the little tag. Perfect for a couple of Hershey Kisses – chocolate is always a win!

Be sure to check out everyones #simplestamping creations on the blog hop and then give it a try yourself. Don’t forget to upload your creation to social media with the hashtag #simplestamping. You can find the full blog roll call by clicking on the little blue rectangle below.


Thanks for stopping by. Join me again to shine a spotlight on creativity!

Share with your friends:

happy 21

This past weekend was my daughter Rachel’s 21st birthday.  When did that happen?  21!? Life continues forward far to quickly.  I love you to the moon and back, Rachel!  I wanted to share the “card” I made for her.  She really likes pineapples, so I used that as my starting point.  I decided to make an explosion box and somehow incorporate 21 pineapples.

Rachel's Pineapple box - Center Stage Stamping

I used Concord and 9th’s Pop Art Pineapple for the 12 pineapples around the exterior of the box. They are stamped in Stampin’ Up! Pumpkin Pie ink on Pumpkin Pie card stock.  Four pineapples are stamped in Pineapple Punch and Granny Apple Green and cut out with the coordinating dies.  I added the Happy Birthday Thinlit and some Braided Linen Trim to the Granny Apple Green box top.  But what about the inside?  When I saw this folded pineapple by Martha Inchley on Pinterest, I knew I had the perfect center for the explosion box.  Thank you, Martha for sharing your pattern!!

Rachel's Pineapple box: inside - Center Stage Stamping

I added eight tiny pineapples in Pineapple Punch and Granny apple Green and punched out with the retired tiny pineapple punch.  I am so happy with how it turned out.  What’s more, Rachel loved it!  Thanks for stopping by! Join me again to shine a spotlight on creativity!

Share with your friends:

grand opening

Last weekend was the Grand Opening of the new Stamp-n-Storage retail store!  It was quite a whirlwind, but a lot of fun.  We had a balloon arch, official ribbon cutting, a make & take, food and a LOT of people.  We are so excited for this new space!


I taught a Creative Class Friday and Saturday to help kick things off.  We had a lot of fun creating this 12×12 canvas home decor piece.


Thanks to the great gals who joined me for the classes!  Didn’t their projects turn out great!

Thanks for stopping by.  Join me again to put a spotlight on creativity!

Share with your friends:

inky friends: suite designs blog hop

Welcome back!  I excited to be part of My Inky Friends Suite Designs Blog Hop!  This time we are putting a spotlight on various product suites in the 2018-19 Stampin’ Up! catalog.  I am thrilled to put the broadway Bound suite center stage! (I know, you are all so surprised that i would pick that suite.  What can I say?  Somethings are just meant to be!)  This dramatic suite can be found on page 69.

Let’s start with this fun project pairing.

Golden Broadway Birthday - Center Stage Stamping


Who wouldn’t love to get a birthday treat like this.  The gold foil in the Broadway Bound designer series paper brings out that Broadway sparkle!

Hooray cupcake - Center Stage Stamping

First off how awesome is this cupcake topper?  A bit of gold glimmer paper punched with the Starburst punch makes a great base for the fun greeting. A few gold Metallic Pearls are a great finishing touch.

Broadway Wish card - Center Stage Stamping


The gold shimmer cut from the Broadway Lights Framelits balloons make this a great coordinating card for the cupcake treat.

This next pair of projects Brings out the Bold colors of Lovely Lipstick and my favorite, Lemon Lime Twist,

Broadway Wish set - Center Stage Stamping

Here is a closer look at the gift box.

let's celebrate gift box - Center Stage Stamping

I started with one of the Lustrous White Mini Gable Boxes.  I wrapped the bottom with the cake pattern from the Broadway Bound dsp.  I glued some Lovely Lipstick 1/8″ Grosgrain Ribbon around the top.  The greeting on the box is layered as follows: 1-3/8″ scallop circle in Basic Black, 1-1/4″ circle in Lovely Lipstick, the hat die cut from the Broadway Lights Framelits (I added the black dots with a Basic Black Stampin’ Write Marker).  I stamped the sentiment on Lemon Lime Twist card stock and cut it apart and adhered to the circle.  This element is added to the box with dimensionals.

Broadway Birthday Wish card- Center Stage Stamping

I let the Broadway Bound dsp take center stage for this card.  The little candle embellishment on the “I” is one of the silver Candle Embellishments.  But wait, it’s pink, not silver.  Ah ha!  I colored it with the dark Lovely Lipstick Stampin’ Blend!  How cool is that?

Broadway Birthday treats - Center Stage Stamping

Broadway Bound is a fantastic suite of products that give your birthday projects great dramatic flair!   I’m sending you over to Twila and her wonderful projects featuring the Under the Mistletoe Suite.  Or, if you are traveling backwards through the hop, you can go back to Rhonda and her delightful projects with the Delightfully Detailed Suite.

That’s a wrap for now. Happy Stamping!

Share with your friends:

You’re Grand

Sharing one last project with the Truly Tailored Suite today.  How about a little treat box filled with goodies to let someone know how “grand” they are.

Grand Day - Center Stage Stamping

I started with on of the adorable little pizza boxes.  I sponged Night of Navy all over it and let it dry over night.  I layered the DSP and stamped image on top.  I created the bow tie by punching out a piece of DSP with the Tailored Tag punch and cutting it in half and adding the tiny center piece. A couple of True Gentleman buttons finish off the box.  And then I had to find the perfect treat to put inside –

Grand Day - Center Stage Stamping

100 Grand bars, of course (three will fit nicely in this little box).

Make sure you stop by on Friday.  It’s time for another Inky Friends blog hop and we have some great projects lined up.  Thanks for stopping by! Happy Stamping!

-Mary

Share with your friends:

Canvas Stamping

Sometimes I branch out from making cards and the rare scrapbook page. Every once in a while I get inspired to create a home decor piece.

Breathe Canvas - Center Stage Stamping

For this project, I started with a 4 inch square canvas.  I did a water color wash with Soft Sky ink across the canvas.  Next I stamped the branch and flowers from the Colorful Seasons stamp set.  It is difficult to get a full image on the canvas because of the edge of the wood under the canvas, but don’t worry.  Next I went over the stamping with my aqua painter to bleed out the image and get more of a water color look.  I stamped “breathe” in black memento ink and traced over it with a Black Journaling Pen to fill in the gaps on the canvas.  a few Rose Red die cut flowers with Crushed Curry baker’s twine knots.  A bit of Linen Thread wrapped around the canvas finishes it off.  All in all, this project came together really quick.  The most time was waiting for the initial water color wash to dry.

Thanks for stopping by! Happy Stamping!

-Mary

Share with your friends:

Love It Live It Share It Blog Hop

Today I’m hopping with my Inky Friends in the Love it. Live it. Share it Blog Hop!  We all are showcasing different sets from the Occasions Catalog. I have the honor to be the first stop to kick things off. Make sure you go through and check out everyone’s blog.  There are some fantastic projects out there.

I am shining a spotlight on the Picture Perfect Birthday stamp set.  This set also has a fantastic suite of products to go with it.  So. Much. Fun. Are you ready for some inspiration?  Let’s get started. First up I have a fun little treat box.

treat yourself box - Center Stage Stamping

I made a little 2-4-6-8 box, similar to the one here, out of the Foil Frenzy Specialty Designer Series Paper.  Love the foil dots!  I stamped the little tag, layered it on the Lemon Lime Twist banner and clipped it to the box with one of the Birthday Mini Binder Clips tied with a bit of Berry Burst Metallic-Edge  Ribbon and piece of Bermuda Bay from the Sale-A-Bration Shimmer Ribbon Pack. A tiny rhinestone to add a little bling on the candle finishes it off.

Next I have 3 different Birthday cards. First is a 3″x6″ greeting showing off the coordinating Picture Perfect Party Designer Series Paper.  I love the realistic photo quality images in this stack.  I used the candles for this one.  Stamped the sentiment right on the DSP and layered it on striped pattern also form the stack.  I stamped the bow in Pool Party on the card base and used Bermuda Bay stamped off for the little shadow details.  A Lemon Lime Twist In Color Bitty Bow is the finishing touch.

Picture Perfect Candles - Center Stage Stamping

This next card also features the Picture Perfect Party DSP stack.  I have to give credit to Mercedes Weber for the polaroid idea.  The photo realistic paper is perfect for this.

Picture Perfect Polaroid - Center Stage Stamping

I used the Layering Squares Framelits to cut out the polaroid frames.  Stamped Happy Birthday in Bermuda Bay, Lemon Lime Twist and Berry Burst and layered the dsp images behind.  It is hard to see, but the Basic Black card base is embossed with the Polka Dot Basics Embossing Folder.  I finished off the card with some rhinestones and Lemon Lime Twist 3/8″ Mini Striped Ribbon.

My last project is another Birthday card, but this one let’s the Stamp set take center stage.

Birthday Treat Yourself - Center Stage Stamping

I started with a 3.5″x5.5″  Crumb Cake card base.  I added a layer of the Wood Textures DSP and a Berry Burst panel layered on the striped piece from the dsp stack.  I used the large Happy Birthday from Perennial Birthday stamp set to create the background for the white heat embossed “Celebrate the Good Stuff” greeting from the Picture Perfect Birthday set.  I stamped and cut out the candle, bow and noisemaker.  The present is one of the patterns in the DSP stack.  two Pool Party strips create the “ribbon” around the gift.  I really like the Wood Texture DSP as the background for this.

Hope you are inspired to create some Birthday fun with the Picture Perfect Birthday set!

Picture Perfect Birthday - Center Stage Stamping

Thanks for hopping by!  Next up on the hop is the amazing Sarah Wills. She is featuring the fabulous Picnic With You set. Happy Stamping!


Share with your friends: