Year: 2018

inky friends: dc9

Time for a design challenge from My Inky Friends! For this challenge, we are featuring a square sketch, inspired by page 16 of the Annual Catalog.

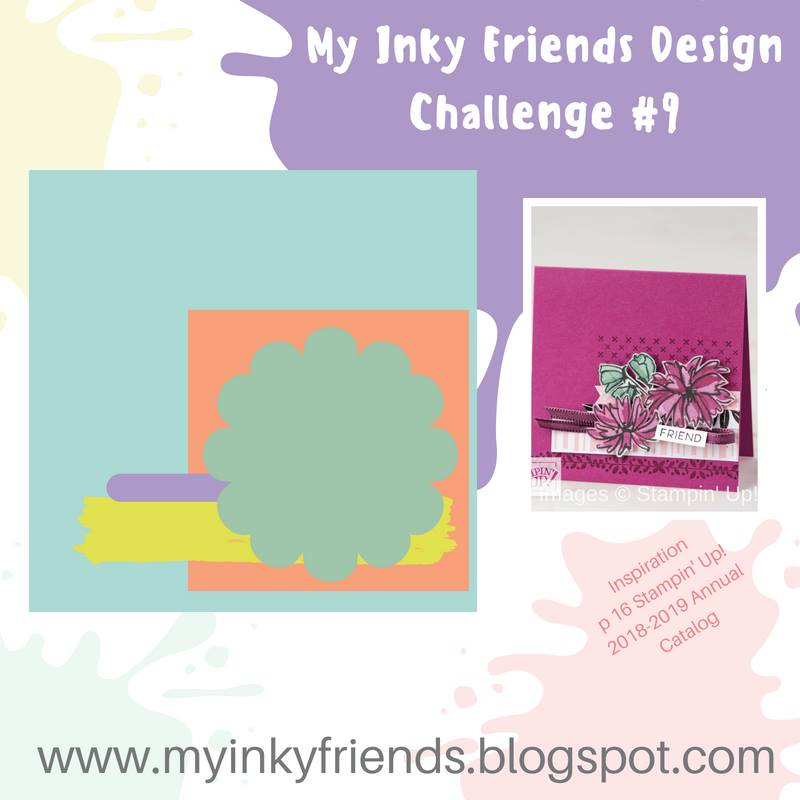
I decided to use some new items from the Stampin’ Up! Holiday catalog which goes live tomorrow!  It is chock full of fantastic goodies for all of your holiday projects!  For this challenge, I used the Dashing Deer Bundle – stamp set and coordinating thinlits – and the Joyous Noel Specialty Designer Series Paper. Oh. My. Goodness.  It is sooooooo pretty!  The copper foil accents are stunning.

Dashing Deer Happiest Christmas

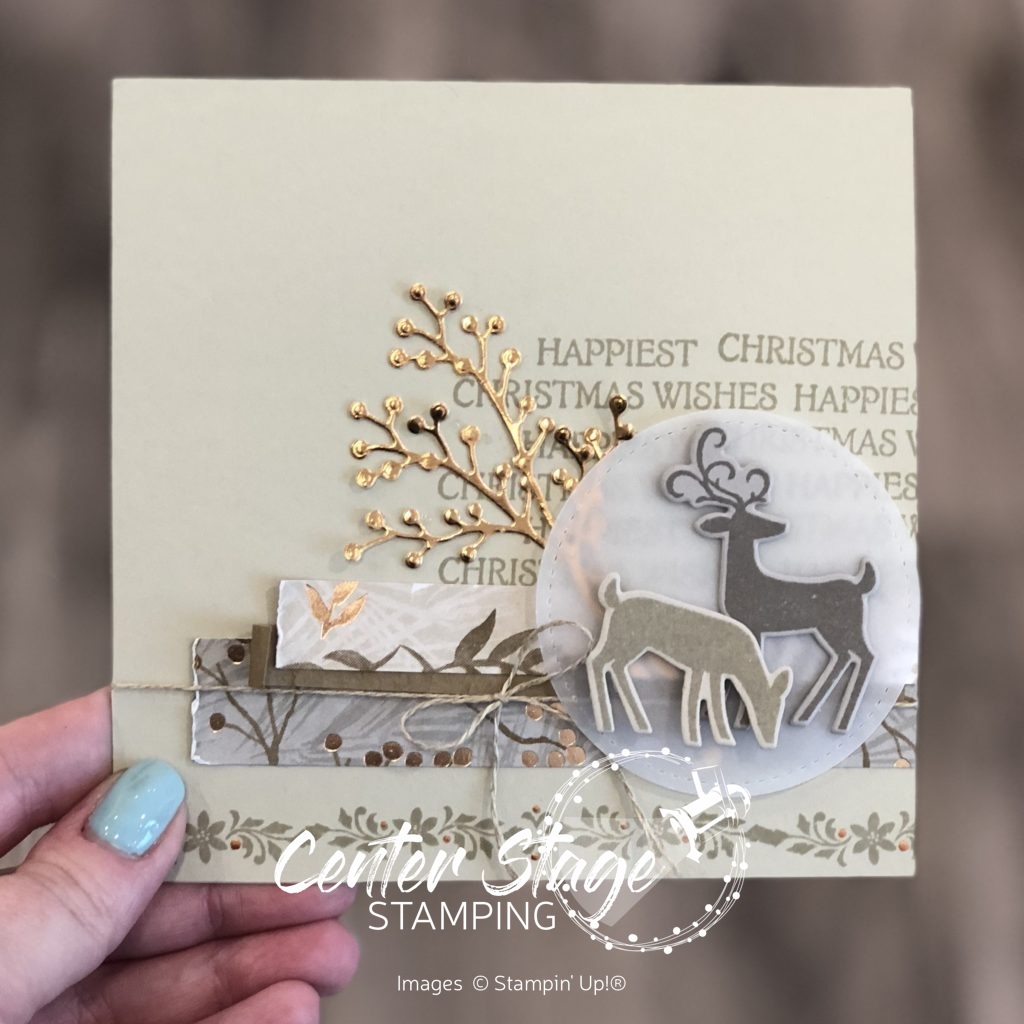
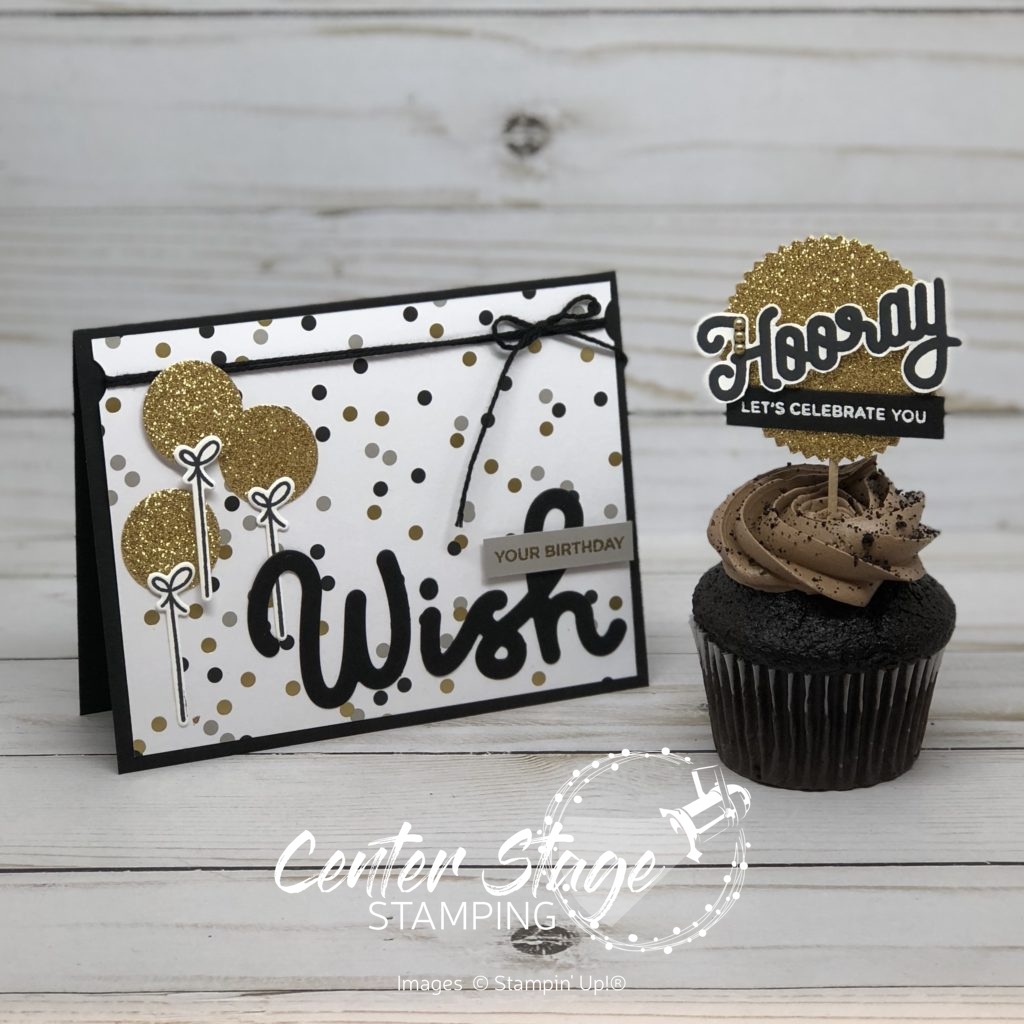
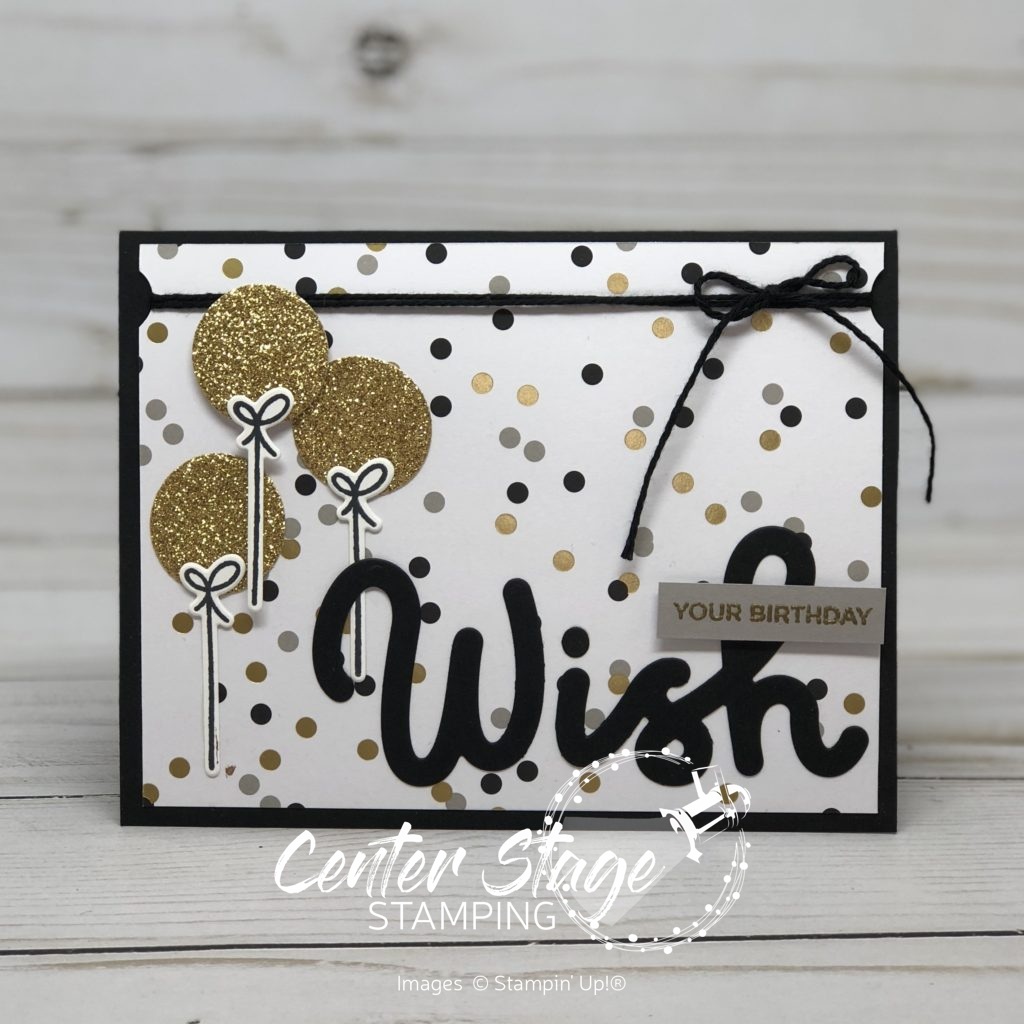
Colors are Sahara Sand, Gray Granite and Copper.  A close up look at a few details:

Dashing Deer Happiext Christmas close up - Center Stage Stamping

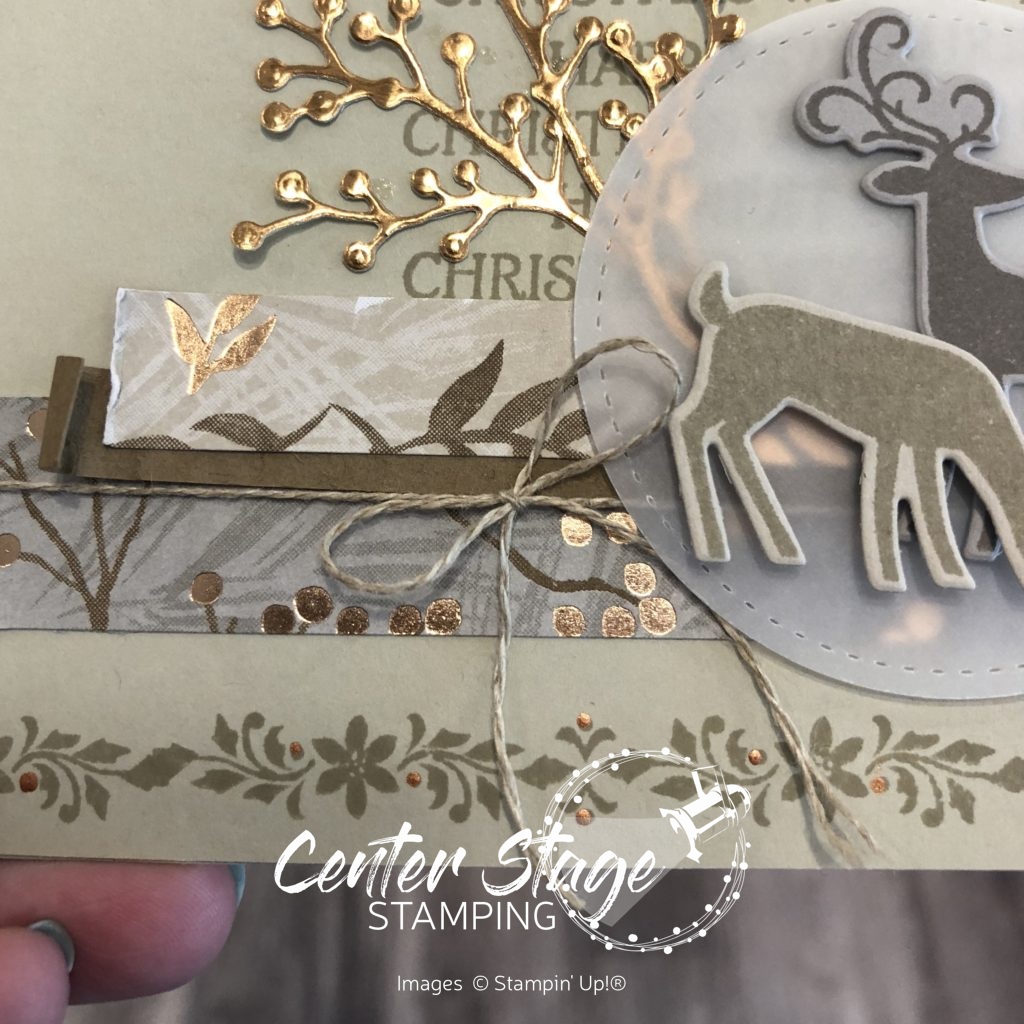
The vellum circle is cut out with one of the Stitched Shaped Framelits.  The sprig is from the Frosted Bouquet Framelits (part of the Frosted Floral Suite) cut out of Copper Foil.  For the Soft Suede strip I crumpled it up then separated the layers so it has a look of suede (difficult to see in the photo). I used the Bright Copper Shimmer Paint and the stylus end from the Take your Pick too. to put the copper details on the image at the bottom of the card.

Finished project is a 5″x5″ card.  I love the neutral tones on this.  What a fantastic Christmas greeting to send.

Head over to My Inky Friends blog and check out the other projects based on this sketch.  I hope you will join us and play along.  Create your project based on this sketch then upload a link to it on My Inky Friends blog to share it with us.  We love to see your projects!

That’s a wrap for today.  Join me again to put a spotlight on creativity!

Share with your friends:

thank you blooms

I can’t believe it is the end of August.  Boy, the summer just flew by.  And here we are going into Labor day weekend.  At least my youngest two will be home for the long weekend.  And on Saturday we are going to see……HAMILTON!!  I have been looking forward to this coming to Minneapolis for over a year.  And I was fortunate to be able to get tickets for the four of us to go!  Eeeeek!  (I’m just a little bit excited.) I am not throwin’ away my shot!


We were doing a photo shoot in my studio for the upcoming Stamp-n-Storage catalog a couple of weeks ago.  And I was told to “grab some stuff and look like I was working on a project”.  So, I pulled out some things and just started stamping.  When the photo shoot was done, I had to finish up the card.  This is the finished product:

Thank you blooms - Center Stage Stamping

The card base is embossed with the Subtle 3D Dynamic Textured Impressions Embossing Folder.  The striped layer is from the Twinkle Twinkle designer series paper pack. For the flower panel, I stamped the flowers from Perennial Birthday in Gray Granite.  Next I colored them with my Stampin’ Blends in Flirty Flamingo and Granny Apple Green (the lighter shade). Then I grabbed my Light Pool Party Stampin’ Blend and colored the background.  Ta Da – I made my own DSP!!!!  I embossed the greeting in white on a piece of Gray Granite card stock and adhered it to the card.  So easy!  Have you tried coloring with Stampin’ Blends yet?  You really need to.  They are fabulous!

Hey, I just realized my manicure even coordinates with this card!

That’s a wrap for today.  Thanks for stopping by. Come back soon and join me in putting a spotlight on creativity!

Share with your friends:

kanga and little roo

Life has been really crazy over here lately.  In the past month we: moved our daughter and son-in-law into their first house; moved our other two children off to college, in opposite directions from our house; moved our business, Stamp-n-Storage, to it’s new location; and continued working on my craft studio remodel.  I have mostly moved back in, but there are still trim details to finish up.  I can’t wait to give you a full tour!  For now, how about a little teaser?

I just LOVE how the top of my Ikea Kallax came together. (thank you Hobby Lobby!)  It really makes me happy to look at.  Which is good, since I spend a lot of time in here!

At the beginning of August, before our youngest two moved, we all went to see the new Winnie the Pooh movie, Christopher Robin, together.  Talk about hitting you right in the feels!  Such a sweet movie.  I love Pooh Bear even more now.  I thought I would share today’s card in honor of a sweet mother and son duo from the Hundred Acre Wood – Kanga and Roo. (Ok, so in this case, Roo is a Koala, use your imagination)

Kanga Happy Birthday - Center Stage Stamping

Coloring this duo was so easy with my Stampin’ Blends and the Animal Expedition DSP. A delightful birthday greeting for any age!

That’s a wrap for today.  I’m heading back to work in my studio – creating and cleaning!  Plus I am working on a special project for a class I am teaching for the Grand Opening of Stamp-n-Storage’s first retail space!  Check out details on the class and other Grand Opening activities here.

Thanks for stopping by! Come back soon and join me in putting a spotlight on creativity!


Share with your friends:

dear friend

I was playing around with the P.S. You’re the Best stamp set.  I just love the typewriter.  I started by adhering a panel of the Share What You Love DSP to a Whisper White card base.  I set this inside a folded piece of vellum card stock to soften the DSP some.

Dear Friend, P.S. You're the Best - Center Stage Stamping

I colored this cute little typewrite with Mint Macron Stampin’ Blends.  Seriously, these markers are the BEST!  It is so easy to get great shading and depth.  I added a Petal Pink watercolor wash on the “paper”.  Once it was completely dry, I stamped the sentiment.  I popped this up with dimensionals on a piece of Wood Textures DSP that I had punched notches out of with my 1/2″ circle punch and wrapped with Linen Thread.  I finished up with three of the Share What You Love Artisan Pearls.

This makes me think of an author working away at a quaint little cottage with a wonderful flower garden.  Like maybe where L.M. Montgomery might have written Anne of Green Gables.  Yeah, I like that.

That’s a wrap for today.  Thanks for stopping by!  Be sure to come back and join me again as I put a spotlight on creativity!

Share with your friends:

stamp review crew: varied vases

The Stamp Review Crew is hopping again and this time we are putting Varied Vases in the spotlight!  This is such a fantastic set.  I love the little vases and flowers.  The coordinating Vases Builder punch makes it even better.  I had played with set quite a bit when it first came out.  Check out this post or this one for even more Varied Vases inspiration.  This time, I wanted to try a different approach with this set.

Hoping your day blooms with happiness - Center Stage Stamping

For my first card, I chose to let the sweet flowers take center stage.  I started with a gradient watercolor wash on three small panels of watercolor paper.  i used Calypso Coral, Lemon Lime Twist and Coastal Cabana.  Once completely dry, I stamped the flowers on each panel with Memento Black ink. I adhered a panel of Wood Textures DSP on a Whisper White card base which I had wrapped three rows of Linen Thread. The sentiment is stamped and embossed in white on the bottom of the Wood Textures DSP.  I adhered the three flower panels with dimensionals for some added depth.  I finished off with a little rhinestone one each panel.  I colored these with Stampin’ Blends markers – Calypso Coral, Granny Apple Green, Bermuda Bay.

You are simply the best - Center Stage Stamping

My next card brings back the Wood Textures DSP.  I think it is a great pairing with Varied Vases.  I stamped the Vase in Coastal Cabana, punched it out with the Vase Builder punch and wrapped a bit of Linen Thread around it.  I stamped the flowers in Memento Black, Poppy Parade and Lemon Lime twist and cut them out.  (Full disclosure, I cut them out with my Scan-n-Cut.) I layered all of this on a Whisper White panel and stamped the sentiment along the edge of the Wood Texture DSP squares.  I added two little Poppy Parade Ribbon loops before gluing the Whisper White layer to the Gray Granite card base.  Notice the texture on the card base?  I ran it through the NEW Tin Tile Dynamic Textured Impressions Embossing Folder.  This folder is in the Stampin’ Up! 2018 Holiday catalog!  It is really awesome!

That’s a wrap for me.  I am the final stop on the blog hop, so if you started at the beginning, you have seen all of the amazing Varied Vases projects.   You can go forward to Charlet, the first stop of the blog hop. Or you can go back to Mickey and work your way back around.  If you started the hop somewhere in the middle make sure you continue on so you don’t miss any of the fantastic inspiration!  And as always, you can find the blog hop archives over on the Stamp Review Crew blog.

**The Stamp Review Crew is a group of International Stampin’ Up! demonstrators who want to show you how much you can do with ONE stamp set. Each edition the SR Crew will showcase a new featured stamp set. Each stop along the hop will show you a different idea, or ideas using that set!**

Thanks for stopping by! Happy Stamping!

Share with your friends:

Back on Broadway

I’m back today with another Broadway Bound Suite project.  What can I say, I REALLY like this suite!

Never to old to wish - Center Stage Stamping

Isn’t that marquee framelit die awesome!  It has holes in it for perfect placement of the metallic pearls.  And, can we talk about the Lemon Lime Twist striped paper!?  LOVE IT!!  The bold stripes are a great base for the marquee greeting.  The photopolymer stamps make lining up the greeting a breeze.

Well, I guess I better get back to work packing up two kids to move off to college later this week. So, that’s a wrap for now.  Happy Stamping!

Share with your friends:

inky friends: suite designs blog hop

Welcome back!  I excited to be part of My Inky Friends Suite Designs Blog Hop!  This time we are putting a spotlight on various product suites in the 2018-19 Stampin’ Up! catalog.  I am thrilled to put the broadway Bound suite center stage! (I know, you are all so surprised that i would pick that suite.  What can I say?  Somethings are just meant to be!)  This dramatic suite can be found on page 69.

Let’s start with this fun project pairing.

Golden Broadway Birthday - Center Stage Stamping


Who wouldn’t love to get a birthday treat like this.  The gold foil in the Broadway Bound designer series paper brings out that Broadway sparkle!

Hooray cupcake - Center Stage Stamping

First off how awesome is this cupcake topper?  A bit of gold glimmer paper punched with the Starburst punch makes a great base for the fun greeting. A few gold Metallic Pearls are a great finishing touch.

Broadway Wish card - Center Stage Stamping


The gold shimmer cut from the Broadway Lights Framelits balloons make this a great coordinating card for the cupcake treat.

This next pair of projects Brings out the Bold colors of Lovely Lipstick and my favorite, Lemon Lime Twist,

Broadway Wish set - Center Stage Stamping

Here is a closer look at the gift box.

let's celebrate gift box - Center Stage Stamping

I started with one of the Lustrous White Mini Gable Boxes.  I wrapped the bottom with the cake pattern from the Broadway Bound dsp.  I glued some Lovely Lipstick 1/8″ Grosgrain Ribbon around the top.  The greeting on the box is layered as follows: 1-3/8″ scallop circle in Basic Black, 1-1/4″ circle in Lovely Lipstick, the hat die cut from the Broadway Lights Framelits (I added the black dots with a Basic Black Stampin’ Write Marker).  I stamped the sentiment on Lemon Lime Twist card stock and cut it apart and adhered to the circle.  This element is added to the box with dimensionals.

Broadway Birthday Wish card- Center Stage Stamping

I let the Broadway Bound dsp take center stage for this card.  The little candle embellishment on the “I” is one of the silver Candle Embellishments.  But wait, it’s pink, not silver.  Ah ha!  I colored it with the dark Lovely Lipstick Stampin’ Blend!  How cool is that?

Broadway Birthday treats - Center Stage Stamping

Broadway Bound is a fantastic suite of products that give your birthday projects great dramatic flair!   I’m sending you over to Twila and her wonderful projects featuring the Under the Mistletoe Suite.  Or, if you are traveling backwards through the hop, you can go back to Rhonda and her delightful projects with the Delightfully Detailed Suite.

That’s a wrap for now. Happy Stamping!

Share with your friends:

more than all the stars

Hello everyone!  Today’s card features the Little Twinkle set and coordinating Twinkle Twinkle designer series paper.  It is a quick and easy card, but still has some fun details.

love you more than the stars - Center Stage Stamping

The designer series paper makes a fun backdrop.  The focal point is the Night of Navy sentiment set on a fun Petal Pink watercolor wash background.  The angled piece behind is Vellum card stock that I brayered with Pool Party Ink.  It gives a soft hint on color to support the main panel.  The stars are punched out of Pool Party card stock with the Twinkle Builder punch.

While the colors from the DSP suggest this card would be for a new baby, it really could work for a variety of occasions – anniversary, valentine, thinking of you…

That’s a wrap for today.  Happy Stamping!

Share with your friends:

stamp review crew: rooted in nature

I’m super excited to be joining the Stamp Review Crew this month! What’s that? What is the Stamp Review Crew? We are an international group of Stampin’ Up! demonstrators that gets together to do a blog hop on the first and third (and sometimes on a fifth) Monday of each month. For each hop we choose a single stamp set to put center stage, and then we work our creative magic! All of the hops are archived on the Stamp Review Crew blog.  So, if you every need some extra inspiration, head on over HERE and check them out.  If you are following the hop in order, you should have arrived here from Anne at The Stampin’ Schach.

For this hop, we are putting Rooted in Nature in the spotlight.  What a beautiful set!  I got to work with this set this spring when I made display samples for Stampin’ Up! On Stage Milwaukee.  You can see some of those projects in this post.

This time I decided to go for a bolder look by stamping the leaves in Granny Apple Green and Tranquil Tide.

Be strong - Center Stage Stamping

I was going for the feeling of falling leaves so I kept them more sparse at the top and layered them heavily at the bottom. The Wood Texture DSP made me think of a fence.  I did use one retired item – the clear epoxy dots.  I just loved the idea of dew drops on the cut out leaves.

I’m also sharing my absolute favorite project I have made with this set.  This scrapbook page features one of my favorite pictures of my two daughters from my oldest’s wedding last summer.  I am so proud to be Momma Bear to these two beauties.

Be Strong - Center Stage Stamping

Well, if you started at the beginning, I am the last stop on the blog hop.  I hope you have enjoyed all the great projects that have shone a spotlight on Rooted in Nature! From here, you can head back to Anne’s blog or go on to Heidi’s(the start of the blog hop). If you started somewhere in the middle, make sure you check out all the other blogs.  There are some fantastic projects out there!

That’s a wrap for now!  Happy Stamping!

Share with your friends:

forget you not

Today, the adorable Little Elephant stamp set and coordinating Elephant Builder punch are taking center stage.

I'll Never Forget You - Center Stage Stamping

How cute is this little guy!?  The elephant punch makes this so easy.  I used Smokey Slate (for the elephant), Basic Black (for the eye) and the pattern from the Tea Room Specialty DSP (for the ear). The sentiment is punched with the Classic Label punch.  That little bird on his trunk would be really tough to line up and stamp just right.  But, with the Stamparatus, it is easy peasy.

Thanks for stopping by! Happy Stamping!

-Mary

Share with your friends: