Year: 2018

october creative class projects

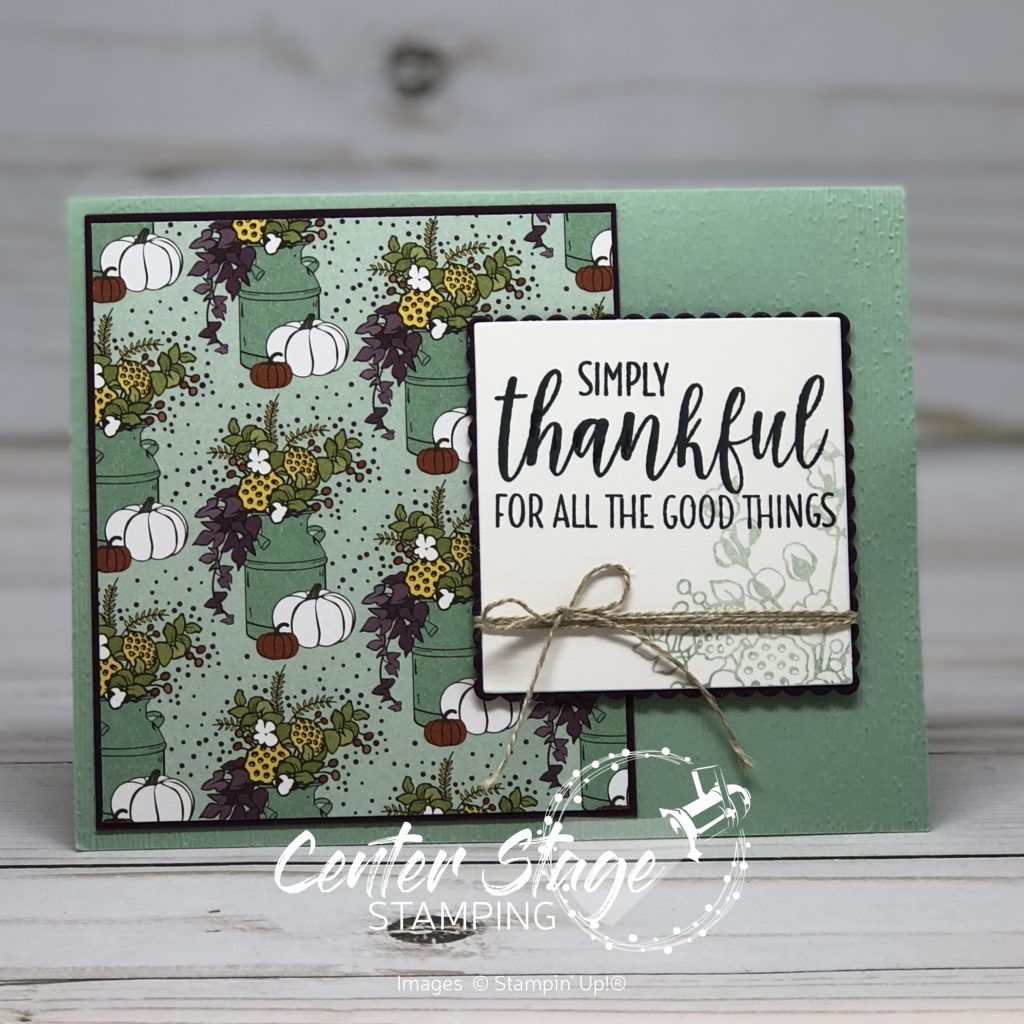
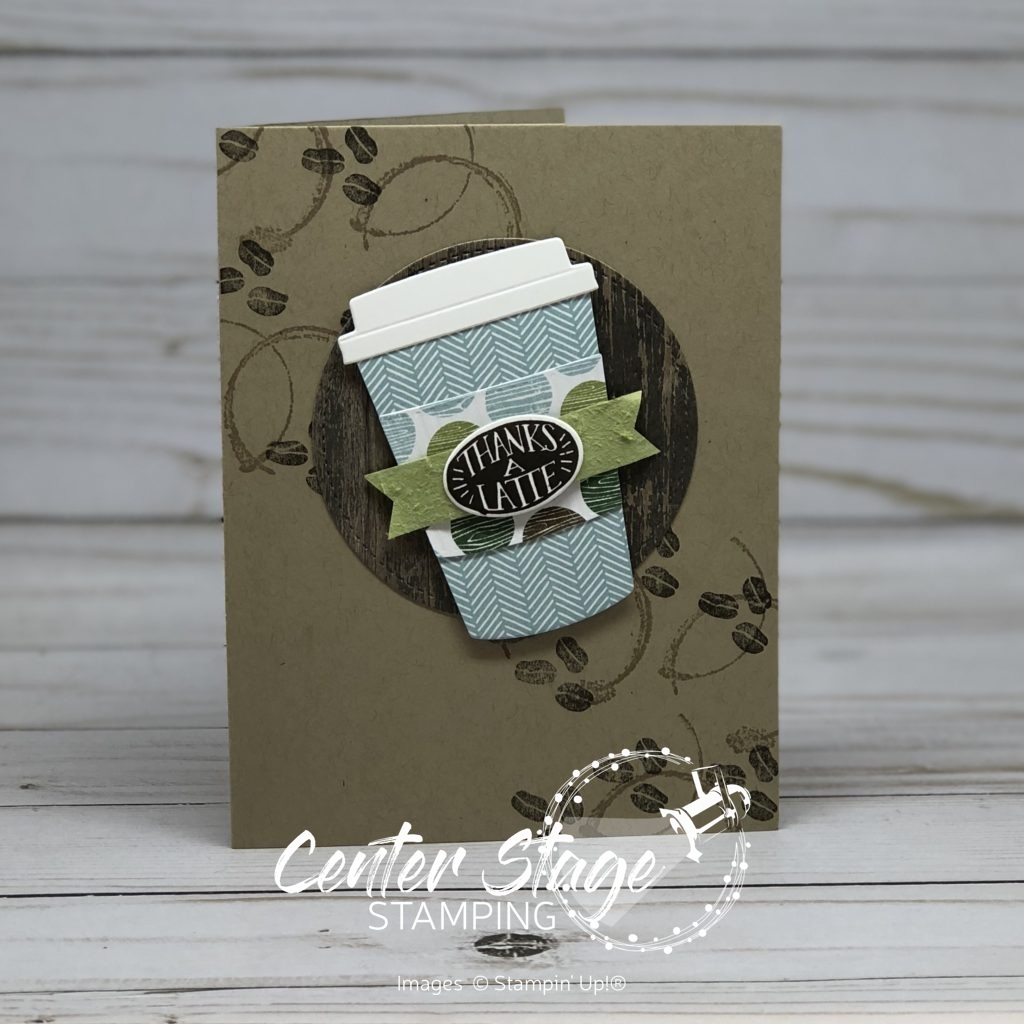
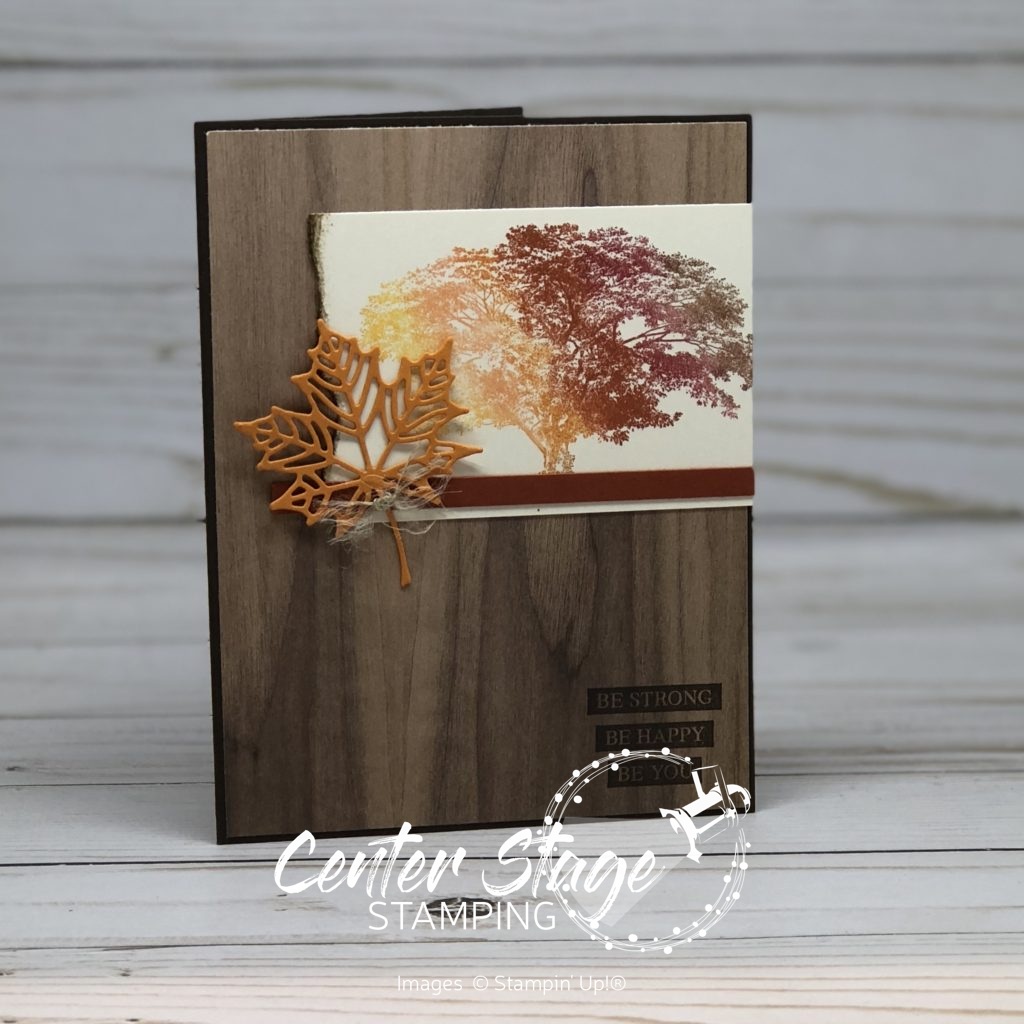
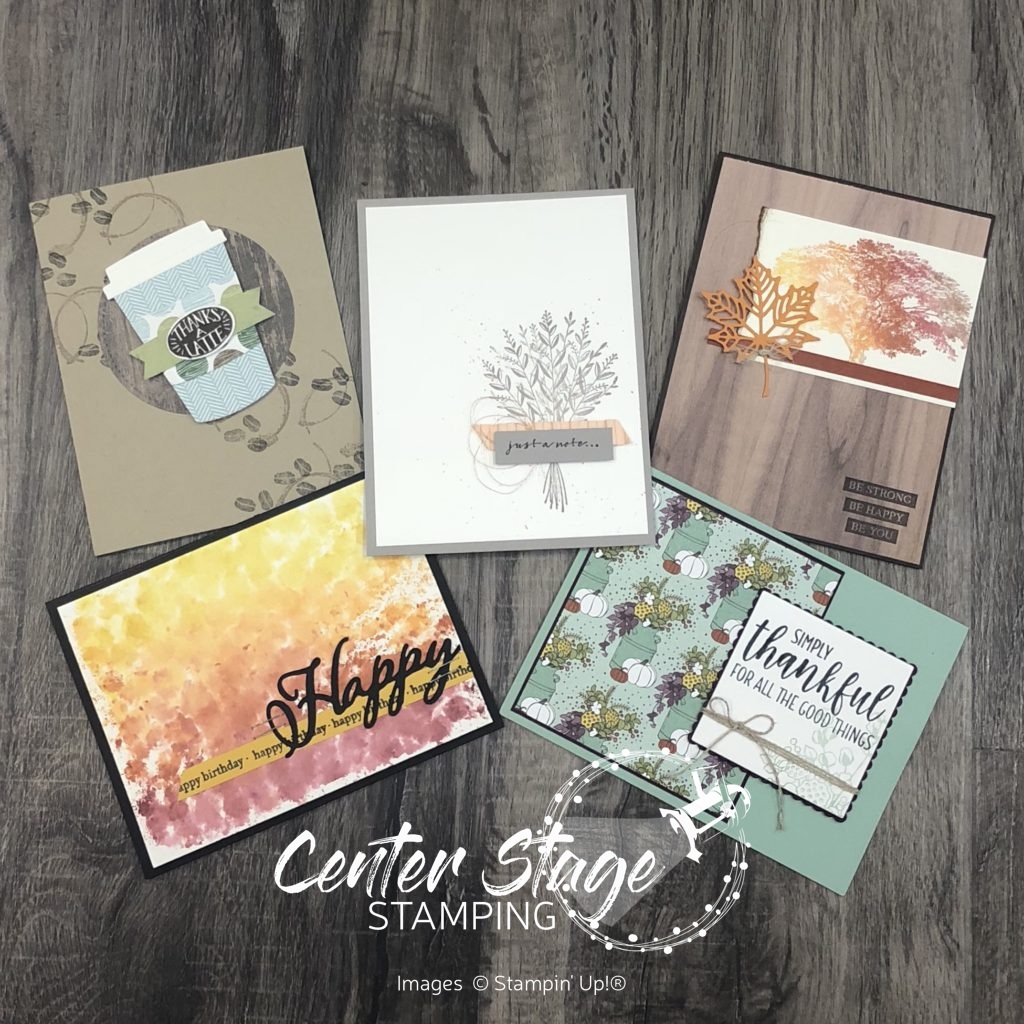
I taught a Creative Class at Stamp-n-Storage on Saturday, October 20.  We had a great time stamping and creating five fall themed cards.  I thought I would pop on today and share those projects with you.

Country Home: Thankful for all the good things - Center Stage Stamping

Coffee Cafe: thanks a latte - Center Stage Stamping

Rooted in Nature: Be Bold fall - Center Stage Stamping

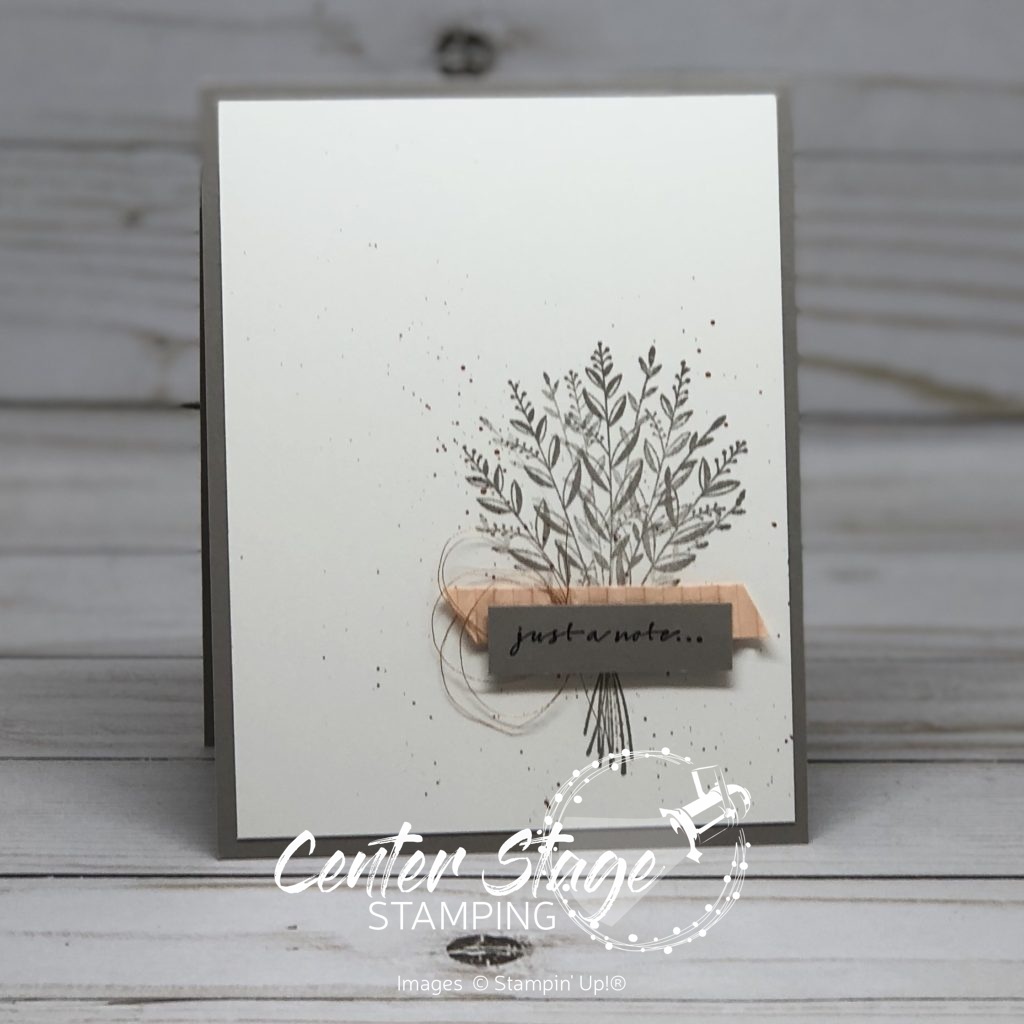
Wishing You Well: just a note - Center Stage Stamping

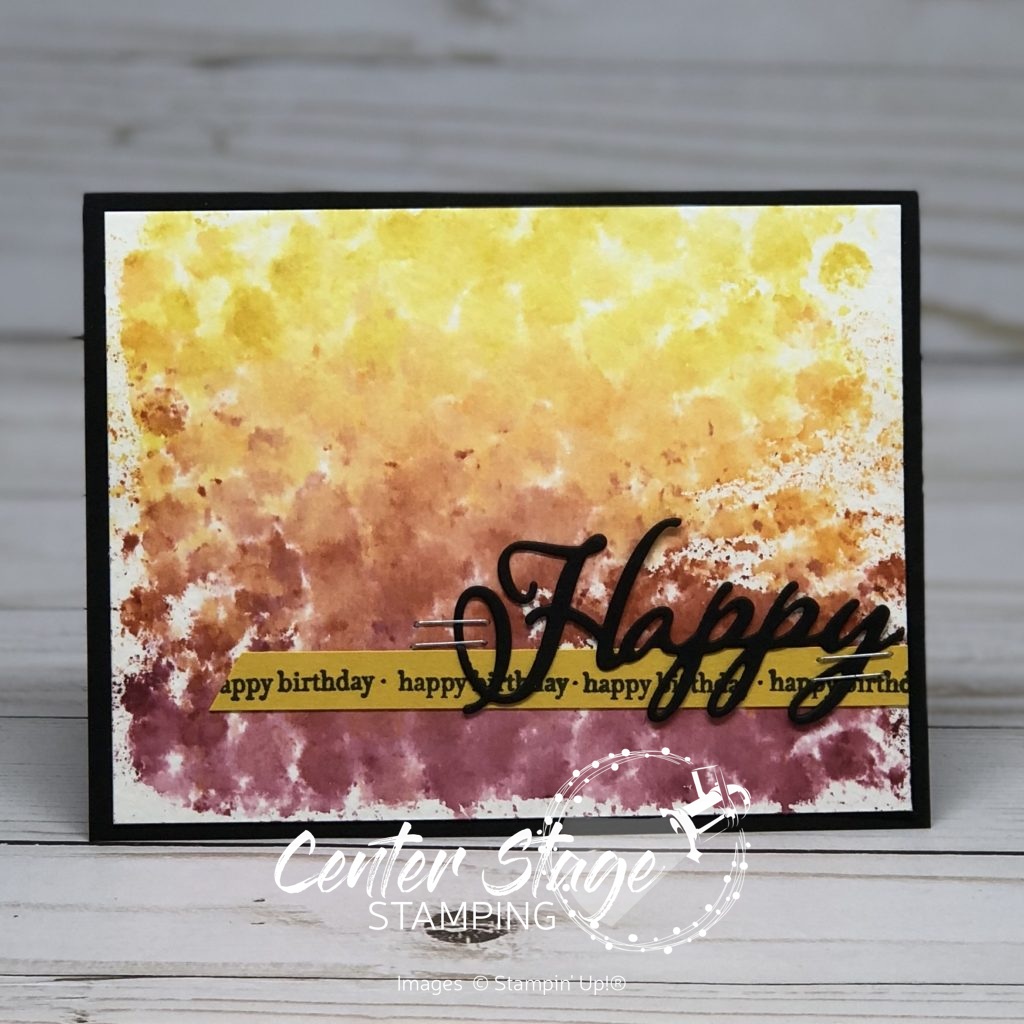
Happy Birthday: bubble wrap water color - Center Stage Stamping

We had a lot of fun putting these cards together.  Especially that last one!  I was able to teach a fun new water color technique.  I will be back on Wednesday with a quick tutorial for this.

Stamp-n-Storage Oct Creative Class projects - Center Stage Stamping

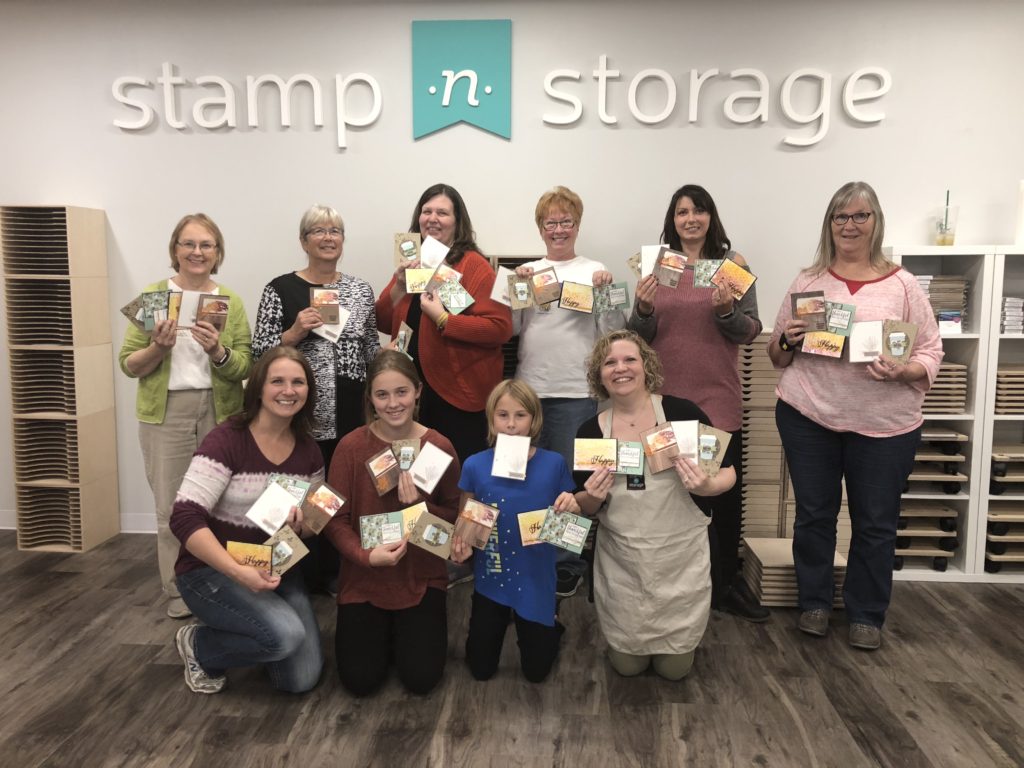
Here is everyone with their finished projects!  They all did a great job.

Stamp-n-Storage Oct Creative Class group photo

The next Stamp-n-Storage Creative Class is Saturday, November 17 at 1:00PM.  You can find more details and register for the class over on the Stamp-n-Storage website HERE.  I’d love to have you join us!

That’s a wrap for today.  Join me again to put a spotlight on creativity!


Share with your friends:

a season of good cheer

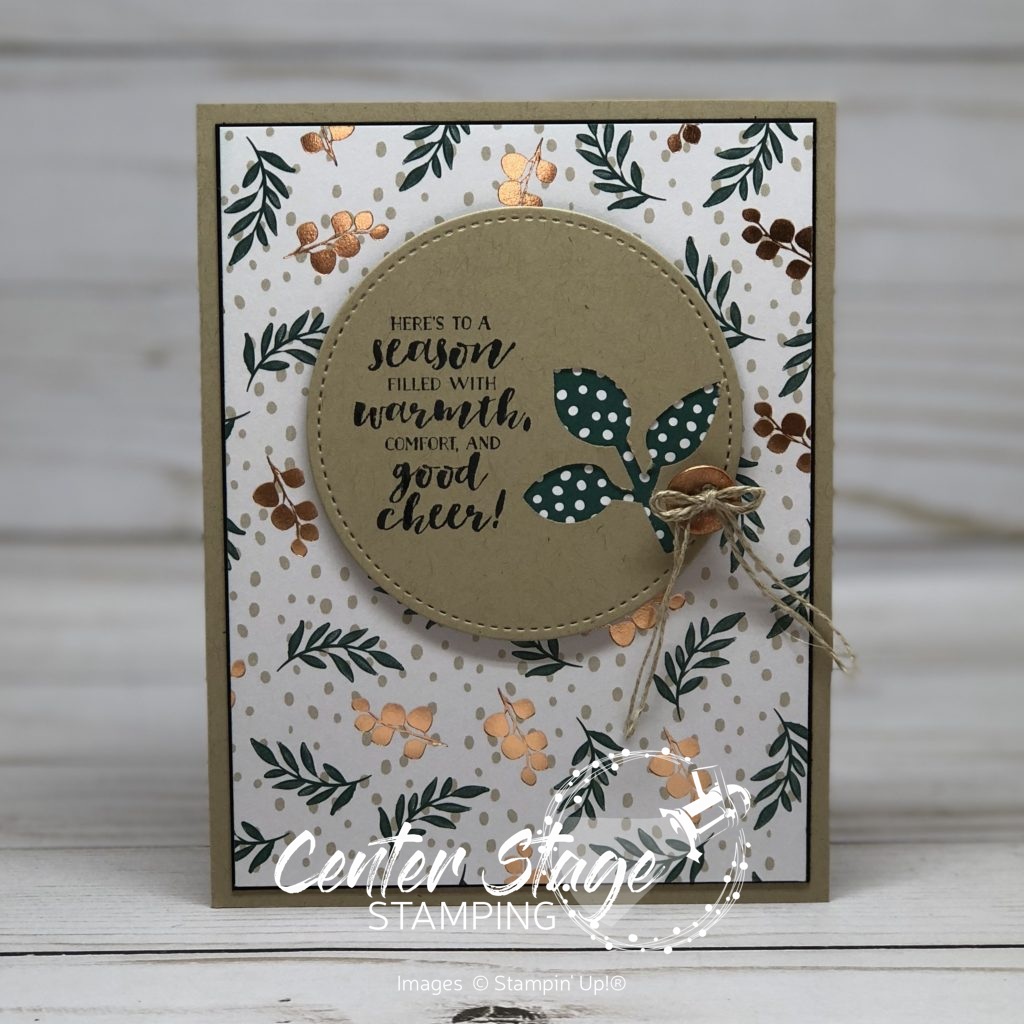
Hello crafty friends!  I have a quick and easy card to share with you today.  The Joyous Noel designer series paper does the work to give this card a wow.  Don’t you just love those copper accents?  They really make this card POP!

First Frost: Season of Cheer - Center Stage Stamping

The DSP has a layer of Basic Black card stock underneath it to help give it a bit more depth.  I cut a Stitched Shapes circle out of Crumb Cake and punched out the leaf punch on the edge of the circle.  I put a circle of Tranquil Tide dots pattern from the 2017- 19 In Colors DSP stack behind the leaf outline.  The sentiment is stamped in Memento Black Ink.  I took one of the Galvanized Buttons and covered it with Copper Shimmer Paint.  Once dry, i threaded it with Linen Thread and adhered it to the stitched circle.

That’s a wrap for today.  Join me again to put a spotlight on creativity!

Share with your friends:

happy 20 my son

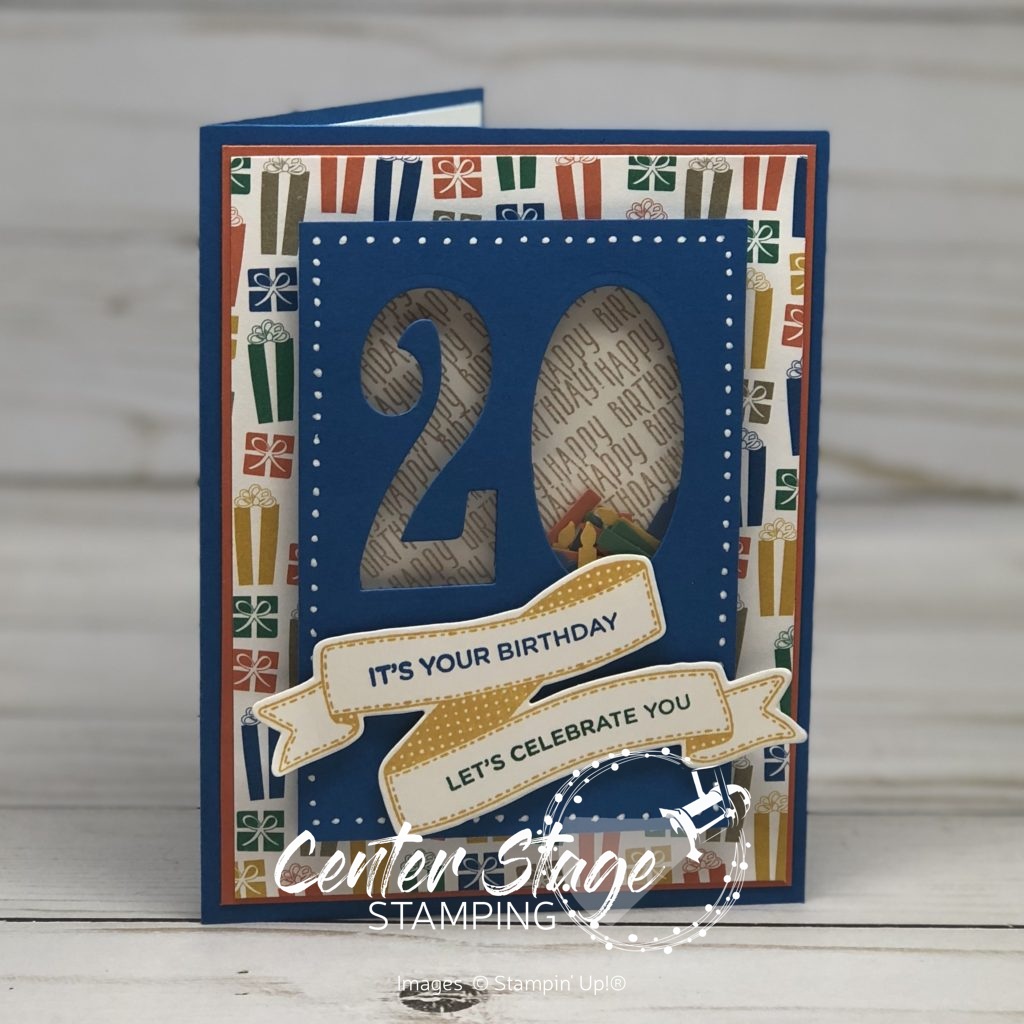
I am trying to wrap my head around the fact that my son…my youngest child…my baby boy…turned 20 on Monday.  I no longer have any teenagers.  When did this happen?  I swear he was just starting Kindergarten.  Now, he is in his second year of college.  I wanted to share the card I made for him.  Full disclosure: it uses some retired paper and ink colors.

Happy 20 - Center Stage Stamping

I made a shaker card with 20 candles in the “0”! The “Happy Birthday” (stamped in Crumb Cake) is from Picture Perfect Birthday. The banner is from Birthday Banners and sentiments are from Broadway Birthday. I used a white gel pen to make the dots around the shaker panel. I am happy with the final result, but it took me a while to get there.  It is hard making a card for a 20 year old boy…um, young man….er, guy. I think I need more time to full grasp this milestone.  But, another is right around the corner.  In 10 days, my middle child turns 21!!  Someone hit the pause button.  Time is moving too fast.

Thanks for stopping by! Join me again to put a spotlight on creativity!

Share with your friends:

stamp review crew: dashing deer

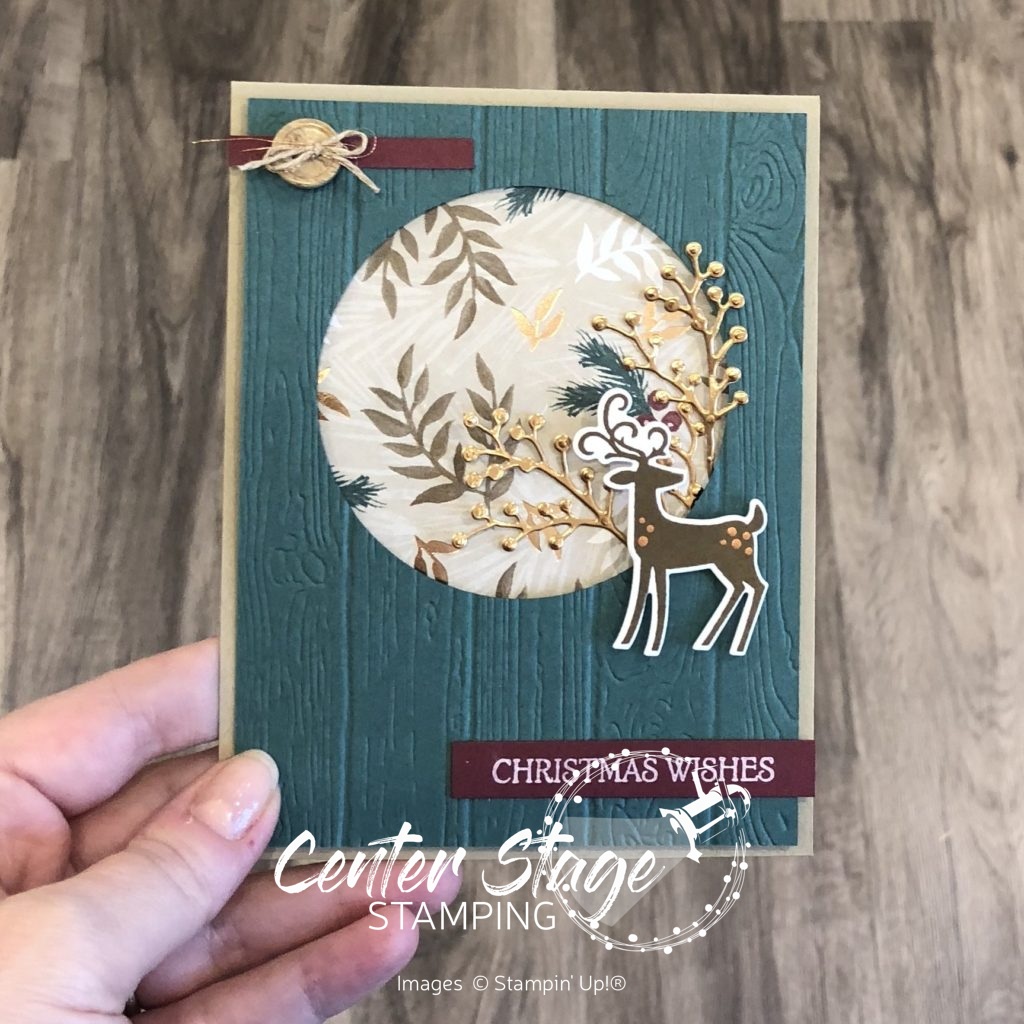
Welcome to another Stamp Review Crew blog hop!  This time we are featuring the fantastic Dashing Deer stamp set!  I have been having a lot of fun creating with this set.  And to think, I almost didn’t get it.  What was I thinking?!  I am so glad I came to my senses and ordered it right away.  I LOVE it!  I have featured it on two previous blog post that you can find here and here.  For today’s spotlight, I decided to showcase two different looks for the set.  The first is a very deep, rich card pairing Dashing Deer with the Joyous Noel Designer Series Paper.

Dashing Deer: Christmas Wishes - Center Stage Stamping

I started with a Crumb Cake card base.  I embossed the Tranquil Tide panel with the Pinewood Planks Textured Impressions Embossing Folder and used my Layering Circles Framelits to cut out a circle in the panel.  I backed this with some of the Joyous Noel DSP.  I stamped the little deer in Soft Suede and cut him out with the coordinating Detailed Deer Thinlit.  I added a few dots of Copper Shimmer Paint for some extra detail. I cut out the twig spray from the Frosted Bouquet Thinlits in copper foil paper and adhered it poking out of the circle.  The sentiment is embossed in White on Merry Merlot card stock with a smaller strip at the top of the card with a True Gentleman button tied with Linen Thread.  My second card has a much lighter color scheme.

Dashing Deer duo - Center Stage Stamping

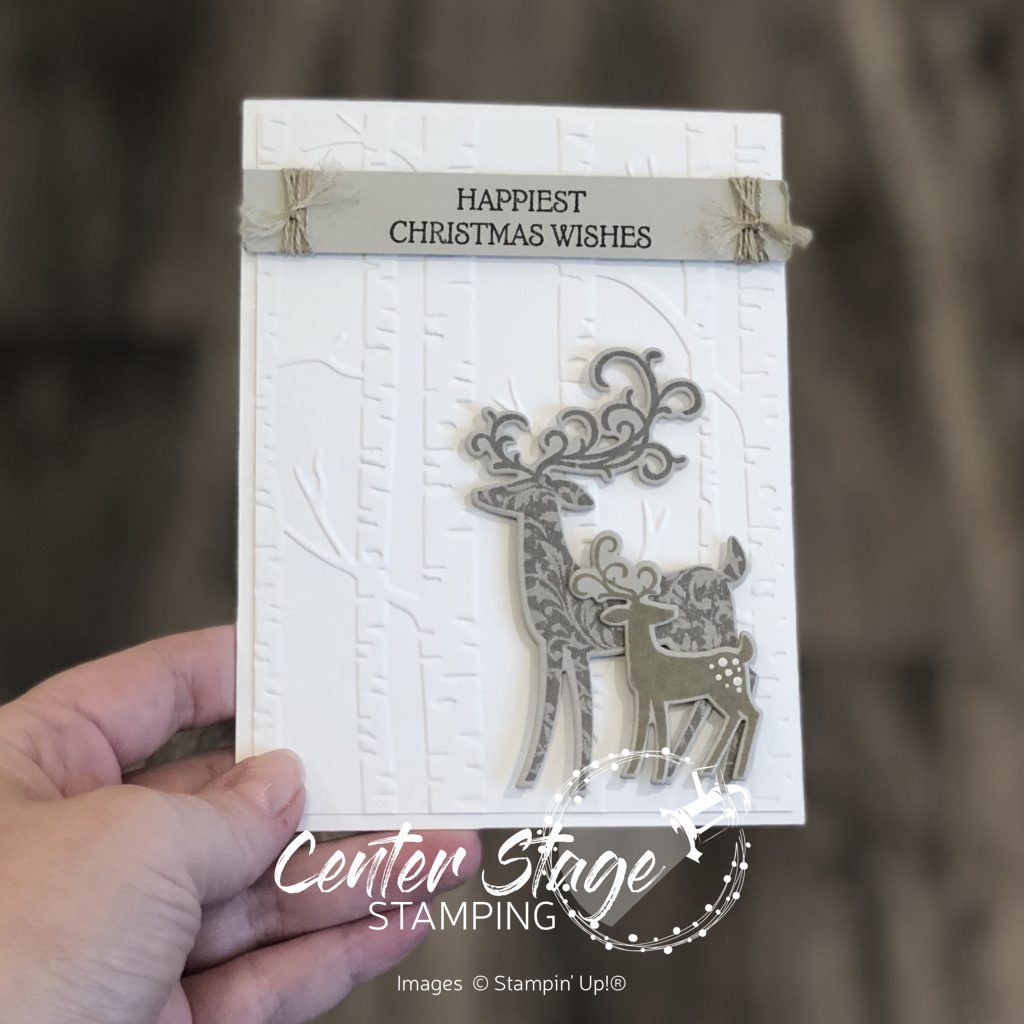
For this card I wanted a winter white woods look. The white panel is embossed with the Woodland embossing folder.  I stamped the large deer with Gray Granite ink on Sahara Sand card stock.  The smaller deer is stamped with Sahara Sand ink on Sahara Sand card stock.  I added some Frost White Shimmer Paint dots on the smaller deer.  The sentiment is stamped in Early Espresso ink on Sahara Sand card stock with Linen Thread wrapped on the ends.  I love these two deer together.

I am now going to send you over to the wonderfully creative Tanya.  Wait until you see what she can do with this great set!  Or you can go back to Lou and her beautiful projects.  Either way, make sure to go all the way through the blog hop – you won’t want to miss any of the inspiration for the gorgeous stamp set!  You can find the full blog hop order on the Stamp Review Crew page.

That’s a wrap for me.  Join me again to put a spotlight on creativity!

Share with your friends:

inky friends: handmade holidays blog hop

Welcome to My Inky Friends: Handmade Holidays Blog Hop!  You will find lots of inspiration for you Holiday crafting!  You should have arrived here from Paula and her wonderful Country Home projects.  Weren’t they great?  If you are starting the hop here, make sure you go through and check out all the stops.  You don’t want to miss a thing.

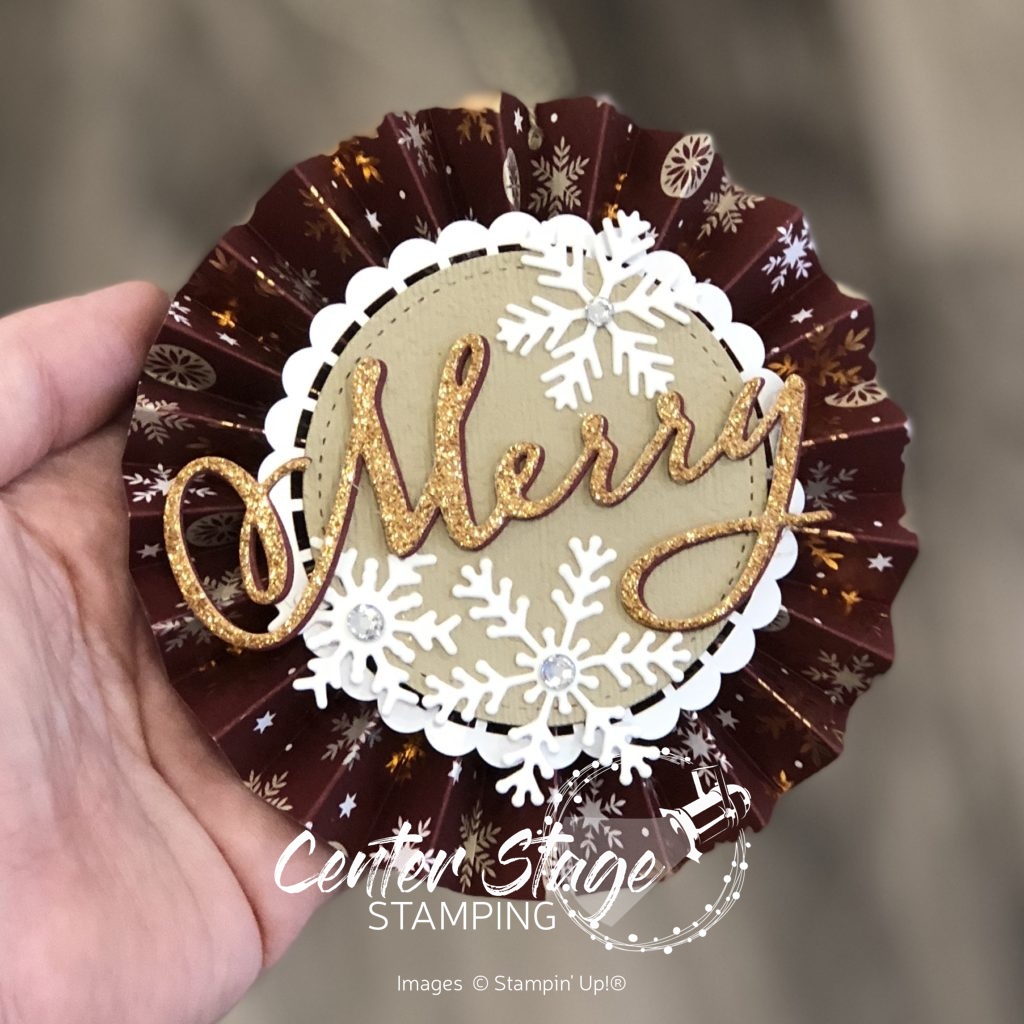
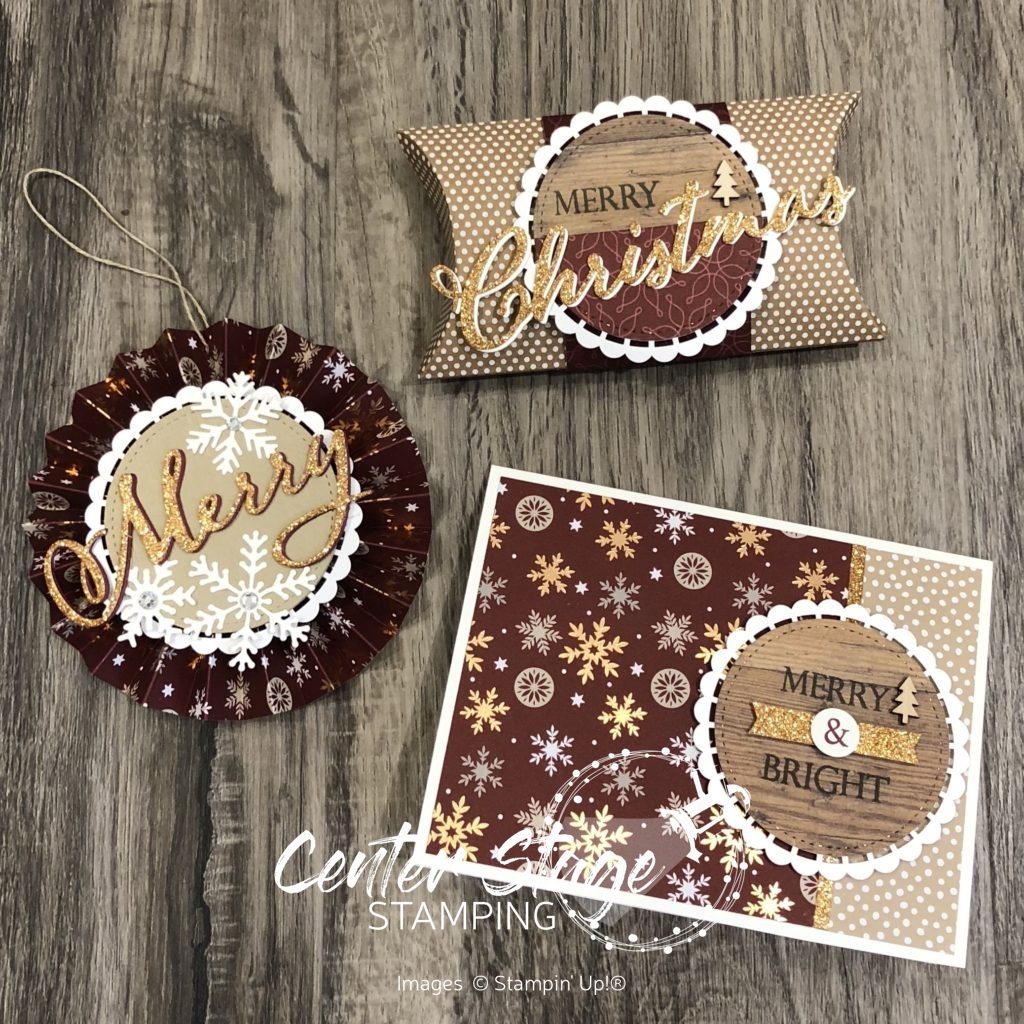
My projects are putting the fantastic set Merry Christmas to All in the spotlight.  This is a great holiday greeting set and the coordinating Merry Christmas Thinlits take it to the next level.  I just love the dimension and texture of die cut words. I paired this great set with the amazing Joyous Noel designer series paper.  I love the new Merry Merlot color.  Paired with a touch of copper, it is perfect for elegant holiday projects.  I decided to create a card, gift package and ornament trio. Let’s start with the card.

Merry Christmas to All: Merry & Bright - Center Stage Stamping

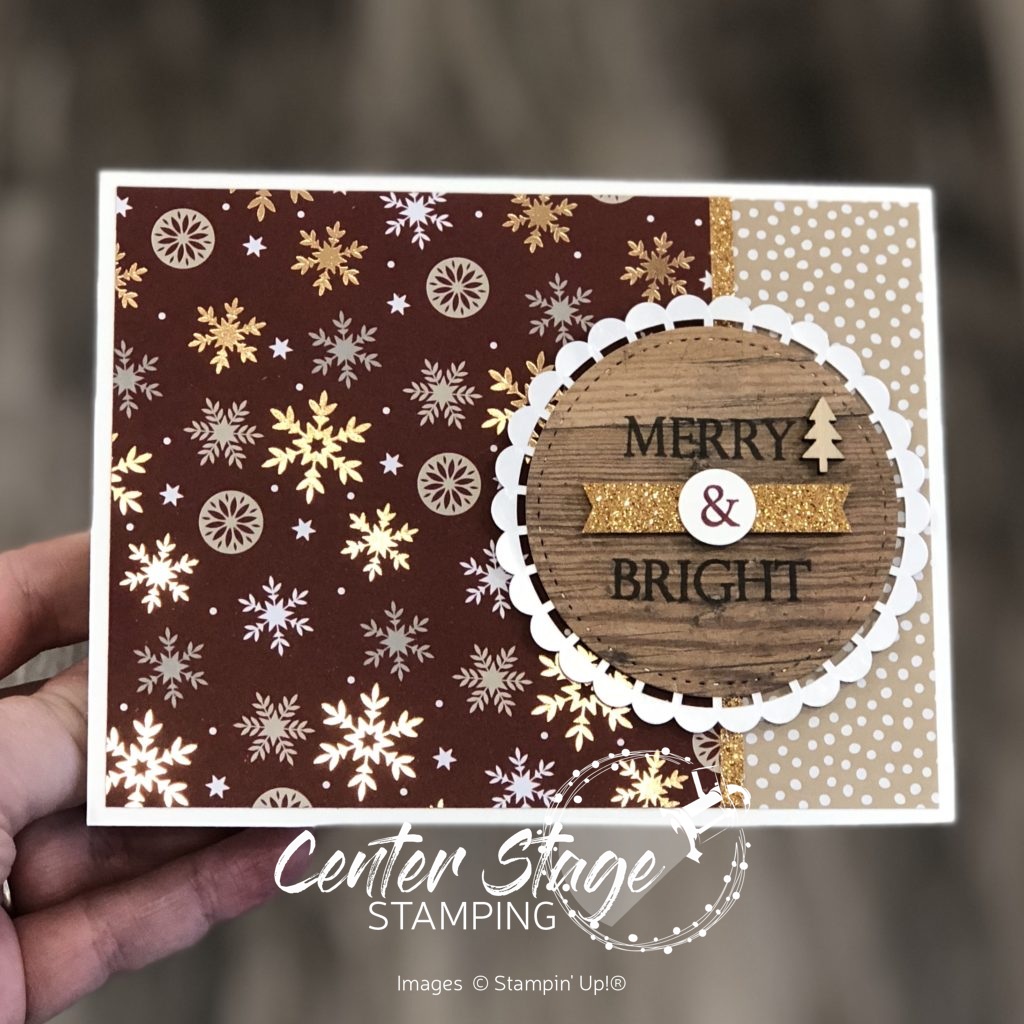
Isn’t that paper gorgeous!? I also used a bit of Neutrals 6×6 DSP (the Crumb Cake dot panel) I layered a Pearlized Doily with a Stitched Shapes circle cut from Wood Textures DSP.  A tiny bit of Copper Glimmer Paper draws out the copper foil in the Joyous Noel DSP.  I also added a tiny tree from the Festive Farmhouse Elements.  The sentiment is stamped on the Wood Texture DSP in Early Espresso Ink.  I think it gives a wood burned look to the image.Merry Christmas to All: pillow box - Center Stage Stamping

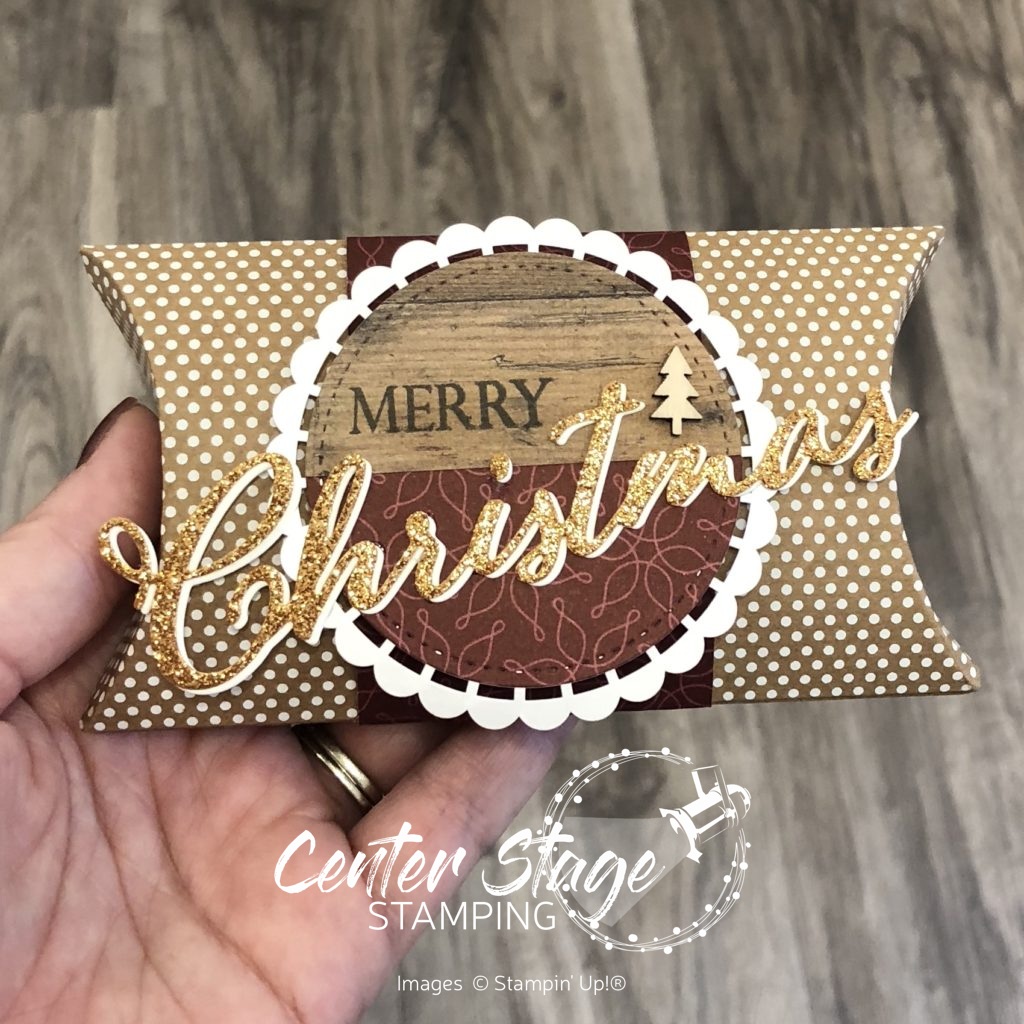
Next up is a cute little gift card pouch.  I started with one of the Kraft Pillow Boxes.  I just love those little white polka dots.  I kept some of the elements from the card, but changed them up a bit to make the belly band wrapped around the pillow box.

Merry Christmas to All: Merry ornament - Center Stage Stamping

Finally, I made this fun medallion ornament. I started with two 4″x12″ strips of the DSP.  I scored them every half inch, fan folded them the assembled them into the medallion.  Once again I used the Pearlized Doily and a Stitched Shape circle, this time cut out of Crumb Cake card stock. I added a few snowflakes from the Blizzard Thinlit with added rhinestones.

Merry Christmas to All: gift trio - Center Stage Stamping

A fabulous trio perfect for holiday gifting!   I am now sending you over to Rhonda and her fun projects with the tiny take-out box!  They are so much fun!

Thanks for stopping by!  Join me again to put a spotlight on creativity!


Share with your friends:

thank you elephant

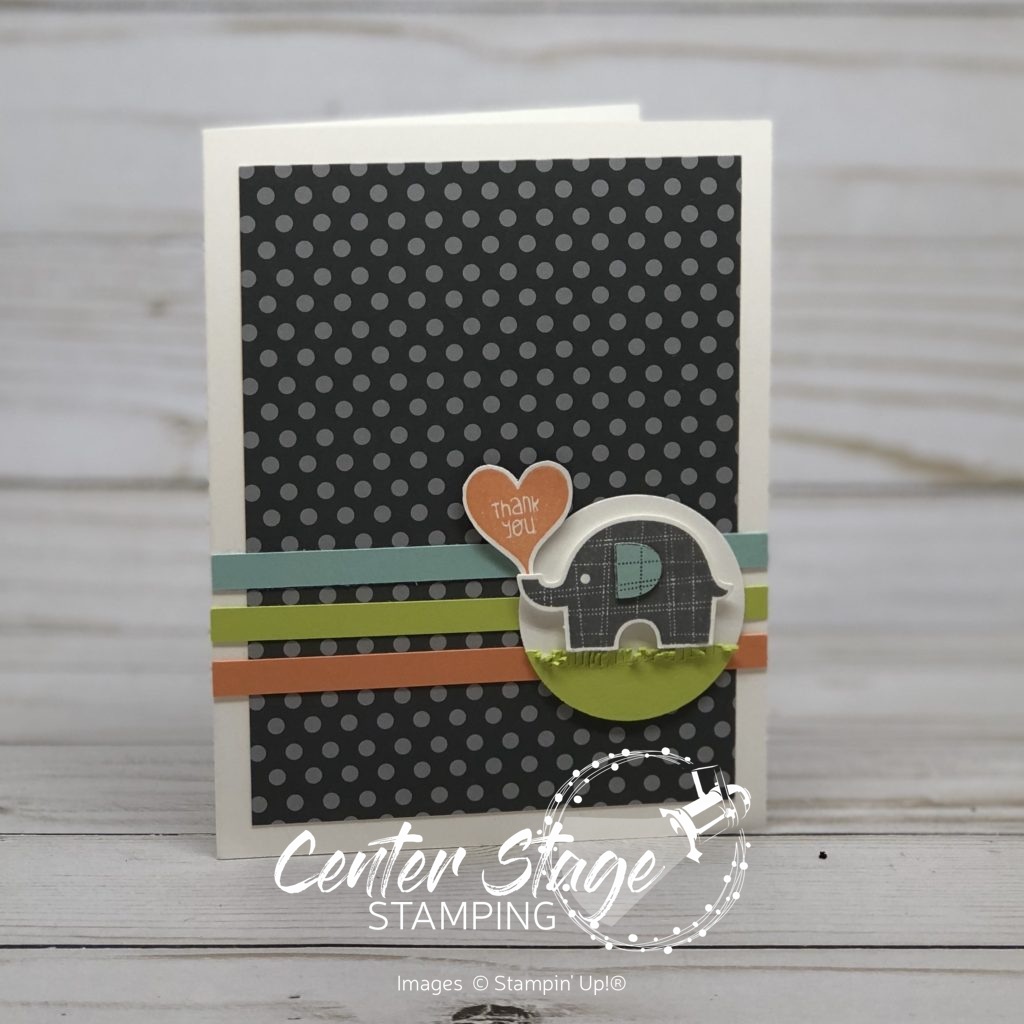
Just a quick post today to share this adorable guy!

Little elephant: thank you - Center Stage Stamping

With Basic Gray as a backdrop and pops of pool Party, Lemon Lime Twist and Grapefruit grove, this cute little elephant steals the show.  I decided to keep the card pretty simple with a few fun details to spotlight my little pachyderm friend. I punched out a Whisper White 1-3/4″ circle and a Lemon Lime Twist 1-3/4″ circle, then trimmed down the Lemon Lime Twist one and fringed the top edge for the grass. The little Basic Gray elephant is punched out with the coordinating Elephant Builder punch and made it a breeze to give him a Pool Party ear.  I fussy cut the Grapefruit grove heart sentiment.  This little guy is definitely deserves to be center stage!

That’s a wrap for today.  Join me again to put a spotlight on creativity!

Share with your friends:

country home hello

The gloomy rainy weather continues – ugh.  It really makes it hard to get anything done, including creating.  Anyone else feel like that?  I need a jolt of sun and warmth.  SOON!  I am counting the days until I leave for Orlando and Stampin’ Up! On Stage!  And of course Disney and Universal with some of my best friends!  Bring on the sun and fun – and Butter Beer!

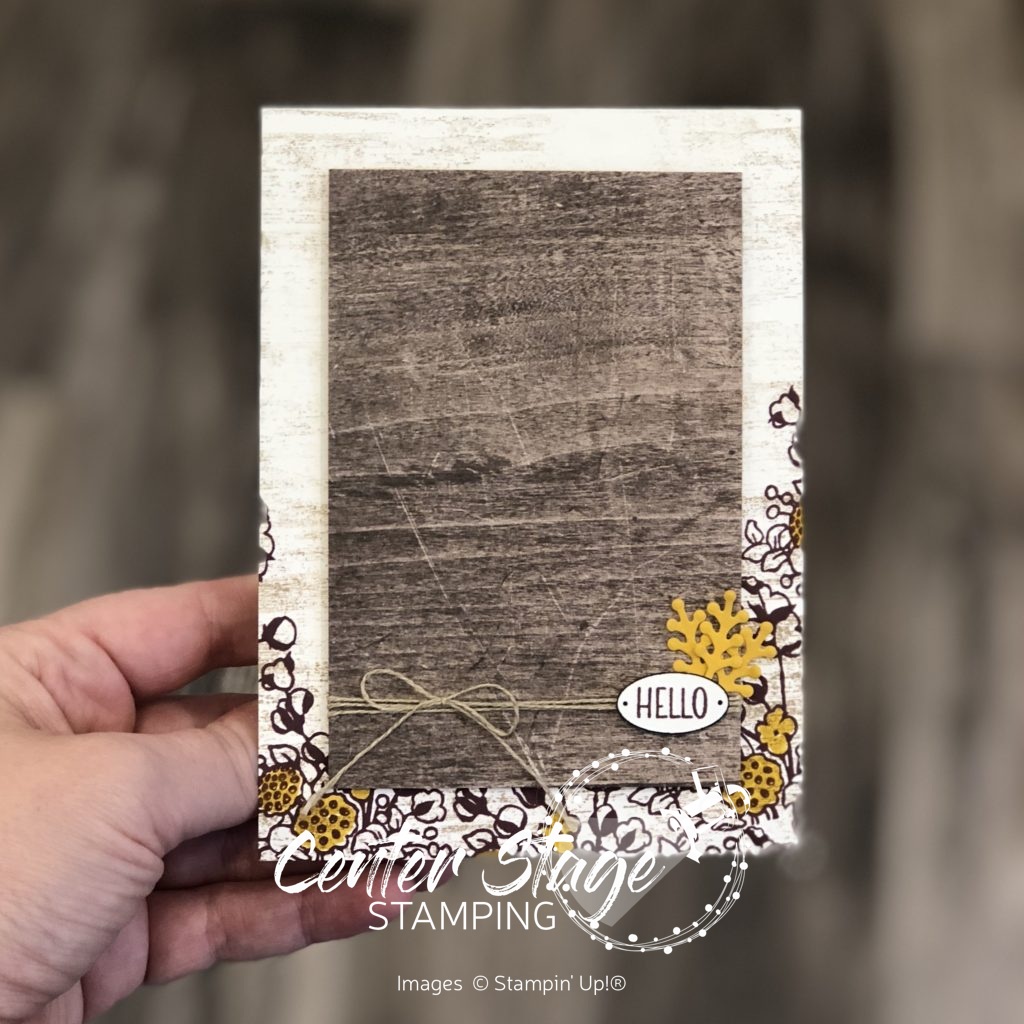
Today’s card takes a different approach to the popular Country home stamp set.  I wanted to do something without the milk can or pitcher.  This set is more versatile than you might think.

Country Home Hello - Center Stage Stamping

I stamped the cotton spray image in Fresh Fig along the bottom of the card base and colored select flowers with my Crushed Curry marker.  I used an image from Timeless Textures to add the distressed look on the base.  I wrapped some linen thread around a Wood Textures dsp layer and layered the fussy cut little oval with the sentiment.  The little Crushed Curry sprigs are from the Eclectic Layers Thinlits.  A quick and simple card with a funcountry fall feel.  Don’t be afraid to branch out from the obvious with a stamp set.  There is a lot more fun to be had!

That’s a wrap for today!  Join me again to put a spotlight on creativity!

Share with your friends:

Christmas Wreath

The weather here has been nutso this week.. We dropped into the 40’s, back into the 50’s, jumped up to the 80’s for a day, then plummeted back to the low 50’s.  Plus rain every other day.  Please, bring back the sun and some warmth!  I am not ready for winter.  At all.  I think I need to move farther south.

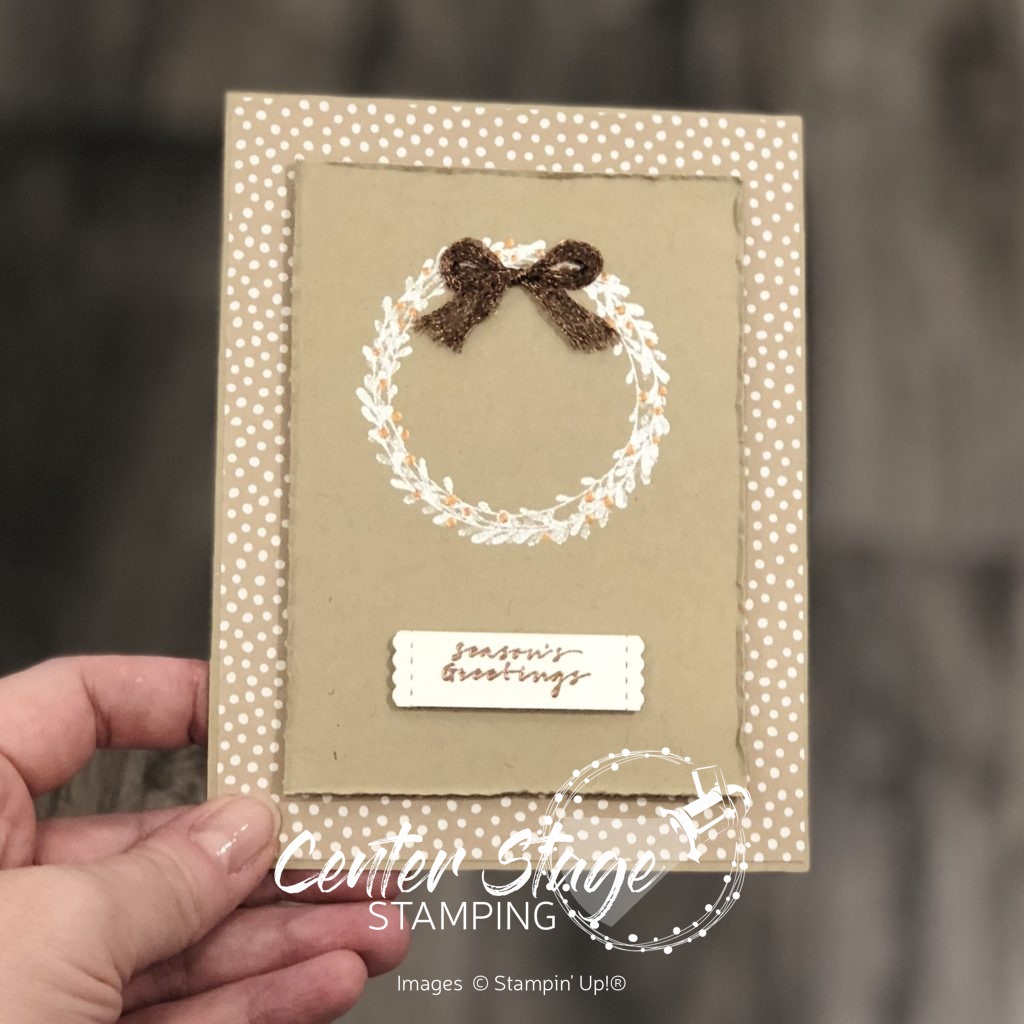
In spite of the weather, I have been busy creating some fun Christmas cards.  And I just got some new goodies that I can’t wait to play with this weekend! I’m excited to share those projects with you soon.  Today I have a card that puts the wonderful Wishing You Well set center stage.

Wishing You Well wreath - Center Stage Stamping

I love the combination of Crumb Cake, White and a touch of copper!  I embossed the wreath in white and added little “berries” with the Bright Copper Shimmer Paint.  I used the stylus end of the Take Your Pick Tool, dipped it in the Copper Shimmer Paint and dotted it on the wreath.  a great way to add some detail with the shimmer paint. A Copper Trim bow is a great finishing touch for the wreath.  The sentiment is embossed in copper on a little tag cut from the Stitched Labels Framelits.  This would be an easy card to mass produce.

While I am not ready for winter and the cold and gray skies that come with it, I do love Christmas and creating fun cards to send to friends and family.  But, hey! I can do that year round!! Hmmm – maybe I do just need to move where it is warmer….

That’s a wrap for today.  Please, join me again to put a spotlight on creativity!


Share with your friends:

stamp review crew: buffalo check

Time for the Stamp Review Crew to put another great stamp set in the spotlight!  Today’s blog hop is featuring the amazing Buffalo Check background stamp.  Buffalo Plaid is very trendy and yet timeless.  It can be found all over fashion and home decor.  With this stamp, your card making can be on top of one of the hottest trends too!  It is great for any occasion and can be the star of the show, or a great supporting role.

Let’s start with featuring Buffalo Check in a supporting role.
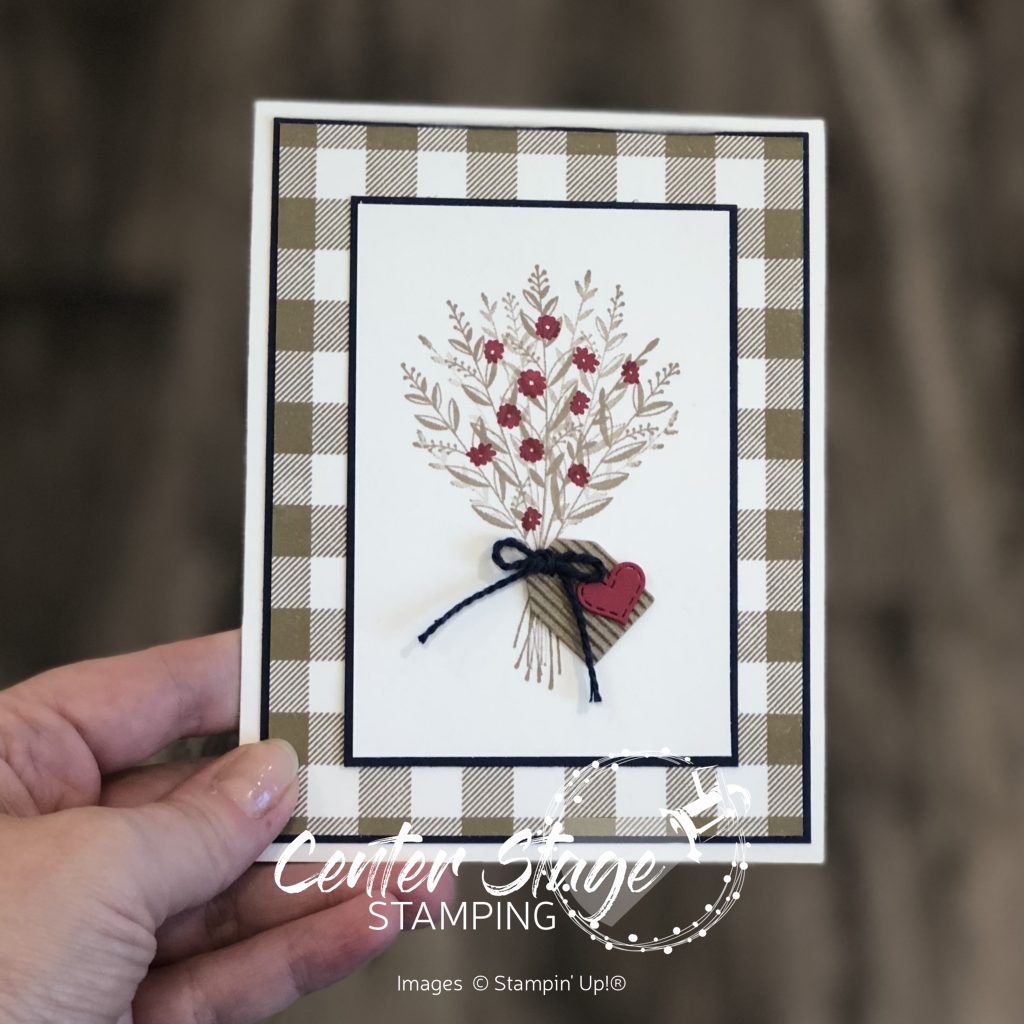
Buffalo Check Wishing You Well - Center Stage Stamping

Stamped in Crumb Cake ink on Whisper White card stock, Buffalo Check makes a great base for this bouquet from the Wishing You Well set.  The layers and ribbon look black in the photo, but it is actually Night of Navy. The flowers and heart are Lovely Lipstick.  I love the little corrugated tag!

The next card puts Buffalo Check in the leading role.
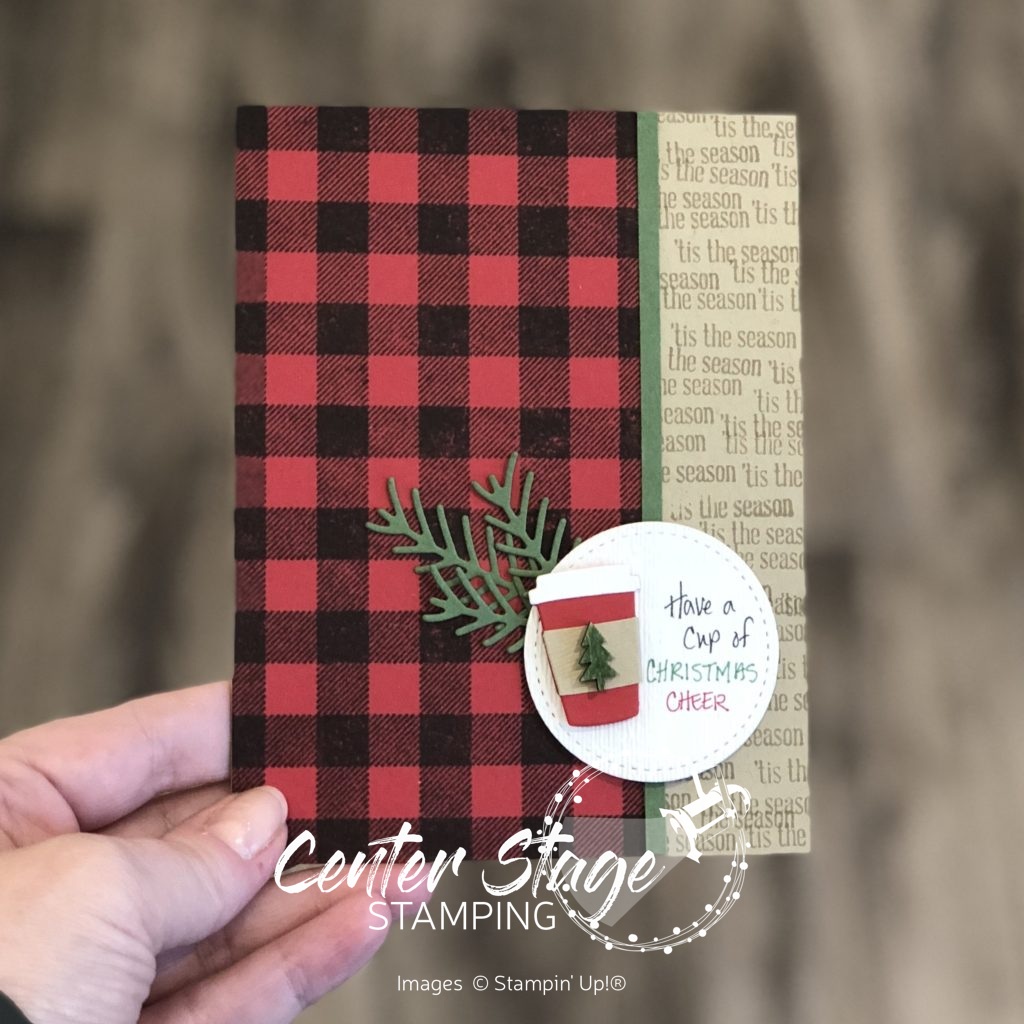
Have a cup of Cheer - Center Stage Stamping

Stamped in black ink on Real Red card stock, you get the iconic buffalo plaid.  I used the tiny cup from the Coffee Cups framelits and layered it on a white Stitched Shapes circle.  I hand wrote the sentiment to get just what I wanted and to fit the space.  The ’tis the season repeated on the right is from Itty Bitty Greetings.  Final touches are a few pine sprigs from the Pretty Pines Thinlits and tree from the Festive Farmhouse Elements.  I used the backside of the tree and colored it with my Garden Green Stampin’ Write marker.

One last card.  I know I have shared it before, but it showcases this stamp so well.
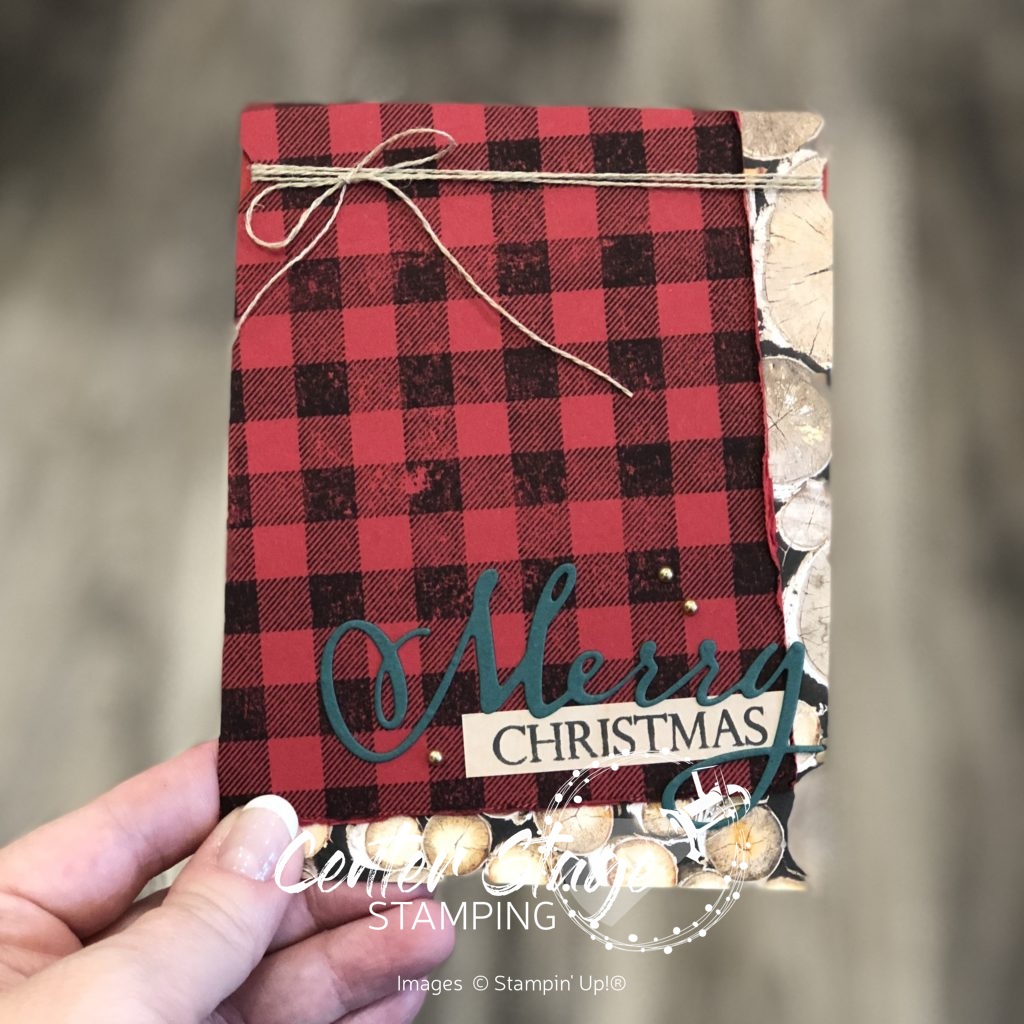
Buffalo Check Christmas - Center Stage Stamping

I think this is one of my favorite Christmas cards I have made this year.  I love Buffalo Check paired with the log patten from the Wood Textures designer series paper stack.  (I don’t know why the tiny bit got blurred out in the photo.  must have blended with my backdrop too much.)

If you are #madforbuffaloplaid like me, this stamp is a must have.  Check out the rest of the stops on the blog hop for more amazing Buffalo Check inspiration!  You can go back to the wonderfully talented Nikki or move on to the uber creative Stesha.  Enjoy the rest of the hop and join me again to put a spotlight on creativity.


Share with your friends:

inky friends: dc 10

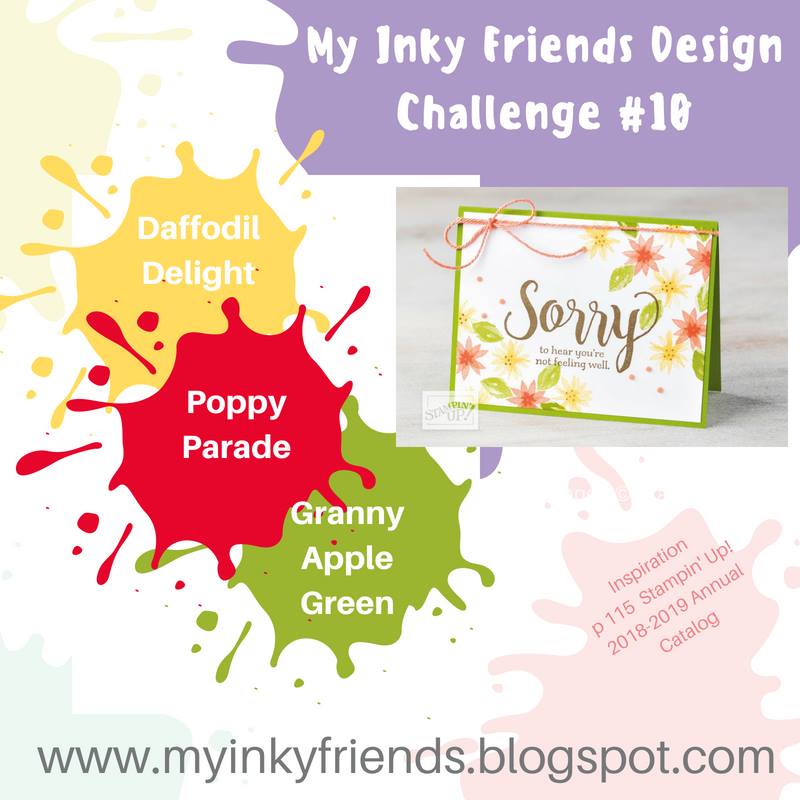
My Inly Friends are back with their 10th design challenge!  This is a color challenge based on a sample on page 115 of the Stampin’ Up! 2018-19 Annual catalog.  A very bright combination of colors! You can head over to the My Inky Friends page to see what all of the Design Team created with this color inspiration.  Here is my creation:

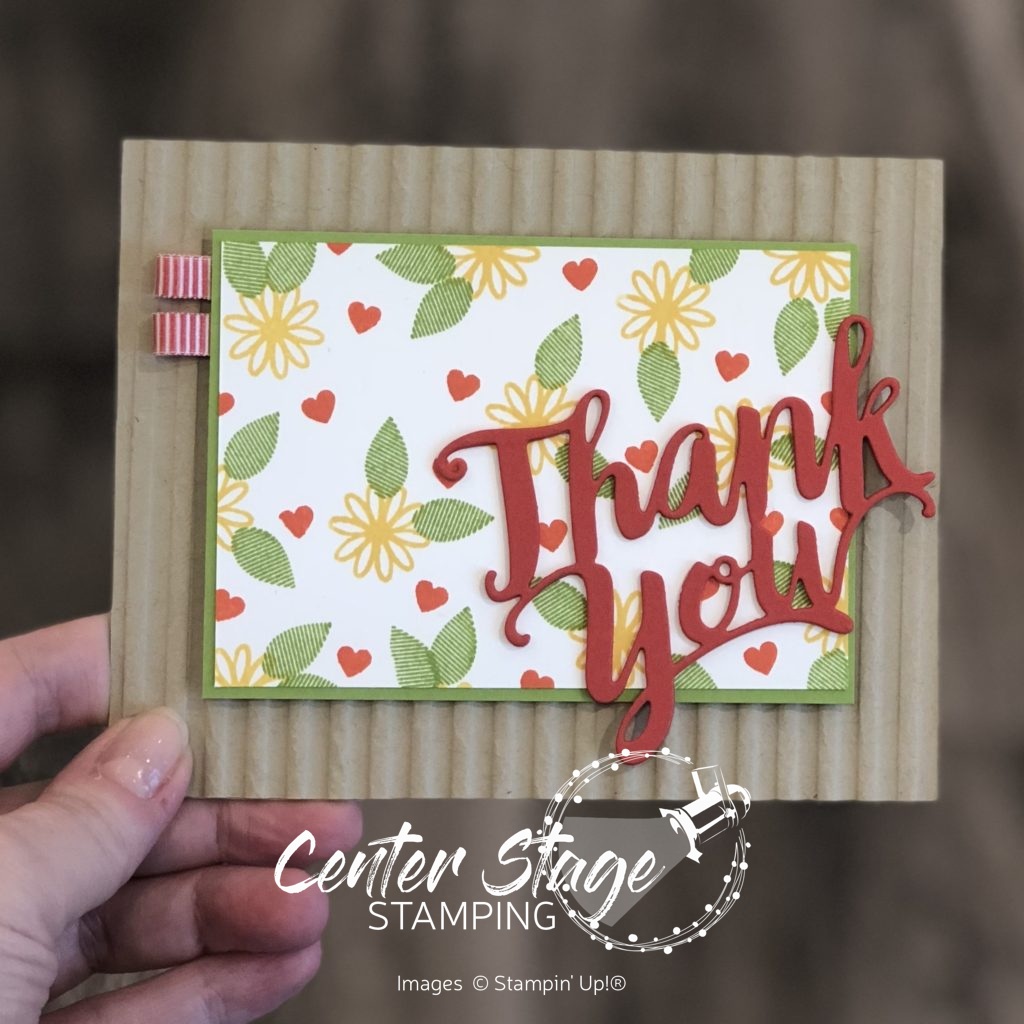
Inky Friends DC 10: Thank You - Center Stage Stamping

I used the A Big Thank You stamp set and coordinating Thank You Thinlit.  The small images work great to create your own background paper. The Crumb Cake card base is embossed with the Corrugated Dynamic Textured Impressions Embossing Folder.  I just love the texture and dimension it gives.  I added two little ribbon loops on the top left corner of the image panel to finish it off.  I let the die cut thank you hang off the image panel a bit to pull it into the card base some.  I think it helps it stand out more.

Head over to the My Inky Friends page and check out the other design team creations, then have a go at this color combo yourself!  Be sure to upload your creation to the My Inky Friends page so we can share in your creativity!

That’s a wrap for today.  Join me again to put a spotlight on creativity!

Share with your friends: