Month: July 2018

a lifetime of love

My daughter Jessica and her husband Tyler celebrated their first wedding anniversary on July 22.

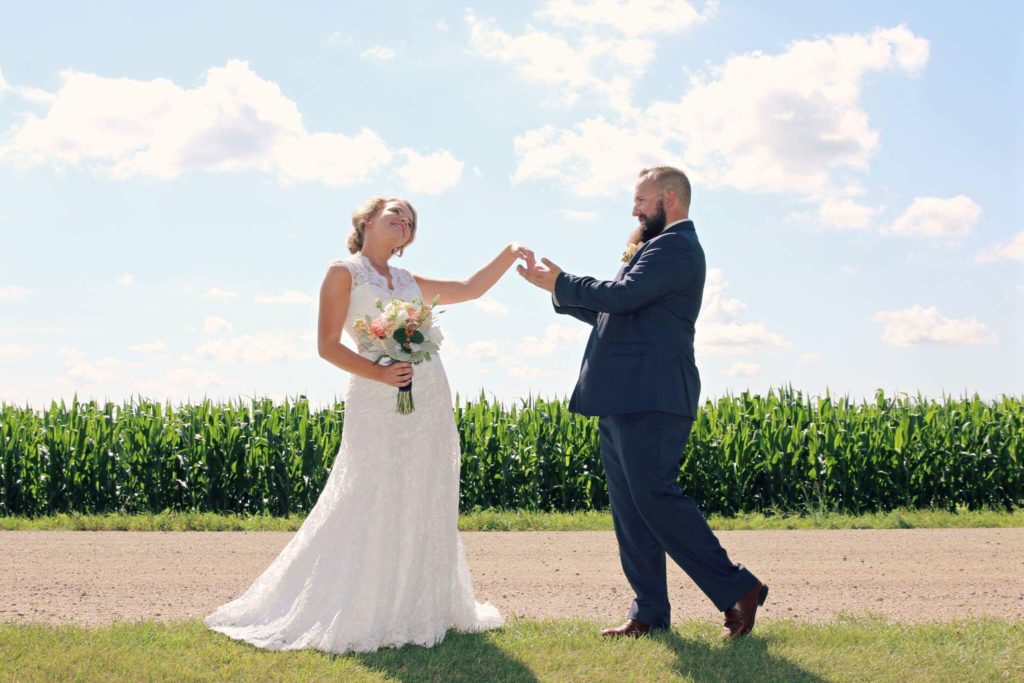
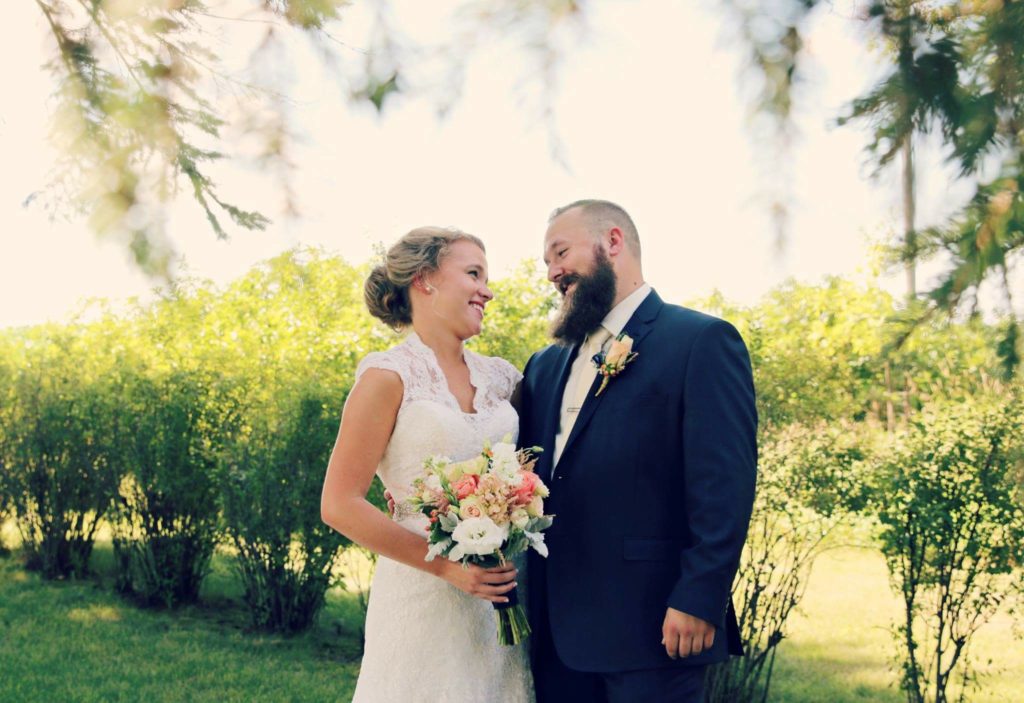
We spent this past weekend in Fargo, ND moving them into their first house!  I was able to hand deliver the card I made for them.

Lifetime of Love and Happiness - Center Stage Stamping

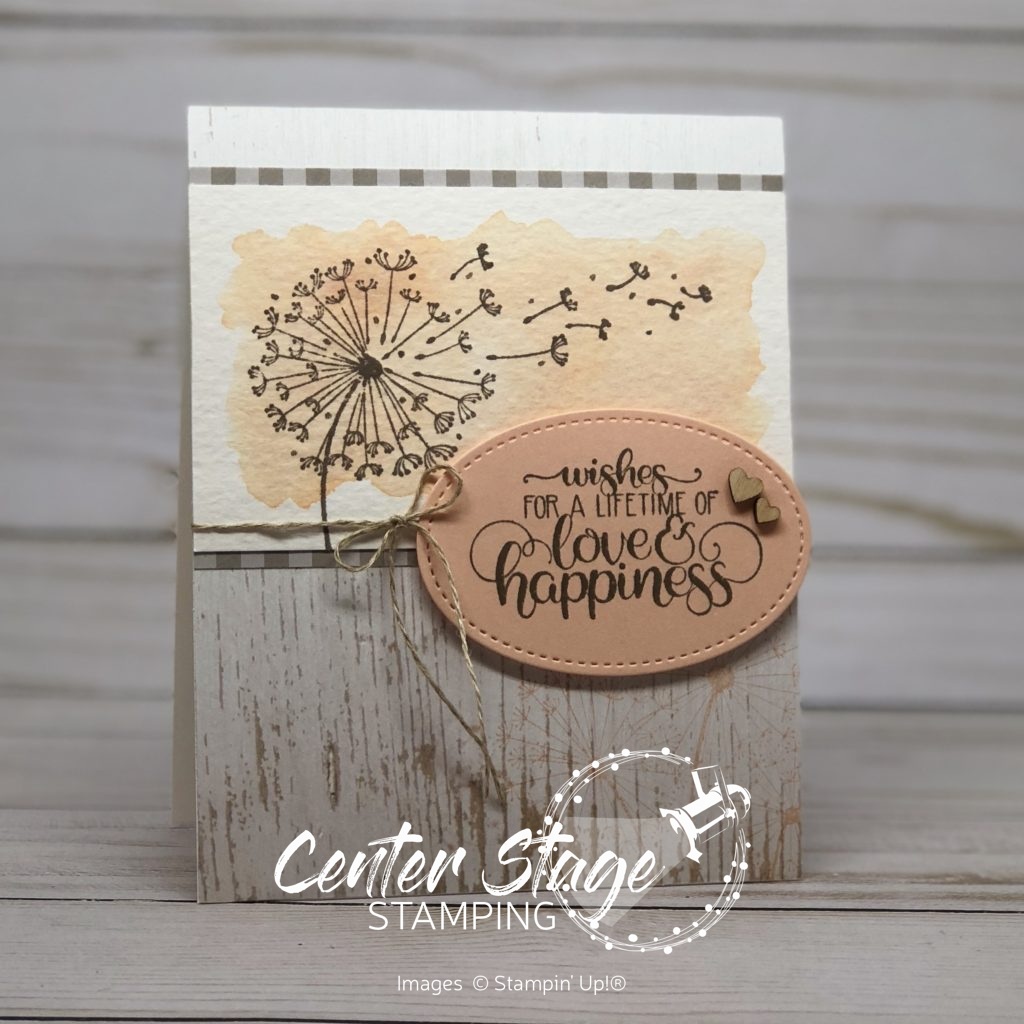
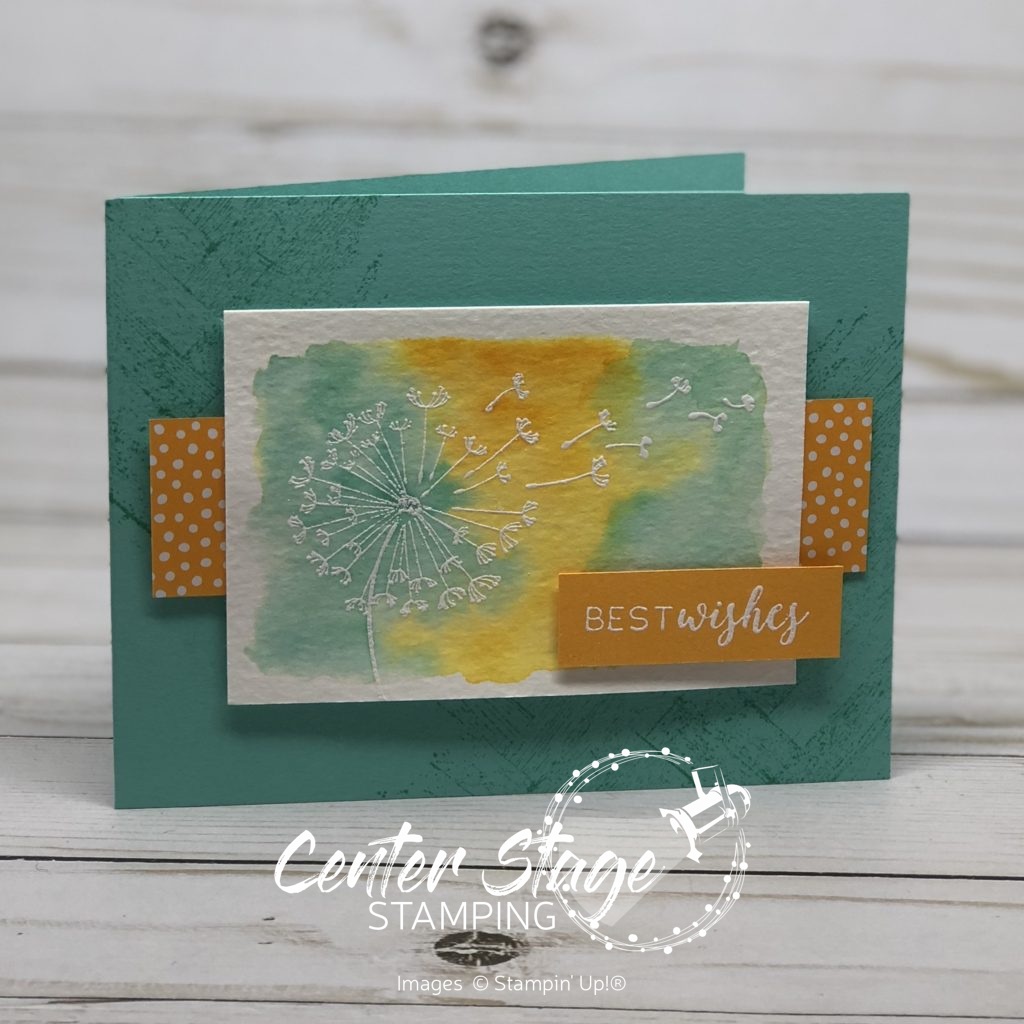
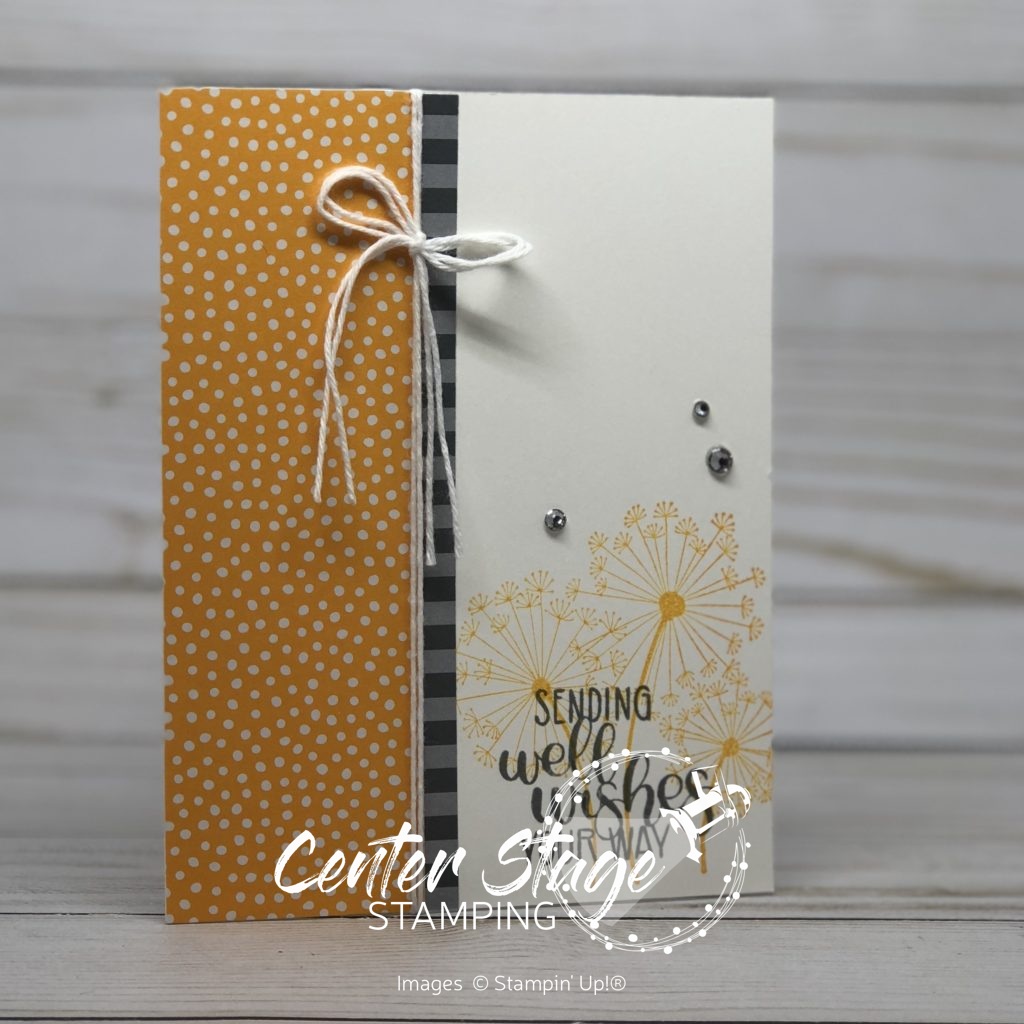
I thought Dandelion Wishes was perfect for this occasion.  I was able to capture the rustic style that was the wedding decor.  I love the Wood Texture dsp.  I stamped the trio of dandelions in petal Pink on the lower right corner.  I did w water color wash of Petal Pink on a piece of water color paper.  Once it was dry, I stamped the dandelion in Gray Granite Ink.  I layered it with a bit of Gray Granite striped paper from the Neutrals Designer Series Paper stack. The sentiment is stamped in gray granite ink on Petal Pink card stock and cut out with an oval from the Stitched Shaped Framelits.  The Linen Thread and wooden hearts tie everything together.

I hope Jess and Tyler have fun settling into their house.  I’m excited to see what is in store for year two!

-Mary


Share with your friends:

inky friends – dc8

Hey everybody!   It’s time for another My Inky Friends challenge! This inspiration for this one is a color combo found on page 119 of the 2018-19 Stampin’ Up! catalog.

I have to admit this was a tough combo for me.  I wasn’t sure how to handle the balance of these colors.  I finally decided less is more and went with a white back ground and small amounts of these colors.

Love and Thanks - Center Stage Stamping

I embossed a white panel with the Pinewood Planks Textured Embossing Folder.  I wrapped a bit of the Night of navy Gingham Ribbon tied offf with some Linen Thread and layered it on a Whisper White card base.  I cut out three leaves from the Tropical Thinlits in Soft Suede, Old Olive and Grapefruit Grove and centered them on the ribbon.  The sentiment is from Tropical Chic.  I masked off part of it, stamped it in Night of Navy ink, and fussy cut around it.  It is popped up on dimensionals over the leaves.  The finishing touch is the three Grapefruit Grove pearls from the Share What You Love Artisan Pearls.

Head on over to My Inky Friends blog to see what the rest of the design team did with this color challenge and then play along.  I’d love to see what you come up with!

Thanks for stopping by! Happy Stamping!

-Mary

Share with your friends:

let’s celebrate you

I’m back with another card using the Broadway Birthday stamp set.  This set is really quite versatile. You can go big and bold like this card, or you can go for a more subtle look like today’s card.

Let's Celebrate You - Center Stage Stamping

Hard to believe that is from the same set isn’t it?  How fun is that little ice cream cone!  I decided to let the ice cream be a simple focal point and the only color on the card.  But that doesn’t mean the card has to be boring.  Texture can help with that.  The Thick Whisper White card base is embossed with the Tufted 3D Dynamic Textured Impressions Embossing Folder.  I just love the quilted look it gives  The Ice cream cone is stamped in Crumb Cake ink on Crumb Cake card stock and the ice cream is Flirty Flamingo ink stamped on Powder Pink card stock.  I cut it out with the coordinating Broadway Lights Framelits. Some Linen thread and a little rhinestone are the finishing touches.

Thanks for stopping by! Happy Stamping!

-Mary

Share with your friends:

dandelion wishes

Dandelions are so pretty when they are fluffy white, but such a nightmare in my yard.  Well, Stampin’ Up!’s new Dandelion Wishes stamp sets lets me enjoy them with out the frustration of dealing with them in my lawn.  I’ll admit, I kind of overlooked it at first.  But, I’m so glad it caught my attention.

Dandelion Wishes - Center Stage Stamping

For today’s card I combined Dandelion Wishes with Stitched All Around (sentiment) and Gallery Grunge (background).  For the main panel, I embossed the dandelion image in white embossing powder.  Next, I did a water color wash.  I started with Mango Melody and let it dry.  Then I added the Coastal Cabana.  I really like how it turned out.  I love water color wash backgrounds.  Each one you do is unique.  I mounted this panel on a strip of mango dots from the Brights Designer Series Paper stack. This was added to the card base that I had stamped with this great image from the Gallery Grunge set.  Finally, I added the white embossed sentiment on a piece of Mango Melody card stock.

I definitely prefer this kind of dandelion over the ones in my yard!

Thanks for stopping by! Happy Stamping!

-Mary

Share with your friends:

hello gorgeous (grape)

I am loving all of the new colors Stampin’ Up! introduced this year!  One that really surprised me is Gorgeous Grape.  I normally don’t use a lot of purples, so Gorgeous Grape kind of snuck up on me.  I tried it as just a pop of color on this card, and I love it!  It is so vibrant and fun.

Varied Vases Hello - Center Stage Stamping

For this card, I trimmed a bit off the front of the card and put a full size Basic Gray panel behind.  I stamped the Basic Gray panel with the Hardwood background stamp.  I think it gives the feel of a floating shelf, which are very popular in home decor right now.  Next, I stamped the vase outlines (and one solid vase) across the bottom, overlapping them a bit.  I added the stem and leaf outline in Granny Apple Green, solid leaf in Lemon Lime Twist, solid flower in Highland Heather and the flower outline in Gorgeous Grape. I embossed the “hello” in White on a small strip of Gorgeous Grape card stock and popped it up on dimensionals.  Final touch is a tiny rhinestone on the solid vase.

I love the simple pop of color on this card.

Thanks for stopping by! Happy Stamping!

-Mary

Share with your friends:

studio makeover update

I thought I’d pop on and give you a quick update on my studio remodel.  Progress is slow, but there is progress.  There is a definite trade off when you tackle remodel projects yourself.  You save money, but it often take longer because you have to find the time in the midst of everyday life happenings to work on it.  My darling husband is so awesome for taking this on.  I truly appreciate all he does for me.

This past week he got the walls taped, mudded and painted.

and over the past two nights he installed the new flooring!

I just LOVE that floor!  Lights are back up, too.  We are adding more of the track lighting and that still needs to be installed.  Plans are for my desk to be installed this weekend! I am getting so excited to move in, organize my supplies and to decorate the space!  Stay tuned…

-Mary

Share with your friends:

animal outing thank you

Hello! Let’s kick off this week with a fun thank you card featuring the super cute Animal Outing set.

Animal Outing Thank You - Center Stage Stamping

I stamped the giraffe and branches with Memento Black ink and colored them with my Stampin’ Blends.  I love these markers.  They make it so easy to get a very artistic look with the shading you can do.  I cut them out with one of the circles form the Stitched Shapes Framelits.  The dotted panel is from the Brights Designer Series Paper stack in Daffodil Delight.  The Crumb Cake panel is embossed with the Petal Burst Textured Impressions Embossing Folder and I roughed up the edges before adhering it to the Whisper White card base.  I masked off just the “thank you” from the “thank you big time” sentiment and stamped it in Whisper White ink on basic Black card stock.  I love how the giraffe looks like he is saying “thank you”! Or maybe he’s singing.

Animal Outing Thank You close up - Center Stage Stamping

Thanks for stopping by! Happy Stamping!

-Mary

Share with your friends:

carnival of colors blog hop

It’s good to be back blog hopping with My Inky Friends.  This time we are spotlighting some of the fabulous NEW Stampin’ Up! colors.  Stampin’ Up! has done a color revamp and it is fabulous!  They have introduced ten BRAND NEW colors and brought back six former In Colors to the core color families.  Plus there are five BRAND NEW In Colors!  So. Much. Color!!!  I LOVE IT!!  You may have arrived here from Yapha if you are following the hop in order. (or from Sharleen if you are being wild and crazy and doing the hop backwards).

Today, I get to put the NEW Mango Melody center stage.  This is such a fantastic cheerful color.  This first card let’s this color introduce itself with the help of the Delightfully Detailed Laser-cut Specialty Paper.

Darling you are fabulous - Center Stage Stamping

The sentiment is from the Stitched All Around stamp set.  I cut out the label from the coordinating framelit set, Stitched Labels.  between the framelits and the Laser cut paper, the work is done for you!  Just throw on a few rhinestones for some added bling and voila!

For the next card, I added in a bit of Basic Gray and the Dandelion Wishes stamp set.

Sending Dandelion Wishes your way - Center Stage Stamping

The patterned paper strips are from the new 6″x6″ Designer Series Paper, Brights and Neutrals.

For the last card, I cast Mango Melody with fellow NEW colors Gray Granite and Granny Apple Green.  They take the stage with the Healing Hugs stamp set.

Healing Vibes - Center Stage Stamping

The card base is embossed with the Basket Weave 3D Dynamic Textured Impressions Embossing Folder. This cheerful color combo should brighten anyones day!

Now, head on over to Sharleen.  She has some great projects featuring the new In Color, Pineapple Punch.  Be sure to follow the full blog hop circle for great color inspiration!

Thanks for stopping by! Happy Stamping!

-Mary


Share with your friends:

never too old to make a wish

When I first saw the Broadway Bound suite of products in the new Stampin’ Up! catalog I knew I had to have it.  I know, shocking, right?  They had me at broadway.  The entire suite is amazing.  I think used most of the products in it on today’s card.

Never too old to make a wish - Center Stage Stamping

I started with a strip of the Broadway Bound Specialty Designer Series Paper.  One side of each sheet has wonderful gold foil accents on it!  Next I stamped ‘WISH” in Lemon Lime Twist.  Above that I stamped the remainder of the sentiment that I colored with Stampin’ Write Markers so I could get more than one color.  I then stamped the little diamond shapes, added the fun little gold candle embellishment and wrapped a little Lovely Lipstick ribbon around. Who wouldn’t love bright, fun birthday reminder like this?

Thanks for stopping by! Happy Stamping!

-Mary

Share with your friends:

in the stars

My studio remodel is slowly moving forward.  We should be ready to prime the ceiling and walls this week!  Once primed, we can paint and then we can move my desk back in!  I am getting really excited.  I have been thinking about decor for the room.  I am planning a trip to Hobby Lobby this week to get some ideas.  I can’t wait to share photos of the finished room!

I have been able to get some stamping done at my temporary location.  Although it is difficult with a small fraction of the space I’m used to and many more distractions being in the center of family activity, it isn’t all bad.  I am enjoying the company of my daughter and son who are home from college for the summer.  Here is one of the cards I create at my kitchen desk.  I used the new Little Twinkle stamp set and coordinating Twinkle Twinkle designer series paper.

written in the stars - Center Stage Stamping

I started with a piece of watercolor paper and did a simple wash of Petal Pink with my aqua painter and ink refill.  Once that was dry, I stamped the heart constellation in Night of Navy and the small star cluster in Petal Pink.  I layered this onto small strips of the striped pattern paper and then onto the Night of Navy layer, which is adhered onto a thick Whisper White card base. the sentiment is stamped on Petal Pink card stock and cut out.  Finally I added a little Nigh of Navy bakers twine and a few rhinestones.  A fun card that could be used for a variety of occasions.

Thanks for stopping by! Happy Stamping!

-Mary

Share with your friends: