Birthday

peaceful poppies

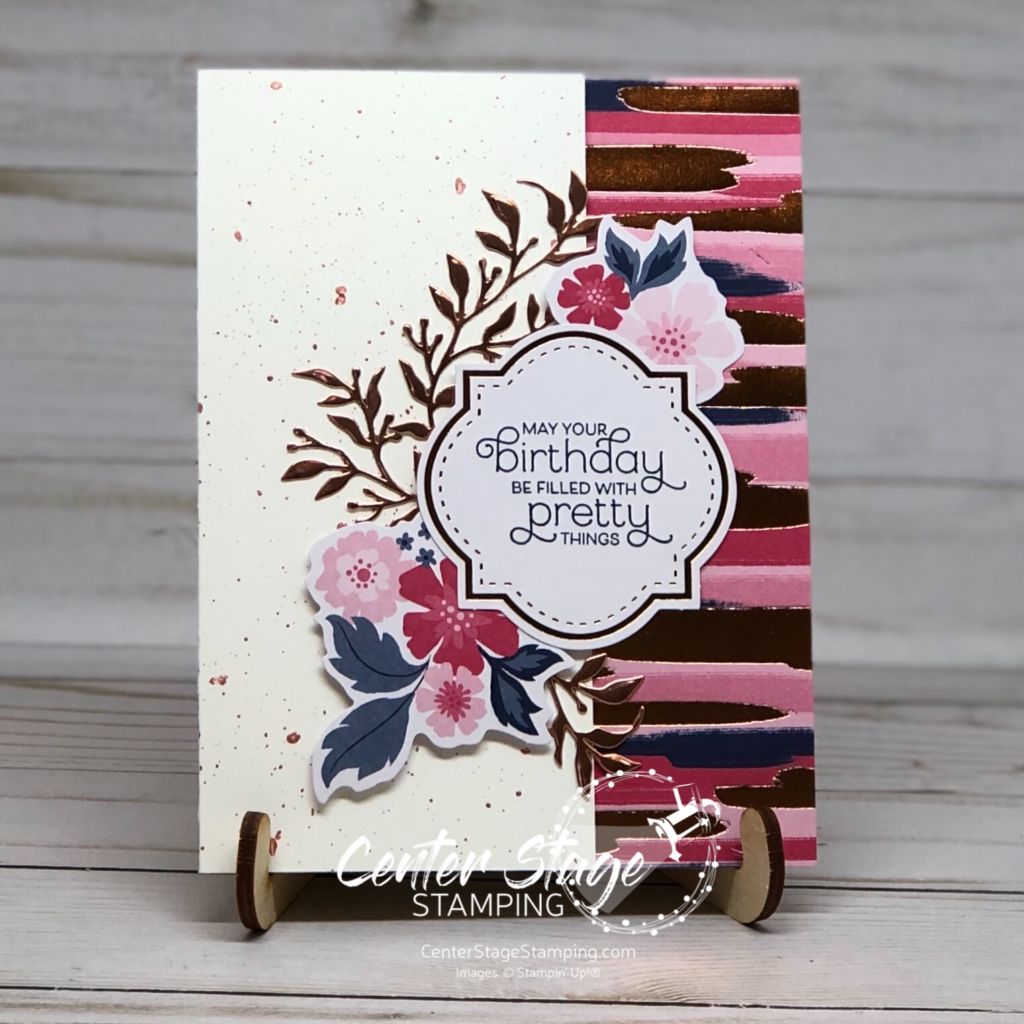
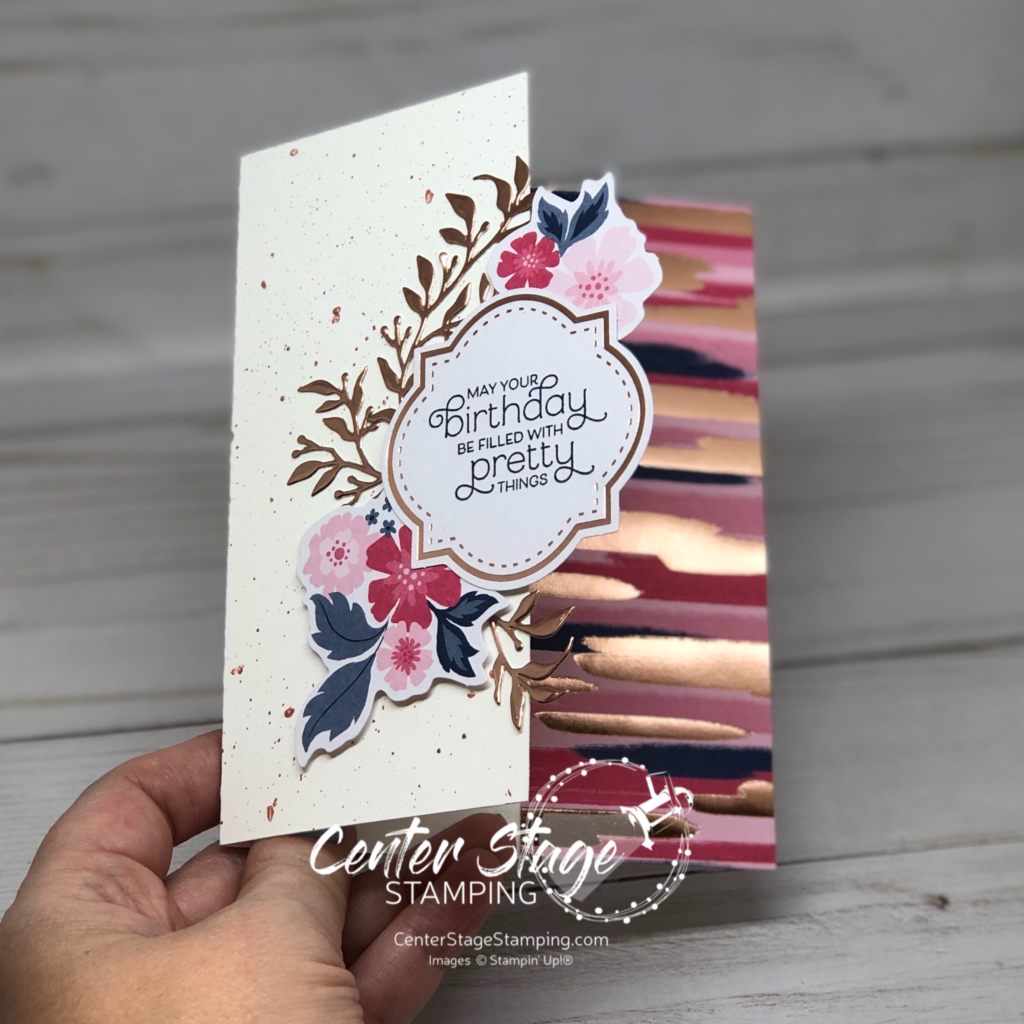
Ready for sneak peek of a GORGEOUS suite from the upcoming Stampin’ Up! 2020 Mini Catalog!?!? This was one of out make&take projects from Stampin’ Up! OnStage last month. One of my favorite things about attending Stampin’ Up! events is getting a sneak peek at NEW products and getting to create with them. Introducing the stunning Peaceful Poppies Suite…

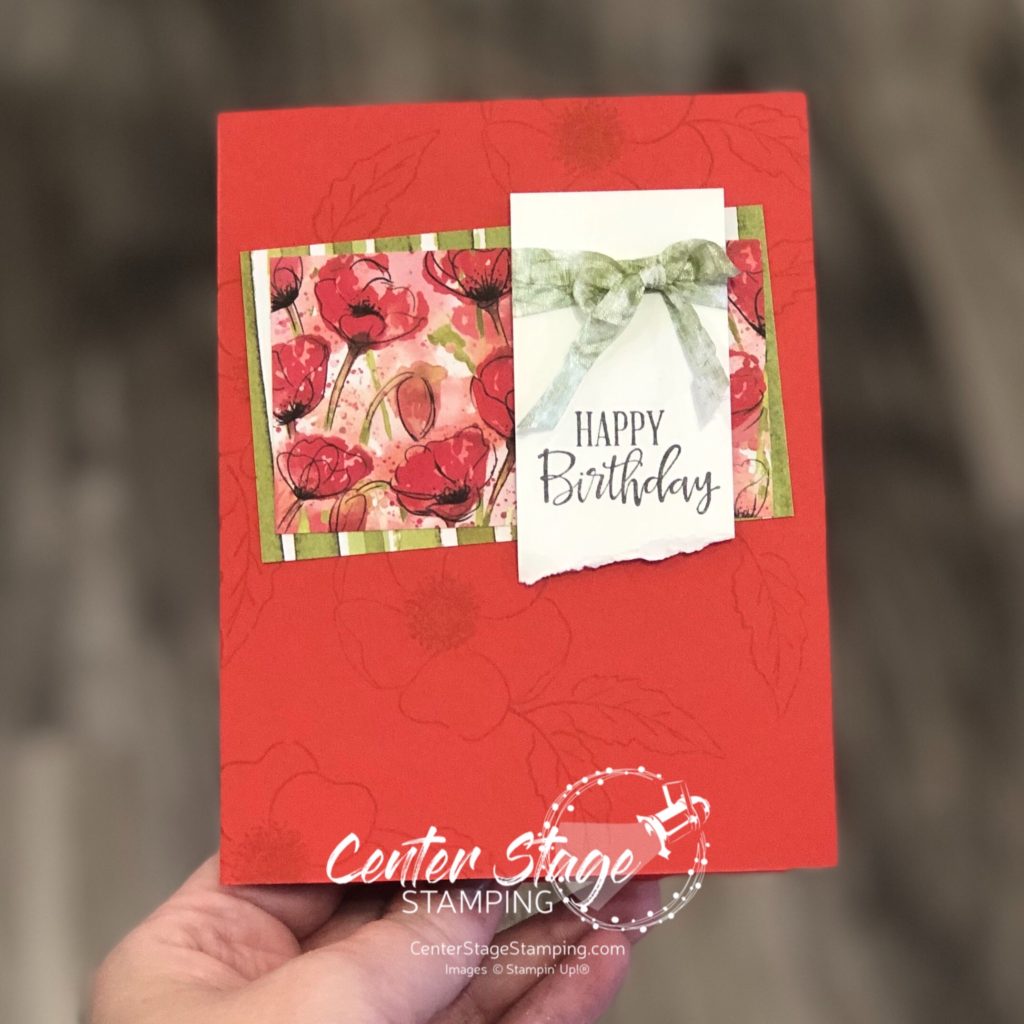
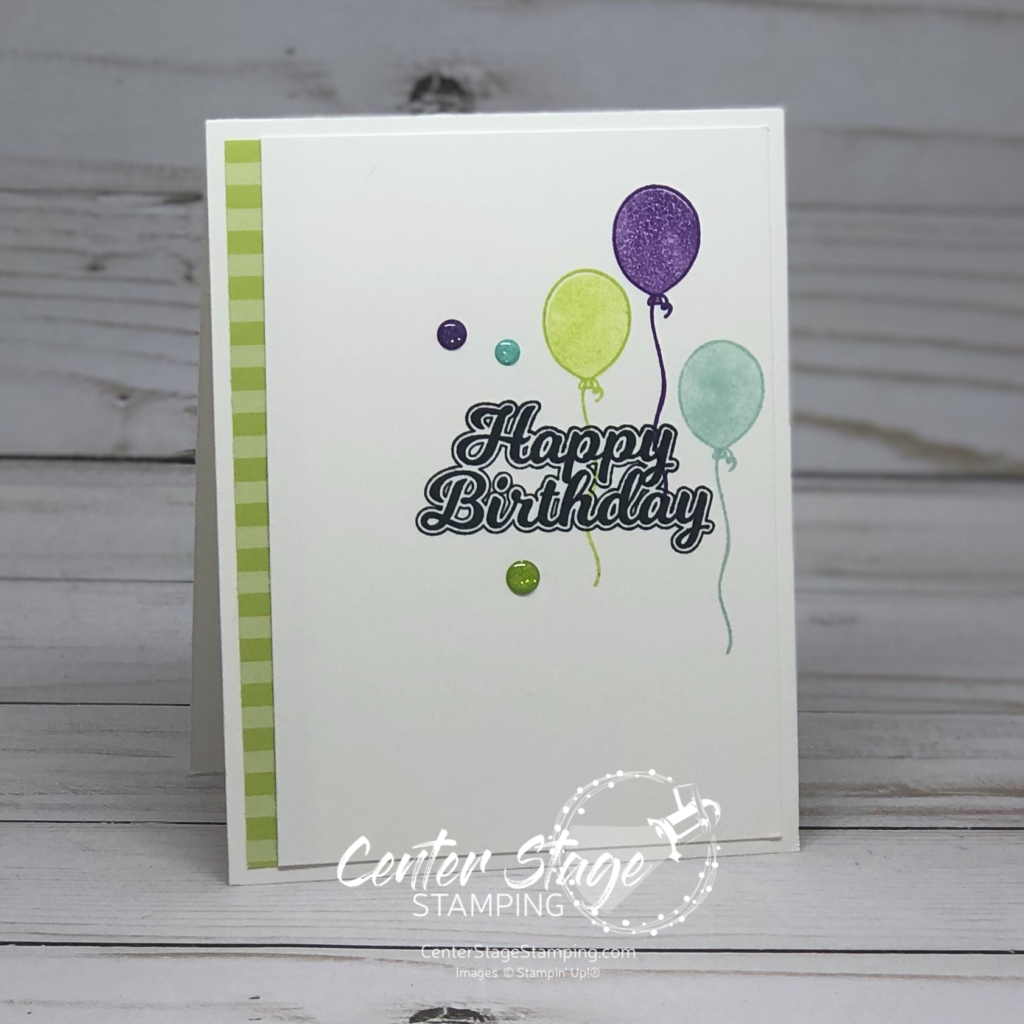
This card features two new stamp sets, beautiful designer series paper and new ribbon. Check this out…The ribbon is Whisper White Crinkled Seam Binding. What’s that? The ribbon on the card looks green, you say? Yes, yes it does. How did we do that? We STAMPED ON IT! Seriously, stamped right on the ribbon. Think of the possibilities!!!!

Thanks for stopping by. Join me again for more sneak peeks and to shine a spotlight on creativity!

Share with your friends:

stamp review crew: piece of cake

Time for another Stamp Review Crew blog hop! Today we are shining a spotlight on Piece of Cake. This is such a fun set. I mean come on, who doesn’t like cake! As my first card says “Cake is the answer…who cares what the question is!”

I went for a bright color scheme for my first card. Bermuda Bay, Poppy Parade and I just realized I used Lemon Lime Twist which, much to my dismay, has retired. You could also use Granny Apple Green.) I used thin strip of striped Bermuda Bay DSP to balance the cakes on the opposite edge. The little heart epoxy droplet was colored with my Dark Poppy Parade Stampin’ Blends.

For my second project, I wanted to showcase the great sentiments in the set. Colors used are Pool Party, Mango Melody, Granny Apple Green and Rich Razzleberry.

What is the Stamp Review Crew? We are an international group of Stampin’ Up! demonstrators that get together to blog hop the first and third Monday of each month. For each hop we chose a single stamp set to feature. All of our hops are archived. Click here to see all of the hops!

Be sure to check out what the rest of the SRC Design Team has done with this fun set. I’m sending you over to my friend Lou or you can go back to Nikki.

Thanks for stopping by. Thank you for your comments. I really appreciate them! Join me again to shine a spotlight on creativity!

Share with your friends:

stamp review crew: lilypad lake

The Stamp Review Crew is back! Today we are featuring the wonderful Lilypad Lake. I hope you will hop through and check out the wonderful creations the design teams have to share with you!

For my first card, I went for an ombre background using Pool Party, Coastal Cabana and Bermuda Bay. I stamped the Crane in Gray granite and added a few Pool Party shadows with my aqua painter. Embossing folders help add texture and interest to an otherwise simple card. Pinewood Planks on the card base and Subtle on the Stitched Circle die cut.

My second card went a bit more rustic with the help of the Wood Textures Designer Series Paper. Reminds me of a framed painting. The sun and sentiment banner are colored with Mango Melody Stampin’ Blends.

What is the Stamp Review Crew? We are an international group of Stampin’ Up! demonstrators that get together to create projects using a specific stamp set. We blog hop on the first and third Monday of each month. I’m excited for you to see what my talented friends have created.

Thanks for stopping by. Join me again to shine a spotlight on creativity!

Share with your friends:

everything is rosy

I love Rose Gold. In fact, it is the accent color in my white and gray studio. I even found rose gold drawer pulls! When Stampin’ Up! announced the Everything Rosy Medley and we saw that Rose Gold was a prominent feature, I knew I HAD to have it. And I was not disappointed. It is GORGEOUS! The rose gold foil highlights, mirror disc embellishments and shimmer paint are fan-tab-u-lous! I may need to order a second kit so I don’t run out. Oh, and did I mention, you can create Ah-Mazingly cute projects with it! Check it out –

The photo doesn’t do justice to the gorgeous rose gold foil on the designer series paper, die cuts or the spatter of rose gold shimmer paint. The Everything Rosy kit comes with sheets of printed and rose gold die cuts that help cards come together even faster.

I adhered the strip of DSP to the inside of the card and trimmed of 1.5″ from the card front for a unique look. The sentiment label and die cuts hang over the front edge. I LOVE everything about this kit. Grab yours today – but hurry it is only available until May 31!

Thanks for stopping by – Join me again to shine a spotlight on creativity!

Share with your friends:

inky friends: last chance blog hop

The new Stampin’ Up! catalog is coming! That means lots of exciting, fun new stamp sets to create with. It also means that we need to say good-bye to others. For today’s Inky Friends Last Chance Blog Hop we are going to showcase some of those wonderful sets that are bidding us farewell.

My projects put the super fun set Blow Out The Candles on stage. I think this set was really overlooked in the catalog. Which is a shame. It is some much fun! Be sure to grab it for yourself before it is gone for good.

My first card is a really quick one with a bright color scheme. Pool Party, Gorgeous Grape, and my FAVE Lemon Lime Twist. This would be great to make a bunch of cards to have on hand in different color schemes.

I stepped things up with this next card. I absolutely LOVE how it turned out!!

I wanted another bright color palette, so I went with Coastal Cabana, Poppy Parade and (surprise) Lemon Lime Twist. I also used the Stitched Shapes and Stitched Labels framelits for some added detail. Finished off with a tiny little knot of Poppy Parade striped ribbon.

Thanks for stopping by! Be sure to check out the rest of the stops on the blog hop for more amazing inspiration. From here you can go on to Rhonda or back to Sara. You can find the full blog roll on the Inky Friends page.

Join me again to shine a spotlight on creativity!

Share with your friends:

OSAT blog hop: sale-a-brate every occasion

I am excited to start off the new year joining the One Stamp At A Time Blog Hop Team! This month we are sharing projects featuring NEW stamp sets from the Occasions catalog and Sale-a-Bration brochure. We have so much fun and inspiration coming your way, make sure you check out all of the stops on our hop.

My projects today put the whimsical Hello Cupcake in the spotlight. This cute set is one of the many fantastic offerings in the Sale-a-bration brochure. These items can be yours FREE with a qualifying purchase. (in the US that is $50 before tax and shipping) I created a card and gift box that work for just about any occasion.

Hello Cupcake: Sweet Wishes - center Stage Stamping
Hello Cupcake: Sweet Wishes box - Center Stage Stamping

How cute is that cupcake? I love the chalkboard effect of Whisper White ink on Basic Black card stock. The tiny hearts are from the new Well Written Framelit Dies. See the fun black and white striped paper peeking out? That is another fun Sale-a-Bration offering: Botanical Butterfly Designer Series Paper.

Hello Cupcake: Sweet Wishes duo - Center Stage Stamping

Thanks for stopping by. Make sure you check out what the rest of the OSAT team has for you. You can get the blog hop list clicking the blue rectangle below. Join me again to shine a spotlight on creativity!

Share with your friends:

happy 21

This past weekend was my daughter Rachel’s 21st birthday.  When did that happen?  21!? Life continues forward far to quickly.  I love you to the moon and back, Rachel!  I wanted to share the “card” I made for her.  She really likes pineapples, so I used that as my starting point.  I decided to make an explosion box and somehow incorporate 21 pineapples.

Rachel's Pineapple box - Center Stage Stamping

I used Concord and 9th’s Pop Art Pineapple for the 12 pineapples around the exterior of the box. They are stamped in Stampin’ Up! Pumpkin Pie ink on Pumpkin Pie card stock.  Four pineapples are stamped in Pineapple Punch and Granny Apple Green and cut out with the coordinating dies.  I added the Happy Birthday Thinlit and some Braided Linen Trim to the Granny Apple Green box top.  But what about the inside?  When I saw this folded pineapple by Martha Inchley on Pinterest, I knew I had the perfect center for the explosion box.  Thank you, Martha for sharing your pattern!!

Rachel's Pineapple box: inside - Center Stage Stamping

I added eight tiny pineapples in Pineapple Punch and Granny apple Green and punched out with the retired tiny pineapple punch.  I am so happy with how it turned out.  What’s more, Rachel loved it!  Thanks for stopping by! Join me again to shine a spotlight on creativity!

Share with your friends:

bubble wrap background

Hello!  I’m back with a quick tutorial for that fantastic watercolor background featured on this card yesterday:

Happy Birthday: bubble wrap water color - Center Stage Stamping

Would you believe it is done with bubble wrap?!  Seriously… it is!  It is really easy, you just have to resist the urge to pop all of the bubbles!  You will need watercolor paper, markers (I used Crushed Curry, Pumpkin Pie and Rich Razzleberry) a spritzer filled with water and of course bubble wrap.


Bubble wrap background: supplies - Center Stage Stamping

Use your markers to color directly on the bubble wrap, starting with the lightest color.  Make sure you color on the bumpy side, not the smooth or you won’t get the dot effect.

Bubble wrap background: color on bubble wrap - Center Stage Stamping

Next spritz the water color paper with water.  Make sure to get it good and saturated.  less water means a more dotted, less blended outcome.

Bubble wrap background: spritz paper - Center Stage Stamping

Next press the bubble wrap colored side down onto the wet watercolor paper.  You can lift and set back down to fill in light areas or to blend colors more.

Bubble wrap background: step3 - Center Stage Stamping

Let the paper dry fully before assembling the card.

Bubble wrap background: step 4 - Center Stage Stamping


Every time you do this it will turn out a little different.  Use less water if you want more of the dots to show, More water if you want it more blended.  Color options are endless.  Let me know if you give it a try!  I’m off to finally pop that bubble wrap…then go get some more!

Bubble wrap background - Center Stage Stamping

That’s a wrap for today.  Join me again to put a spotlight on creativity!


Share with your friends:

happy 20 my son

I am trying to wrap my head around the fact that my son…my youngest child…my baby boy…turned 20 on Monday.  I no longer have any teenagers.  When did this happen?  I swear he was just starting Kindergarten.  Now, he is in his second year of college.  I wanted to share the card I made for him.  Full disclosure: it uses some retired paper and ink colors.

Happy 20 - Center Stage Stamping

I made a shaker card with 20 candles in the “0”! The “Happy Birthday” (stamped in Crumb Cake) is from Picture Perfect Birthday. The banner is from Birthday Banners and sentiments are from Broadway Birthday. I used a white gel pen to make the dots around the shaker panel. I am happy with the final result, but it took me a while to get there.  It is hard making a card for a 20 year old boy…um, young man….er, guy. I think I need more time to full grasp this milestone.  But, another is right around the corner.  In 10 days, my middle child turns 21!!  Someone hit the pause button.  Time is moving too fast.

Thanks for stopping by! Join me again to put a spotlight on creativity!

Share with your friends:

happy birthday to my hubby

We are one week away from Stamp-n-Storage’s annual warehouse sale and Grand Opening of our new retail space.  It is crunch time to get everything done.  It hasn’t left much time for stamping this week.  But I did have to pop on to say Happy Birthday to my amazing husband, Brett.

Hooray, let's celebrate you - Center Stage Stamping

He is hip deep in all of the details with moving SnS to the new location and the Grand Opening.  I will be taking him out for supper at Buffalo Wild Wings so he can enjoy his favorite Big jack Daddy burger.  Hopefully he will get some time to enjoy his day.  He constantly amazes me with his abilities to run this business and keep it growing.  I am super blessed to have him by my side.  Happy Birthday, Brett!  I love you so very much!

Share with your friends: