thank you

stamp review crew: artistically inked

Hello friends, welcome to the Stamp Review Crew blog hop featuring Artistically Inked. This set is part of the Expressions in Ink product suite in the 2021-2022 Stampin’ Up! catalog. This stamp set looks like an alcohol ink wash, without the hassle of alcohol inks! As usual with stamp sets that are part of a product suite, I decided to use some alternate colors to help you see beyond the limits of coordinating products. Let’s take a look

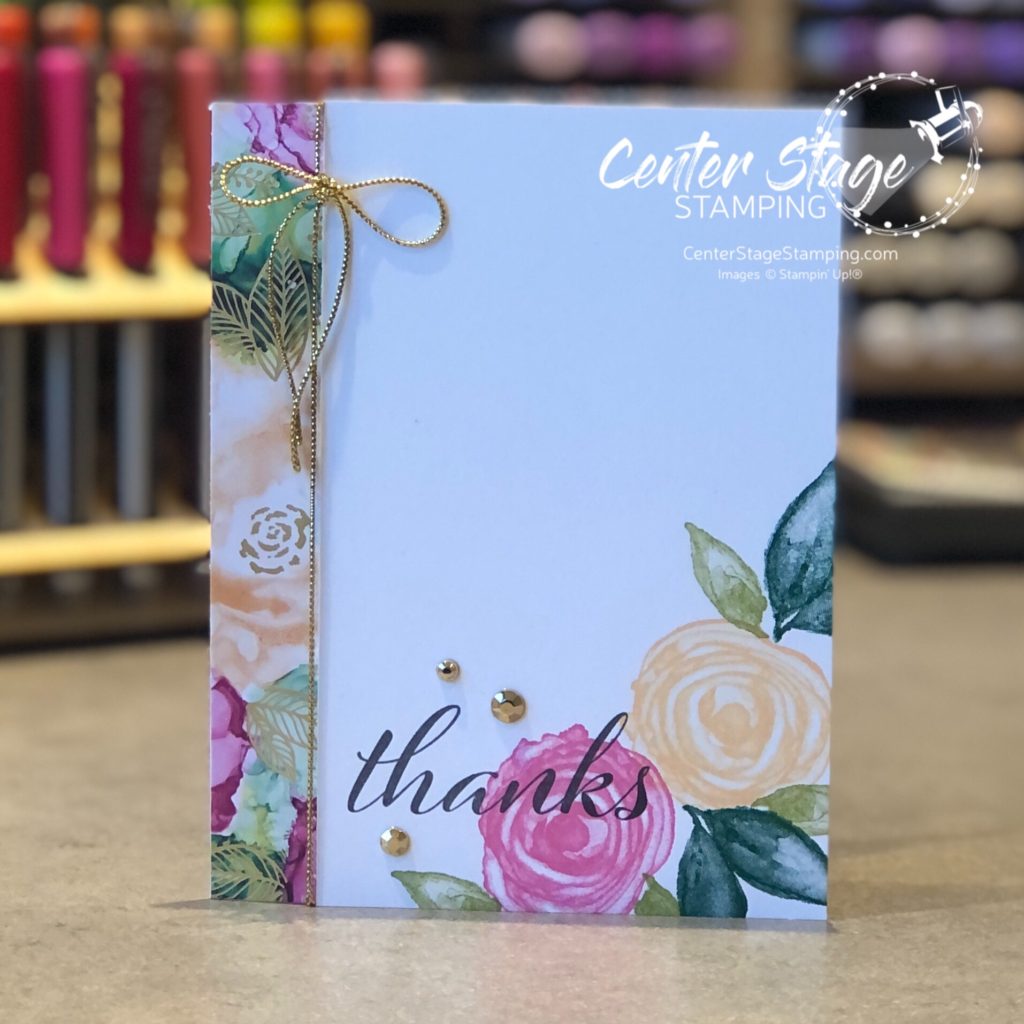
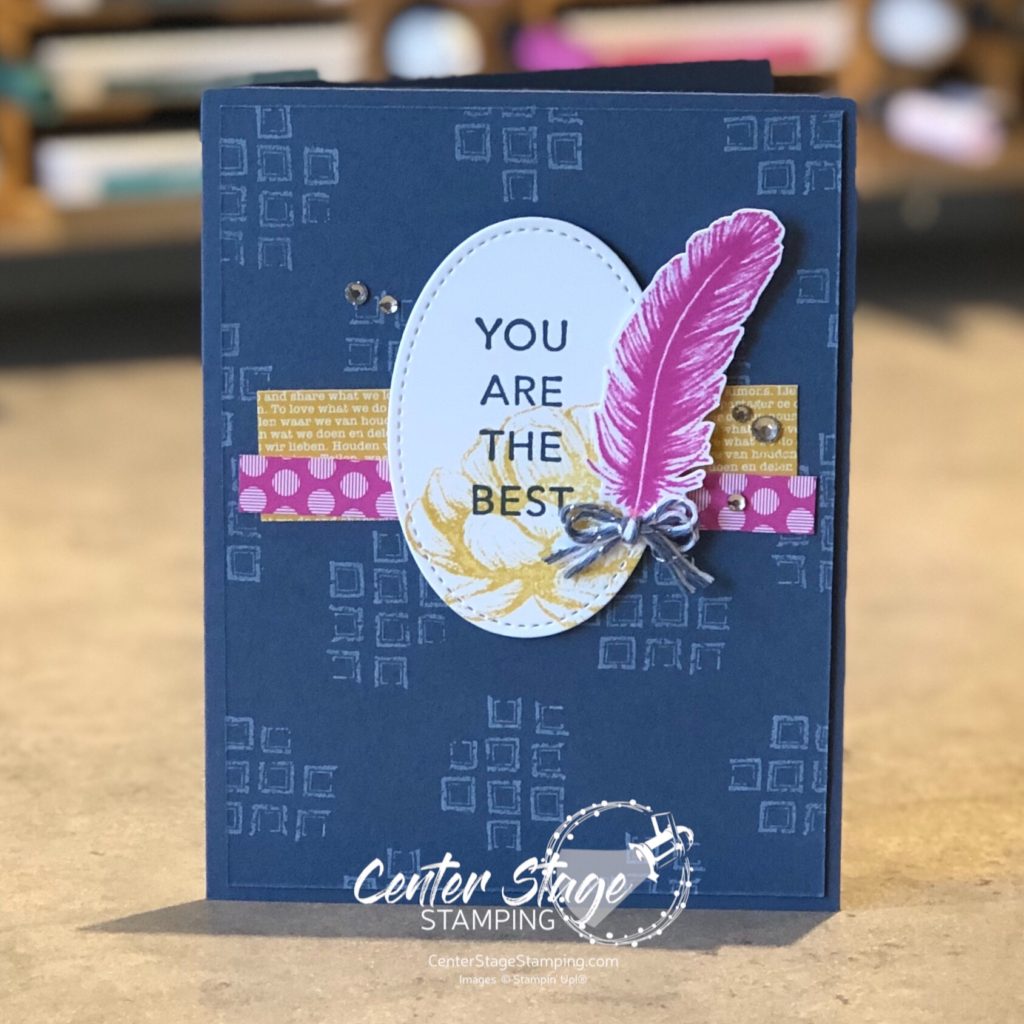
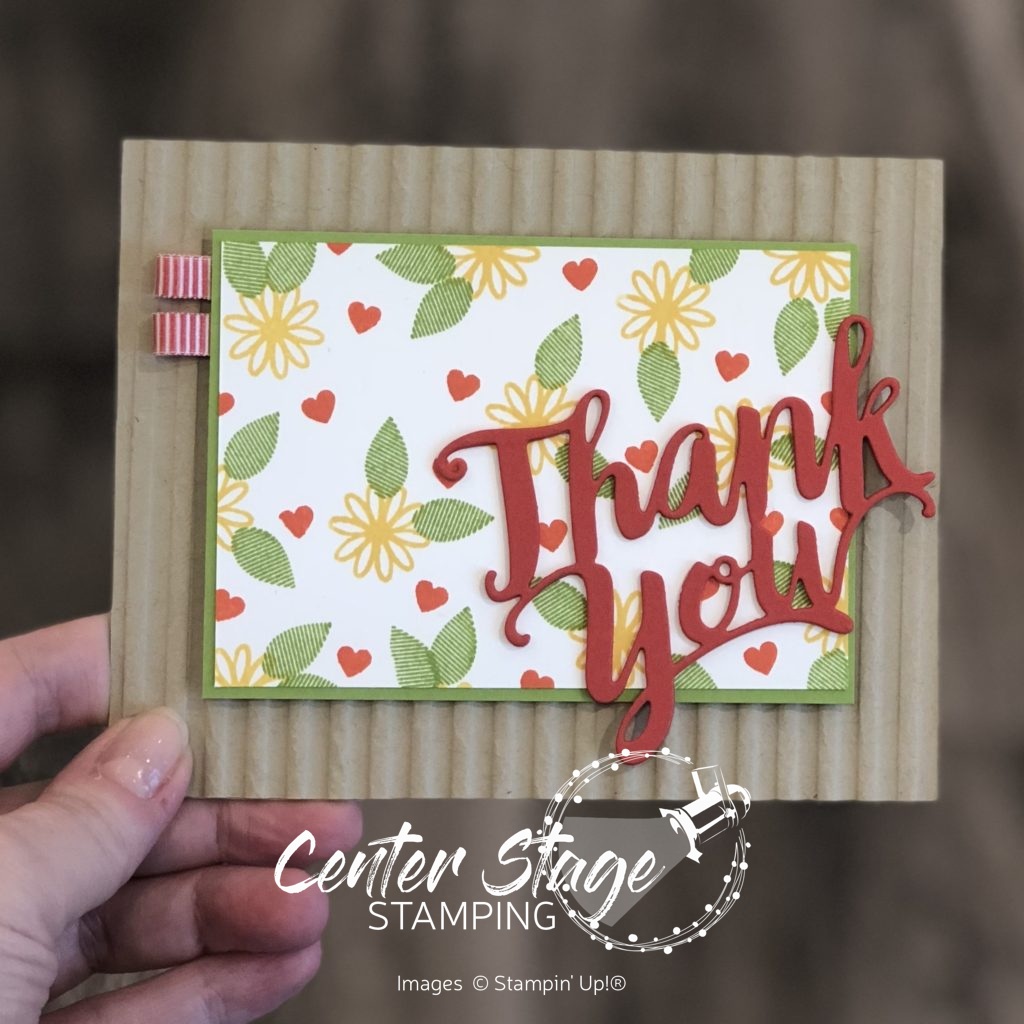
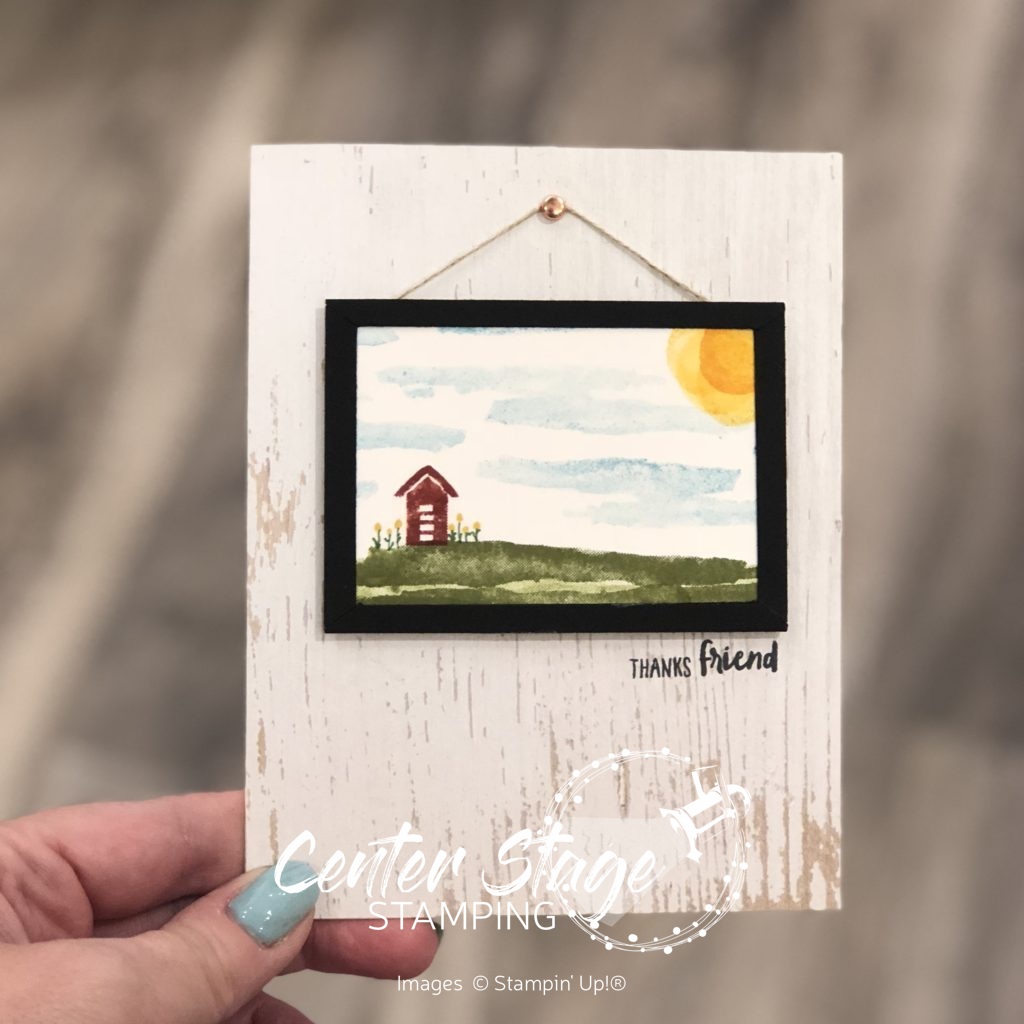
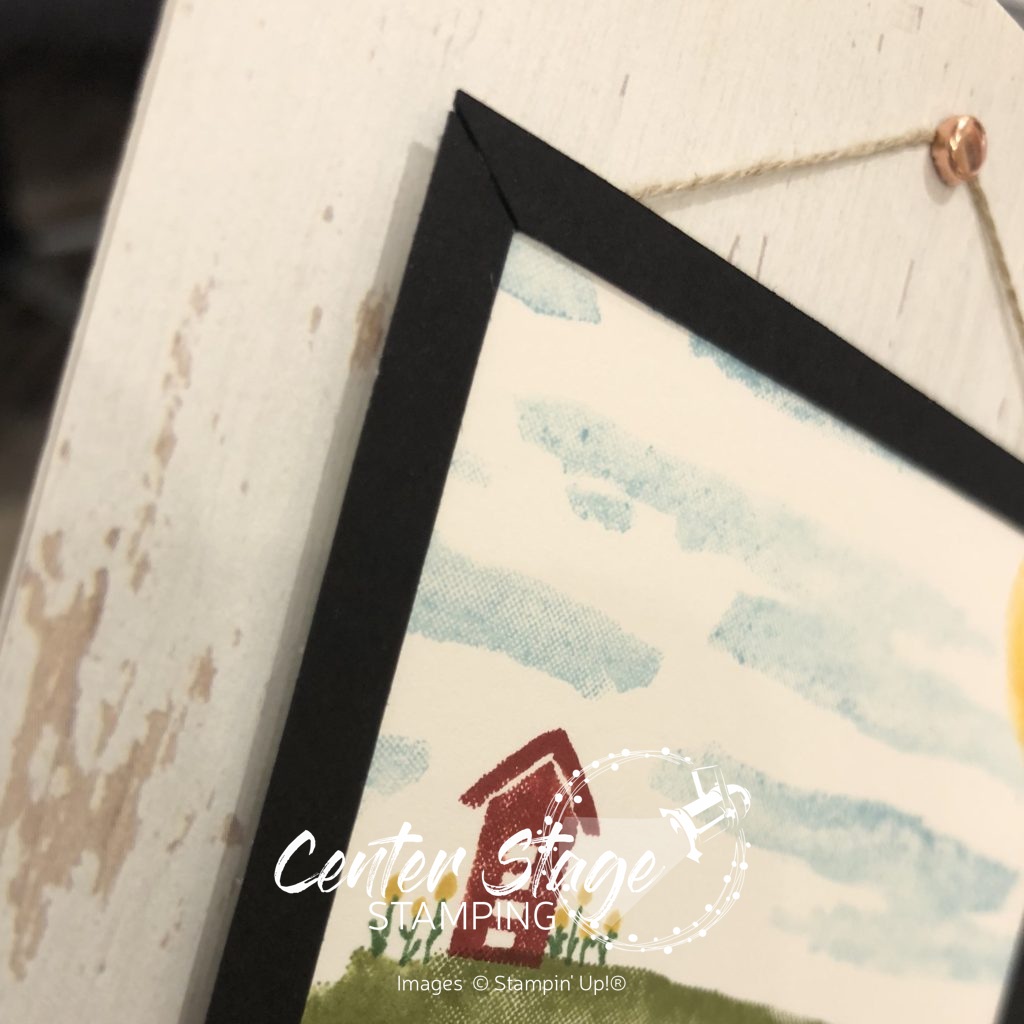
First up is s simple thank you card. Started with a Smokey Sate card base and added 1/4″ strips of Polished Pink, Pale Papaya, Granny Apple Green, Balmy Blue and Fresh Freesia card stock. I stamped the ink was image in Smokey Slate and over-stamped the “thanks” in the coordinating card stock ink colors. The stamped panel was die cut with a stitched rectangle.

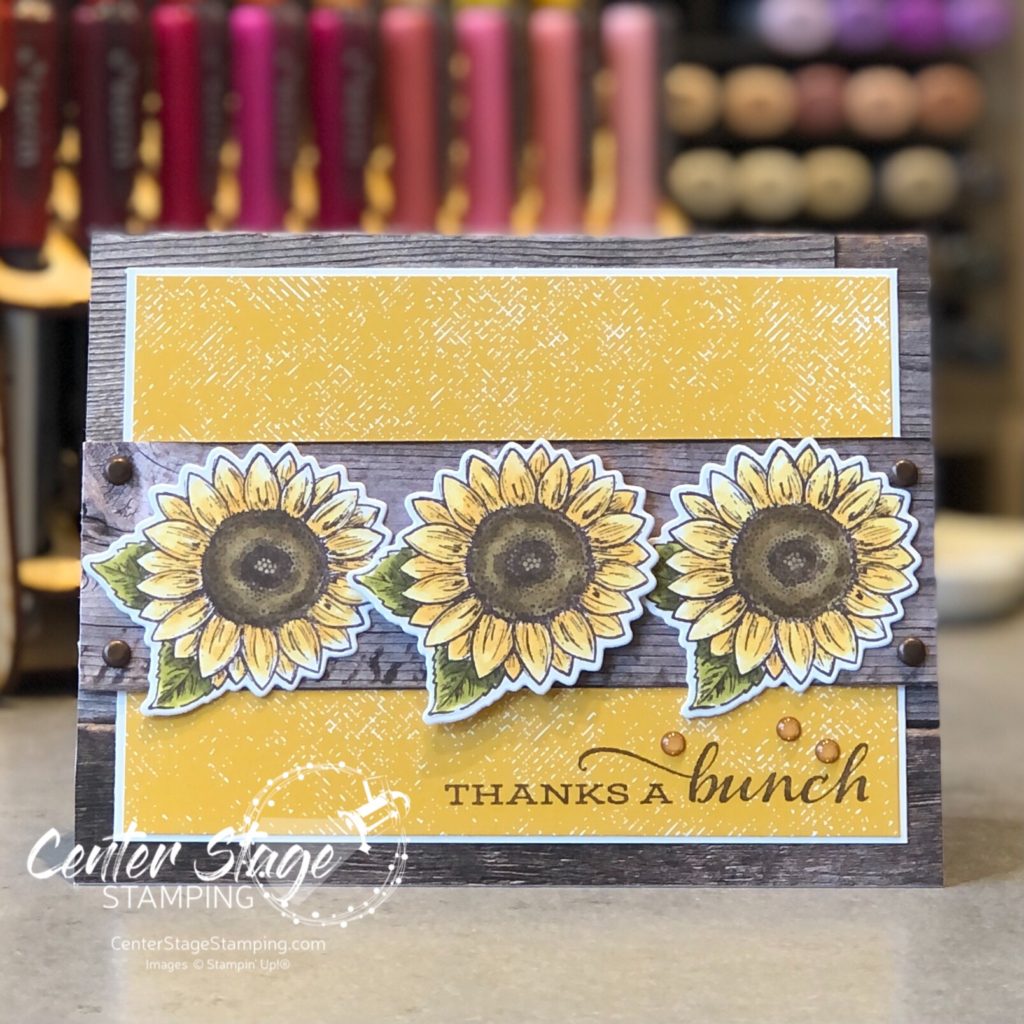
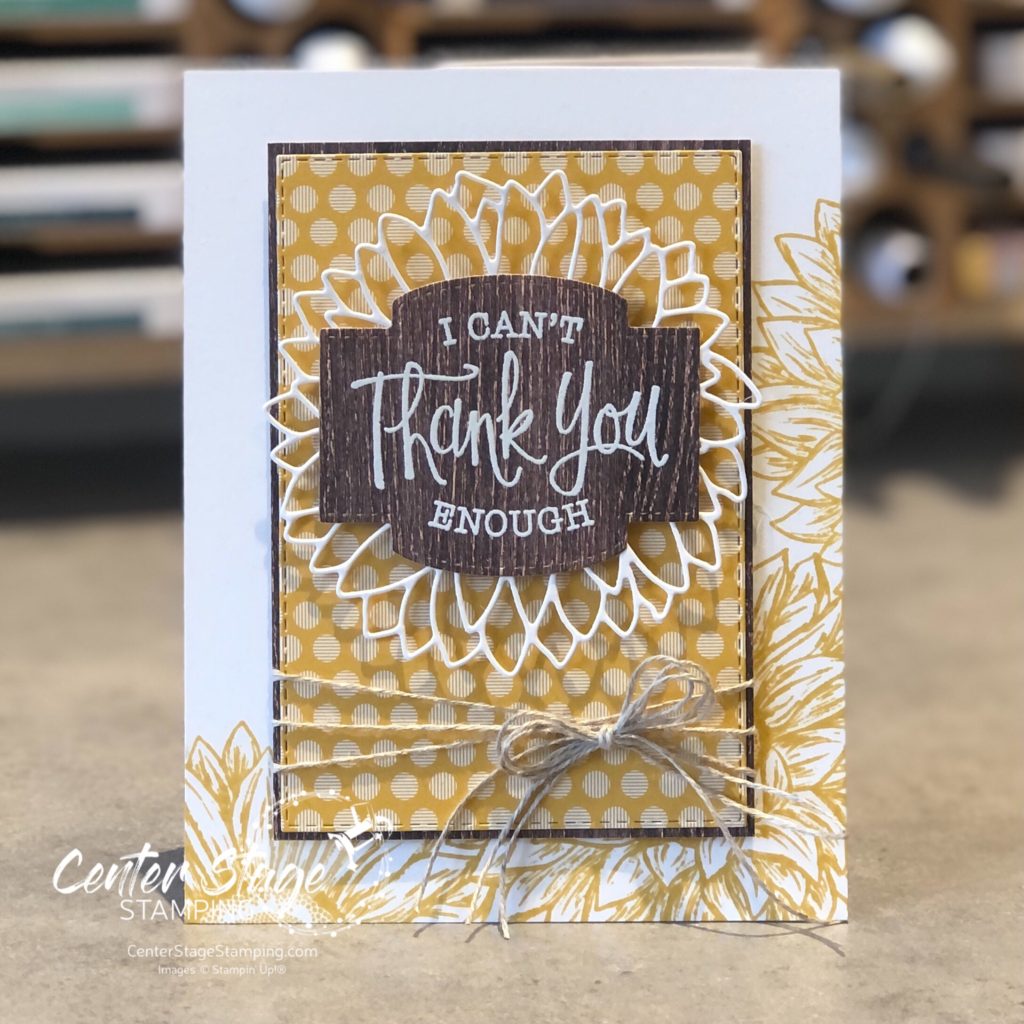
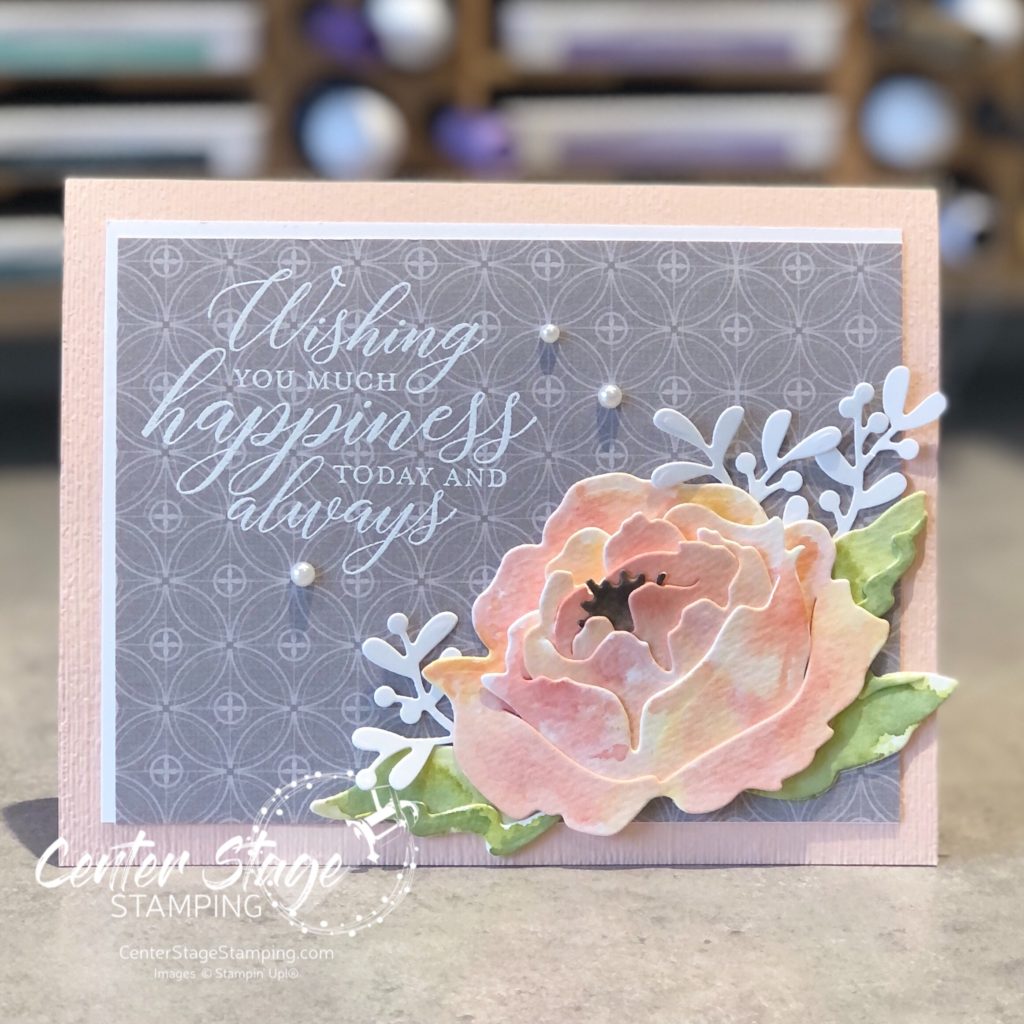
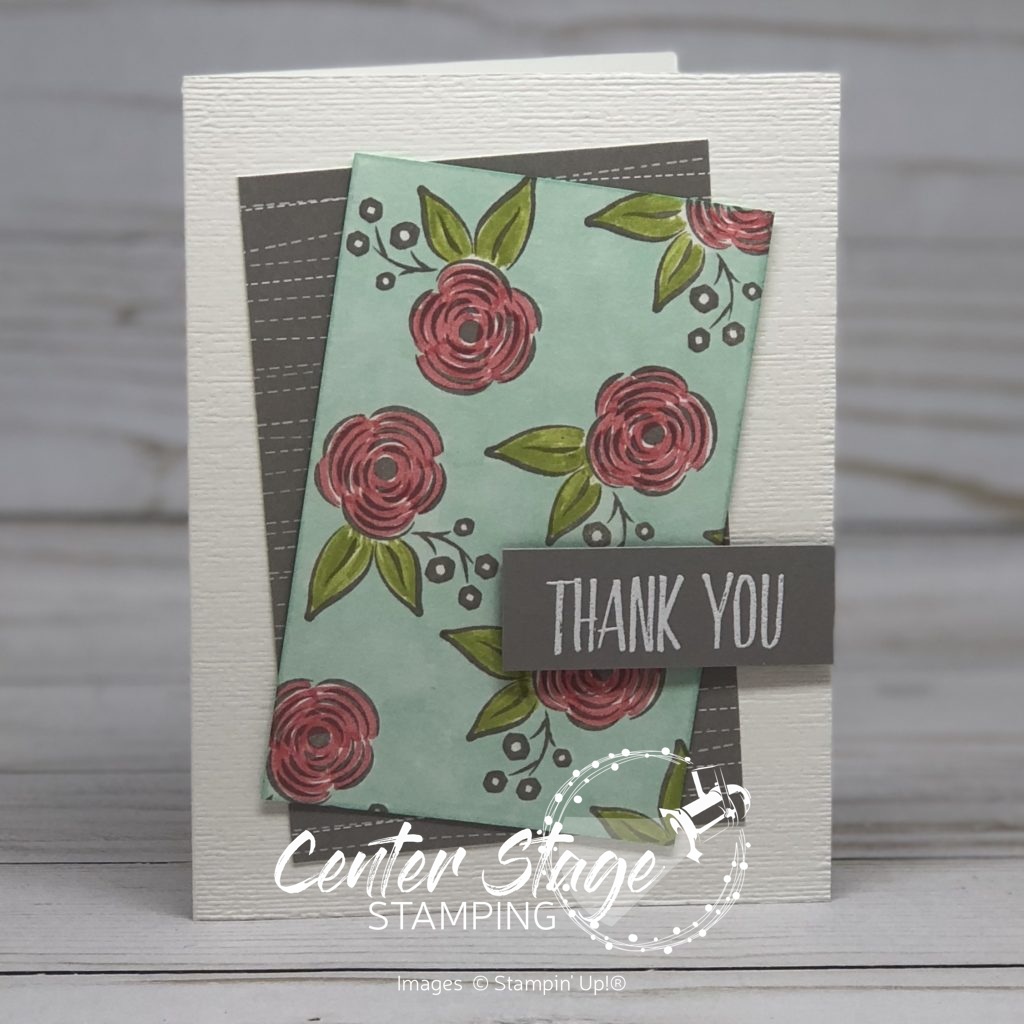
For my second card, I added a few more images and stamped a background panel in Smokey Slate and Polished Pink inks. I die cut the edge of the panel, and a Polished Pink strip with the NEW Basic Border dies. I love a bit of added detail. I embossed the sentiment in black. and added some Matte Black Dots to finish it off. This panel was mounted to a Smokey Slate card base with a bit of DSP from the Neutrals Assortment stack.

Thanks for stopping by! I’m sending you over to Bronwyn and her amazing projects. Just click the NEXT button below. If you are doing the hop in reverse, you can move on to Jay and his awesome creativity! Click on the PREVIOUS button below.

Thanks for stopping by! I hope you will join me again to shine a spotlight on creativity!

Share with your friends:

artistically inked thanks

I find alcohol ink art absolutely fascinating. I have yet to try my hand at it. Fortunately for me, Stampin’ Up! came out with the Expressions in ink suite of products and the Artistically Inked stamp set. I can get a similar look with my dye based inks. And the gorgeous Expressions in Ink specialty DSP is a perfect addition, capturing beautiful alcohol ink flow designs.

Just a small strip of the DSP and a few stamps create a simple, yet elegant thank you card. I love the bright colors against a large amount of white space. It really captures the eye.

Thanks for stopping by! Join me again to shine a spotlight on creativity!

Share with your friends:

pcc #425

Welcome, friends! Let’s check out this week’s Paper Craft Crew Challenge.

I went for a rustic look with Celebrate Sunflowers stamp set and some wood patterned paper from the In Good Taste DSP pack.

I colored the sunflowers with Crushed Curry, So Saffron, Soft Suede, Crumb Cake, Old Olive Stampin’ Blends.

The Paper Craft Crew would love to have you play along! Hop on over to the PCC blog for some more inspiration from the design team

Thanks for stopping by. Join me again to shine a spotlight on creativity!

Share with your friends:

stamp review crew: so sincere

Hello my crafty friends! Welcome to the first Stamp Review Crew blog hop of the new year!  If you are not familiar with The Stamp Review Crew, we are a group of international Stampin’ Up! Demonstrators who hop together on the first and third Monday of the month to bring you some great inspiration. Each blog hop features a different stamp set. You can find all of the blog hops archived on the Stamp Review Crew blog. We are going to kick off 2021 by shining a spotlight on the awesome sentiment set So Sincere.

For both of my cards, I embossed the sentiments on some designer series paper. I like the bit of design behind the words. It gives some depth to the image. My first card also uses the Celebrate Sunflowers set and dies, In Good Taste and 20-21 In Color DSP Stack, and the In Color Bumblebee ink.

For my second card I added a beautiful peony that I die cut out of water color paper and colored with Petal Pink, Flirty Flamingo and Mango Melody, Granny Apple Green and Garden Green ink refills.

This particular sentiment works for a variety of occasions. This card would be great for a birthday or a wedding. The So Sincere set is full of some great sentiments in wonderful fonts and opens the door to lots of design possibilities.

I hope you will work your way through the full Stamp Review Crew blog hop for more great inspiration! From here you can click on the NEXT button below to head on over to talented Cindy or click on the PREVIOUS button to go back to creative Betty

Thanks for stopping by! Here’s to a new year full of creativity. I hope you will join me again to shine a spotlight on creativity!

Share with your friends:

paper craft crew challenge #381

Time for this week’s challenge from the Paper Craft Crew! We have another great card sketch to inspire your creativity.

I decided to play with some of the new In colors from Stampin’ Up! – Misty Moonlight, Magenta Madness, Bumble Bee – and the new Tasteful Touches stamp set.

I love the softness of the flower and feather images against the different geometric patterns. Be sure to head over to the Papercraft Crew blog and check out the rest of the Design team’s project and then take part in the challenge yourself!

Thanks for stopping by! Please, join me again to shine a spotlight on creativity!

Share with your friends:

inky friends: dc 15

Digging out from one snowstorm with another right around the corner – sounds like a perfect time to hunker down in my studio. My Inky Friends ave another design challenge to help kick your crafting mojo in gear. This time it is one of my favorite color combos chosen from a sample on page 37 of the 2019 Occasions catalog. Right now those colors are making me think of spring. In the midst of all this snow, I’ll take what I can get. Here is my project with this color scheme.

I made that fantastic watercolor background with a technique I featured in this post. The flower and sentiment are from the All That You Are stamp set in the Occasions catalog.

Check out what the rest of the Inky Friends design team has created, then create your own project putting the color combo center stage. Be sure to share your creation by linking to the My Inky Friends design challenge 15 page.

Thanks for stopping by. Join me again to shine a spotlight on creativity!

Share with your friends:

inky friends: thankful for… blog hop

Today, I am joining My Inky Friends Thankful For… blog hop. You are in for a great variety of inspiration on today’s hop.  We are each featuring a Stampin’ Up! stamp set or product that we are thankful for.  If you are following in order, you have arrived here from Holly and her wonderful projects.  Weren’t they great.  If you are starting here make sure you check out all the stops and see what everyone is thankful for!

I am thankful for… Stampin’ Blends!  These markers are so amazing and really easy to use.  They make me feel like a real artist!  There is so much you can do with them!

First off, how about no-line coloring.  I’ve seen it done with watercolors and thought why not try it with my Stampin’ Blends!  I love the outcome!

Country Home: no line with blends - Center Stage Stamping

I stamped the milk can and flowers in Sahara Sand that was stamped off to make it lighter.  Then I colored it in.  I used the stamps as a guide if I could no longer see the inked outline.  I really like how the milk can turned out! It’s even better in person.

Next up, I went with basic coloring.  Postcard Palls is a great set for this.  Isn’t that little otter just adorable!  The Stampin’ Blends make it possible to get so much depth with the shading.

Postcard Palls: Otter - Center Stage Stamping

Finally, I made my own designer paper – the flowers and background are colored with Stampin’ Blends.  The possibilities are endless!Perennial Birthday: stampin' blends - Center Stage Stamping

If you haven’t tried Stampin’ Blends yet, you need to.  They make coloring so much fun!  I now send you over to Cindy and her fantastic creations!

Thanks for stopping by!  Join me again to put a spotlight on creativity!


Share with your friends:

thank you elephant

Just a quick post today to share this adorable guy!

Little elephant: thank you - Center Stage Stamping

With Basic Gray as a backdrop and pops of pool Party, Lemon Lime Twist and Grapefruit grove, this cute little elephant steals the show.  I decided to keep the card pretty simple with a few fun details to spotlight my little pachyderm friend. I punched out a Whisper White 1-3/4″ circle and a Lemon Lime Twist 1-3/4″ circle, then trimmed down the Lemon Lime Twist one and fringed the top edge for the grass. The little Basic Gray elephant is punched out with the coordinating Elephant Builder punch and made it a breeze to give him a Pool Party ear.  I fussy cut the Grapefruit grove heart sentiment.  This little guy is definitely deserves to be center stage!

That’s a wrap for today.  Join me again to put a spotlight on creativity!

Share with your friends:

inky friends: dc 10

My Inly Friends are back with their 10th design challenge!  This is a color challenge based on a sample on page 115 of the Stampin’ Up! 2018-19 Annual catalog.  A very bright combination of colors! You can head over to the My Inky Friends page to see what all of the Design Team created with this color inspiration.  Here is my creation:

Inky Friends DC 10: Thank You - Center Stage Stamping

I used the A Big Thank You stamp set and coordinating Thank You Thinlit.  The small images work great to create your own background paper. The Crumb Cake card base is embossed with the Corrugated Dynamic Textured Impressions Embossing Folder.  I just love the texture and dimension it gives.  I added two little ribbon loops on the top left corner of the image panel to finish it off.  I let the die cut thank you hang off the image panel a bit to pull it into the card base some.  I think it helps it stand out more.

Head over to the My Inky Friends page and check out the other design team creations, then have a go at this color combo yourself!  Be sure to upload your creation to the My Inky Friends page so we can share in your creativity!

That’s a wrap for today.  Join me again to put a spotlight on creativity!

Share with your friends:

stamp review crew: waterfront

Welcome back to another Stamp Review Crew blog hop!  I’m so glad you have joined us as we put the Waterfront stamp set in the spotlight.  This set is a lot of fun to play with and creates wonderful watercolor style landscapes and more when you let your creativity cut loose.  I have to admit, I have had the set for several months, but this is the first time I have created anything with it.  I assure you, it won’t be the last!

Waterfront: Friends make the good times better - Center Stage Stamping

For this card, I stamped the mountains, lake and trees first in Whisper White craft ink on Crumb Cake card stock and let it completely dry.  Once dry, I stamped over the images with the colors Gray Granite, Pool Party and Tranquil Tide (with a little Early Espresso for the tree trunks).  Since the stamps are photopolymer, it made lining up the images a breeze.  I didn’t try to line them up perfectly.  The bits of white peeking out give some nice highlights. I layered the image panel on a piece of Tranquil Tide dots from the ’17-’19 In Colors Designer Series Paper stack.  The front of the card base was run through the NEW Corrugated Dynamic Textured Impressions Embossing Folder.  Isn’t it just AMAZING!  I can tell it will be used A LOT!

I used Stampin’ Write markers to ink the sentiment stamp and layered it on a Pool Party circle cut from the Stitched Labels Framelits.  Then adhered it over a bit of Linen Thread wrapped around the image panel.

I had been watching an episode of Murder She Wrote when I came up with the idea for this next card.  I hand an image in my mind of a quaint painting hanging on a weathered cottage wall,  Here’s what I came up with:

Waterfront: thanks friend - Center Stage Stamping

I covered the card base with a piece of the Wood Textures designer series paper – seriously, my FAVE!  I stamped the scene on a piece of thick Whisper White card stock.  I hand drew the flowers with Stampin’ Write markers.  Then I framed the painting.  First I cut a pice of Basic Black card stock the same dimension as my “painting”.  Next, I cut diagonally corner to corner both directions.  Finally, I trimmed about 1/4″ off the outer most edge of each triangle.  Here is a picture to help you see what I did.

I could have just mounted the “painting” on a piece of Basic Black and called it good.  But this way, I get the mitered corners like a real frame.

Waterfront: thanks friend close up - Center Stage Stamping

It’s a really small detail and most probably won’t notice it, but I thought it was neat.

If you started this blog hop from the beginning, I am the final stop.  If you picked it up somewhere in the middle, make sure you go around and check out all the great inspiration with the Waterfront stamp set!  From here you can go back to Heidi or on to Debra

*The Stamp Review Crew is a group of International Stampin’ Up! demonstrators who want to show you how much you can do with ONE stamp set. Each edition the SR Crew will showcase a new featured stamp set. Each stop along the hop will show you a different idea, or ideas using that set!**


That’s a wrap for now.  I hope you will come back and join me in putting a spotlight on creativity!


Share with your friends: