Merry Christmas Thinlits

bubble wrap background

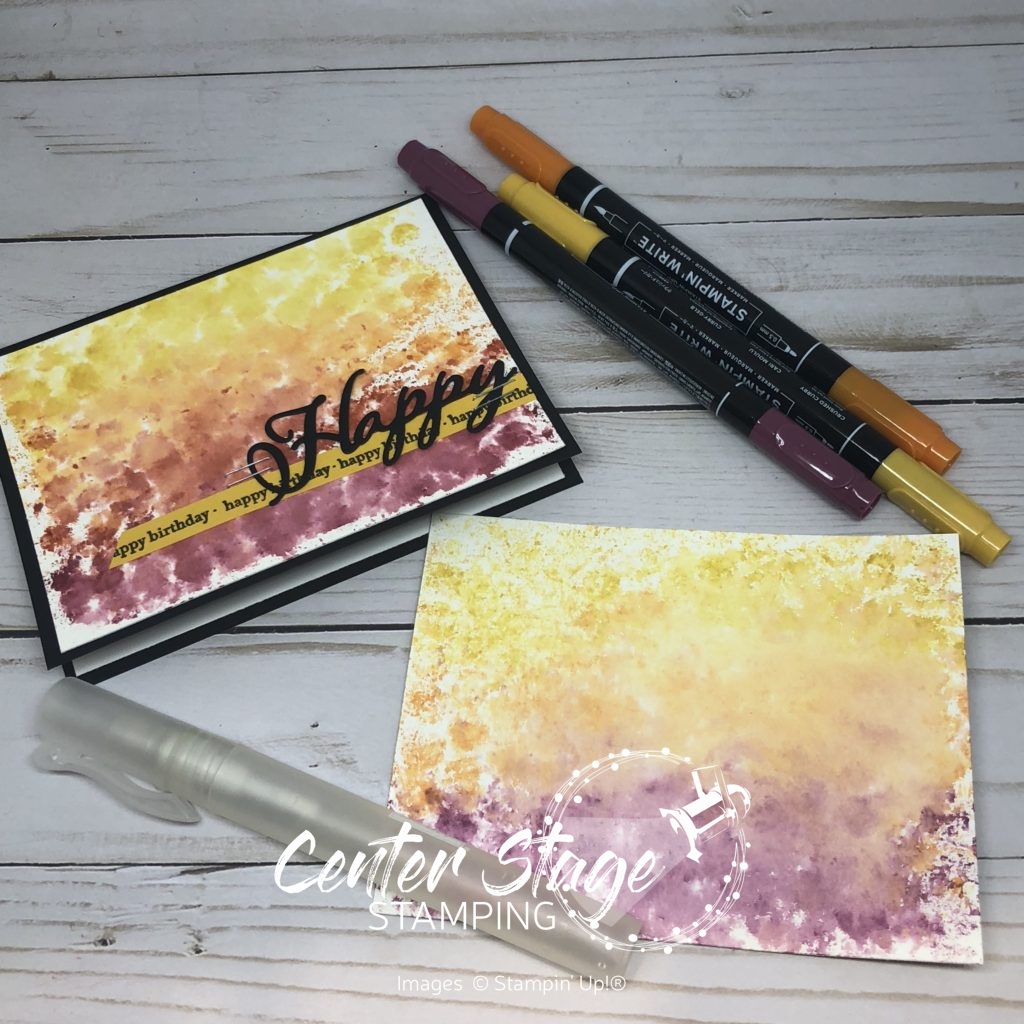
Hello!  I’m back with a quick tutorial for that fantastic watercolor background featured on this card yesterday:

Happy Birthday: bubble wrap water color - Center Stage Stamping

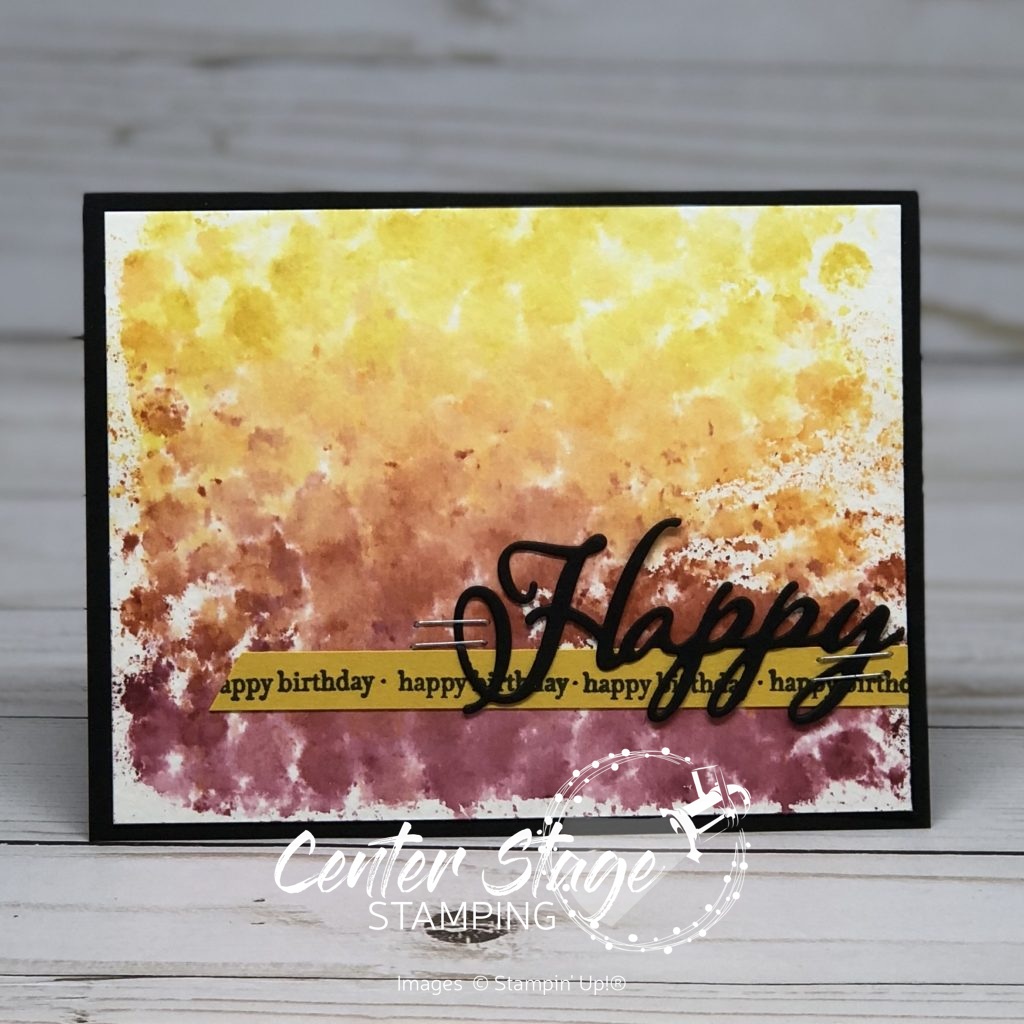
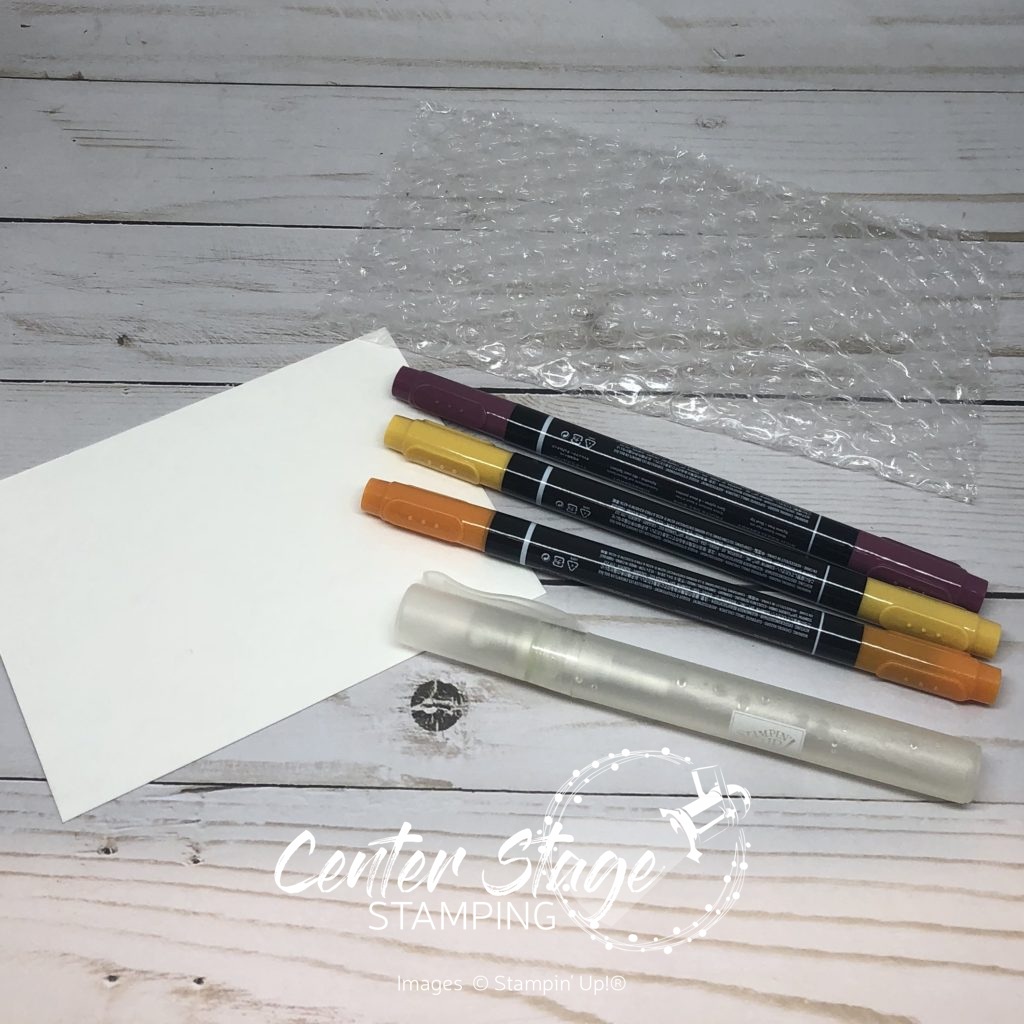
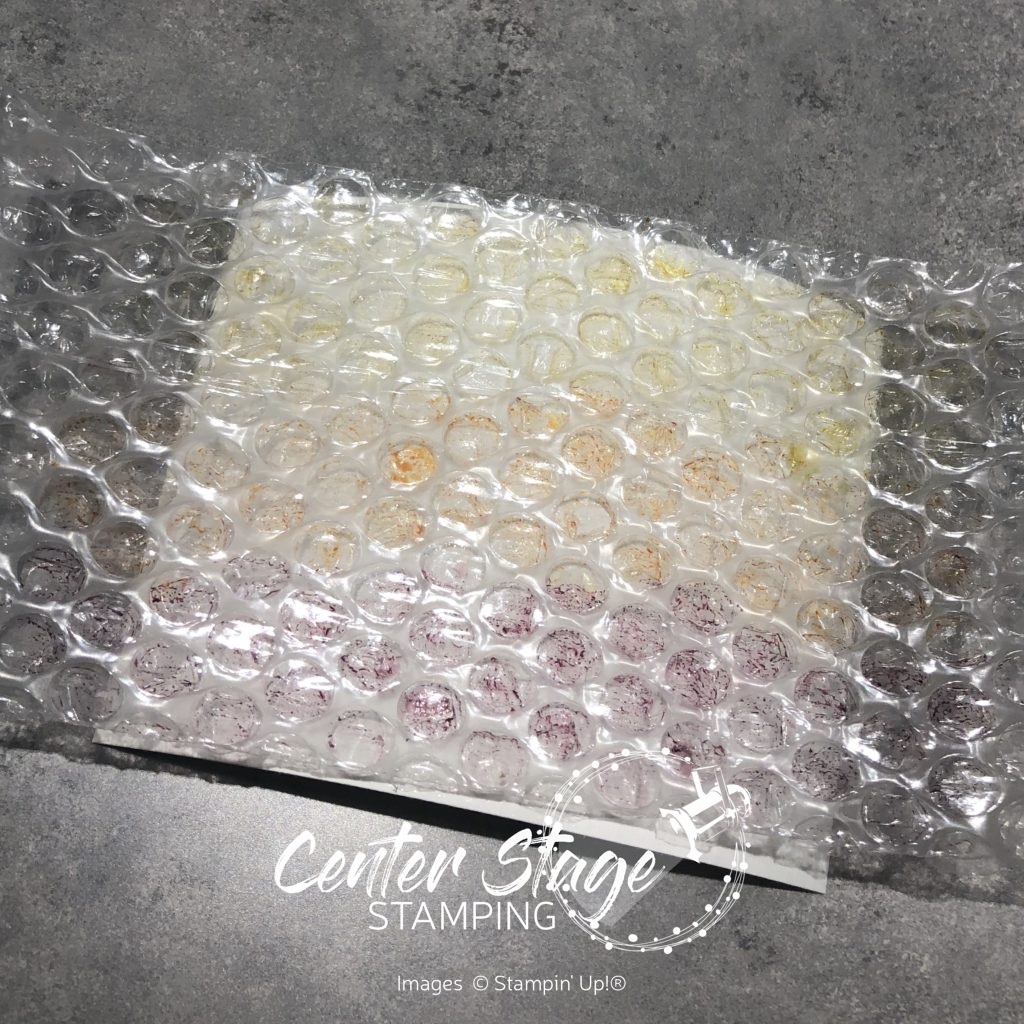
Would you believe it is done with bubble wrap?!  Seriously… it is!  It is really easy, you just have to resist the urge to pop all of the bubbles!  You will need watercolor paper, markers (I used Crushed Curry, Pumpkin Pie and Rich Razzleberry) a spritzer filled with water and of course bubble wrap.


Bubble wrap background: supplies - Center Stage Stamping

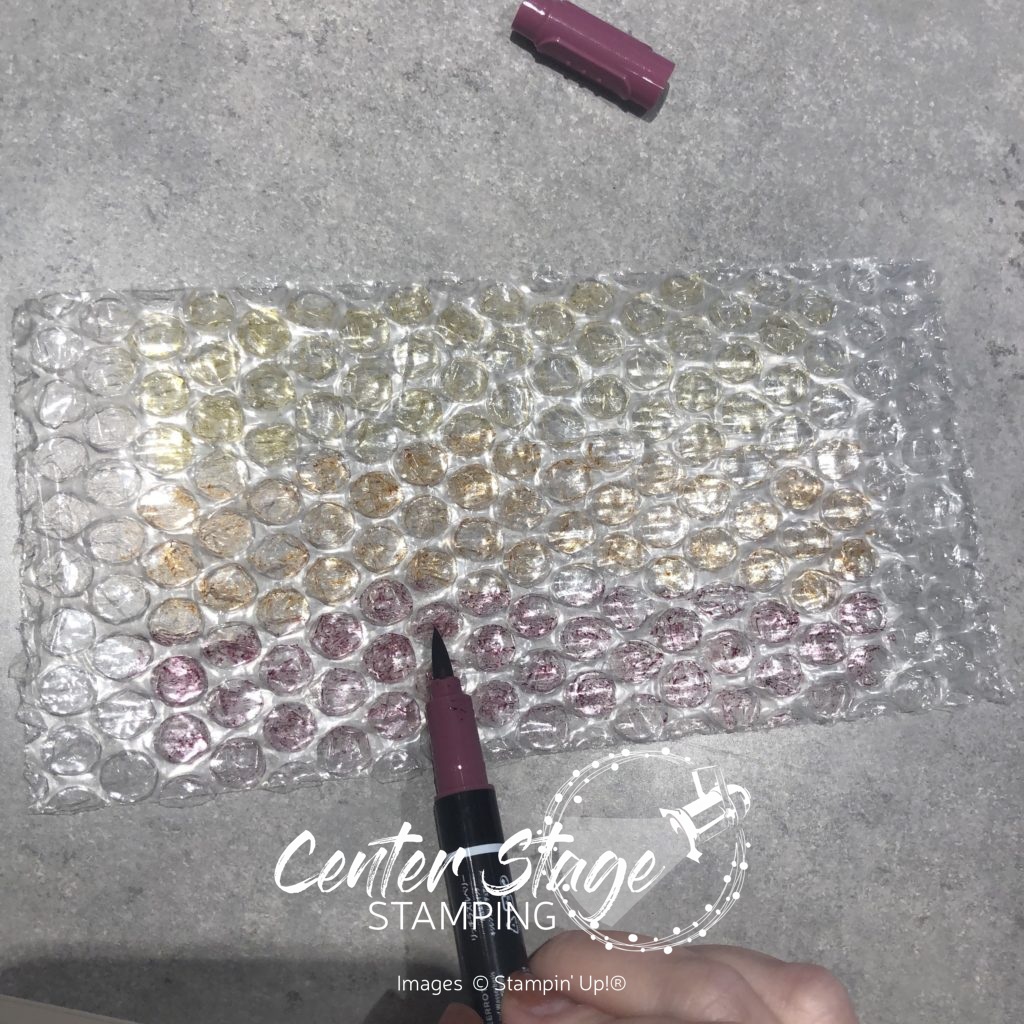
Use your markers to color directly on the bubble wrap, starting with the lightest color.  Make sure you color on the bumpy side, not the smooth or you won’t get the dot effect.

Bubble wrap background: color on bubble wrap - Center Stage Stamping

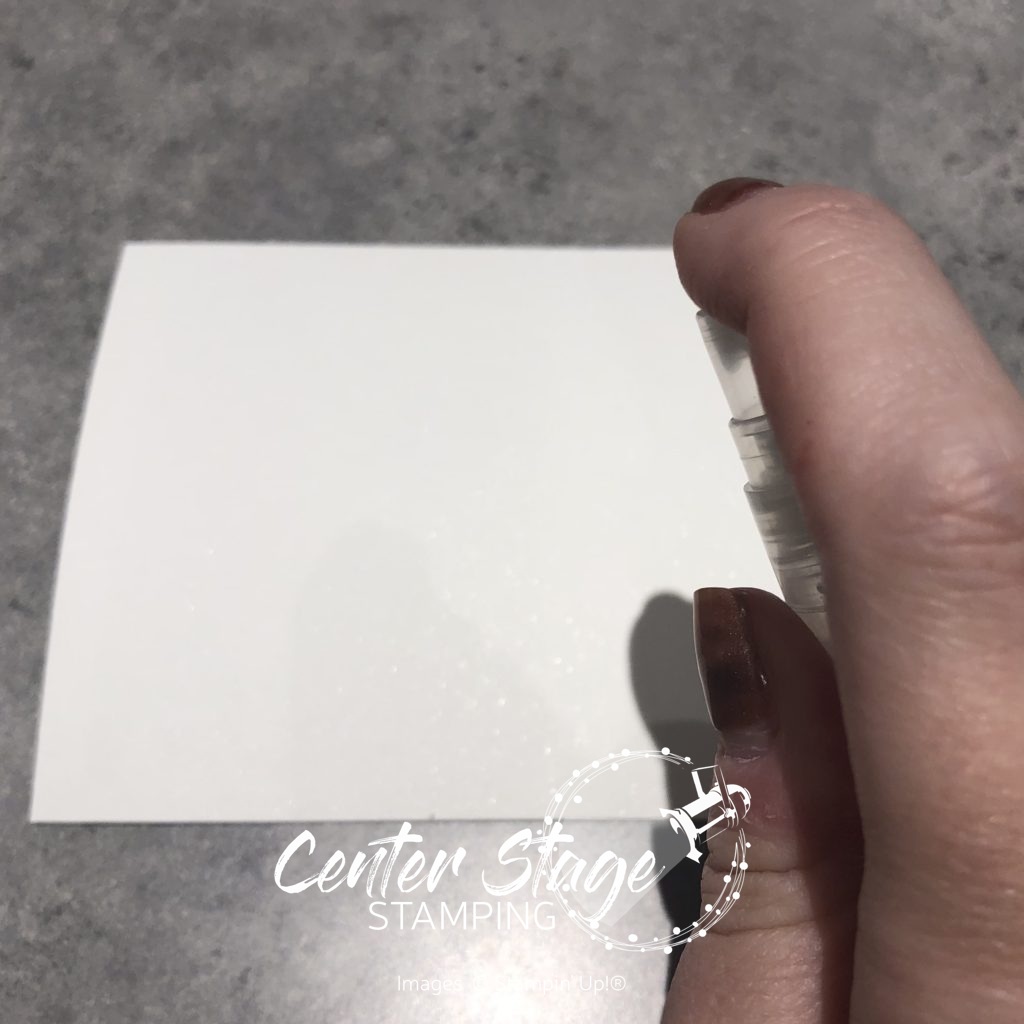
Next spritz the water color paper with water.  Make sure to get it good and saturated.  less water means a more dotted, less blended outcome.

Bubble wrap background: spritz paper - Center Stage Stamping

Next press the bubble wrap colored side down onto the wet watercolor paper.  You can lift and set back down to fill in light areas or to blend colors more.

Bubble wrap background: step3 - Center Stage Stamping

Let the paper dry fully before assembling the card.

Bubble wrap background: step 4 - Center Stage Stamping


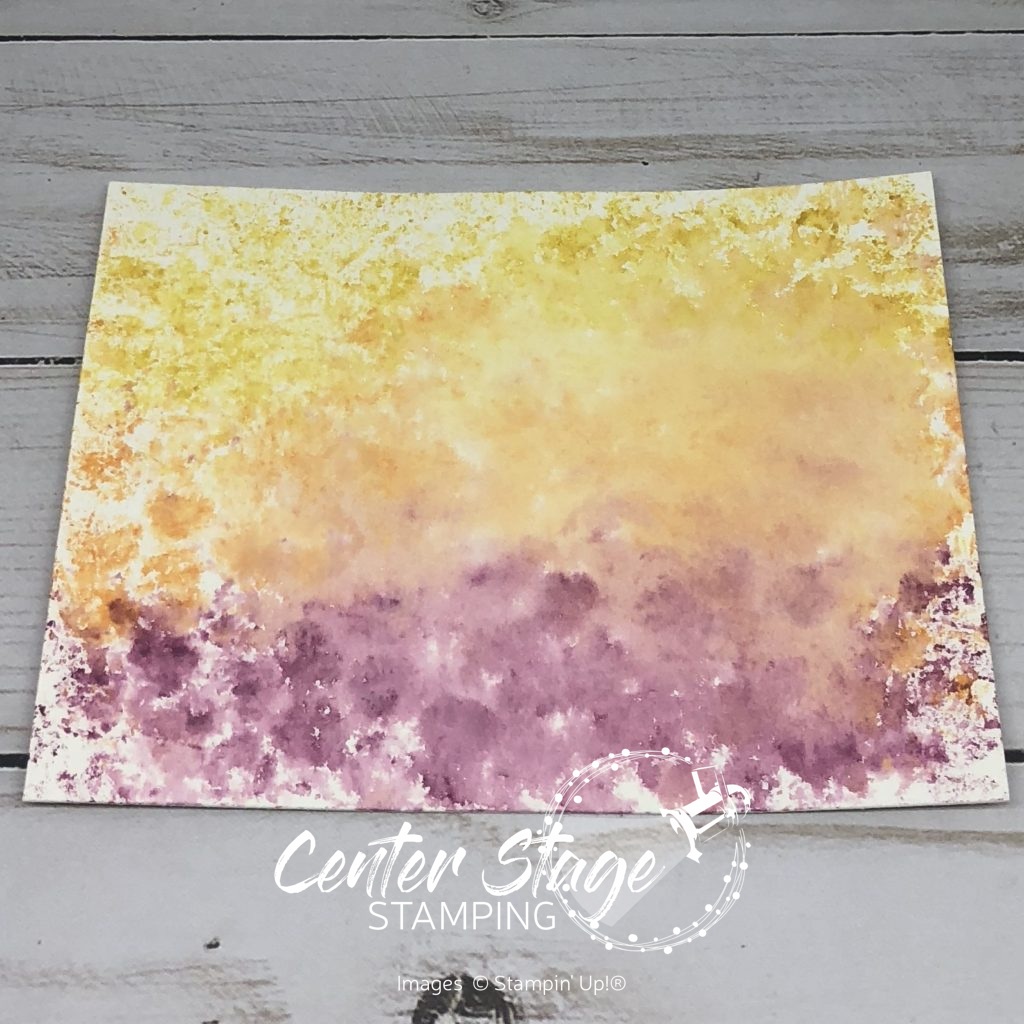
Every time you do this it will turn out a little different.  Use less water if you want more of the dots to show, More water if you want it more blended.  Color options are endless.  Let me know if you give it a try!  I’m off to finally pop that bubble wrap…then go get some more!

Bubble wrap background - Center Stage Stamping

That’s a wrap for today.  Join me again to put a spotlight on creativity!


Share with your friends:

october creative class projects

I taught a Creative Class at Stamp-n-Storage on Saturday, October 20.  We had a great time stamping and creating five fall themed cards.  I thought I would pop on today and share those projects with you.

Country Home: Thankful for all the good things - Center Stage Stamping

Coffee Cafe: thanks a latte - Center Stage Stamping

Rooted in Nature: Be Bold fall - Center Stage Stamping

Wishing You Well: just a note - Center Stage Stamping

Happy Birthday: bubble wrap water color - Center Stage Stamping

We had a lot of fun putting these cards together.  Especially that last one!  I was able to teach a fun new water color technique.  I will be back on Wednesday with a quick tutorial for this.

Stamp-n-Storage Oct Creative Class projects - Center Stage Stamping

Here is everyone with their finished projects!  They all did a great job.

Stamp-n-Storage Oct Creative Class group photo

The next Stamp-n-Storage Creative Class is Saturday, November 17 at 1:00PM.  You can find more details and register for the class over on the Stamp-n-Storage website HERE.  I’d love to have you join us!

That’s a wrap for today.  Join me again to put a spotlight on creativity!


Share with your friends:

inky friends: handmade holidays blog hop

Welcome to My Inky Friends: Handmade Holidays Blog Hop!  You will find lots of inspiration for you Holiday crafting!  You should have arrived here from Paula and her wonderful Country Home projects.  Weren’t they great?  If you are starting the hop here, make sure you go through and check out all the stops.  You don’t want to miss a thing.

My projects are putting the fantastic set Merry Christmas to All in the spotlight.  This is a great holiday greeting set and the coordinating Merry Christmas Thinlits take it to the next level.  I just love the dimension and texture of die cut words. I paired this great set with the amazing Joyous Noel designer series paper.  I love the new Merry Merlot color.  Paired with a touch of copper, it is perfect for elegant holiday projects.  I decided to create a card, gift package and ornament trio. Let’s start with the card.

Merry Christmas to All: Merry & Bright - Center Stage Stamping

Isn’t that paper gorgeous!? I also used a bit of Neutrals 6×6 DSP (the Crumb Cake dot panel) I layered a Pearlized Doily with a Stitched Shapes circle cut from Wood Textures DSP.  A tiny bit of Copper Glimmer Paper draws out the copper foil in the Joyous Noel DSP.  I also added a tiny tree from the Festive Farmhouse Elements.  The sentiment is stamped on the Wood Texture DSP in Early Espresso Ink.  I think it gives a wood burned look to the image.Merry Christmas to All: pillow box - Center Stage Stamping

Next up is a cute little gift card pouch.  I started with one of the Kraft Pillow Boxes.  I just love those little white polka dots.  I kept some of the elements from the card, but changed them up a bit to make the belly band wrapped around the pillow box.

Merry Christmas to All: Merry ornament - Center Stage Stamping

Finally, I made this fun medallion ornament. I started with two 4″x12″ strips of the DSP.  I scored them every half inch, fan folded them the assembled them into the medallion.  Once again I used the Pearlized Doily and a Stitched Shape circle, this time cut out of Crumb Cake card stock. I added a few snowflakes from the Blizzard Thinlit with added rhinestones.

Merry Christmas to All: gift trio - Center Stage Stamping

A fabulous trio perfect for holiday gifting!   I am now sending you over to Rhonda and her fun projects with the tiny take-out box!  They are so much fun!

Thanks for stopping by!  Join me again to put a spotlight on creativity!


Share with your friends:

holiday catalog is here

It’s here!  The Stampin’ Up! 2018 Holiday Catalog is here and loaded with fabulous products and creative inspiration.  Let’s kick it off with a project that features a couple of great new products. Buffalo Check background stamp and Merry Christmas to All bundle.

Buffalo Check Christmas - Center Stage Stamping

Isn’t this just perfect for a woodsy Christmas?! The Buffalo Check is stamped in black on Real Red card stock and backed with the log design from the Wood Textures designer series paper stack.  Kind of has a lumberjack feel, doesn’t it.  Change out the Sentiment and it would be great a great guy card  “Merry” is cut out in Tranquil Tide with one of the Merry Christmas Thinlit dies. I really love die cut words, and this thinlit set has FOUR!  “Christmas” from the Merry Christmas to All stamp set is stamped in black on a strip of Very Vanilla card stock.  A bit of Linen Thread and a few gold metallic pearls add just the right finishing touch.  I’m ready to curl up with some hot cocoa, flannel and fuzzy socks.  Just kidding, I’m am NOT ready for that just yet.  I’ll keep the sun shine, shorts and flip flops for a bit longer, thank you.  (Seriously, I am NOT ready for winter…)

That’s a wrap for today.  Come back and join me again to put a spotlight on creativity!

Share with your friends: