Baby

happy 1st birthday

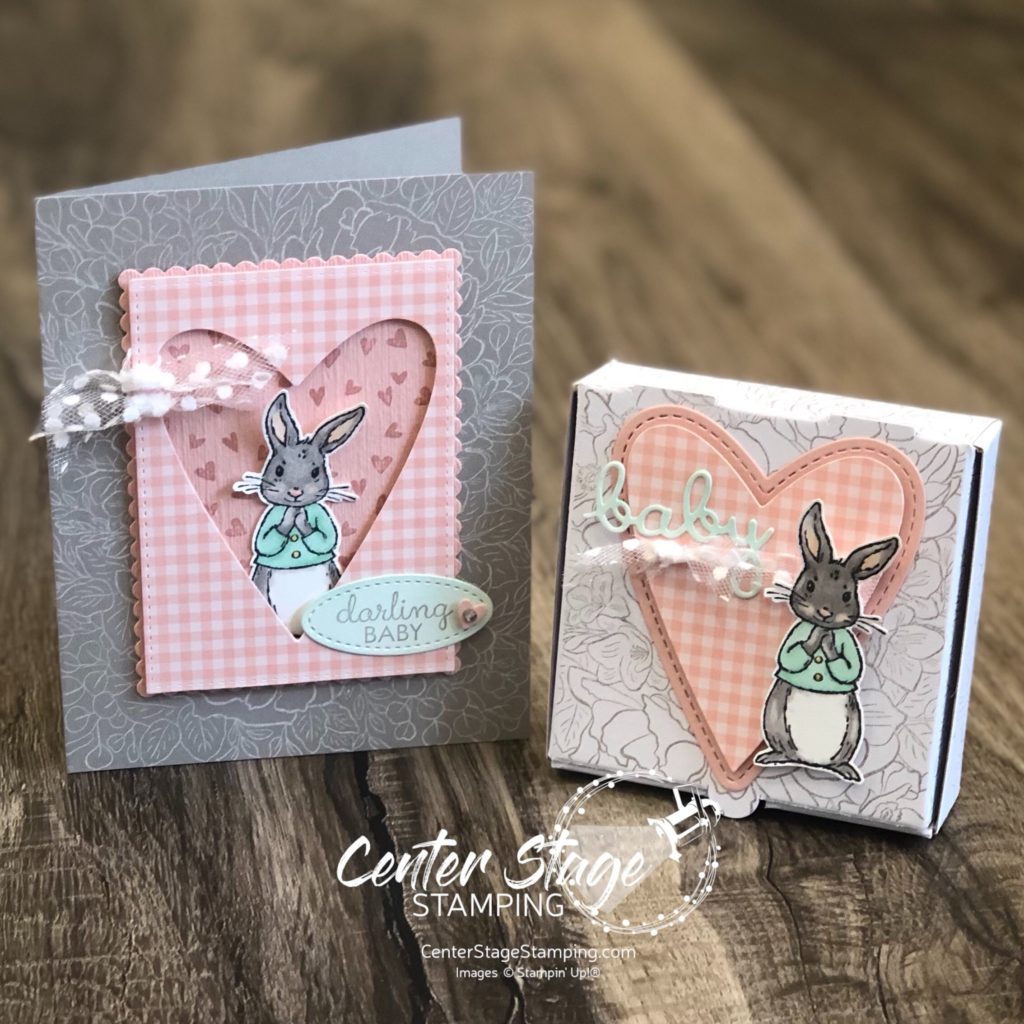
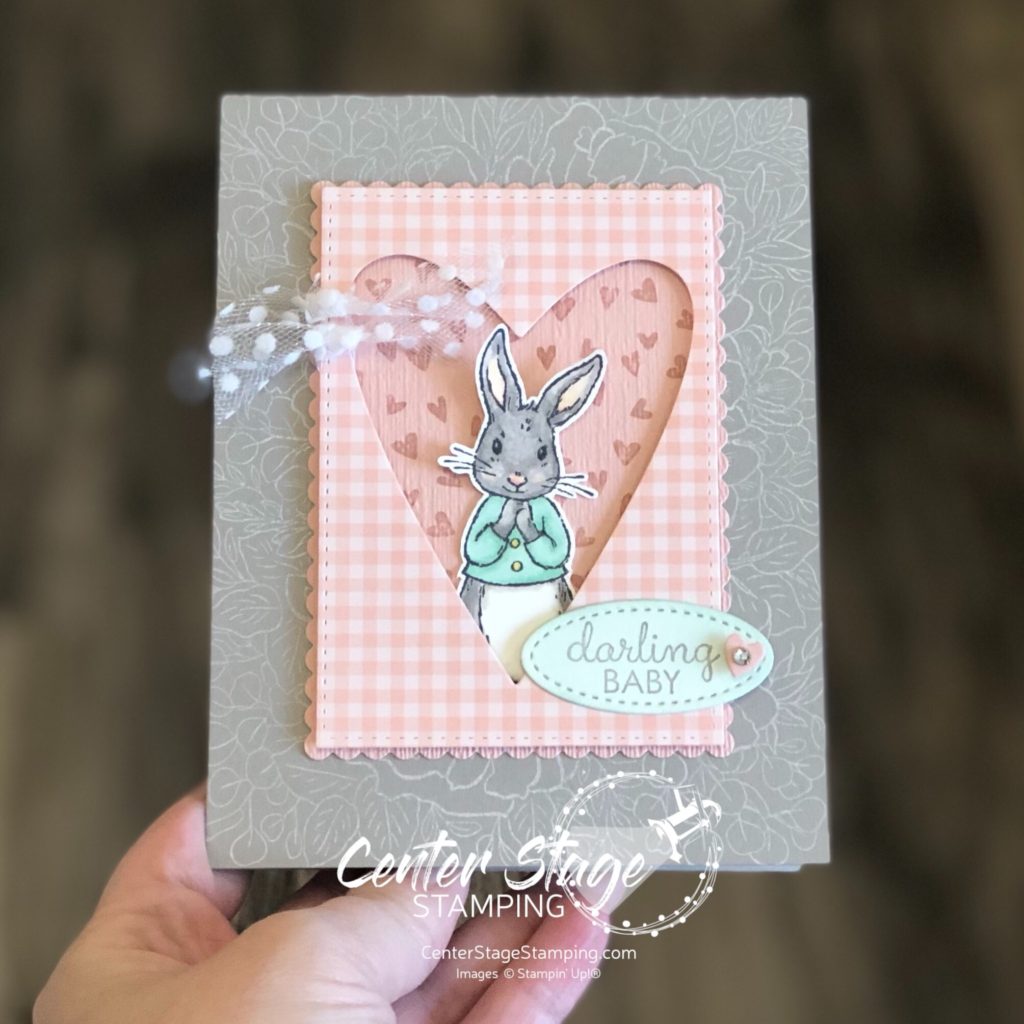
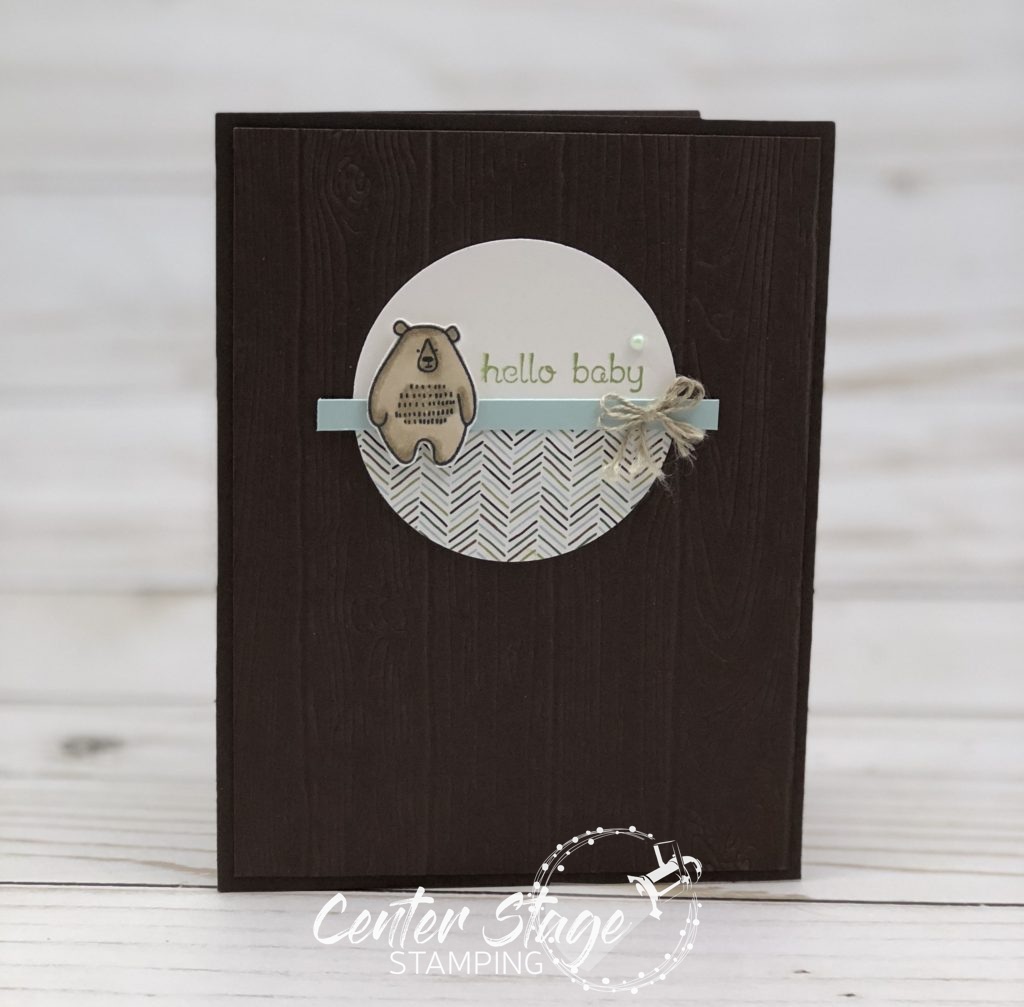
This is by far one of my most loved cards to create – a card to celebrate my granddaughter’s first birthday! My daughter wanted elephants and florals for her party. I created the invitations with that theme. I shared that last week. I decided those adorable elephants would be perfect for her birthday card as well.

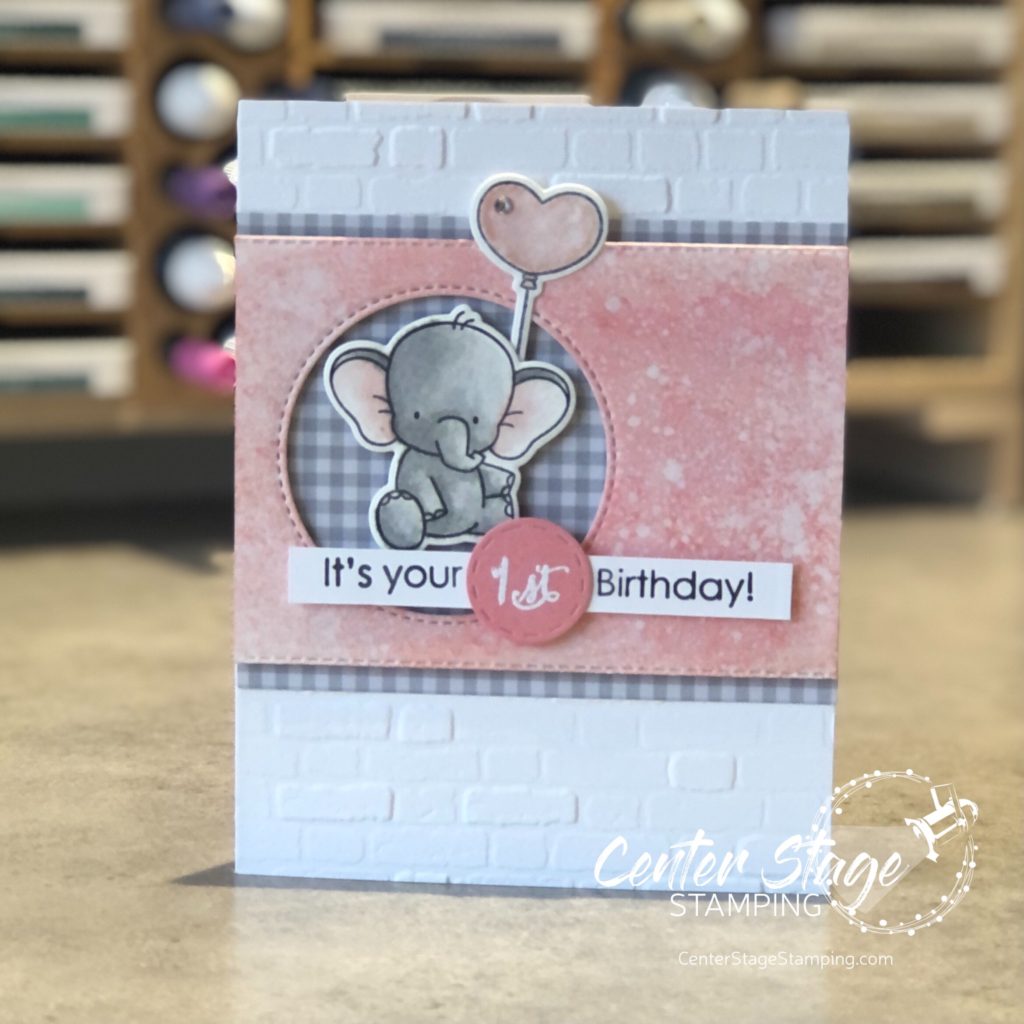
The pink panel was created by smooshing colors on a piece of watercolor paper. I also watercolored the little elephant and balloon.

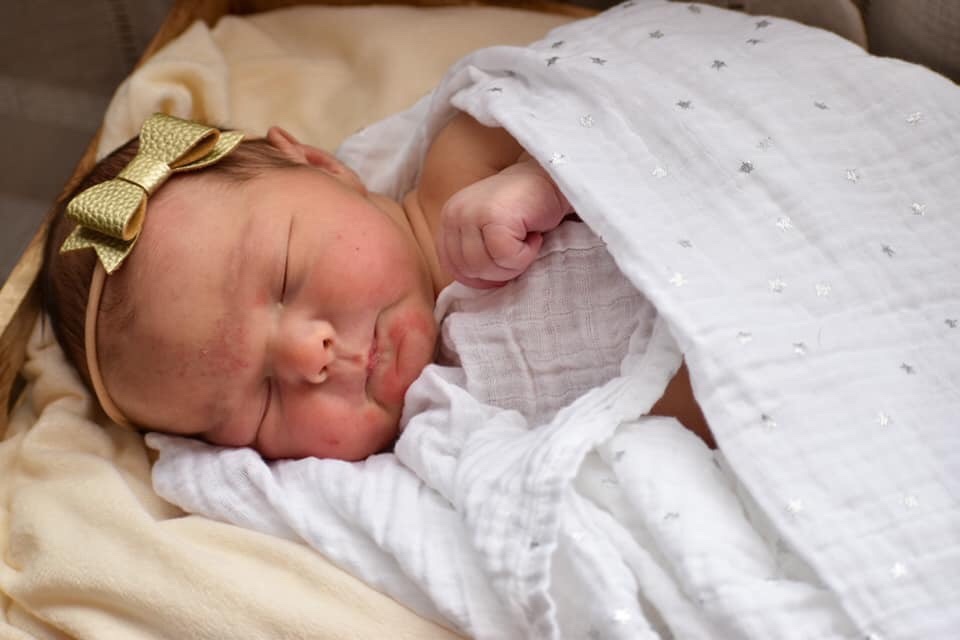
It has been such a joy to watch my granddaughter grow over the past twelve months. From those first sweet snuggles holding a new born to the smiles and babbles to waving HI to grandma over a Facetime call. Melt my heart. I look forward to each new moment with this little sweetheart. Miss Amelia Mae, you fill my heart with joy.

Thanks for stopping by. Join me again to shine a spotlight on creativity!

Share with your friends:

osat blog hop: chick ewe out

Hello friends! It is time for the monthly One Stamp At A Time Blog Hop. This month’s hop is an animal theme and the OSAT Design Team has some fun projects in store. Be sure to make your way through the complete blog hop roster. You don’t want to miss anything!

Last month I received the BEST Valentine gift ever. My first Grandchild was born!!! She has completely stolen my heart.

So naturally with baby on my mind, I create a couple of fun projects to welcome a sweet little girl.

I just adore this sweet little bunny from the Fable Friends stamp set. Reminds me so much of Peter Rabbit. Paired with the Beautiful Bouquet background stamp and some sweet Blushing Bride gingham DSP, you end up with a perfect gift pair.

I colored the little bunny with my Stampin’ Blends. I love the shading you can get. The Beautiful Bouquet is stamped with white ink on a Gray Granite card base. I sponged Pool Party ink on the oval with the sentiment to achieve a lighter shade of Pool Party. Isn’t he adorable peeking out from the heart opening?

I made a little gift box using one of the Mini Pizza Boxes. I stamped the Beautiful Bouquet in Gray Granite ink. I also used the heart cut out from the card. The “baby” is cut out of Whisper White card stock and sponged with Pool Party ink for a soft shade to match the oval on the card.

Thanks for stopping by. I am going back to staring at photos of my sweet little Granddaughter!

Be sure to check out what the rest of the Design Team has created! You can find a pop up full blog hop roster by clicking on the BLUE RECTANGLE below.

Thanks for stopping by. Join me again to shine a spotlight on creativity!

Share with your friends:

blessed sweet baby

Still waiting for Minnesota’s weather to catch up to the correct season. Sheesh. I really should move south. But then there are more snakes and spiders and other creatures. Hmmm… Minnesota, get your act together!

Meanwhile, I have had some more fun in my studio with the Everything is Rosy medley. My daughter and son-in-law’s best friends just had a sweet little baby girl! So, naturally I had to make a card for this little bundle.

Everything is Rosy: blessed baby - Center Stage Stamping

I LOVE the floral prints in this DSP stack. This delicate print was perfect for a baby card! I did a wash with the Rose Gold Shimmer paint before I stamped the “Blessed” from the new To A Wild Rose set. Of course I had to decorate the envelope as well.

Here’s a closer look at some details:

Everything is Rosy: blessed baby details - Center Stage Stamping

Thanks for stopping by. Join me again to shine a spotlight on creativity!

Share with your friends:

Posted in Baby, Create | Comments Off on blessed sweet baby

more than all the stars

Hello everyone!  Today’s card features the Little Twinkle set and coordinating Twinkle Twinkle designer series paper.  It is a quick and easy card, but still has some fun details.

love you more than the stars - Center Stage Stamping

The designer series paper makes a fun backdrop.  The focal point is the Night of Navy sentiment set on a fun Petal Pink watercolor wash background.  The angled piece behind is Vellum card stock that I brayered with Pool Party Ink.  It gives a soft hint on color to support the main panel.  The stars are punched out of Pool Party card stock with the Twinkle Builder punch.

While the colors from the DSP suggest this card would be for a new baby, it really could work for a variety of occasions – anniversary, valentine, thinking of you…

That’s a wrap for today.  Happy Stamping!

Share with your friends:

a star is born

I had some fun this weekend creating with the new Little Twinkle stamp set.  I paired it with the Twinkle Twinkle designer series paper and came up with this sweet card.

A Star is Born - Center Stage Stamping

I started with a Gray Granite card base that I embossed with the Pinewood Planks 3D Dynamic Textured Impressions Folder.  The Star is stamped in Pool Party and cut out by hand.  I added the paper strips to give it a shooting star feel.  For the bow, I took a piece of the Petal Pink/ Silver Bakers Twine and pulled it apart to get just the Petal Pink threads.  I doubled it and tied a bow.

This would be a great card to send to any of my theatre friends with a new baby.  Or, you could change the color scheme and it could celebrate someone’s performance in a show!

Thanks for stopping by! Happy Stamping!

-Mary

Share with your friends:

it’s here!

(Trumpet fanfare)  It’s here!  The new items in the 2018-19 Stampin’ Up! catalog are ready and waiting to be ordered.  If you don’t currently have a demonstrator, I would love to help you shine a spotlight on your creativity.  Let me know if you would like a catalog.  It is bursting with great products.  I can’t wait to get creating and put them center stage!

Let’s kick off this new catalog year with a sweet welcome card for a new little baby.  Introducing the NEW Animal Outing stamp set!

Welcome little one Animal Outing - Center Stage Stamping

I am smitten with that little rhino.  He is so cute!  I colored him in with an aqua painter and some NEW Gray Granite ink.  What a great new color!  The leaves are from the Petals & More Thinlits.  I used a few strips of Wood Textures designer series paper.  The ‘welcome’ is stamped in Balmy Blue, another NEW color.  Coordinating Balmy Blue card stock was used for the Little One tag.  It was punched out using the Classic Label punch.  But wait, that punch is 2 1/4″ long.  To get it smaller, you simply put line up one end back into the punch and punch again.  Ta da – Smaller label!

Classic Label punch trick - Center Stage Stamping

Classic Label Punch - Center Stage Stamping

The Animal Friends Thinlits coordinate with the Animal Outing set to give you even more creative options.    Thanks for stopping by! Happy Stamping!

-Mary


Share with your friends:

Hello Baby Bear

I did it!  I survived another Middle School musical production and now I get to enjoy a week free from rehearsals.  My husband, Brett is gone this week.  Stamp-N-Storage is on the road, heading to pop up sales in Florida, Georgia, and North Carolina.  Let me know if you happen to get to one of these.  Hopefully, in the future I will be able to travel along to some of these.  For now, I’m spending some quality time in my studio.

I realize I have been really focused on products from the Occasions and Sale-A-Bration catalogs.  They are new and I am having a lot of fun.  I still have a lot to share with you.  But let’s not forget about all of the awesome stuff in the Annual Catalog.  Today’s card shines a spotlight on one of my favorite sets – Pieces and Patterns.  I LOVE the little dinosaur and bear in this set.  I thought the little bear would be great on a baby card, but not your typical baby card.  I decided to go with a non-traditional baby color scheme and used colors from the Coffee Break designer series paper.

Hello baby bear - Center Stage Stamping

I started with an Early Espresso card base and added a panel of Early Espresso that I ran through the Pinewood Planks 3D Textured Embossing Folder. here is a better shot of the texture folder.

Hello baby bear - Center Stage Stamping

Next I punched a 2 1/4″ circle out of thick Whisper White card stock and one out of Coffee Break designer series paper.  Isn’t that chevron pattern so cute! I cut the patterned circle in half and glued it to the bottom of the white circle and added a thin strip of Soft Sky across the circle.  I colored the little bear with the Crumb Cake Stampin’ Blends.  I love the shading detail you can achieve with these markers.  It is SO easy.  Finished off with the sentiment, a Linen Thread bow and a tiny Pearl that I colored with the Lighter Pool Party Stampin’ Blend, since there isn’t a Soft Sky Blend at this time. (Fingers crossed for next year’s catalog!  What a sweet greeting for a new little someone.

Thanks for stopping by – Happy Stamping!

-Mary

Share with your friends: