Wedding

stamp review crew: so sincere

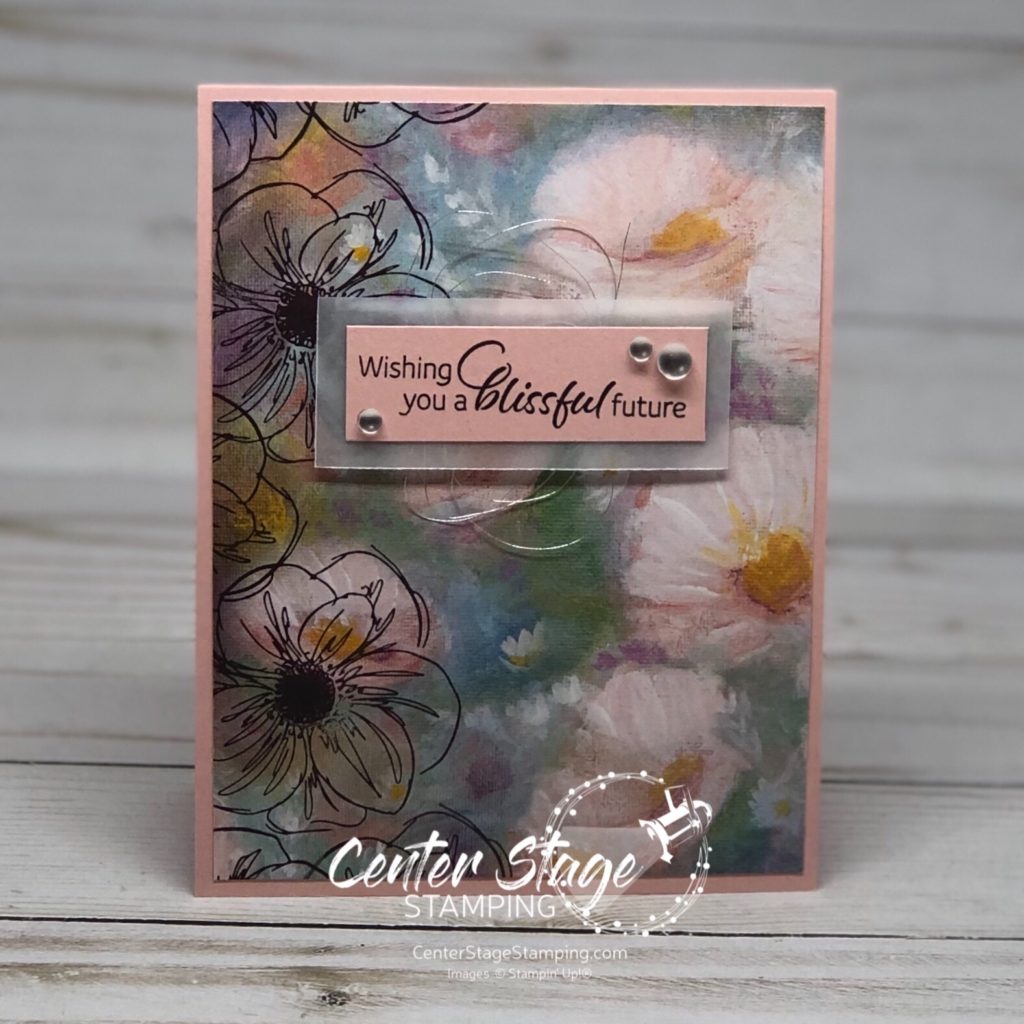
Hello my crafty friends! Welcome to the first Stamp Review Crew blog hop of the new year!  If you are not familiar with The Stamp Review Crew, we are a group of international Stampin’ Up! Demonstrators who hop together on the first and third Monday of the month to bring you some great inspiration. Each blog hop features a different stamp set. You can find all of the blog hops archived on the Stamp Review Crew blog. We are going to kick off 2021 by shining a spotlight on the awesome sentiment set So Sincere.

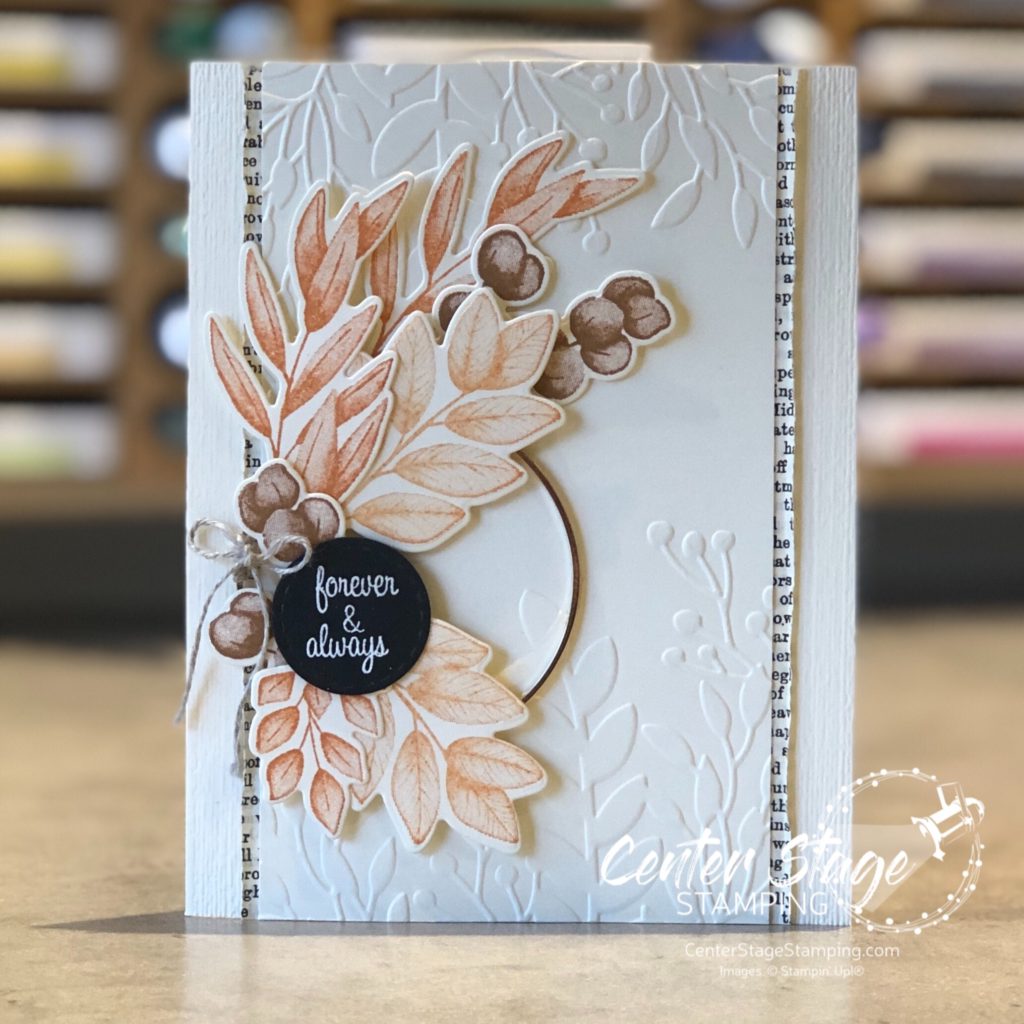
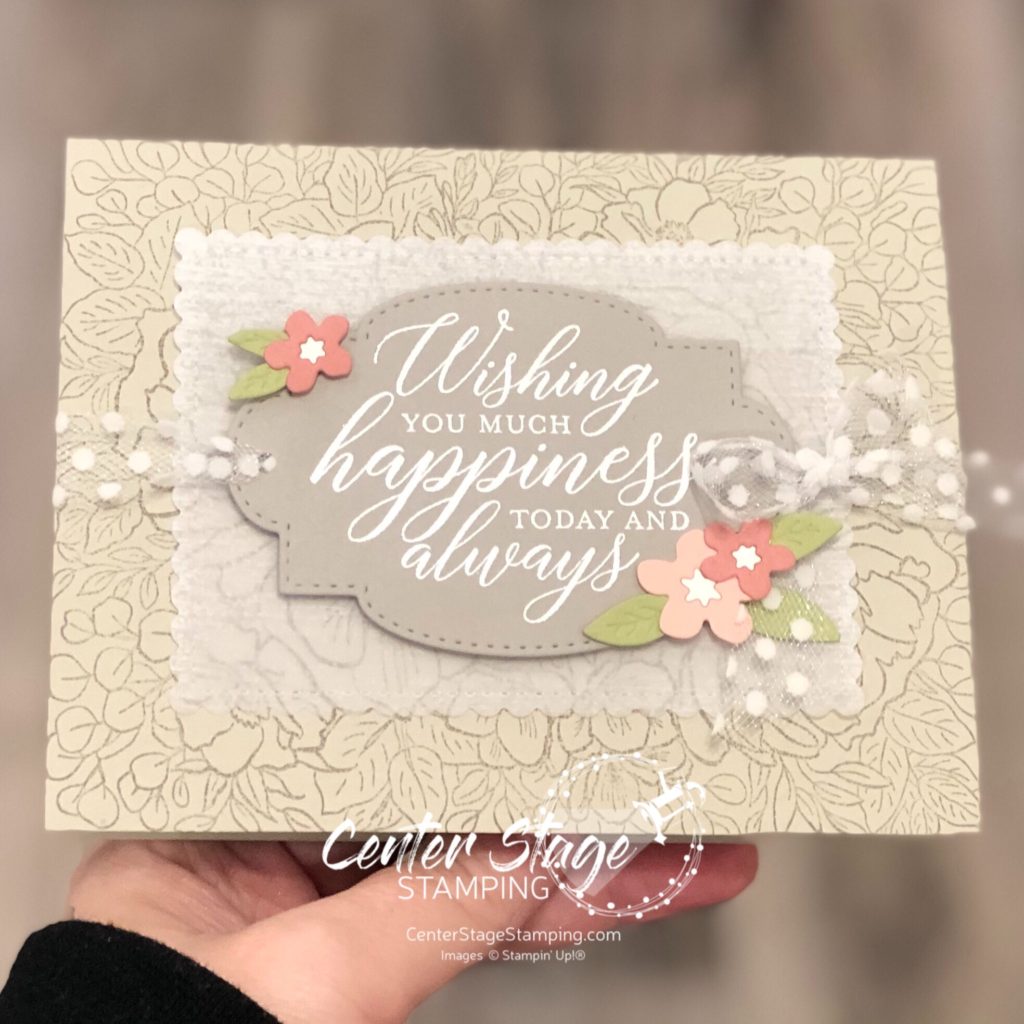
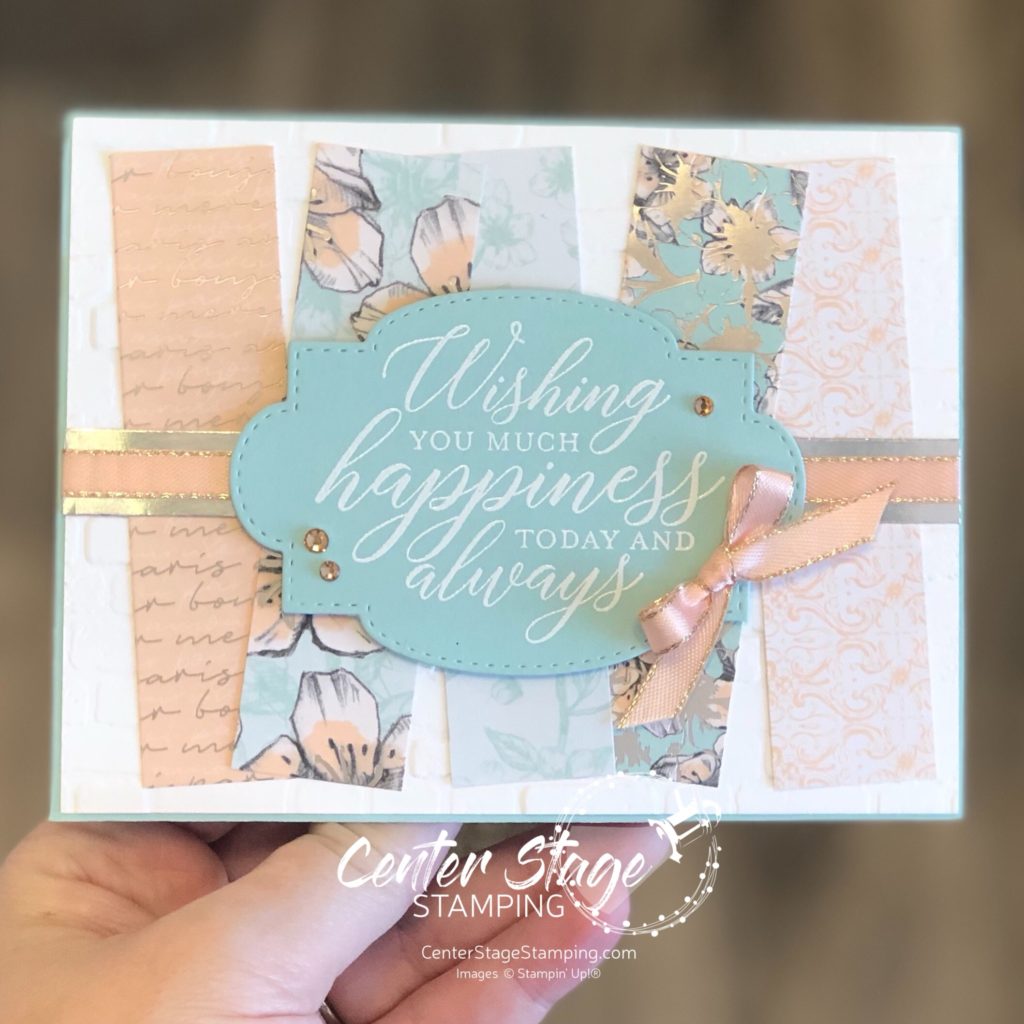
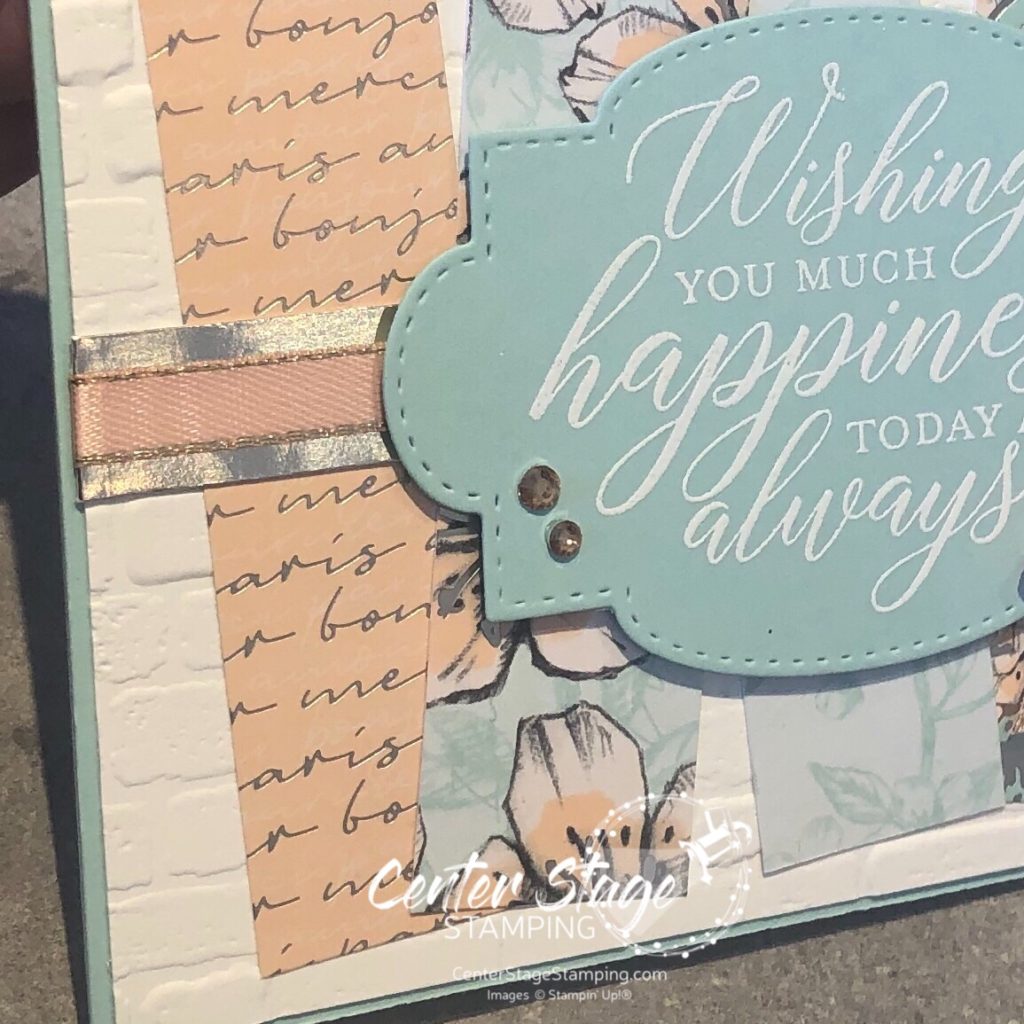
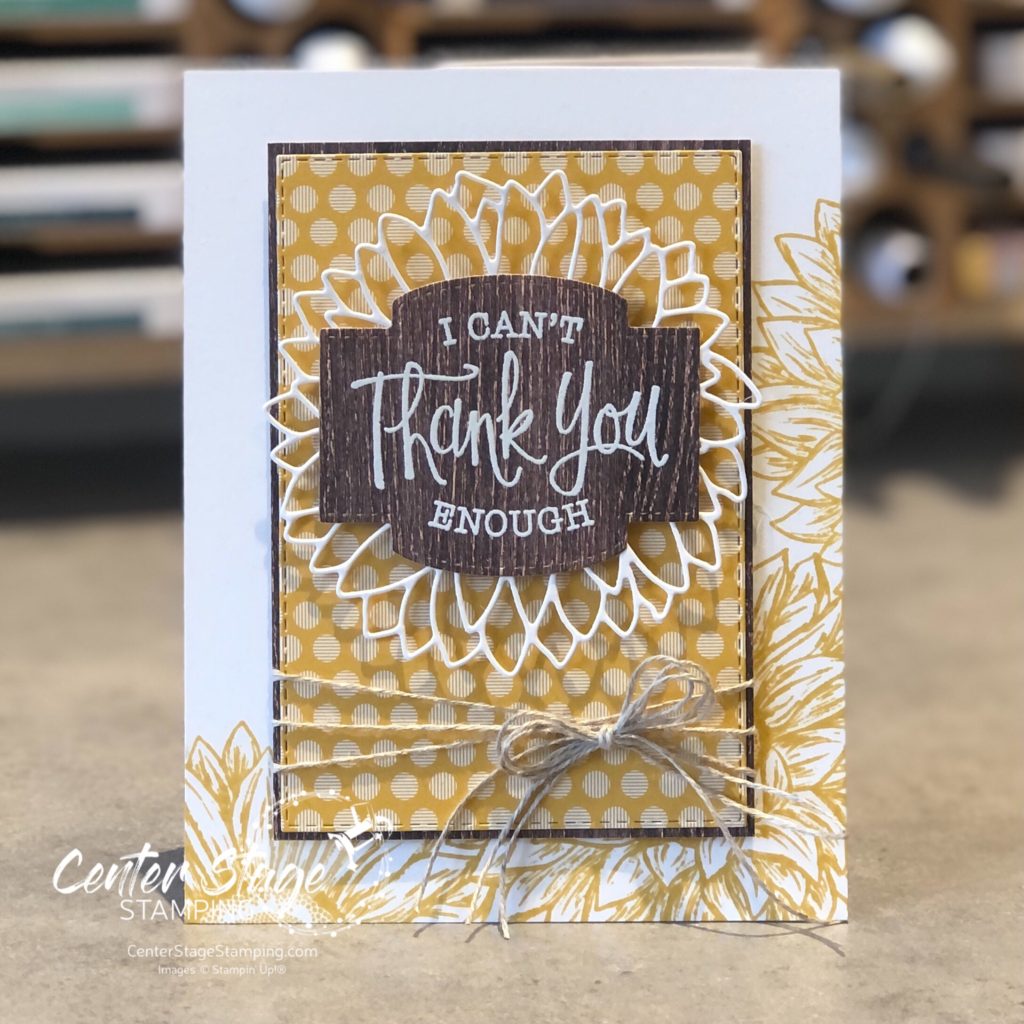
For both of my cards, I embossed the sentiments on some designer series paper. I like the bit of design behind the words. It gives some depth to the image. My first card also uses the Celebrate Sunflowers set and dies, In Good Taste and 20-21 In Color DSP Stack, and the In Color Bumblebee ink.

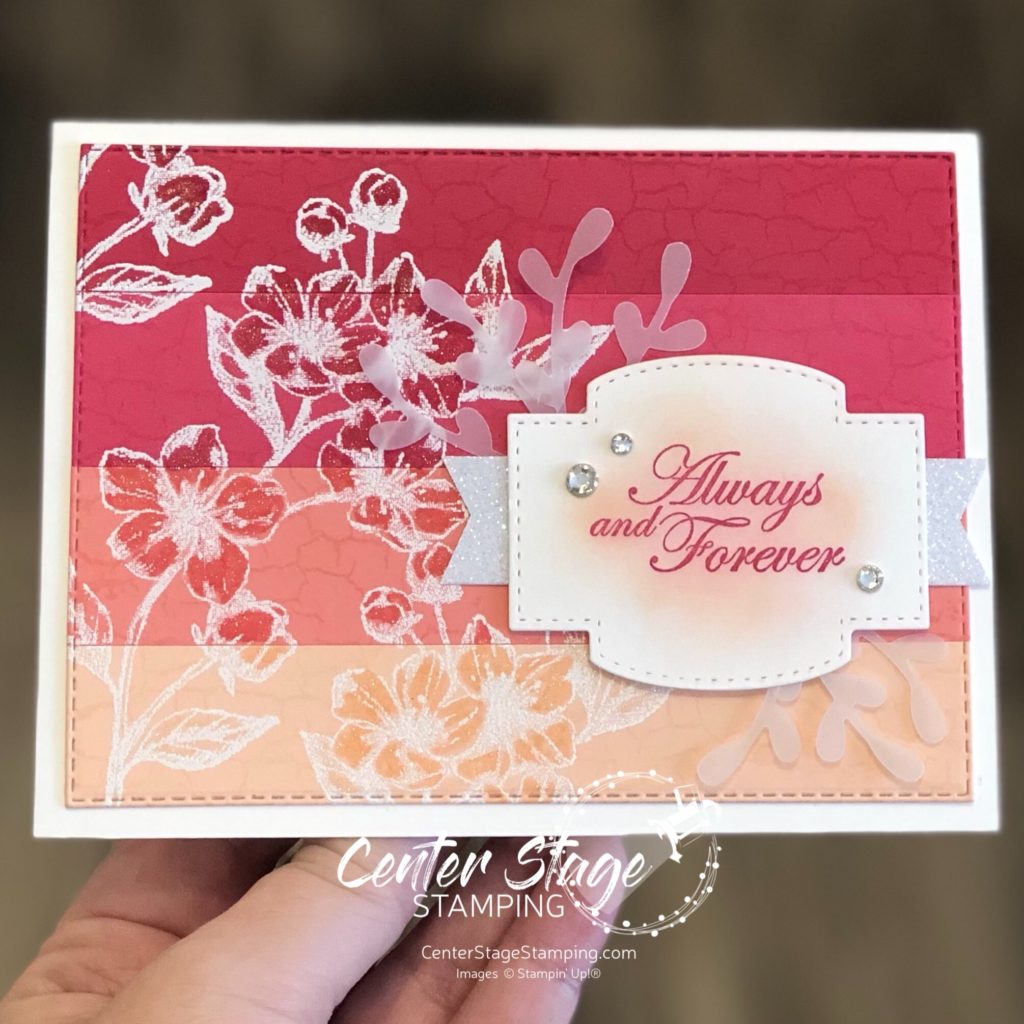
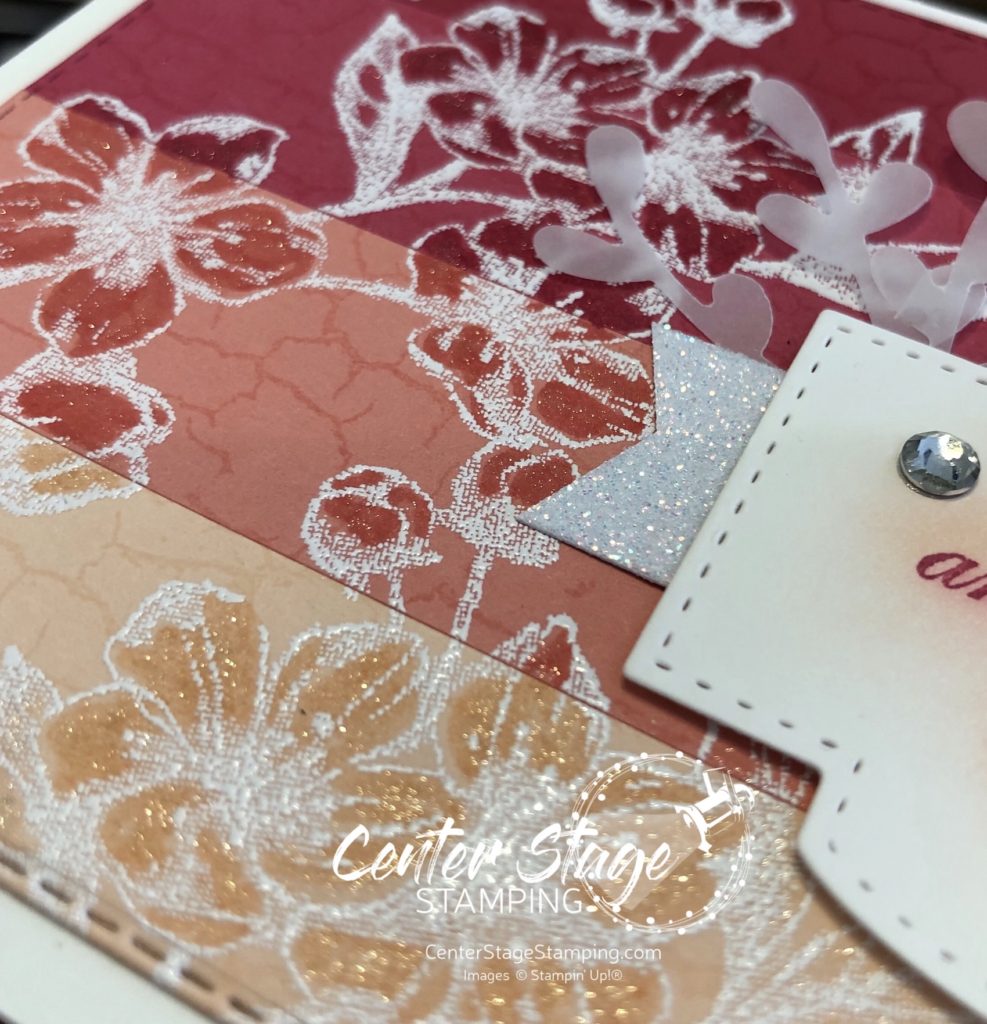
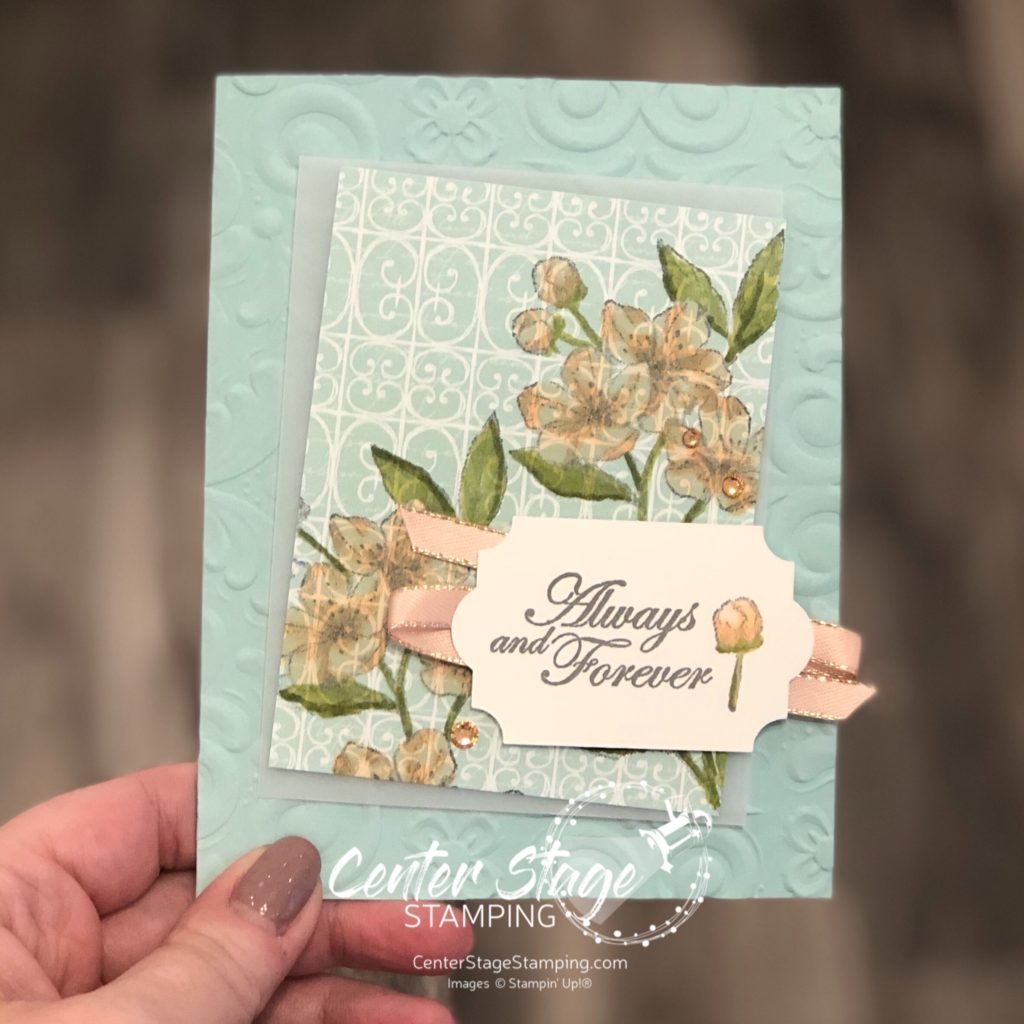
For my second card I added a beautiful peony that I die cut out of water color paper and colored with Petal Pink, Flirty Flamingo and Mango Melody, Granny Apple Green and Garden Green ink refills.

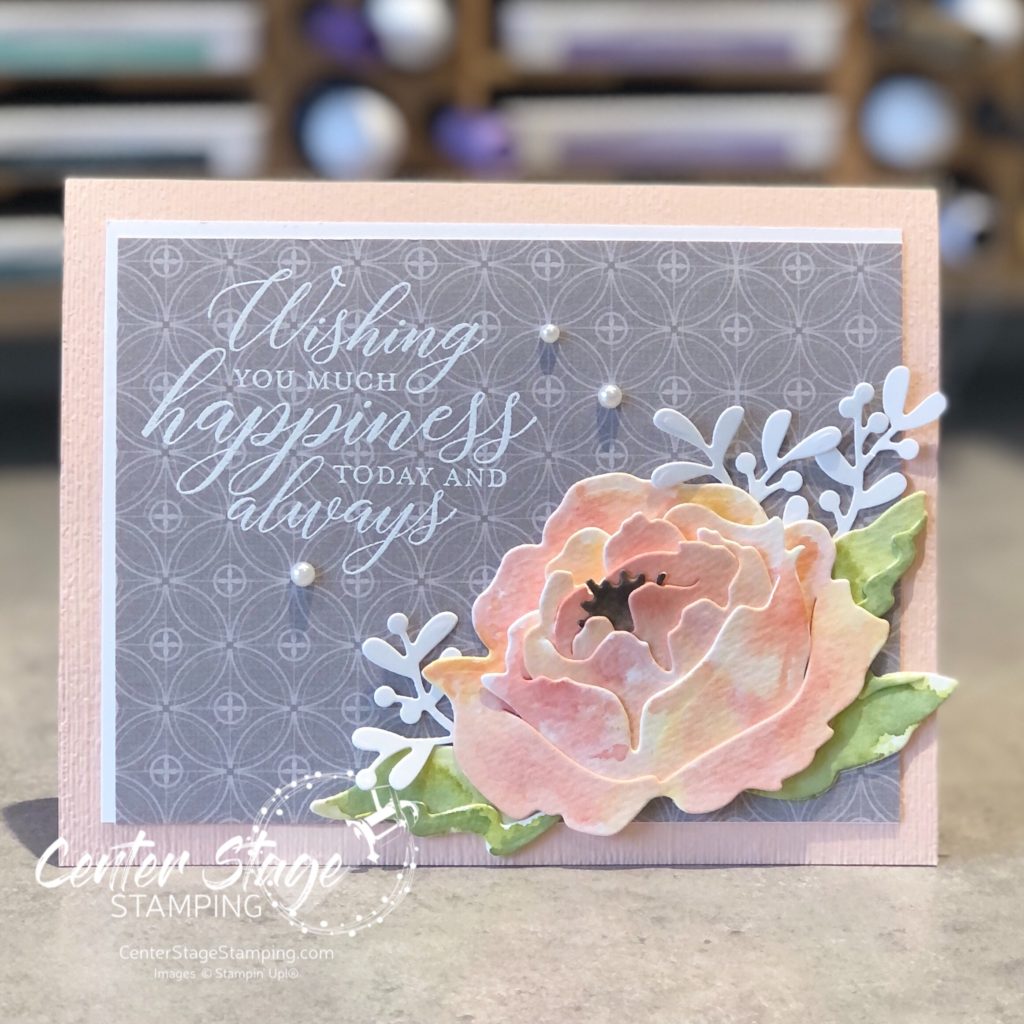
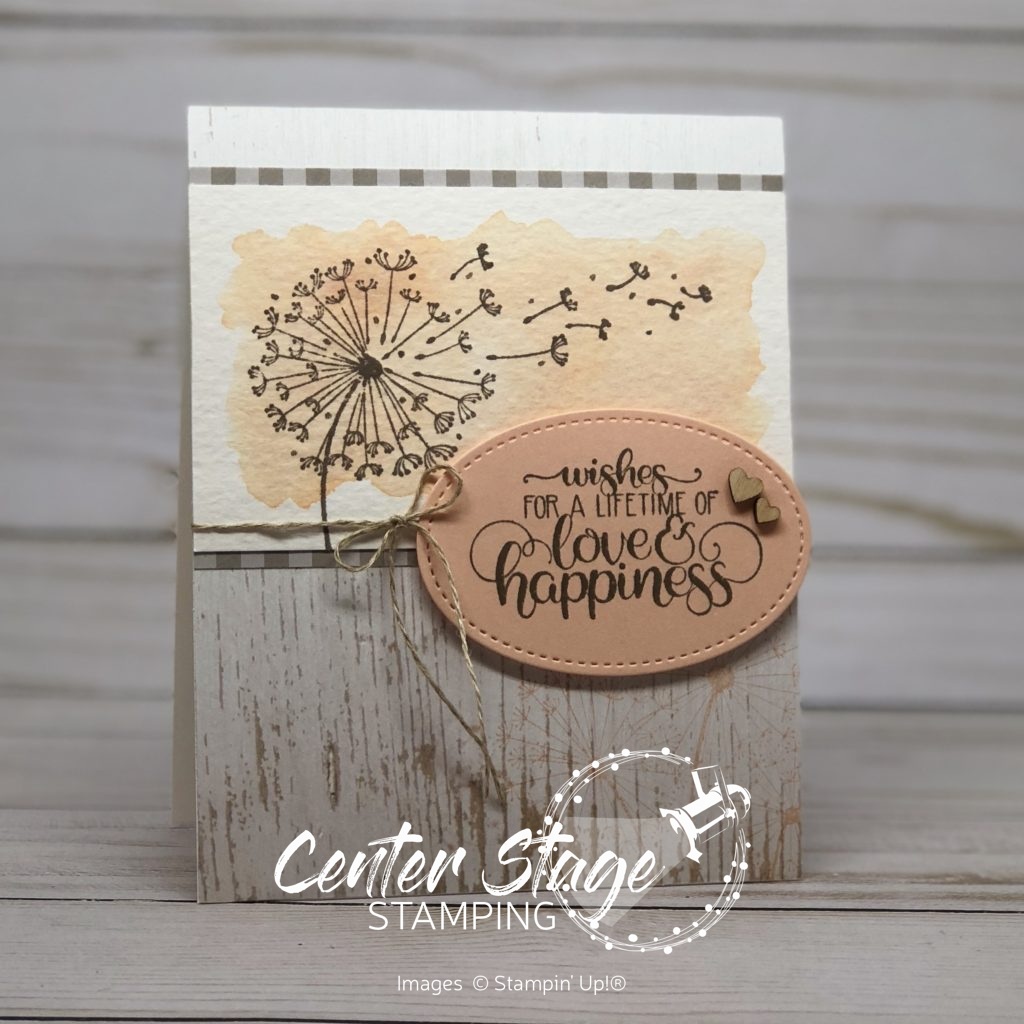
This particular sentiment works for a variety of occasions. This card would be great for a birthday or a wedding. The So Sincere set is full of some great sentiments in wonderful fonts and opens the door to lots of design possibilities.

I hope you will work your way through the full Stamp Review Crew blog hop for more great inspiration! From here you can click on the NEXT button below to head on over to talented Cindy or click on the PREVIOUS button to go back to creative Betty

Thanks for stopping by! Here’s to a new year full of creativity. I hope you will join me again to shine a spotlight on creativity!

Share with your friends:

pcc #398

Hello, crafty friends! I’m happy to be back creating with the Paper Craft Crew for this week’s challenge. Today we have a fun horizontal sketch to inspire your creativity.

I was inspired by my daughter for this card.

She is an avid reader… thus the sentiment (from Taylored Expressions Simple Strips background), She loves the out doors…thus the tree (Stampin’ Up! Pine Woods dies) and sunset watercolor, She recently got married…thus the two hearts.

How does this sketch inspire you? Join the fun over at the Paper Craft Crew! Thanks for stopping by. Join me again to shine a spotlight on creativity!

Share with your friends:

forever and always

Hello friends. I have a special card to share with you today. It is the card I made for my daughter and son-in-law’s wedding. Their wedding was at a local winery. Beautiful venue. Wedding colors were Burnt Orange and Peacock Teal. And my baby girl was absolutely gorgeous!

My daughter loves the color orange and she loves to read. I really wanted to incorporate these into the card. I used the Forever Fern stamp set on their wedding invitations, so I decided to use that on the card to tie it together.

Thanks for stopping by and letting me share this special project with you. Join me again to shine a spotlight on creativity!

Share with your friends:

stamp review crew: forever blossoms

Hello crafty friends and welcome to another Stamp Review Crew blog hop! Taking the stage today is the beautiful Forever Blossoms form the Mini Catalog. I believe the large sprig is a cherry blossom. (I’m guessing based on the fact that Cherry Blossoms is the coordinating die set.)

I started with a color scheme of various shades of pink. I used Petal Pink, Flirty Flamingo, Melon Mambo, and Lovely Lipstick. For the first card, I started with a water color wash for the back ground. I added a little Daffodil Delight and Calypso Coral for more color depth.

Once the water color was completely dry, I stamped the flower sprig in black ink and added some white accents with a white color pencil. Then I colored the petal with some Wink of Stella for a delicate shimmer. The card base is stamped with All Wired Up in Flirty Flamingo.

For the second card, I glued down strips of card stock for an ombre look. I heat embossed the flowers in white and colored them in with the same color Stampin’ Write markers to make them stand out. This panel was then stamped with the Crackle background using VersaMark ink for a subtle background. I added Wink of Stella to the flowers for sparkle and cut the panel with a stitched rectangle die. The sentiment is on one of the Stitched So Sweetly dies with a little glimmer paper for more sparkle. Finished off with some vellum sprigs and a few rhinestones.

I love the delicate sparkle on these cards. It’s really giving me some springtime vibes. Sigh. That’s a long way off. Let’s go see what the rest of the design team has in store for this beautiful set! You can head over to Ann by clicking on the NEXT button below or go back to Lauren by clicking the PREVIOUS button.

Thanks for stopping by! Join me again to shine a spotlight on creativity!

Share with your friends:

happiness today

Starting off a crazy week for me. It is dress rehearsal/ performance week for the Hutch Middle School musical that I am co-directing: James and the Giant Peach, Jr. My eyes are on next Monday, when it is all over and I crash. Hoping to get more time in my studio next week.

In the mean time here is a card I created to send to another Stampin’ Up! Demonstrator. Last November at Stampin’ Up! On Stage in Las Vegas, one round of the Prize Patrol recipients were given two stamp sets witht he stipulation that they must give one of the sets away to another Demonstrator. One very sweet demo chose to share her prize with me, and gave me the beautiful Breathtaking Bouquet background stamp. I said I would make her a card with it in return. Here is the card I made:

The card base is Sahara Sand with a layer of vellum that is cut with one of the scalloped rectangles in the Stitched So Sweetly die set and embossed with the Subtle emboss folder. The sentiment, from So Sentimental, is heat embossed in white on Gray Granite card stock. The flowers and leaves are from the Cherry Blossom dies in Blushing Bride, Rococo Rose and Pear Pizzazz. The Polka Dot ribbon is a great addition to accent the softness of the card. This sentiment is so versatile and would work for numerous occasions.

Thanks for stopping by! Join me again to shine a spotlight on creativity!

Share with your friends:

wishing you happiness

Hello friends! I have had a nice stretch in my craft studio and boy has it felt good. Sometimes the ideas are really flowing and other times I just don’t know what to make. When that happens, I like to check out some challenge blogs for inspiration. This week I found a fun sketch at TGIF Challenges and decided to have a go with it.

This sketch is a great way to use up some DSP scraps. I really liked the layout, so I stayed pretty true to it. I just extended the horizontal piece across the entire card.

I love the softness of the Parisian Blossoms Specialty Designer Series Paper – Pool Party, Petal Pink with a touch of Champagne Foil. This sentiment from So Sentimental works for a variety of occasions. Of course I had to add some Champagne Rhinestones! It is hard to see in the photo, but the white layer is embossed with the Brick and Mortar 3D embossing folder. Here is a closer look:

Go check out the fun at TGIF Challenges and play along! The TGIF design team is ridiculously talented. You are sure to be inspired.

Thanks for stopping by! Join me again to shine a spotlight on creativity!

Share with your friends:

forever blossoms

Ready for another sneak peek from the NEW Stampin’ UP! Mini Catalog? Let me introduce you to a few products from one of my favorite suites: Parisian Blossoms. And possibly my favorite product in the entire mini catalog…Champagne Rhinestones!!! I will definitely be stocking up on these!

This card is another of the make&take projects from November’s Stampin’ Up! OnStage event. These projects not only give us a chance to use new products, they also give us a chance to try new techniques. On the last card we stamped on ribbon. This time we stepped up designer series paper! The flowers were stamped in Basic Gray ink and colored with Petal Pink and Old Olive Stampin’ Blends. You can really customize your projects with this technique.

Thanks for stopping by. Join me again to shine a spotlight on creativity!

Share with your friends:

perennial essence

Hello! I thought I’d pop on today to share this super quick card. It is a really simple card that looks great thanks to the GORGEOUS Perennial Essence Designer Series Paper.

DSP’s bring a lot of detail to a project on their own. But, you can alter them to fit your needs by stamping on them or coloring them. For this card, I stamped the outlined flower on the left edge of the DSP in Blackberry Bliss ink.

I kept the sentiment panel simple to let the stunning paper take center stage. (Sentiments panel and card base are Blushing Bride.) I added a layer of vellum behind the sentiment for more depth and finished off with silver metallic thread and some Frosted Epoxy Droplets.

This sentiment is suitable for a variety of occasions: wedding, new job, moving, even graduation.

Thanks for stopping by. I hope you are inspired to try personalizing your own DSP! Join me again to shine a spotlight on creativity!

Share with your friends:

a lifetime of love

My daughter Jessica and her husband Tyler celebrated their first wedding anniversary on July 22.

We spent this past weekend in Fargo, ND moving them into their first house!  I was able to hand deliver the card I made for them.

Lifetime of Love and Happiness - Center Stage Stamping

I thought Dandelion Wishes was perfect for this occasion.  I was able to capture the rustic style that was the wedding decor.  I love the Wood Texture dsp.  I stamped the trio of dandelions in petal Pink on the lower right corner.  I did w water color wash of Petal Pink on a piece of water color paper.  Once it was dry, I stamped the dandelion in Gray Granite Ink.  I layered it with a bit of Gray Granite striped paper from the Neutrals Designer Series Paper stack. The sentiment is stamped in gray granite ink on Petal Pink card stock and cut out with an oval from the Stitched Shaped Framelits.  The Linen Thread and wooden hearts tie everything together.

I hope Jess and Tyler have fun settling into their house.  I’m excited to see what is in store for year two!

-Mary


Share with your friends:

in the stars

My studio remodel is slowly moving forward.  We should be ready to prime the ceiling and walls this week!  Once primed, we can paint and then we can move my desk back in!  I am getting really excited.  I have been thinking about decor for the room.  I am planning a trip to Hobby Lobby this week to get some ideas.  I can’t wait to share photos of the finished room!

I have been able to get some stamping done at my temporary location.  Although it is difficult with a small fraction of the space I’m used to and many more distractions being in the center of family activity, it isn’t all bad.  I am enjoying the company of my daughter and son who are home from college for the summer.  Here is one of the cards I create at my kitchen desk.  I used the new Little Twinkle stamp set and coordinating Twinkle Twinkle designer series paper.

written in the stars - Center Stage Stamping

I started with a piece of watercolor paper and did a simple wash of Petal Pink with my aqua painter and ink refill.  Once that was dry, I stamped the heart constellation in Night of Navy and the small star cluster in Petal Pink.  I layered this onto small strips of the striped pattern paper and then onto the Night of Navy layer, which is adhered onto a thick Whisper White card base. the sentiment is stamped on Petal Pink card stock and cut out.  Finally I added a little Nigh of Navy bakers twine and a few rhinestones.  A fun card that could be used for a variety of occasions.

Thanks for stopping by! Happy Stamping!

-Mary

Share with your friends: