Stampin’ Up!

You Are Simply Amazing

Curtain’s up!  It is opening night for Mulan Jr. at Hutchinson Middle School.  It is always exciting to get to this point. To be honest, after three long months, I am also ready for it to wrap up.  Of course, I go right into rehearsals for the High School spring show. So the whole cycle begins again.  I hope to get some more time in the studio soon.  For now, here is a scrapbook page I made of my amazing middle child, Rachel.  I used one of my favorite shots from her Senior pictures (she graduated in 2016).  This picture just blows me away.  It was a lot of fun designing this page.

Amazing you sb page - Center Stage Stamping

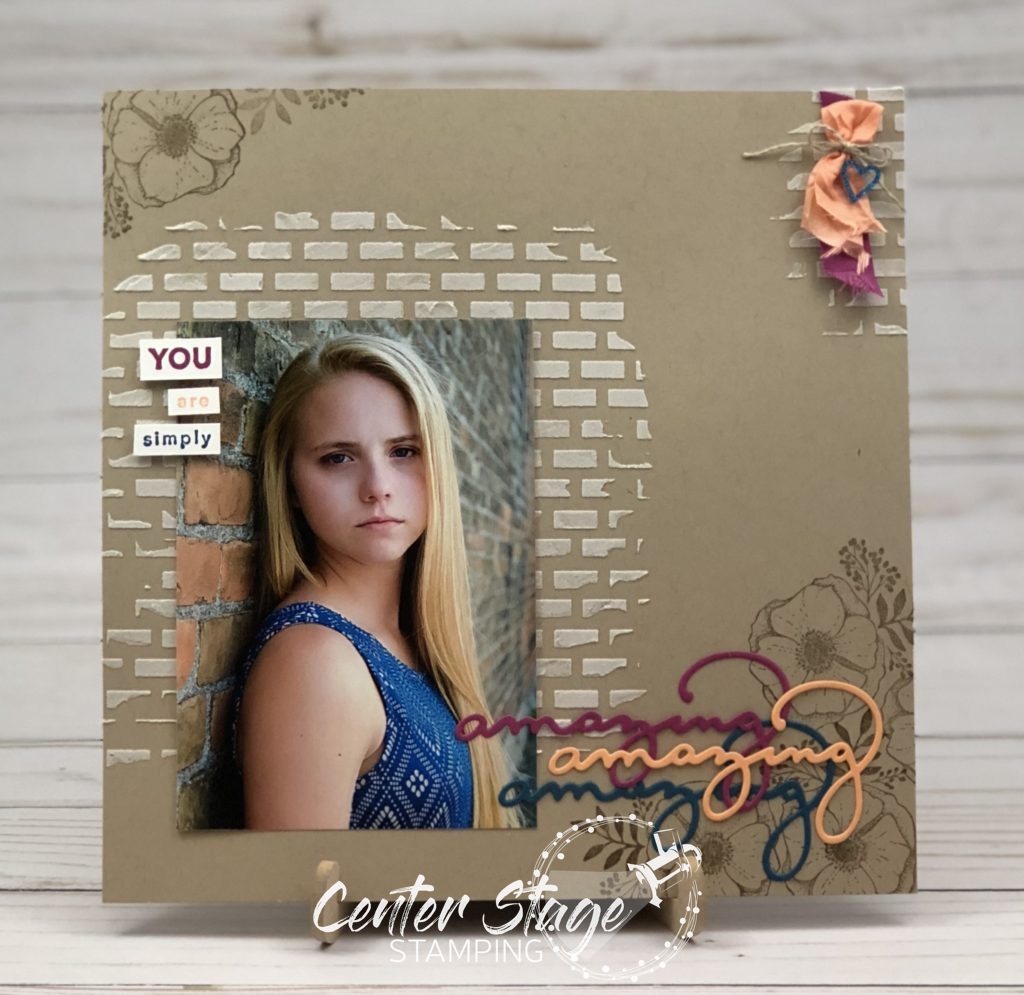
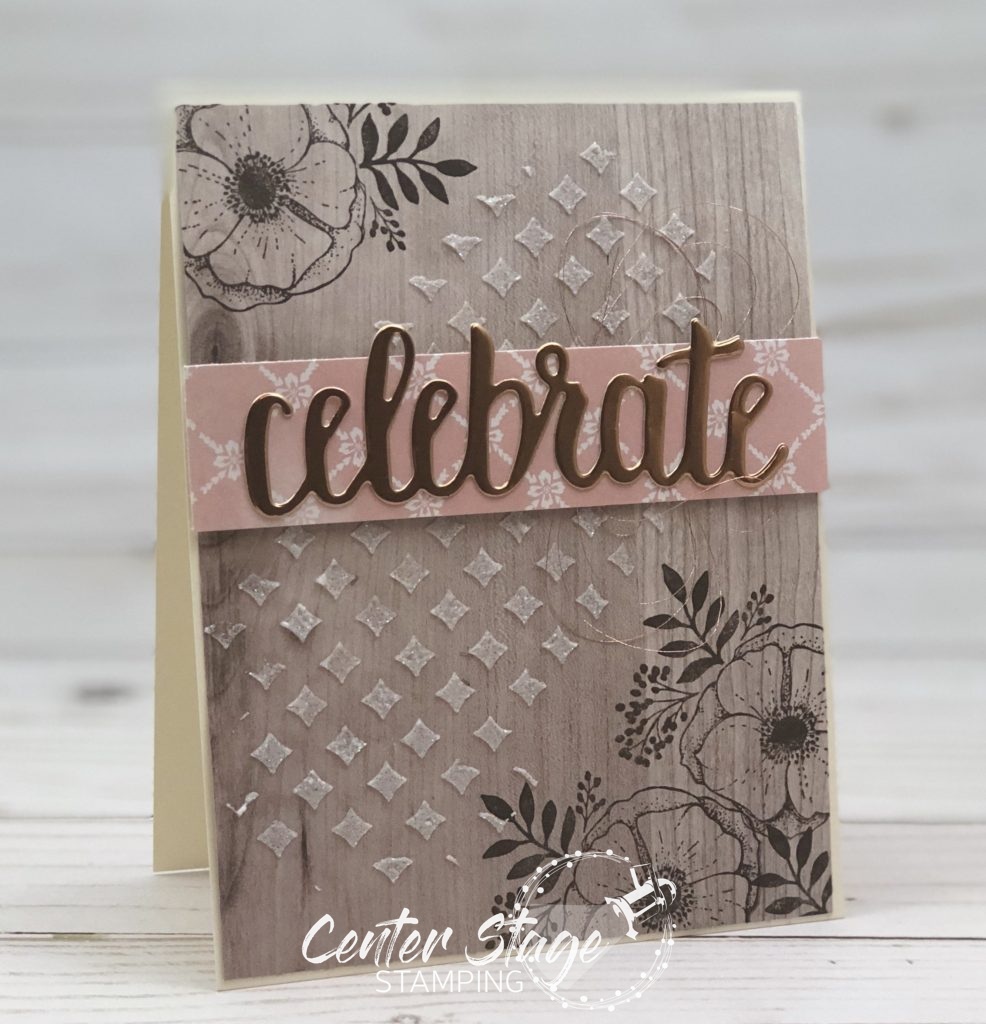
I started with an 8″x8″ piece of Crumb Cake card stock.  I stamped the flowers from the Amazing You Sale-A-Bration stamp set in Soft Suede.  Next, I added the brick background with the decorative mask and embossing past.  I stamped the words “You are Simply” in Berry Burst, Peak a Boo Peach and Dapper Denim and cut them out.  I used the Celebrate You Thinlits to die cut the word “amazing” from those same three colors.  The last detail is the ribbon element at the top.

I really do think she is simply amazing!

Thanks for stopping by – Happy Stamping!

-Mary

Share with your friends:

Copper Celebrate

Well, tonight is the final dress rehearsal for our Middle School production of Mulan Jr.  Followed by a performance for 5th and 6th grades Thursday morning and three public shows Friday through Sunday and it’s a wrap.  Then I move right into auditions for our High School spring play.  Whew.  Thankfully I have some projects finished ahead of time that I can share with you.  Like this one.


Amazing You Stampin' Up! - Center Stage Stamping

Today’s card features some fun products.  The Amazing You stamp set and coordinating Celebrate You Thinlit dies available in the Sale-A-Bration Brochure; Shimmery White Embossing Paste in the Occasions catalog; Copper Metallic Thread, Copper Foil Sheets, Wood Textures and Fresh Florals designer series papers, and the Pattern Party Decorative Mask in the Annual Catalog.  The Embossing Paste adds some great texture to the card. It is very glittery, the photo doesn’t do it justice.  The flower image is stamped in Early Espresso Ink on the Wood Texture dsp.  The hint of Powder Pink dsp is a supports the copper sentiment nicely.

Thanks for stopping by! Happy Stamping!

-Mary

Share with your friends:

Have a Birthday Brew

I had some fun playing along with another challenge at Fab Friday.  This time it is a sketch challenge.  Go check it out and play along!

I was inspired to use the Bubble Over set.  I have been having a lot of fun with this one lately.  I stayed pretty true to the sketch with my card, but decided to expand the focal shape.

Stampin' Up! Bubble Over - Center Stage Stamping


I am in love with the Bubbles and Fizz dsp in the Sale-A-Bration brochure.  These colors are so bright and fun. Started with one of the Tutti-frutti cards also from the Sale-A-Bration brochure. Layered the bottle print strip and the this strips (the thin coral strip is from one of the Tutti-frutti cards, too).  I die cut the bottle out from one of the sheets of dsp and layered it on a Starburst punched from another pattern in the pack.  Added the banner with the sentiment and finished off with some of the enamel dots.

Thanks for stopping by! Happy Stamping!

-Mary


Share with your friends:

My Inky Friends Design Challenge 2

My Inky Friends are back with another design challenge.  This time it is a color challenge based on page 36 in the Annual Catalog.

Lemon Lime Twist is one of my favorite colors, so I love this challenge.  I thought it was great for a birthday greeting.  Here is my card:

SU Birthday Wishes for You - Center Stage Stamping

I used two sets from the new Occasions Catalog.  Birthday Wishes for You and Picture Perfect Birthday.  I lined up the three card stock strips, Then stamped the Happy Birthday in Basic Black.  I used the Lemon Lime Twist, Berry Burst and Soft Sky markers to color in the word Birthday to darken the color so it would stand out more.  Added confetti in the challenge colors at the bottom of the card and the 3 balloons to finish it off. The white card base really lets this color palette take Center Stage on this card.   Come on over to My Inky Friends and play along!

Thanks for stopping by! Happy Stamping!

-Mary

Share with your friends:

Pineapple Treat Box

Monday we had an early school dismissal due to bad weather.  This meant our rehearsal for the Middle School musical was cancelled.  (Sigh) We really can’t afford to lose a rehearsal at this point, so we will make it up on Friday evening.  Yuck.  I really don’t like Friday rehearsals.  But, it is what it is.  The show must go on.

So, how about a hint of summertime for today’s project? – A fun little Pineapple treat box.

Stamping up! Fruit basket - Center Stage Stamping

I used the Sale-A-Bration Tutti-Frutti cards for the box.   I started with the card base.  Since it is already scored , I trimmed 1/4″ of one side. Giving me a 8 1/4″x5 1/2″ base.  Next I scored every 2″ along the 8 1/2″ side.  Turned and scored up 2″ o the 5 1/2″ side.  Next cut the bottom tabs so the box will fold together and trim off the extra 1/4″ piece on the bottom.  Hopefully the photo below helps my explanation.

Assemble the box and pinch the top together.  I cut the green top by hand and glued it inside the top before closing it up.  I punched out notches on each side with a 1/4″ hand held punch and wrapped Linen Thread around to hold the box shut.  The little tag features the Tutti-frutti designer series paper and the Fruit Basket set and matching punches.

SU fruit basket tag - Center Stage Stamping

I just love that tiny little pineapple!  A fun summertime treat in the midst of winter.

Thanks for stopping by! Happy Stamping!

-Mary

Share with your friends:

Birthday Panda

A little Theatre update: This week is the last week of rehearsals for the Middle School musical – Disney’s Mulan Jr. – that I am co-directing.  The following week is show time.  That means the next 2 weeks are going to be CRAZY!  Making sure every last details comes together.  This show will end on Feb. 4 and on Feb. 5 I have auditions for the High School spring play that I direct. Plus, I am getting things ready for the summer children’s theatre workshop that I run.  Trying to find creative time in the studio will be a challenge this week.

I have one last (for now) Party Panda project to share with you.  This set has been SO much fun to work with.  (I have been creating some fun stuff with other sets as well, I promise.)

Birthday Panda - Center Stage Stamping

The card base is the Sale-A-Bration Tutti-Frutti cards and envelopes.  Our little panda friend stands out against the text background.  His hat was colored with Stampin’ Markers and the tiny little bow is Pool Party bakers twine. His balloon was colored with the new Blends markers.  Made it a breeze to do the shading.  A fun birthday greeting for friends of any age.

Thanks for stopping by! Happy Stamping!

-Mary

Share with your friends:

Panda on Ice

WooHoo!  It’s actually above freezing!  What a joy to go out and the air doesn’t hurt my face.  I know it won’t last.  We still have at least 2 months of winter ahead.  You would think I would be used to it, having lived in MN my entire life (except for a brief stint in ND, but we don’t talk about that).  Growing up in Northern MN, naturally Hockey was a big part of winter.  (Although, I personally come from a Basketball family.)  When I saw this card that Diana Gibbs made, I knew I had to make one of my own.

Panda Hockey - Center Stage Stamping

Yes, I used Party Pandas again.  I just can’t seem to stop.  The greeting is from Perennial Birthday and Labeler Alphabet. Can you guess where the hockey stick, puck and helmet came from?  They are in the Bottles and Bubbles Framelits – the straw, bottle cap and one of the labels!

Sorry, I forgot to get the bottle cap in the pic.   The hockey stick is cut from the Wood Textures dsp, and a thin strip of black washi tape wrapped around the stick helps the look. I cut off the top of the label to make the helmet.  The green helmet is a nod to my high school team – the Roseau Rams.  What a fun birthday greeting for a hockey fan.

Thanks for stopping by! Happy Stamping!

-Mary

Share with your friends:

Bubble Over with Happiness

I’m back with another Bubble Over card.  This set and paper are just so much fun to create with!  The paper has so many fun patterns in it.

I really like how the Basic Gray card base lets the colors pop.  I die cut the bottles from one of the sheets of Designer Series Paper, easy peasy.  I altered the label on the light green bottle by punching out circles form other bottles on the sheet to create the label I wanted.  The sentiment is actually in 2 long lines, so I did a bit of masking to make it fit the space.  It is embossed in white to help it stand out.  A die cut bottle cap and some Clear Epoxy drops add the finishing details.

Thanks for stopping by! Happy Stamping!

-Mary

Share with your friends:

Bubble Up!

Remember the soda Bubble Up?  Kind of a Sprite, 7Up, lemon-lime flavor.  This was one of my favorites when I was growing up.

Today’s card reminded me of this tasty beverage.  Must have been the name of the set and the green bottle! (Lemon Lime Twist – my favorite!)

I love the new Bubble Over set and the Bottles and Bubbles Framelits in the 2018 Occasions Catalog.  They pair great with the Bubbles and Fizz designer series paper that is one of the exclusive Sale-A-Bration items.  Bright, fun colors and patterns make for a fun project.  A fun detail is the Glitter and Clear Epoxy Shapes – Tiny little dots or tear drops.

Sparkly little bubbles rising from the bottle – how fun is that? I love surprising little details like that.

Thanks for stopping by! Happy Stamping!

-Mary

Share with your friends:

Beautiful Wreath

We are back in a cold snap, so how about another little hint of spring?  Today’s card uses the Beautiful Peacock Sale-A-Bration set in a different way. I used the sweet bird previously on this card. For today’s card I decided to use one of the “tail” stamps to create a delicate wreath.

SU beautiful Friend - Center Stage Stamping

I stamped the leaves in Lemon Lime Twist.  I think the Petal Burst Embossing Folder nicely compliments the wreath.  Add a few Berry Burst flowers with tiny pearls, a Linen Thread bow and a tiny bit of doily on the sentiment to finish it off.  I decided to make another one with this same idea, but changed it up just a bit.

SU Beautiful Peacock wreath - Center Stage Stamping

This time I put the greeting on a banner across the center of the wreath and wrapped the linen thread around the bottom.  I think I like this one better.  What do you think?

Thanks for stopping by! Happy Stamping!

-Mary

Share with your friends: