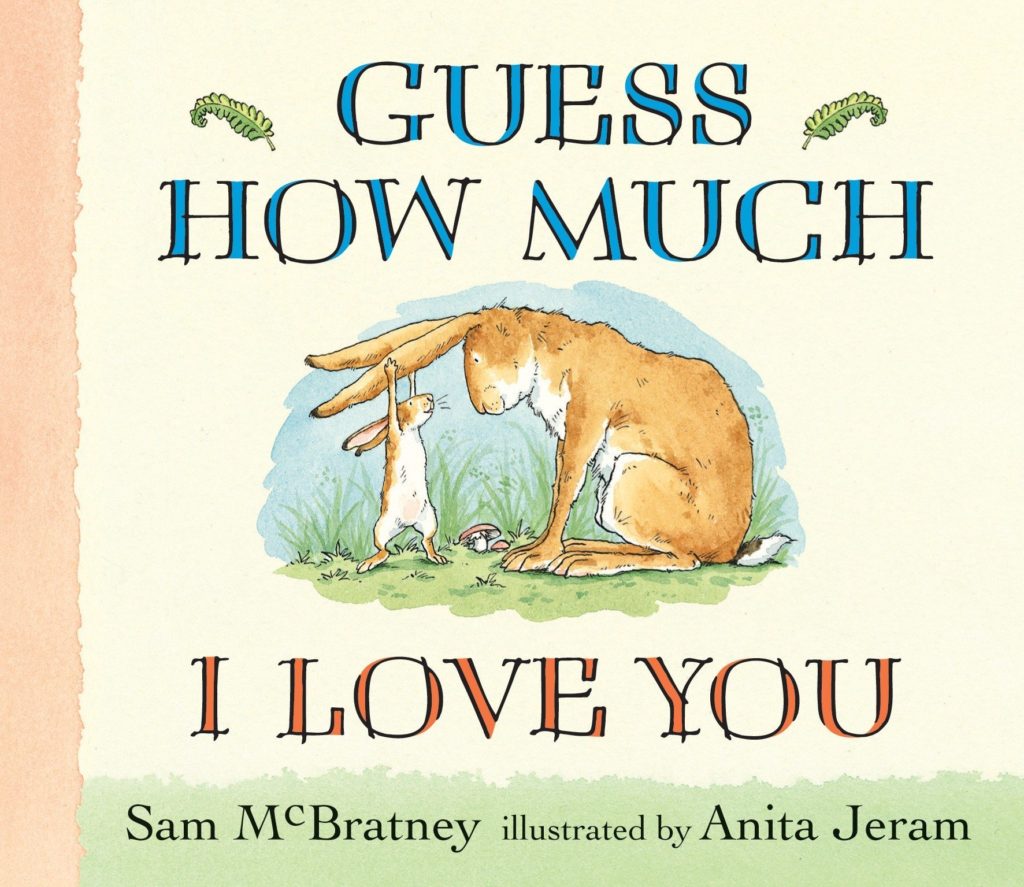
When my kids were little, one of my favorite books to read to them was Guess How Much I Love You by Sam McBratney, illustrated by Anita Jeram.
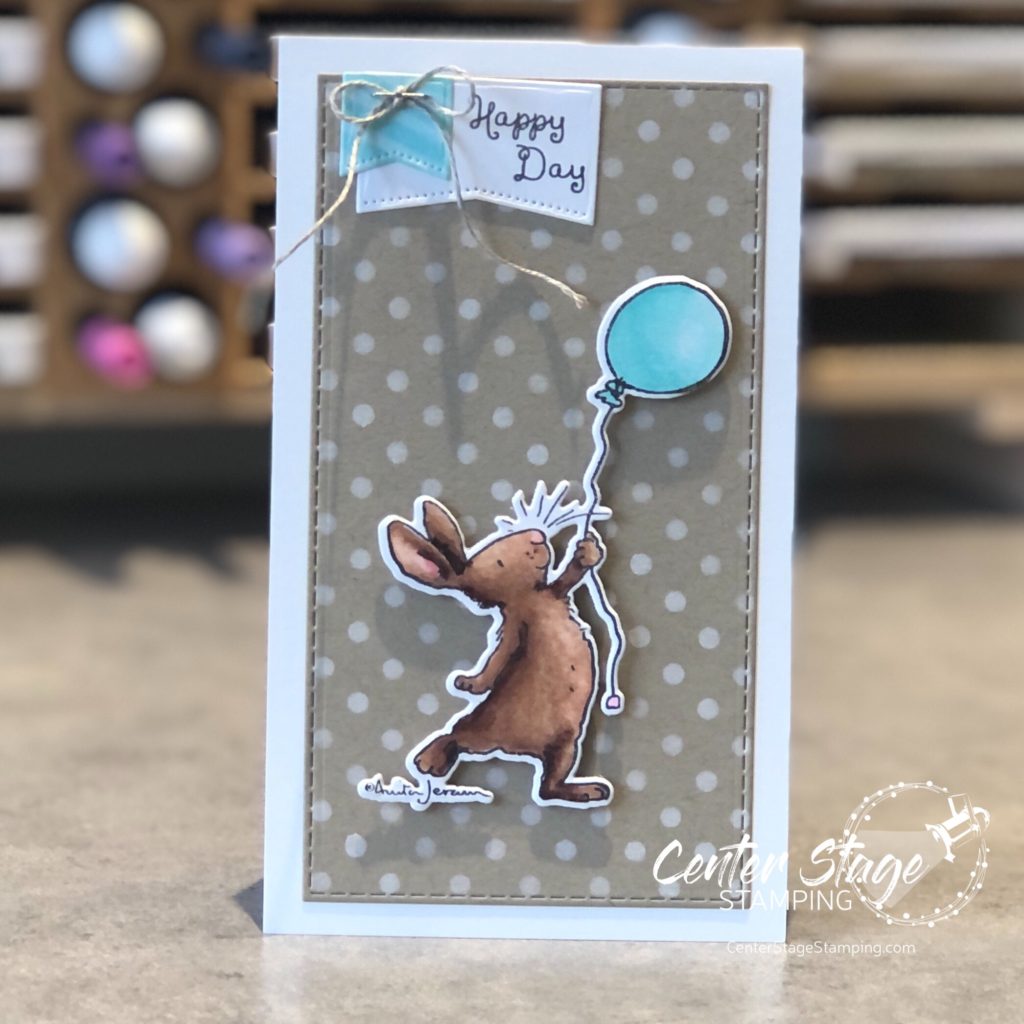
I just love those adorable nut brown hares. I recently found out that Colorado Craft Company has a line of stamps designed by the one and only, Anita Jeram! I ordered the Birthday Wishing set and now I can have some adorable bunnies on my own creations!
This little guy is so much fun to color. I used Copic markers here, and I can’t wait to try water color and colored pencils.
Thanks for stopping by. Join me again to shine a spotlight on creativity! And to my kids, and my granddaughter – I love you to the moon…and back!
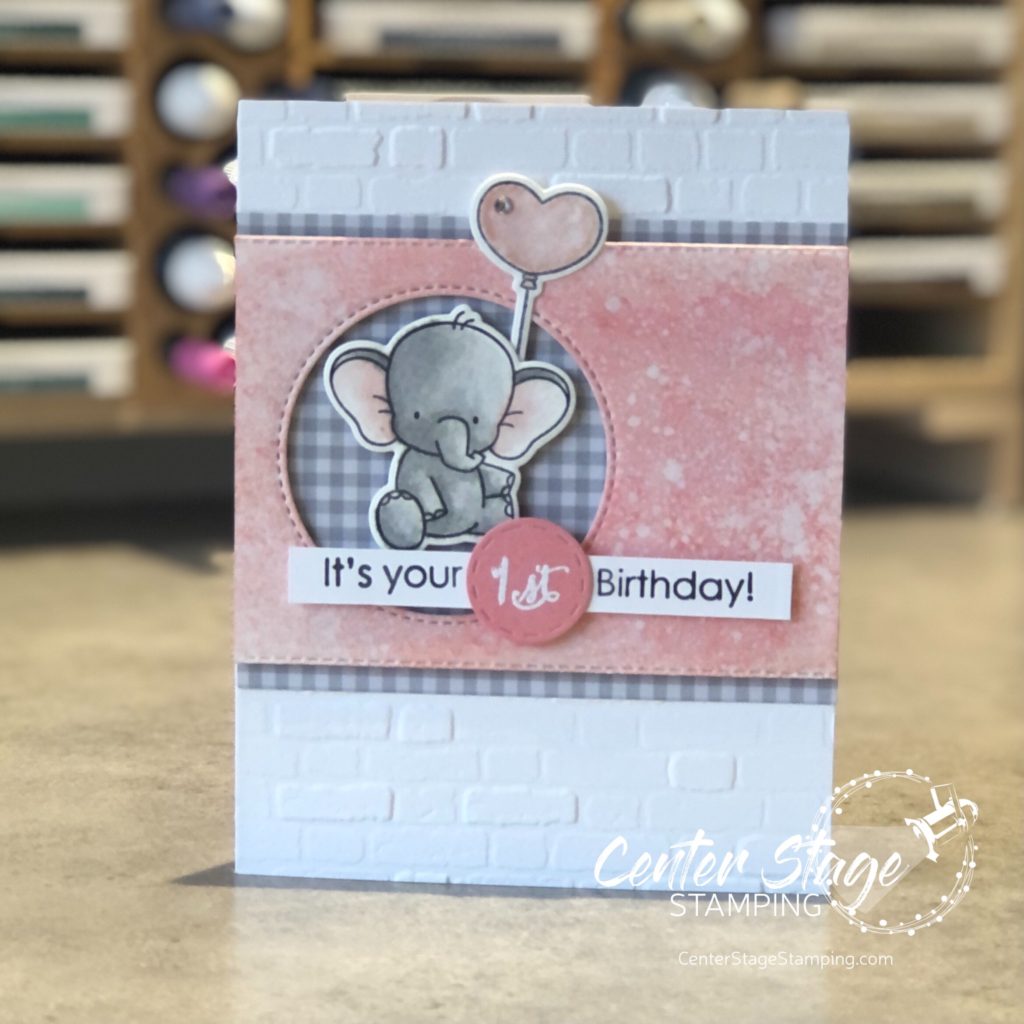
This is by far one of my most loved cards to create – a card to celebrate my granddaughter’s first birthday! My daughter wanted elephants and florals for her party. I created the invitations with that theme. I shared that last week. I decided those adorable elephants would be perfect for her birthday card as well.
The pink panel was created by smooshing colors on a piece of watercolor paper. I also watercolored the little elephant and balloon.
It has been such a joy to watch my granddaughter grow over the past twelve months. From those first sweet snuggles holding a new born to the smiles and babbles to waving HI to grandma over a Facetime call. Melt my heart. I look forward to each new moment with this little sweetheart. Miss Amelia Mae, you fill my heart with joy.
Thanks for stopping by. Join me again to shine a spotlight on creativity!
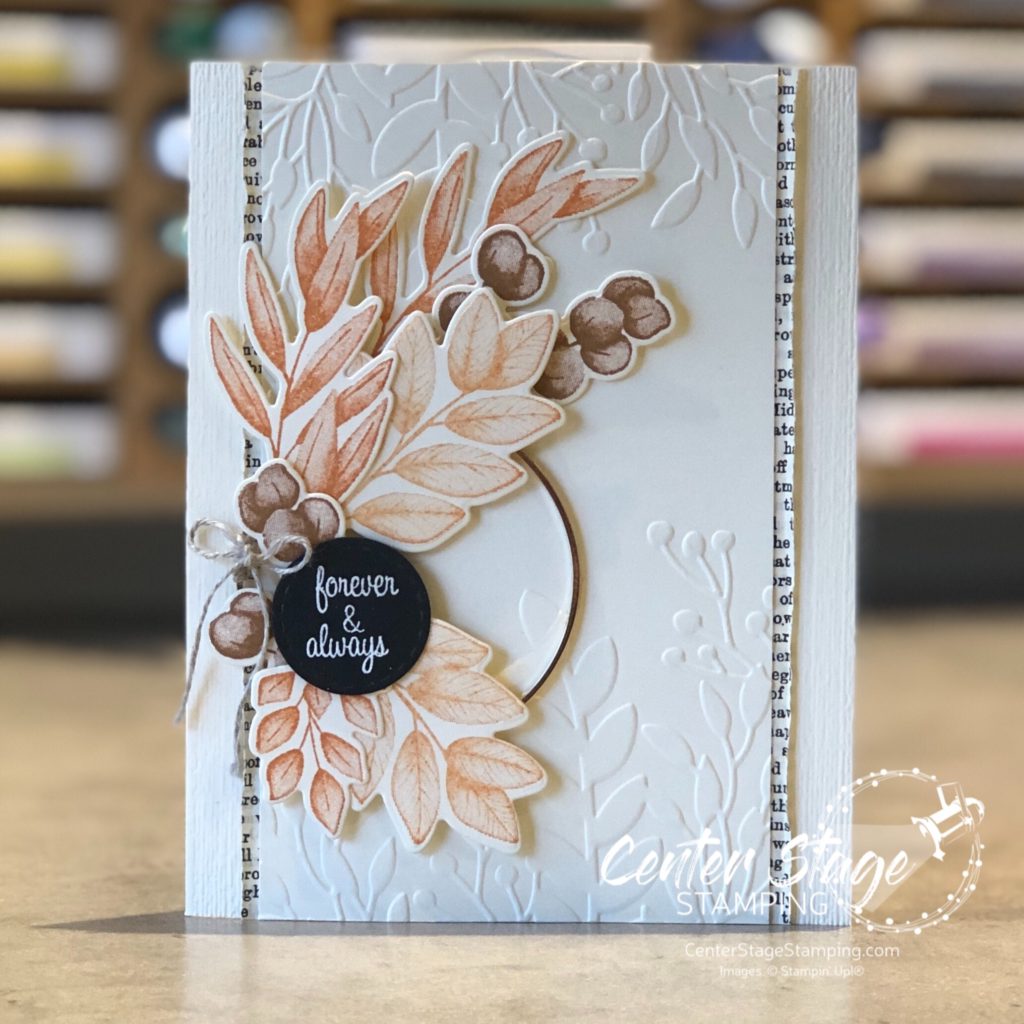
Hello friends. I have a special card to share with you today. It is the card I made for my daughter and son-in-law’s wedding. Their wedding was at a local winery. Beautiful venue. Wedding colors were Burnt Orange and Peacock Teal. And my baby girl was absolutely gorgeous!
My daughter loves the color orange and she loves to read. I really wanted to incorporate these into the card. I used the Forever Fern stamp set on their wedding invitations, so I decided to use that on the card to tie it together.
Thanks for stopping by and letting me share this special project with you. Join me again to shine a spotlight on creativity!
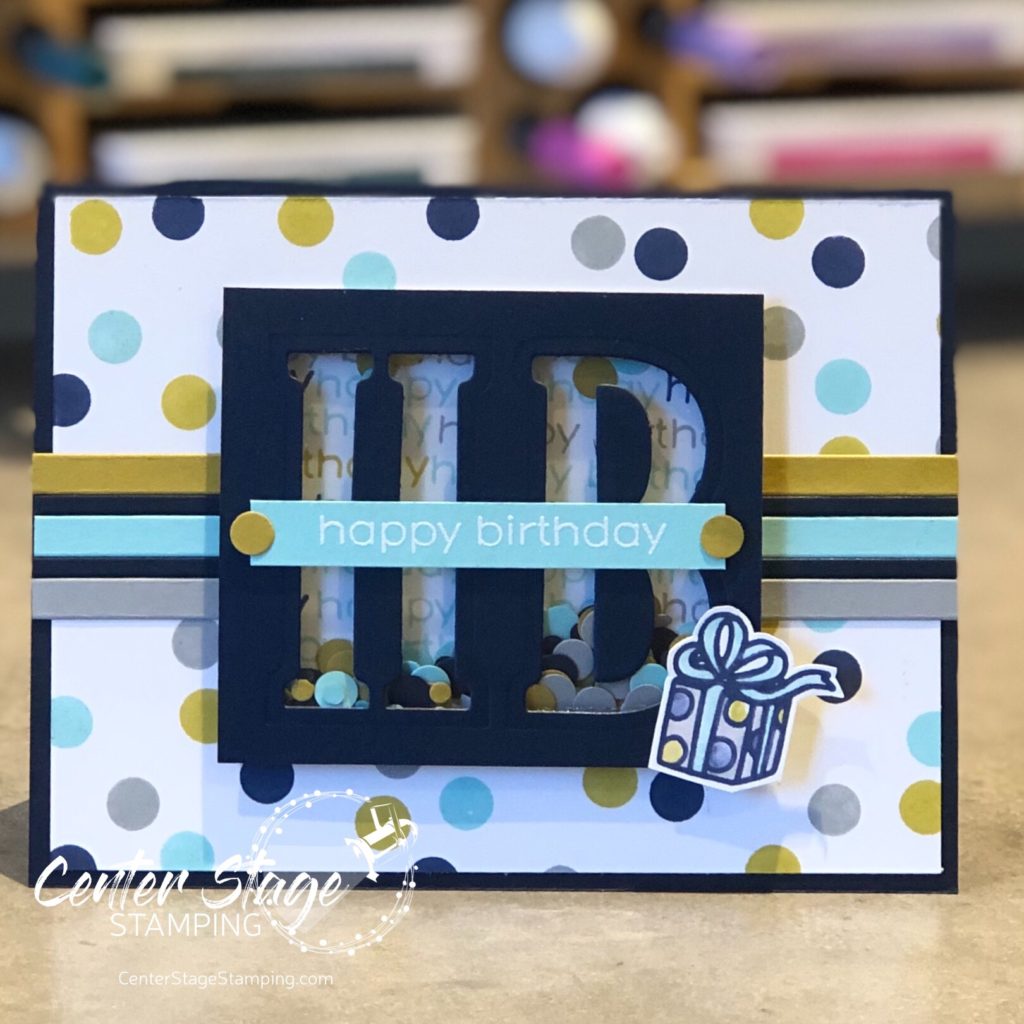
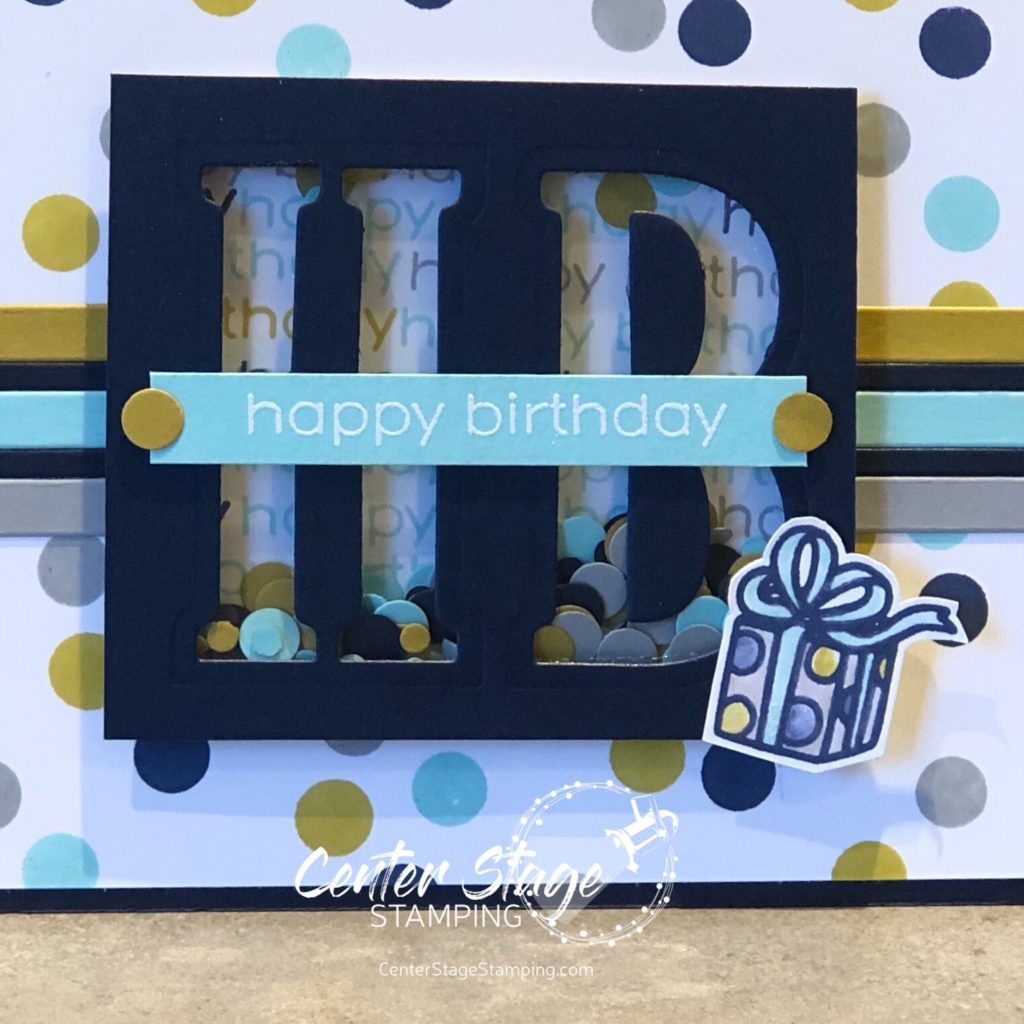
Hello all! This is a crazy month as we prepare for our daughter’s wedding on Oct 2! Plus, we just finished the annual Stamp-n-Storage Warehouse Sale. Add in other life happenings and I’m not sure where the month went. I wanted to share the card I made for my husband Brett’s birthday earlier this month.
I love polka dots. The Scattered Dots Turnabout stamp from Concord & 9th is quickly becoming a favorite in my studio. As are the new C&9 inks! I absolutely LOVE the colors. For this card I used Midnight, Aqua Sky, Stardust and Dove. The present is from the collaborative set Happy Birthday by The Stamping Village.
It’s been awhile sine I have done a shaker card, so I thought this would be a good time to tackle one. I used 1/8″ and 1/4″ hand held circle punches to created the confetti for inside the shaker.
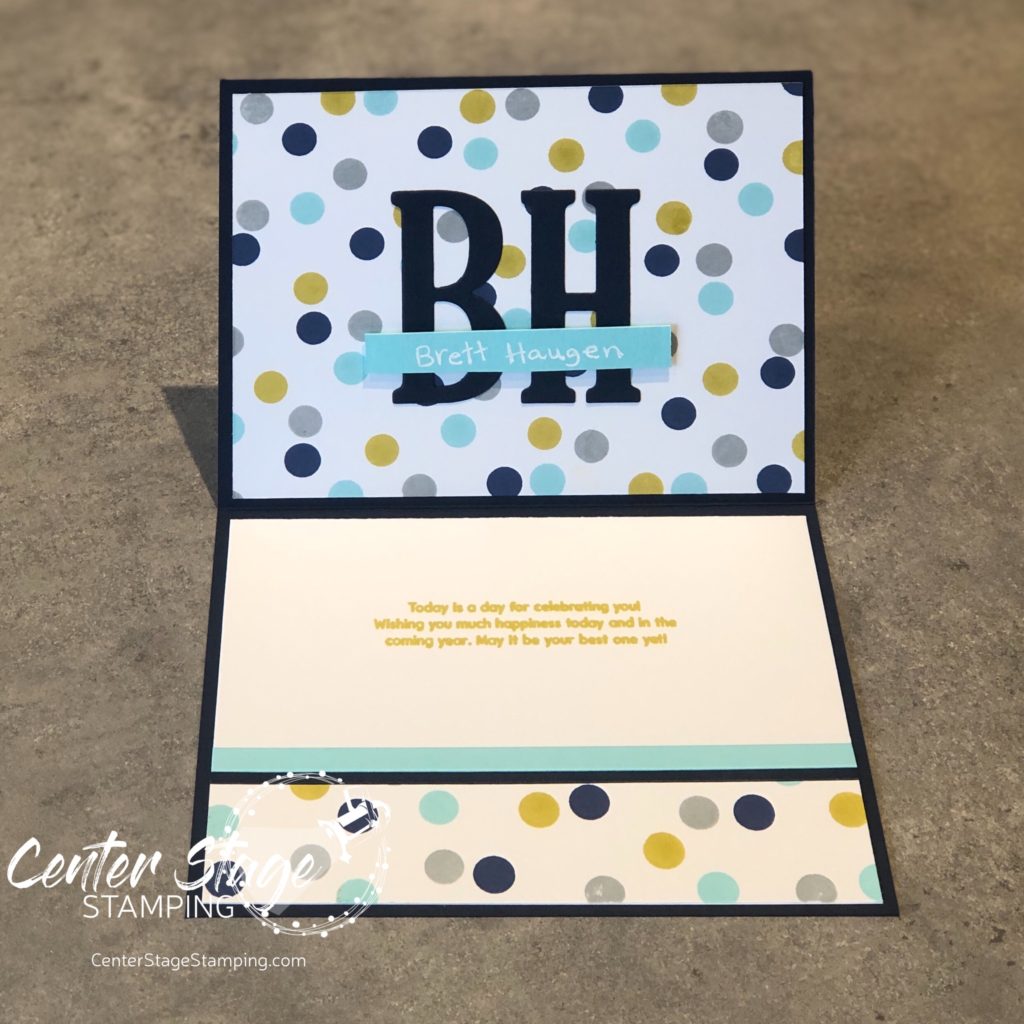
It is a happy coincidence that my husband’s initials are BH. So I took the cut letters from the front and added them to the inside to personalize the card.
I hand wrote his name with a white gel pen. It added a fun touch to the inside of the card. I really should add to the inside of cards more often. I think it really makes them more interesting. What do you think about decorating the inside of cards?
Thanks for stopping by! Join me again to shine spotlight on creativity!
Hello friends! It is time for the monthly One Stamp At A Time Blog Hop. This month’s hop is an animal theme and the OSAT Design Team has some fun projects in store. Be sure to make your way through the complete blog hop roster. You don’t want to miss anything!
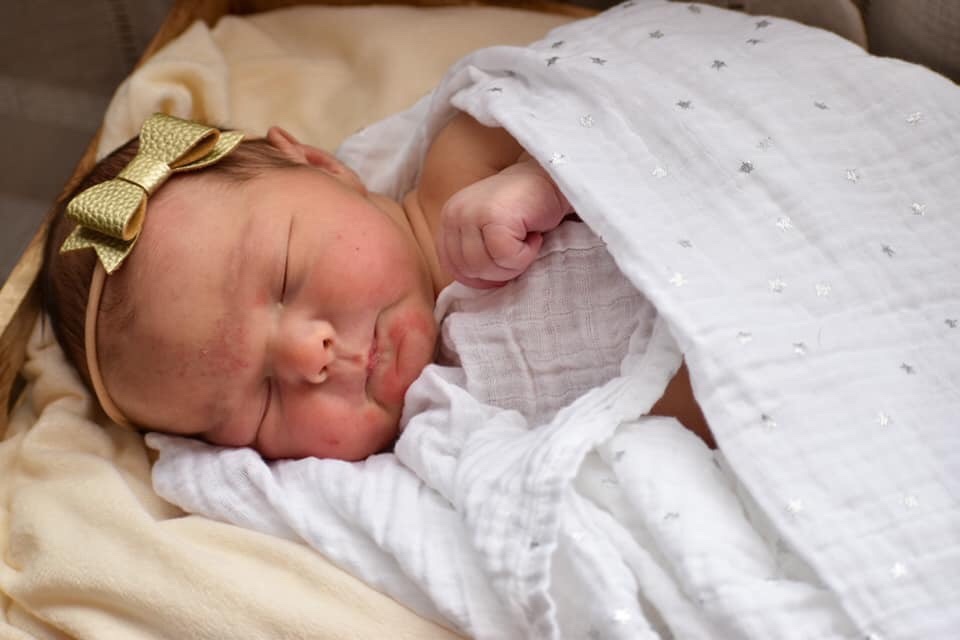
Last month I received the BEST Valentine gift ever. My first Grandchild was born!!! She has completely stolen my heart.
So naturally with baby on my mind, I create a couple of fun projects to welcome a sweet little girl.
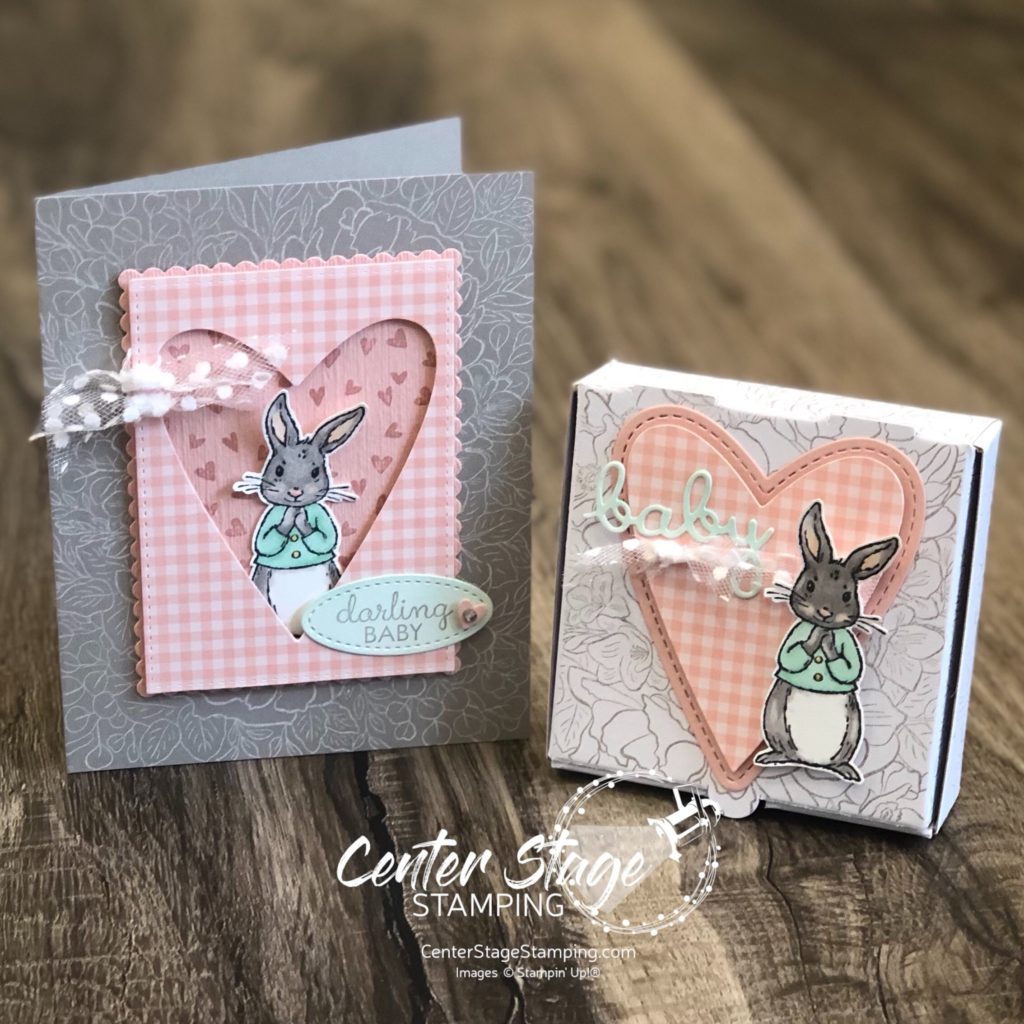
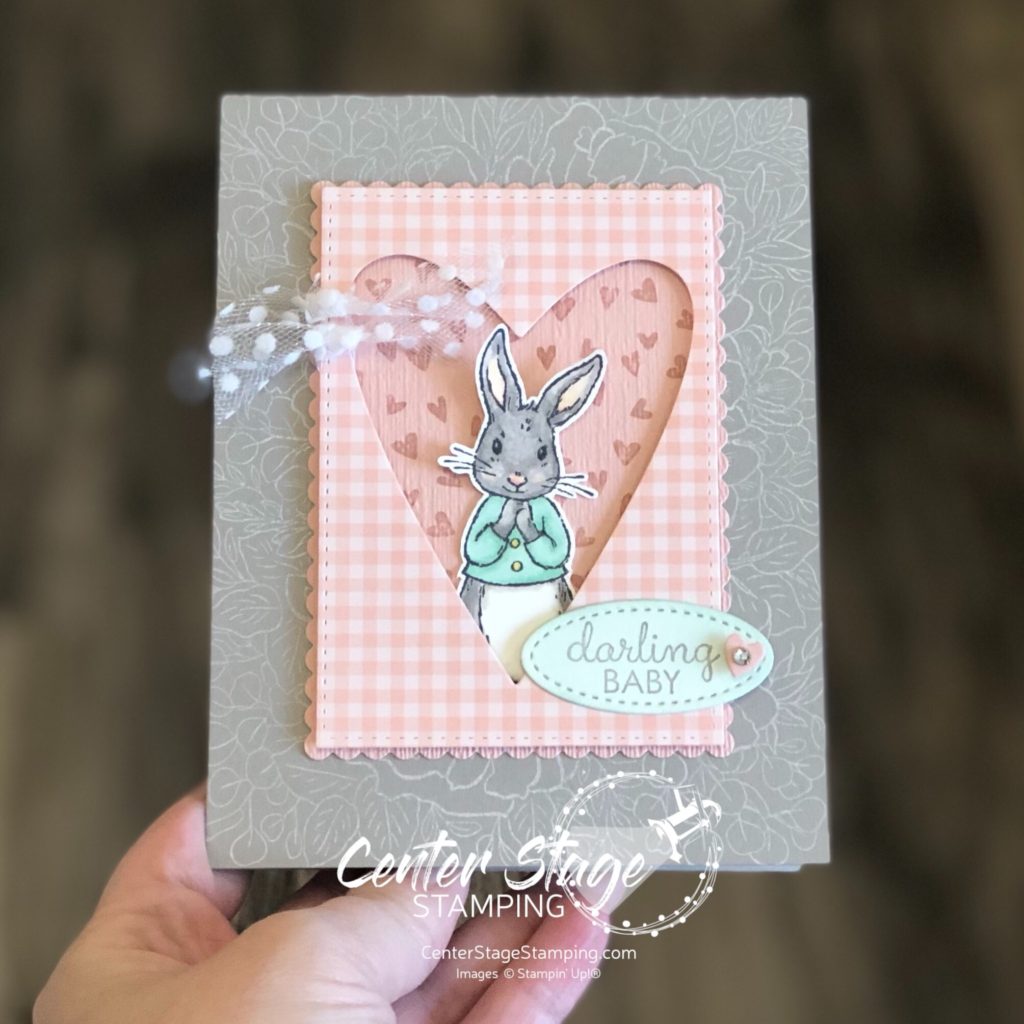
I just adore this sweet little bunny from the Fable Friends stamp set. Reminds me so much of Peter Rabbit. Paired with the Beautiful Bouquet background stamp and some sweet Blushing Bride gingham DSP, you end up with a perfect gift pair.
I colored the little bunny with my Stampin’ Blends. I love the shading you can get. The Beautiful Bouquet is stamped with white ink on a Gray Granite card base. I sponged Pool Party ink on the oval with the sentiment to achieve a lighter shade of Pool Party. Isn’t he adorable peeking out from the heart opening?
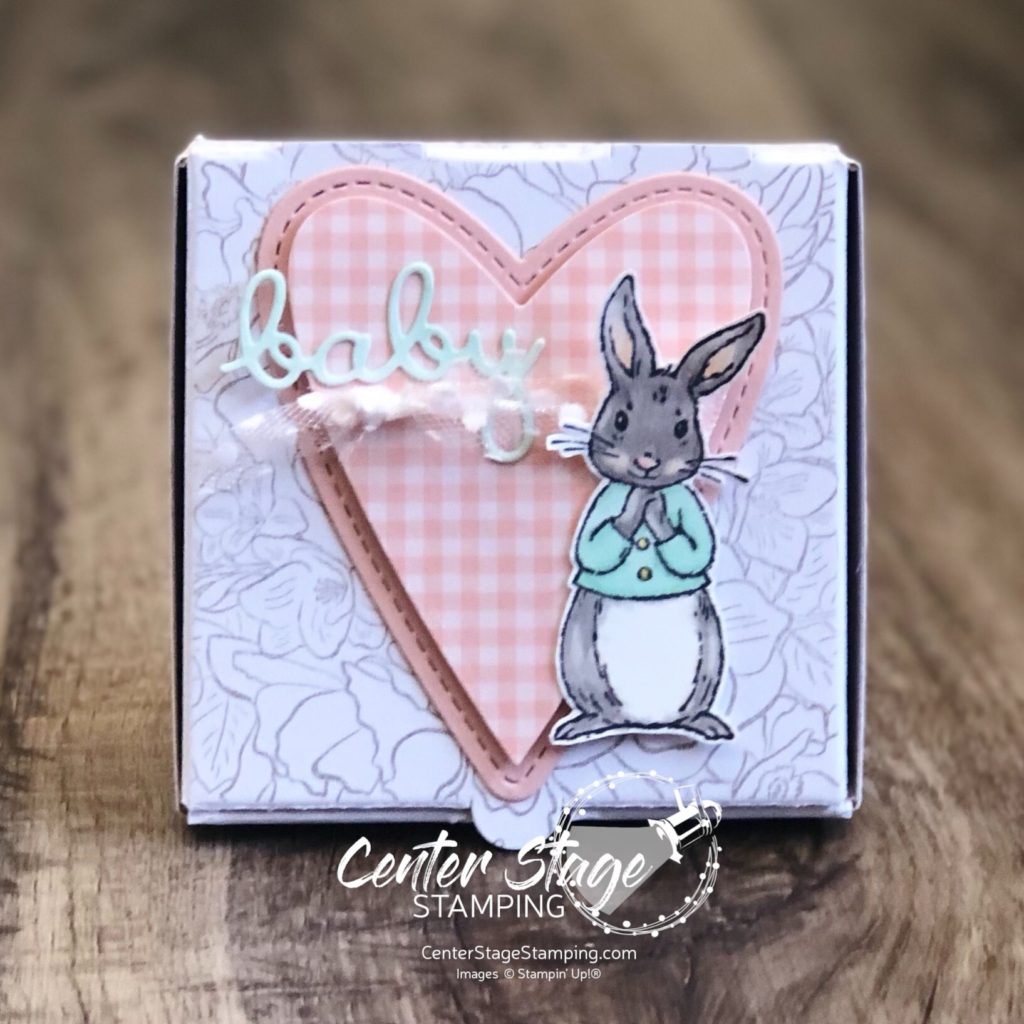
I made a little gift box using one of the Mini Pizza Boxes. I stamped the Beautiful Bouquet in Gray Granite ink. I also used the heart cut out from the card. The “baby” is cut out of Whisper White card stock and sponged with Pool Party ink for a soft shade to match the oval on the card.
Thanks for stopping by. I am going back to staring at photos of my sweet little Granddaughter!
Be sure to check out what the rest of the Design Team has created! You can find a pop up full blog hop roster by clicking on the BLUE RECTANGLE below.
Thanks for stopping by. Join me again to shine a spotlight on creativity!
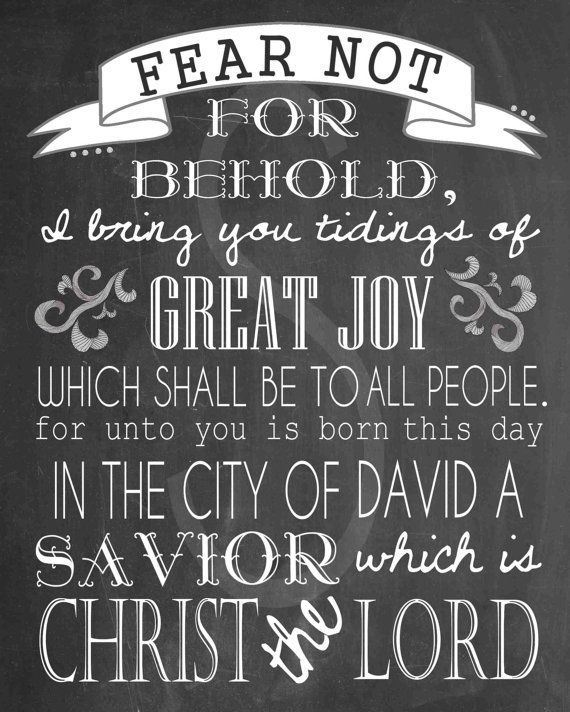
Celebrating the greatest news ever announced: “Unto you is born this day….A SAVIOR which is Christ the Lord”!!! God’s gift to man. His only son. Came to earth as a baby. To grow, teach and finally offer himself as the ultimate sacrifice for the sins of all men.
Glory to God in the Highest, and on earth peace, good will toward men.
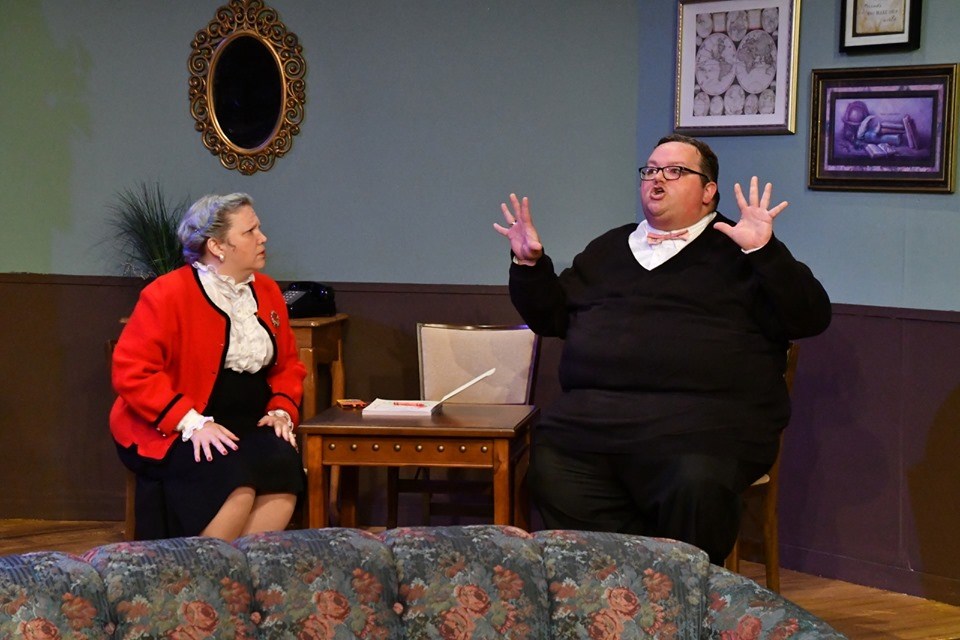
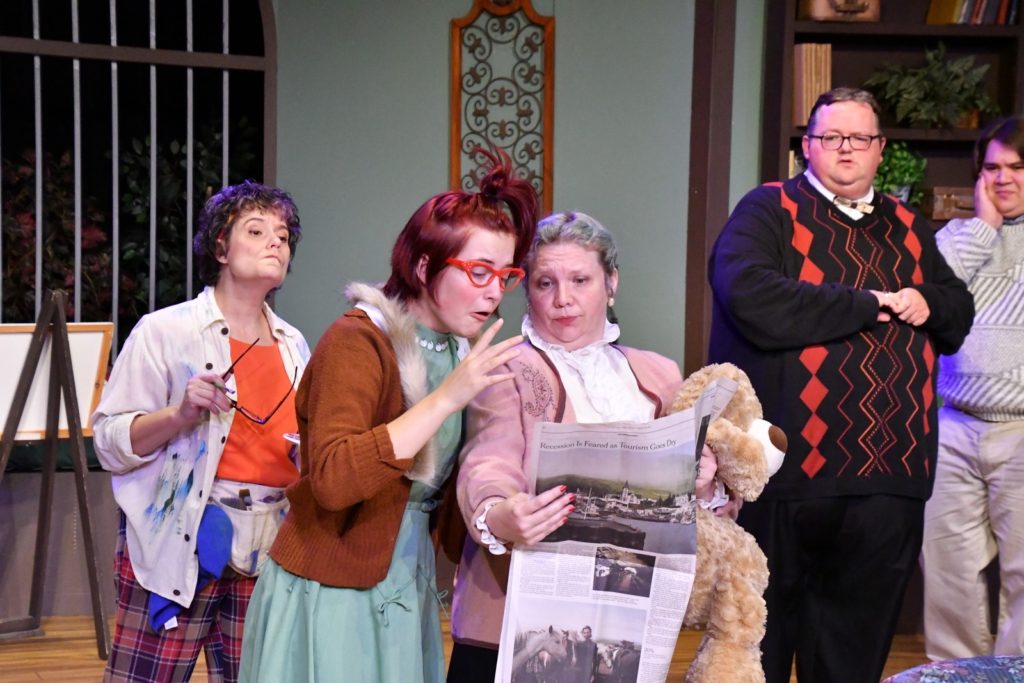
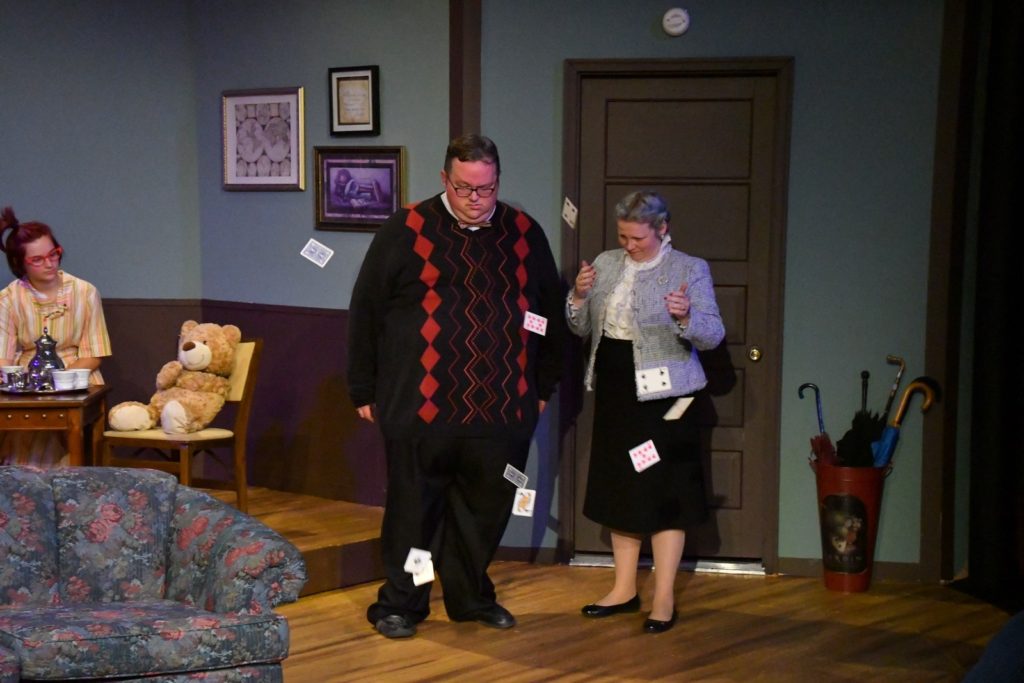
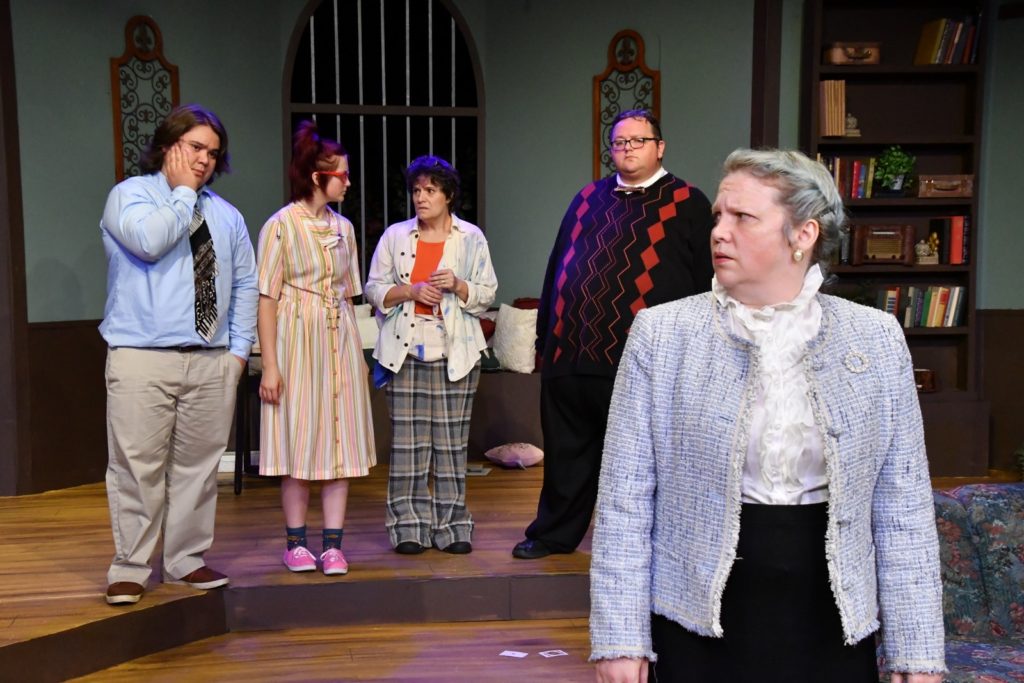
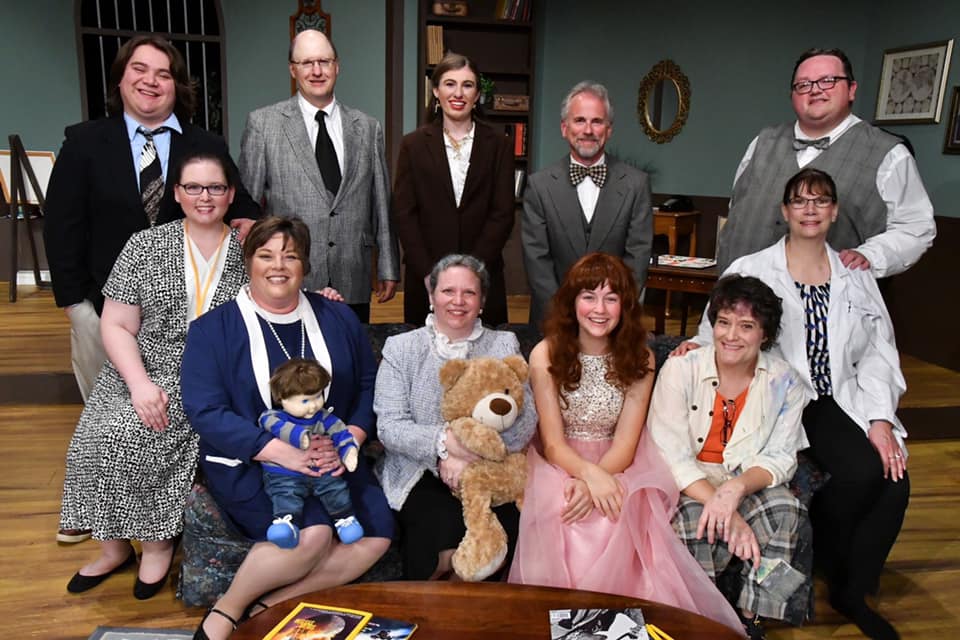
I didn’t get around to sharing much in September. There wasn’t much creating going on in my studio. My time was filled with rehearsals and performances for the play The Curious Savage at The Barn Theatre in Willmar, MN. It was a wonderful experience. I had the amazing opportunity to reprise a role I have played before – ten years ago I played the same role when the Hutchinson Theatre Company did the same play! The Curious Savage is one of my favorite plays and Mrs. Savage one of the best characters I have ever portrayed! If you ever have the chance to see this show done – GO! It is a beautiful story, hilarious and touching all in one.
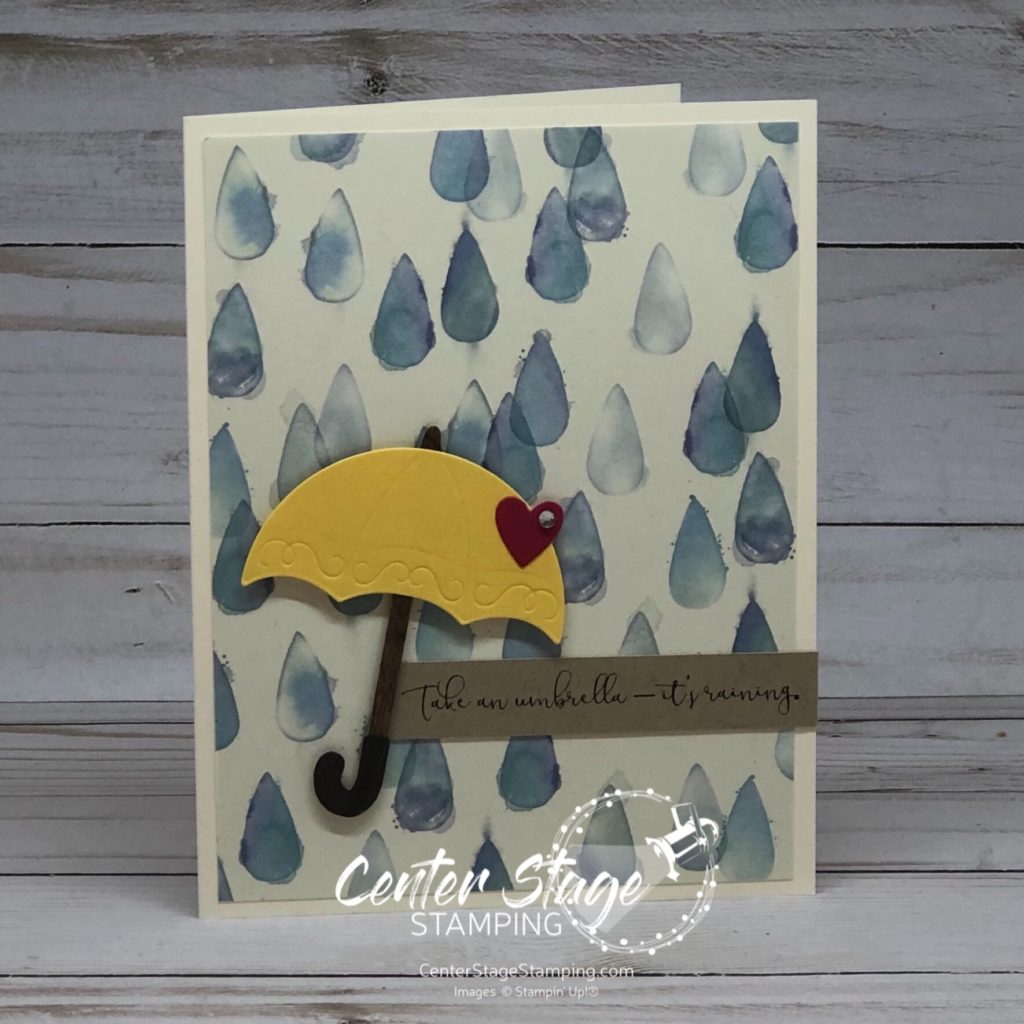
Of course I had to create a special card for my fellow cast/ crew mates. I tied it to a special line in the play. “Take and umbrella, it’s raining.” It is a way of saying “I love you”.
Mrs. Savage tells Fairy May there are hundreds of ways people say “I love you”, you just have to listen for it. Something we all can learn to do.
Now that the play is done, I need to get back in my studio and create some new projects to share. I hope you will come back to see what I come up with! Let’s shine a spotlight on creativity!
Well… the past two months flew by! I haven’t had much creative time in my studio lately. My days were filled with directing the play “Shadowlands” for our local community theatre. It was a beautiful story and I am grateful for the opportunity to bring it to life on stage.
I also had the opportunity to attend Stampin’ Up!’s local On Stage event in Minneapolis on April 13. (Yep, same day as the final performance of Shadowlands. I made it back just in time!) It was a great time to reconnect with my demonstrator friends and of course getting the NEW 2019-20 Stampin’ Up! catalog!
So many exciting and fun new stamp sets and products are coming! One of the benefits of attending On Stage is the opportunity to preview products from the new catalog. We got to use new product for our make and take projects, plus we were able to order from a selection of new items!
These were the make and take projects featuring four new product suites and a preview of the May Paper Pumpkin kit – designed with Stampin’ Up! cofounder Shelli Gardner.
Now that my calendar is a bit more open, I hope to get back to creating in my studio again. Not going to lie, kind of feel like my mojo is still hibernating from the ridiculously long winter. Time to get inky!
Thanks for staying with me! Join me again to shine a spotlight on creativity!
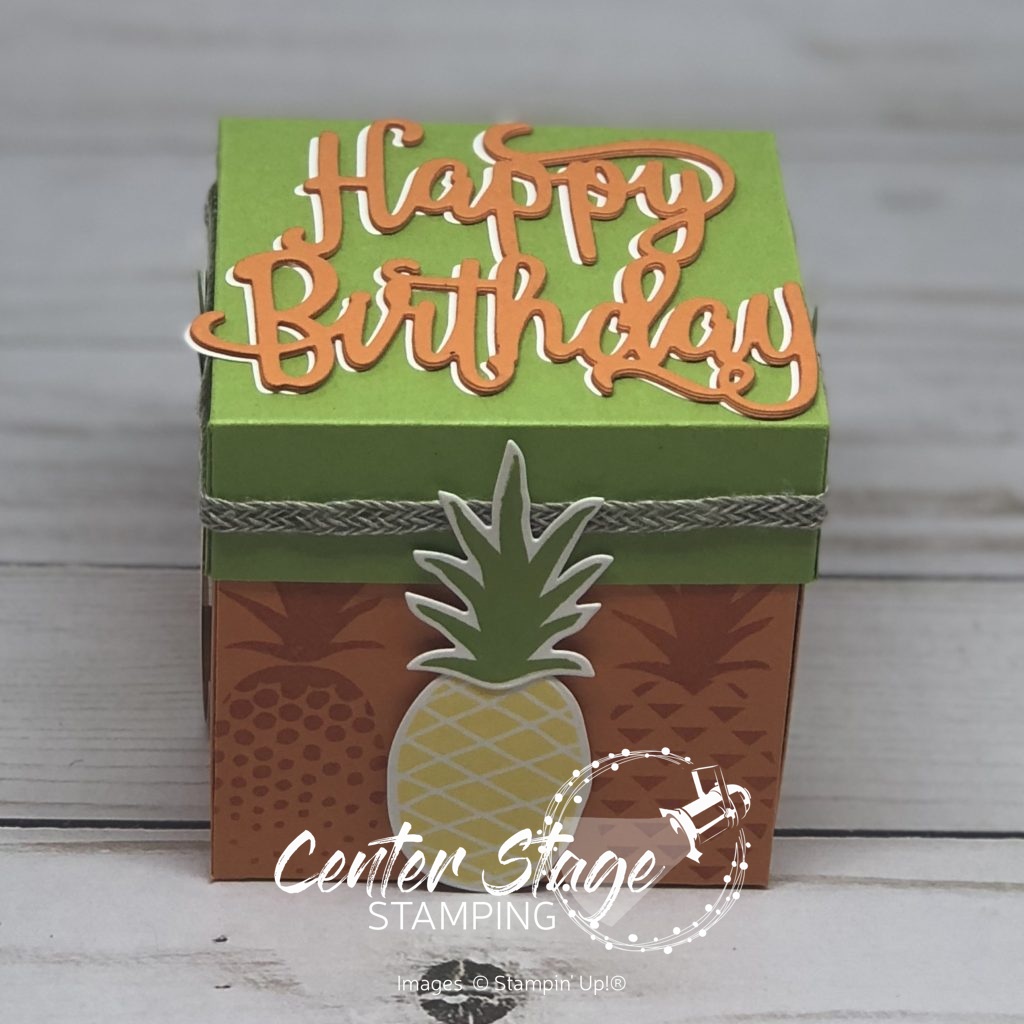
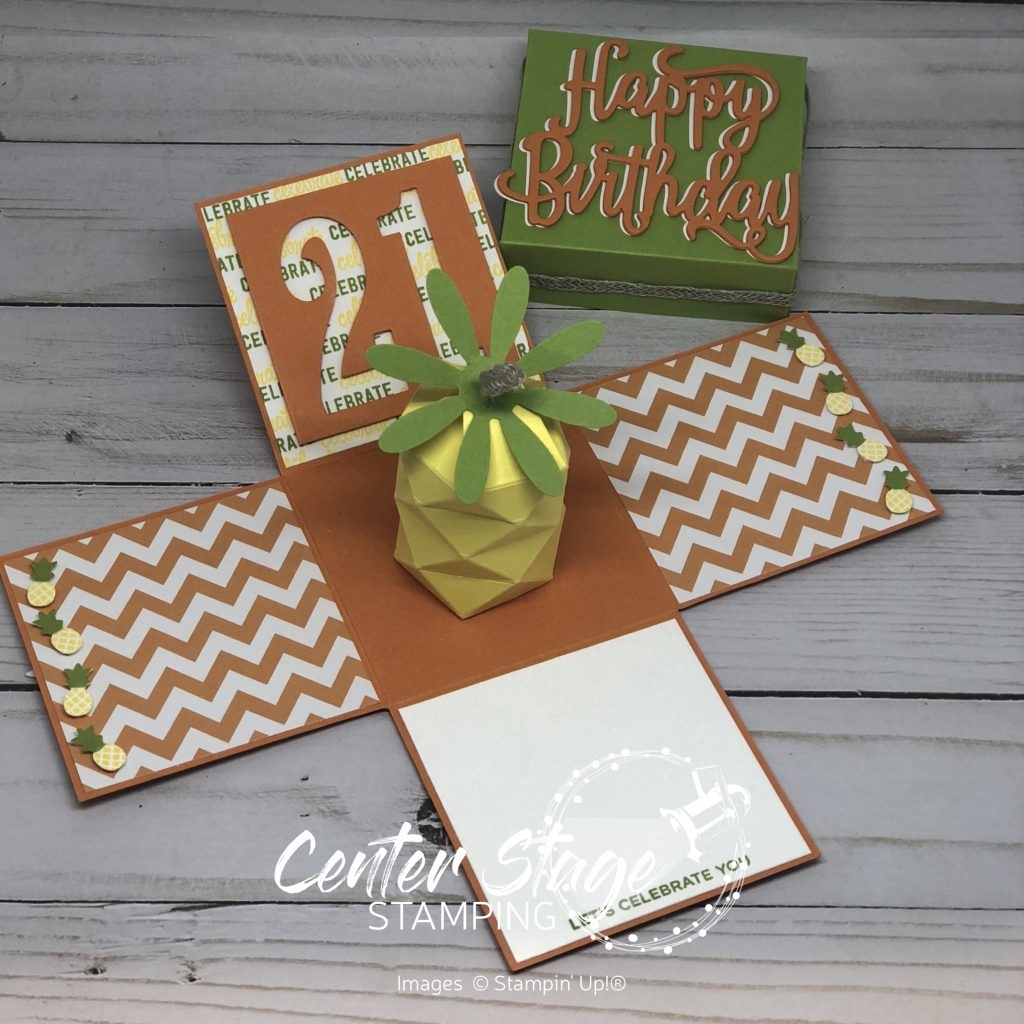
This past weekend was my daughter Rachel’s 21st birthday. When did that happen? 21!? Life continues forward far to quickly. I love you to the moon and back, Rachel! I wanted to share the “card” I made for her. She really likes pineapples, so I used that as my starting point. I decided to make an explosion box and somehow incorporate 21 pineapples.
I used Concord and 9th’s Pop Art Pineapple for the 12 pineapples around the exterior of the box. They are stamped in Stampin’ Up! Pumpkin Pie ink on Pumpkin Pie card stock. Four pineapples are stamped in Pineapple Punch and Granny Apple Green and cut out with the coordinating dies. I added the Happy Birthday Thinlit and some Braided Linen Trim to the Granny Apple Green box top. But what about the inside? When I saw this folded pineapple by Martha Inchley on Pinterest, I knew I had the perfect center for the explosion box. Thank you, Martha for sharing your pattern!!
I added eight tiny pineapples in Pineapple Punch and Granny apple Green and punched out with the retired tiny pineapple punch. I am so happy with how it turned out. What’s more, Rachel loved it! Thanks for stopping by! Join me again to shine a spotlight on creativity!
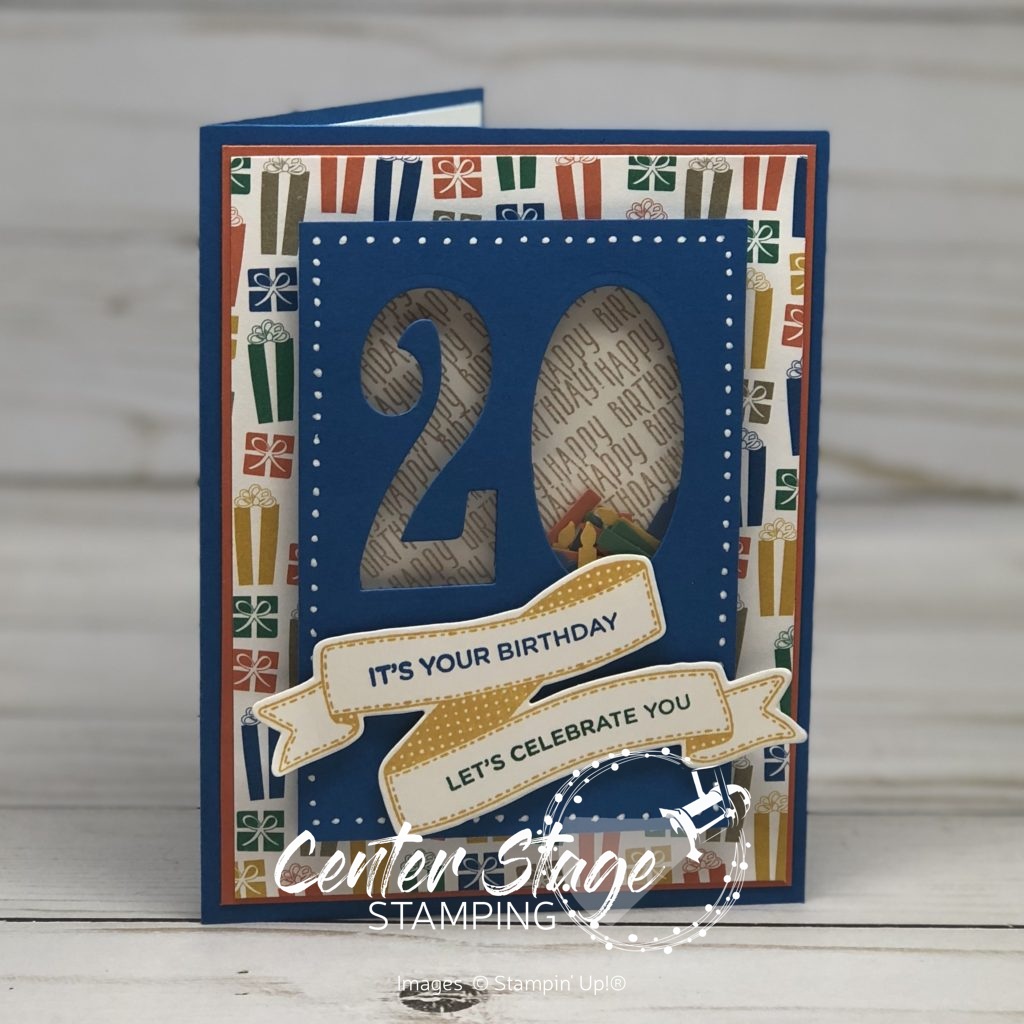
I am trying to wrap my head around the fact that my son…my youngest child…my baby boy…turned 20 on Monday. I no longer have any teenagers. When did this happen? I swear he was just starting Kindergarten. Now, he is in his second year of college. I wanted to share the card I made for him. Full disclosure: it uses some retired paper and ink colors.
I made a shaker card with 20 candles in the “0”! The “Happy Birthday” (stamped in Crumb Cake) is from Picture Perfect Birthday. The banner is from Birthday Banners and sentiments are from Broadway Birthday. I used a white gel pen to make the dots around the shaker panel. I am happy with the final result, but it took me a while to get there. It is hard making a card for a 20 year old boy…um, young man….er, guy. I think I need more time to full grasp this milestone. But, another is right around the corner. In 10 days, my middle child turns 21!! Someone hit the pause button. Time is moving too fast.
Thanks for stopping by! Join me again to put a spotlight on creativity!